
Open a Web browser and go to
ftp://ftp.gnupg.org/gcrypt/binary
Find the latest Windows version--when I wrote this, it was gupg-w32-2.1.0_20141105.exe, as shown below on this page.
Download the EXE file. Save the file on your desktop.
On your desktop, double-click the installer file and install the software with the default options.
Go to
Click the "Sign up" button.
Fill out the form to create an account.
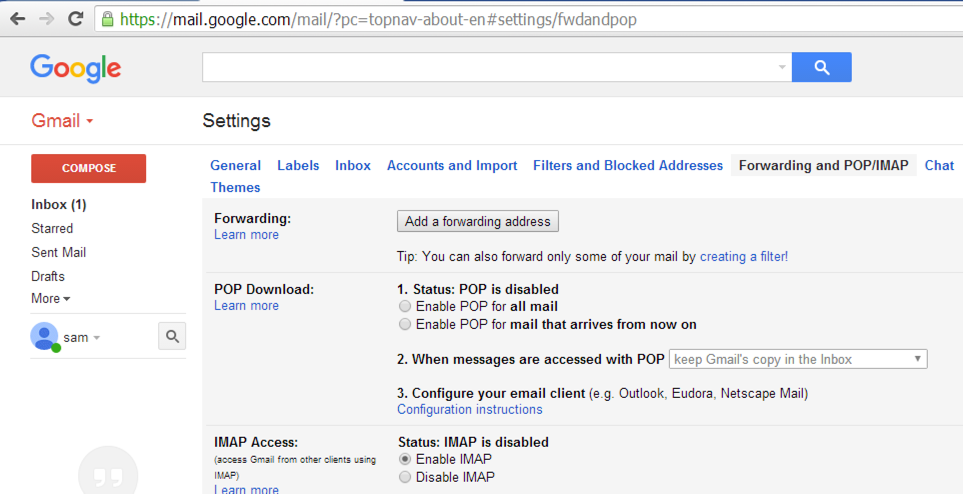
You should now be logged in to Gmail. On the upper right, click the gear icon, and then click Settings.
On the Settings page, at the top, click "Forwarding and POP/IMAP". In the "IMAP Access" section, click "Enable IMAP", as shown below.
At the bottom of the page, click "Save Changes".
Click the "Free Download" button. Download the software and install it with the default options.
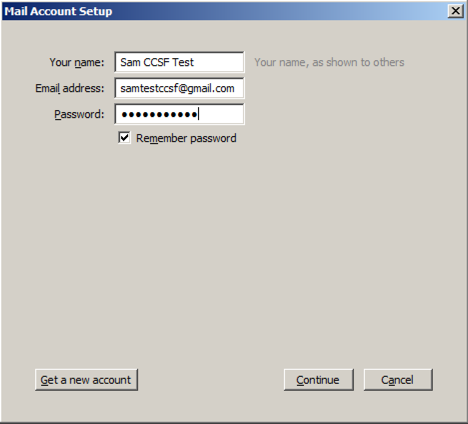
In the "Mail Account Setup" box, enter the requested information, as shown below, and click Continue. Note:if you are using a real email account on a public computer, don't check the "Remember password" box.
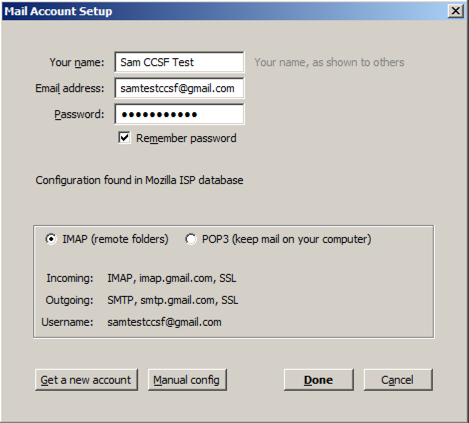
Thunderbird should automatically detect the IMAP settings and fill them in, as shown below.
Click Done.
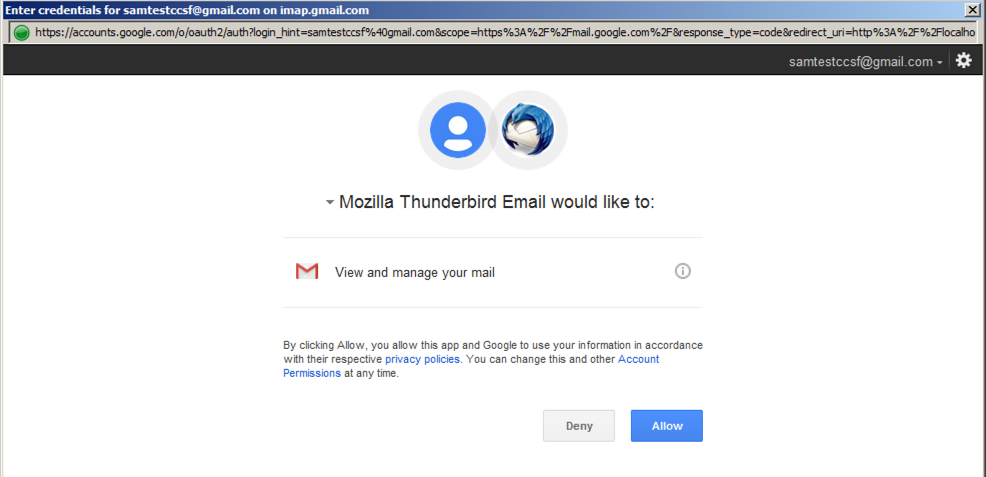
A Gmail page opens. Click Next
Enter your password and click "Sign in".
The next page asks you if "Mozilla Thunderbird Email" can view and manage your mail, as shown below. Cick Allow.
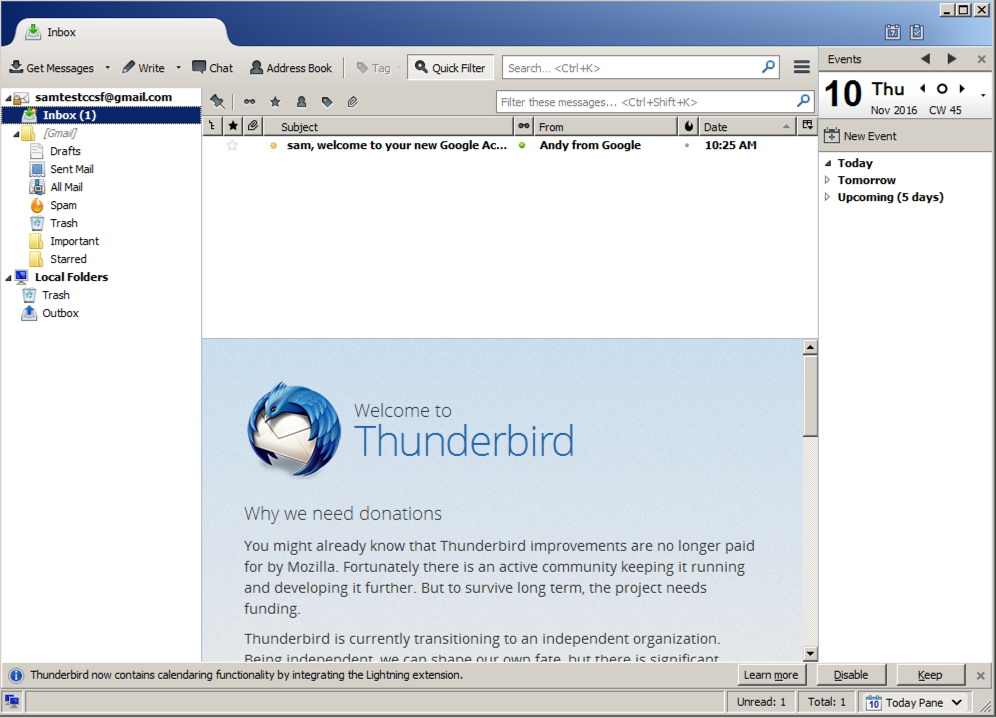
You should now see your inbox in Thunderbird, as shown below.
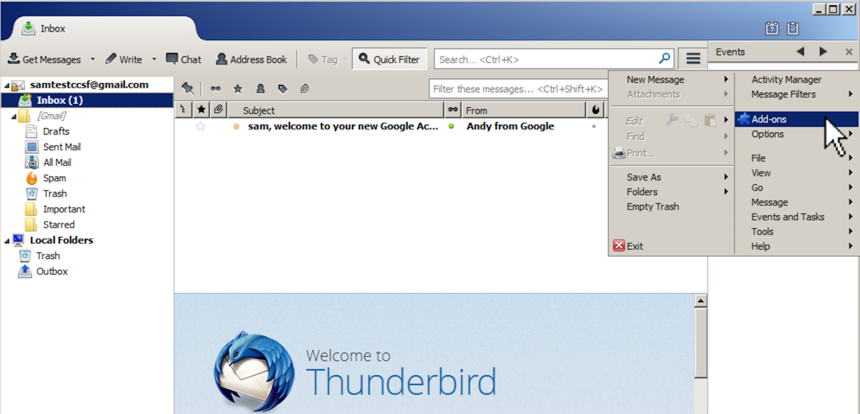
At the top right of the Thunderbird window, click the icon with three horizontal bars. Click Add-ons, as shown below.
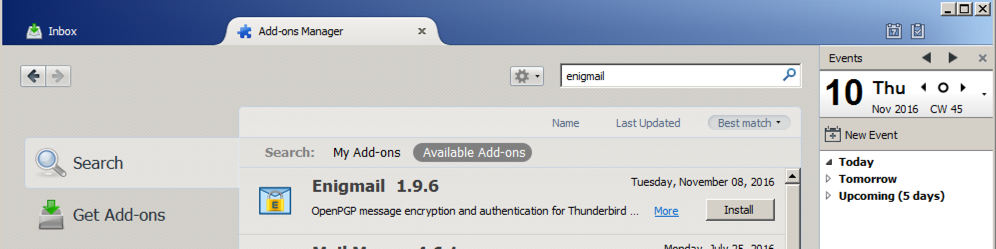
In the Add-ons box, type enigmail into the search box and press Enter. Enigmail is found, as shown below. Click the "Add to Thunderbird..." button.
In the Enigmail line, click the Install button. Wait a few seconds while the software downloads and installs.
When the process finishes, at the top of the Thunderbird window, click the blue "Restart now" link.
n the "Welcome to the OpenPGP Setup Wizard" box, click Next.
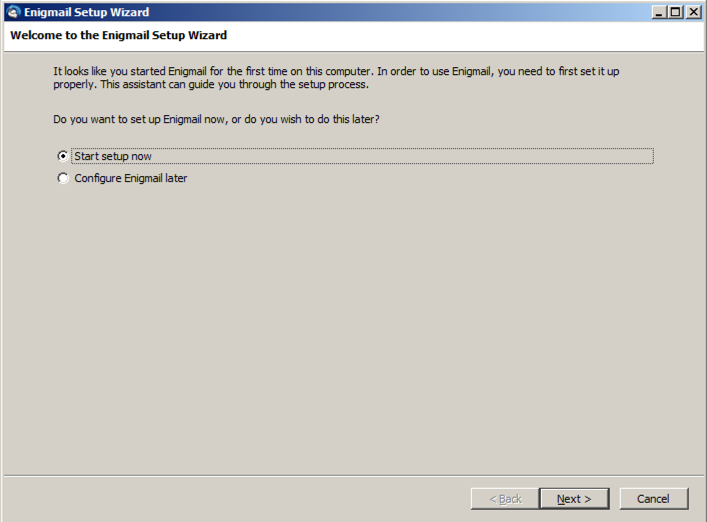
In the "How would you like to Configure Enigmail?" box, accept the default selection of "I prefer a standard configuration (recommended for beginners)" and click Next.
In the "GnuPG Required" box, click the "Install GnuPG..." button.
When the download finishes, a box pops up titled "installer Language". Accept the default of English, click OK.
The Gpg4win installation wizard opens, as shown below.
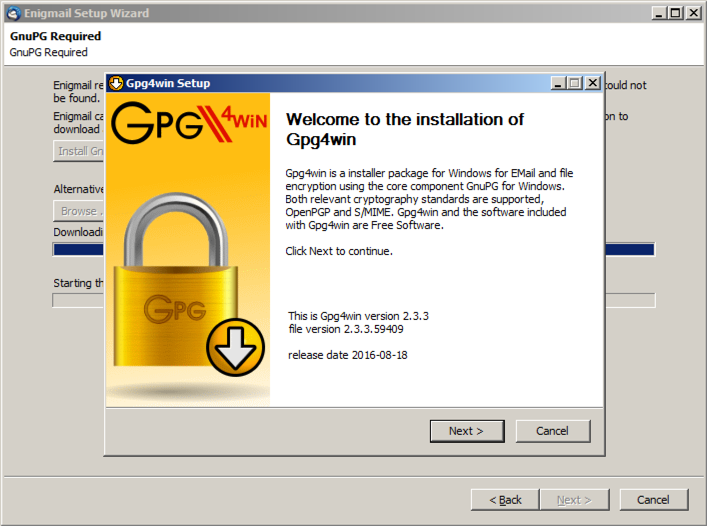
Click through the installer, accepting the default options. It replaces "version 2.1.0" with "version 2.3.3".
In the Enigmail Setup Wizard, in the "GnuPG Required" box, click Next.
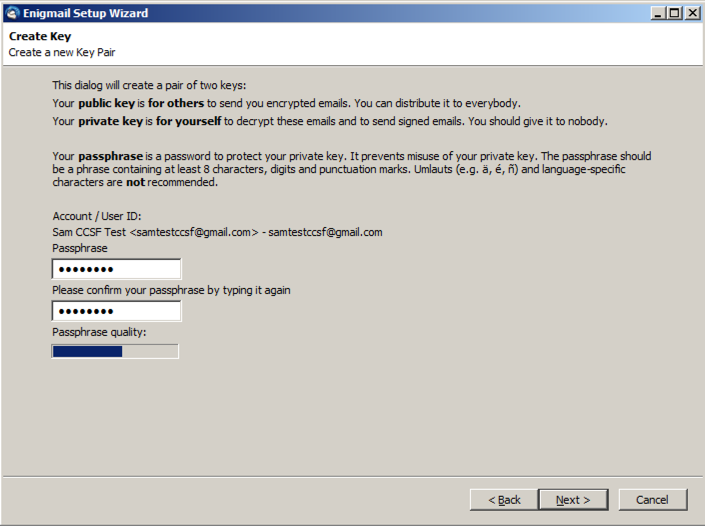
In the "Create Key" box, type a passphrase of your choice into both boxes, as shown below, and click Next.
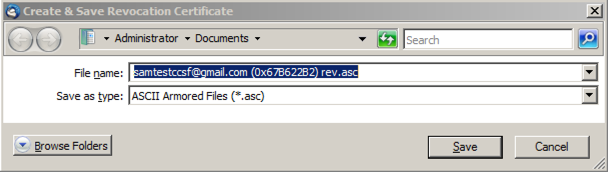
When you see the message: "Your Key is Generated", click the "Create Revocation Certificate" button.
Enter your passphrase.
A "Create & Save Revocation Certificate" box appears, as shown below. Click Save. Click OK.
In the Enigmail Setup Wizard, click Next. Click Finish.
Click in the Thunderbird window to focus on it. Press the Alt key on the keyboard to make the menu bar appear.
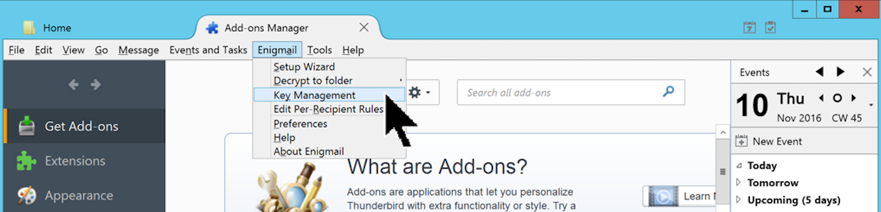
From the menu, click Enigmail, "Key Management", as shown below.
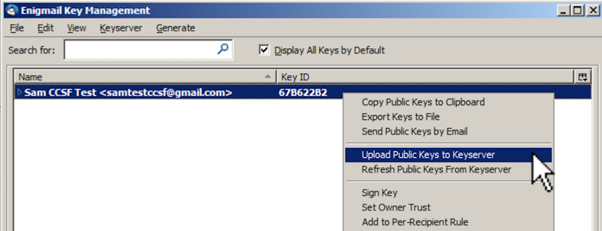
The Enigmail Key Management window opens.
Your key is visible in the lower pane, with a Key ID, as shown below.
Right-click your key ID and click "Upload public keys to Keyserver".
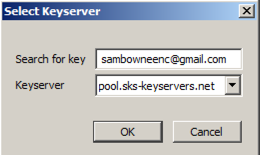
In the "Select Keyserver" box, type sambowneenc@gmail.com, as shown below, and click OK.
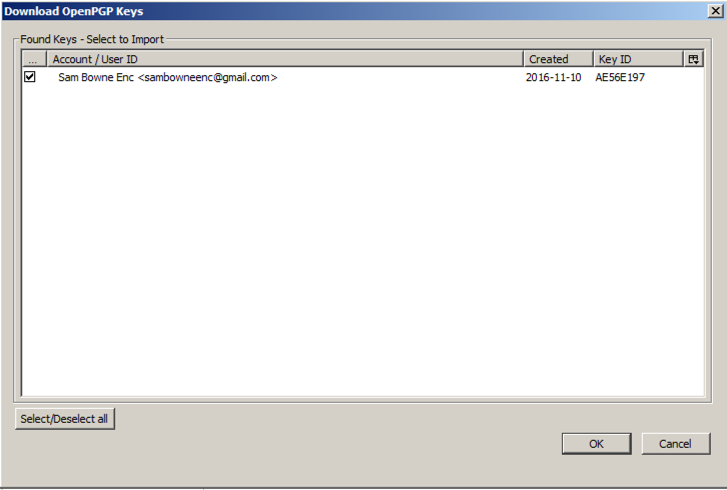
The key is found, as shown below. A "Found Keys" box pops up. Click OK.
A 'SUCCESS! Keys imported" box pops up. Click OK.
Your "Enigmail Key Management" box now shows two keys: one for you, and one for Sam, as shown below.

Close the "OpenPGP Key Management" box.
Compose an email to these three recipients, as shown below:
Put some text in the body of the message, such as "Hello!".
Notice the red text in the top center of this window, saying "This message will be unsigned and unencrypted".
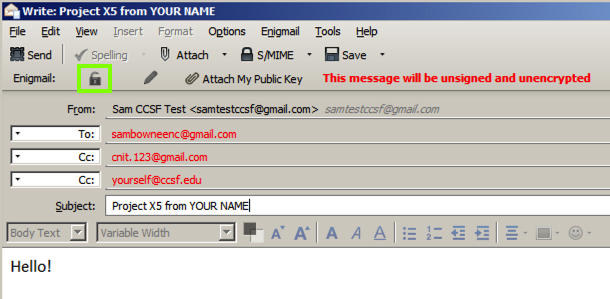
In the Write window, at the top left, click the padlock icon, which is outlined in green in the image above.
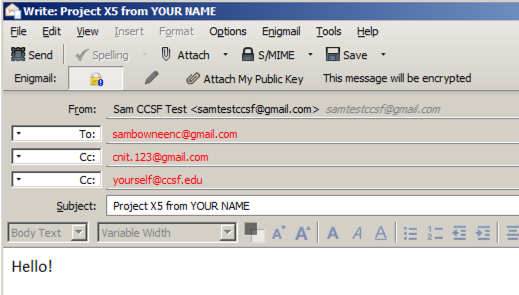
The message changes to "This message will be encrypted", as shown below.
At the top left, click Send.
In the "Enigmail Key Selection" box, at the lower right, click Send.
In the "Enigmail Confirm" box, click Continue.
A box pops up asking for your passphrase. Type it in and click OK.
You're done--we will grade the project based on that email.