Click Start. Right-click Computer. Click Manage.
In the left pane of Computer Management, click "Disk Management".
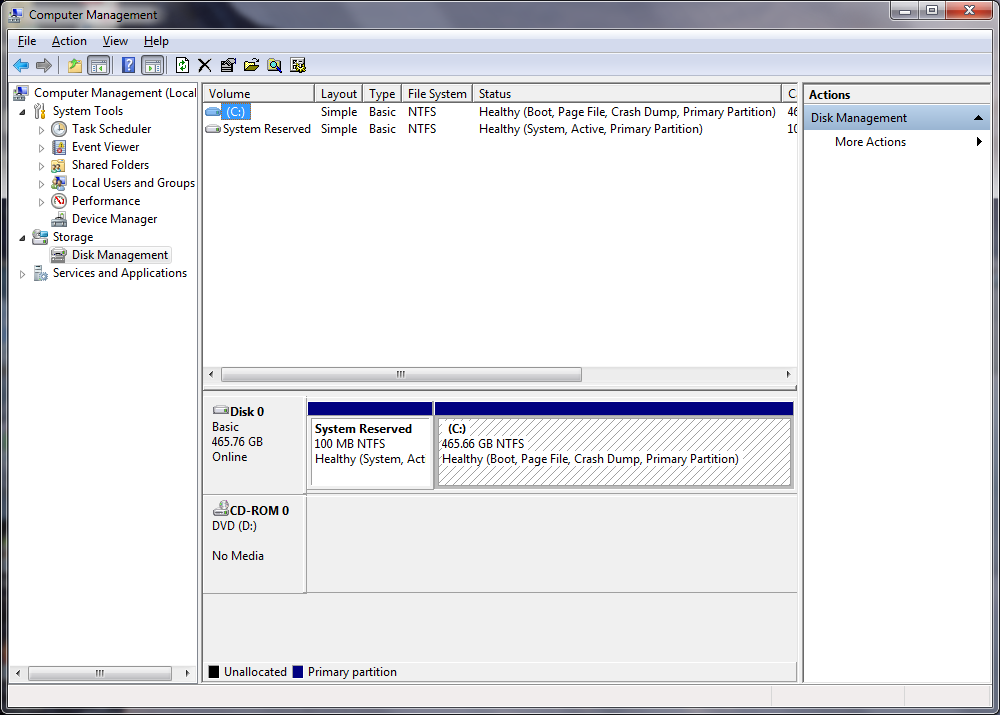
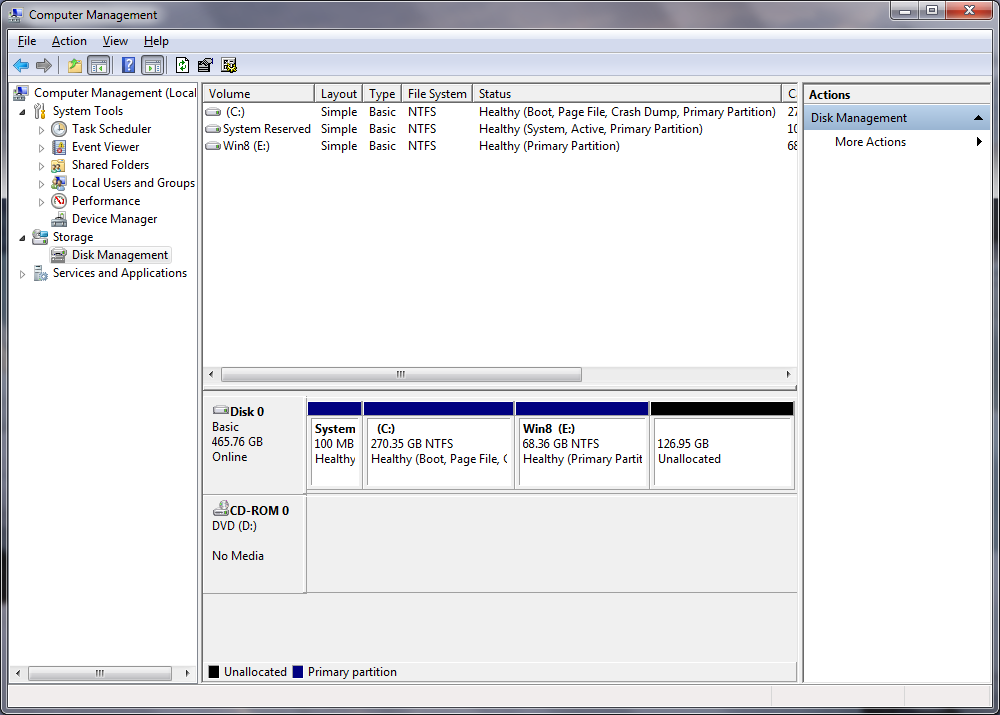
The hard disk structure appears, as shown below.
There are currently two partitions: one is "System Reserved" and the other is C:.
In the right pane of Computer Management, in the "Disk 0" line, right-click the C: partition and click "Shrink Volume".
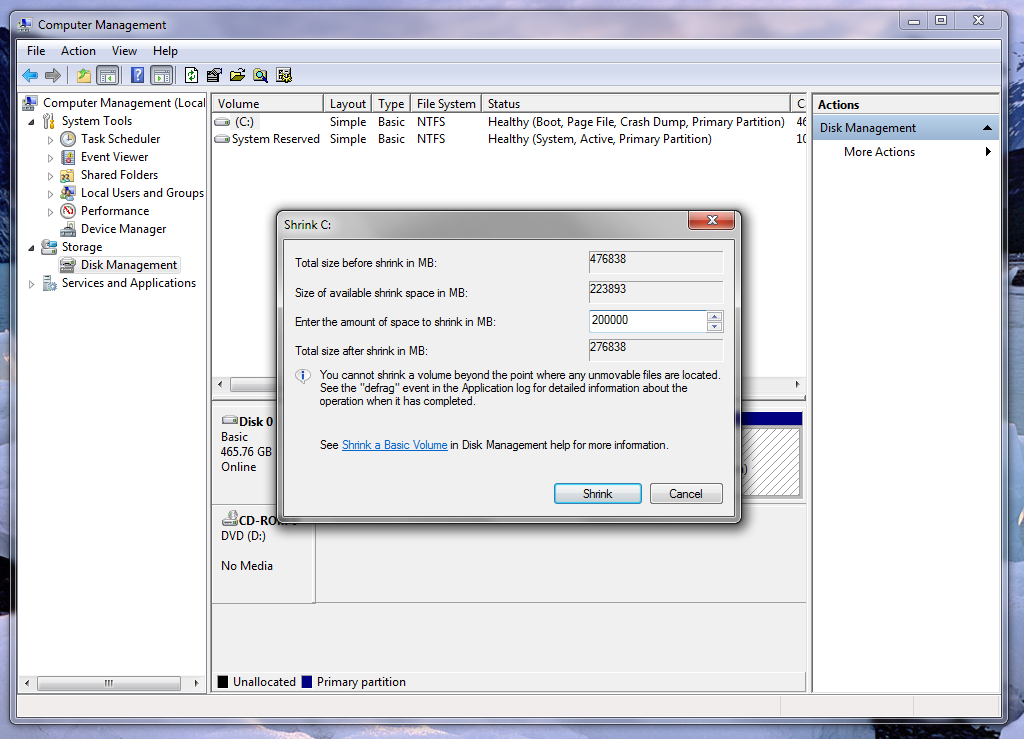
A "Shrink C:" box opens, as shown below.
Check the "Size of available shrink space in MB" value--it should be at least 200000. If not, there's a problem with that machine and it will have to be treated as a special case.
In the "Enter the amount of space to shrink in MB" field, enter 200000, as shown below.
Then click Shrink.
In the "Welcome to the New Simple Volume Wizard" box, click Next.
In the "Specify Volume Size" box, enter 70000, as shown below. Click Next.

In the "Assign Drive Letter or Path" box, click Next.
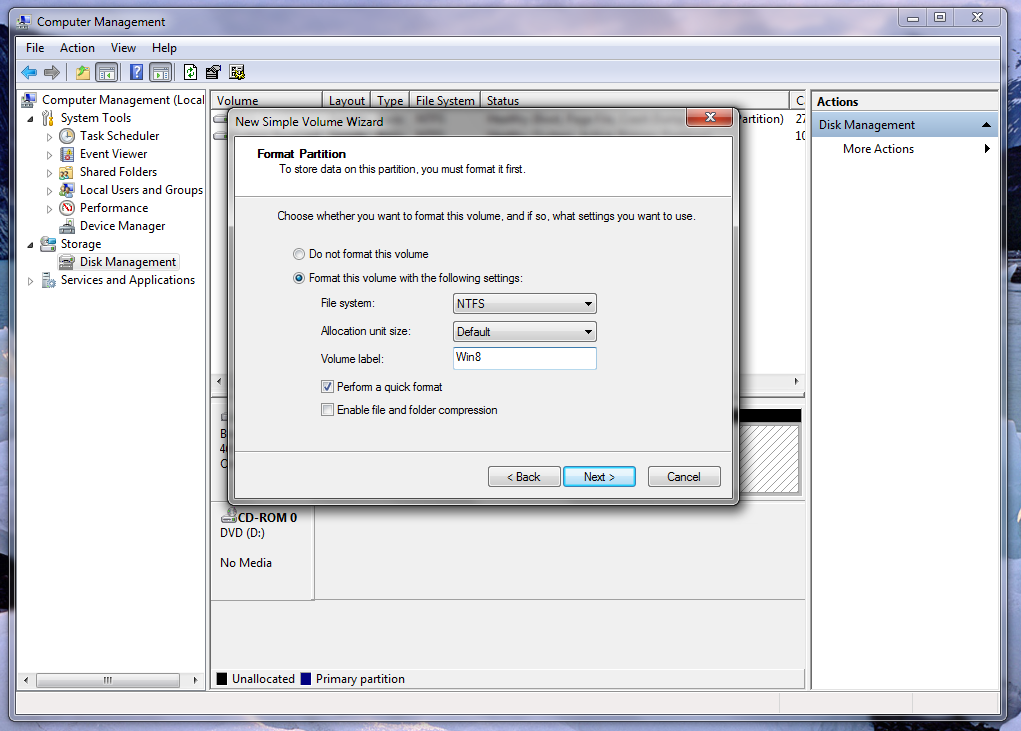
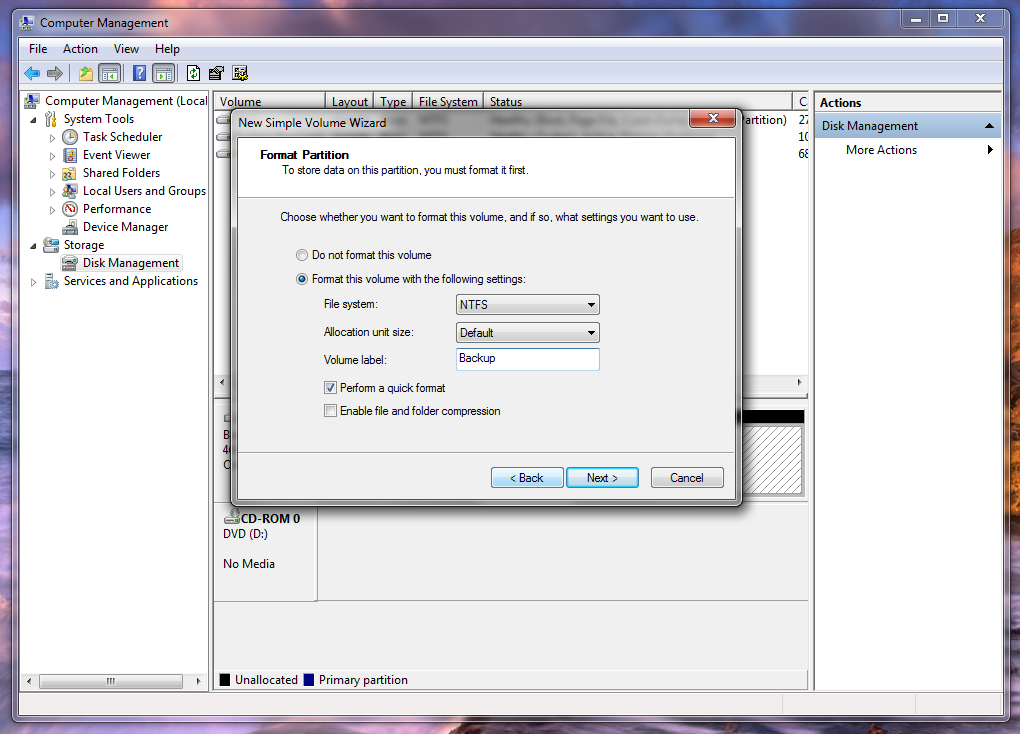
In the "Format Partition" box, enter a "Volume Label" of Win8, as shown below. Click Next. Click Finish.
Computer Management appears, showing the new Win8 partition, as shown below.
In the "Welcome to the New Simple Volume Wizard" box, click Next.
In the "Specify Volume Size" box, click Next.
In the "Assign Drive Letter or Path" box, click Next.
In the "Format Partition" box, enter a "Volume Label" of Backup, as shown below. Click Next. Click Finish.
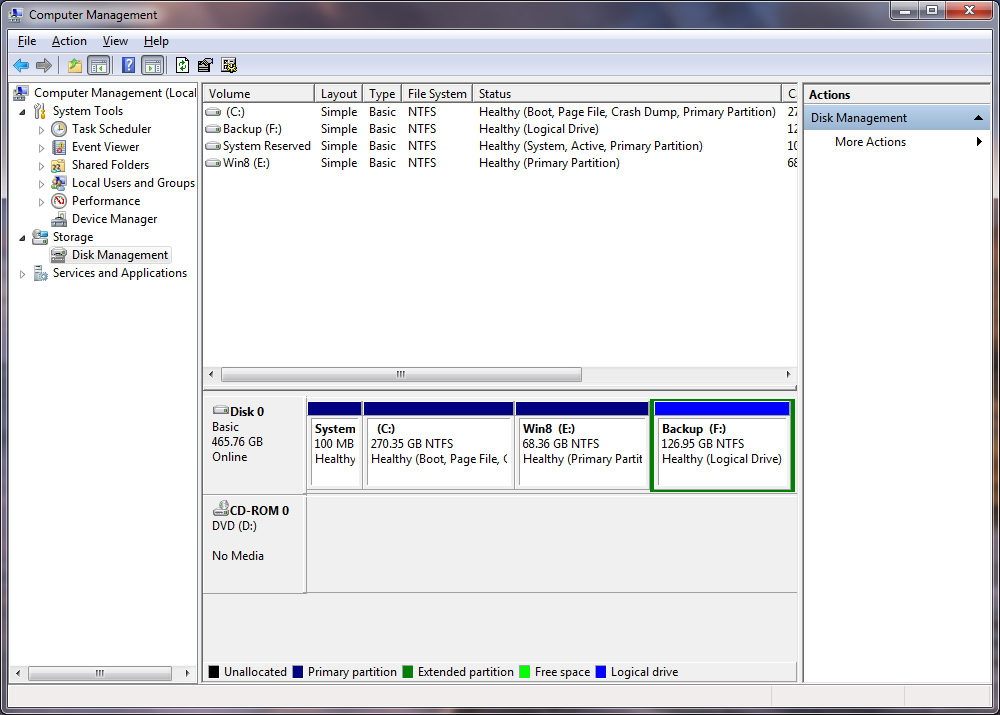
Computer Management appears, showing four partitions, as shown below.
Restart the computer.
Press F9 to access the Boot menu.
Press the down-arrow key several times to select the last boot item: SATA2. Then press Enter.
WHen you see the "Press any key to boot from CD/DVD..." message, press Enter again.
In the "Windows Setup" box, click Next.
Click "Install now".
Enter the product key from the label on the side of the computer and click Next.
In the "License Terms" box, click the "I accept the license terms" box and click Next.
In the "Windows Setup" box, click "Custom: Install Windows only (advanced)".
In the "Where do you want to install Windows>" box, click the Win8 partition and click Next.
Wait for the installation--it will take about 15 minutes.
A blue "Personalize" screen appears asking for a "PC name". Enter the station number for your machine, on the label, something like C218-01 and click Next.
In the next screen, click the "Use express settings" button.
In the next screen, click the "Create a local account" button.
In the "Your Account" screen, enter a User name of Student and leave the password fields and the hint field empty.
Click Finish.
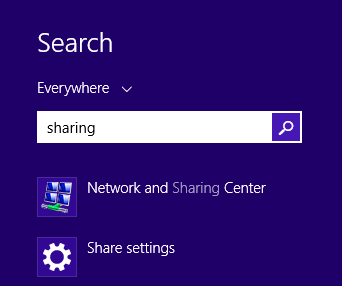
On the right side, in the Search section, click "Network and Sharing Center", as shown below.
In "Network and Sharing Center", on the left side, click "Change adapter settings".
In "Network Connections", right-click the Ethernet icon and click Properties.
In "Ethernet Properties", scroll down and double-click "Internet Protocol Version 4 (TCP/IPv4)".
Look at the label on your PC to find your IP address.
Put your IP address in the top field. Fill in the other four fields as shown below.
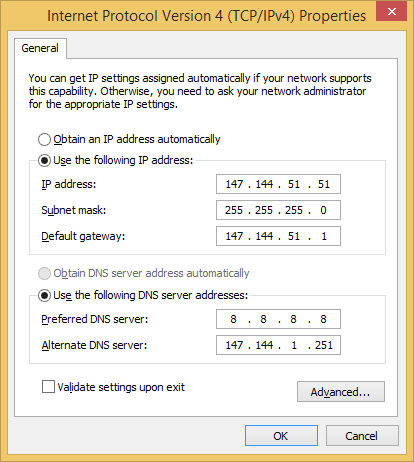
Click OK.
Click OK.
A "Networks" message appears on the right side. asking "Do you want to find PCs, devices, and content...".
Click Yes.
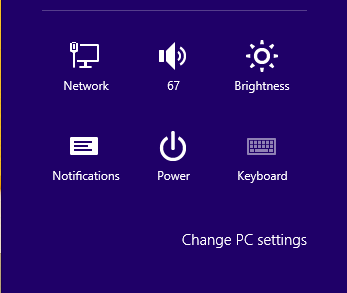
For example, there is no obvious way to shut down Windows 8.
Hold down the Windows Logo key and press I
The hidden menu appears in the lower right corner of the screen, containing a Power icon, as shown below.
Click the Power icon and click "Update and Restart".
There should be a lot of updates--wait for them.
Click Start and type msconfig
Press Enter.
In "System Configuration", click the Boot tab.
In the top portion of the box, click "Windows 7".
In the center of the box, click the "Set as default" button.
Your window should now look like the image below.
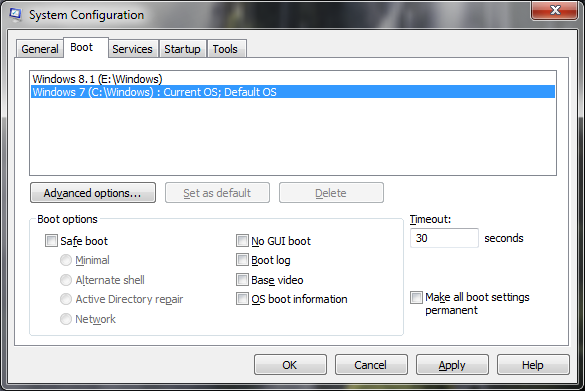
Click OK.
Click Restart.
Click Start. Type in backup
Click "Backup and Restore".
In "Backup and Restore", on the left side, click "Create a system image".
A "Create a system image" window opens. Verify that the "Backup (F:)" drive has been chosen, as shown below.
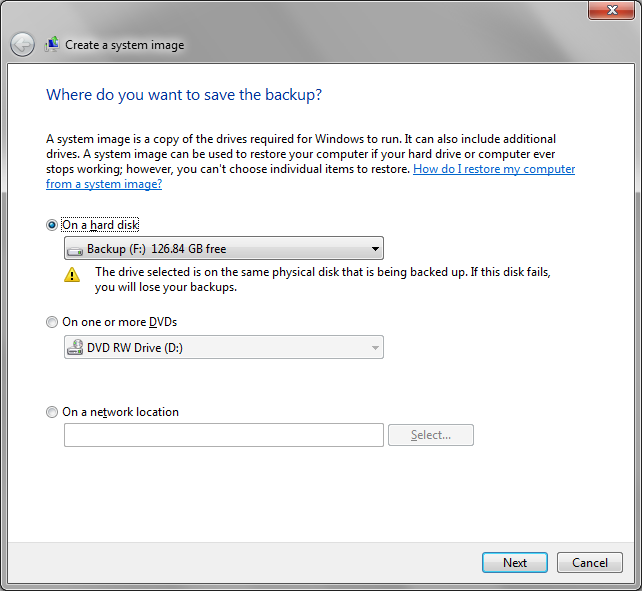
Click OK.
A "Which drives do you want to include in the backup?" window opens.
Check the Win8 box, as shown below.
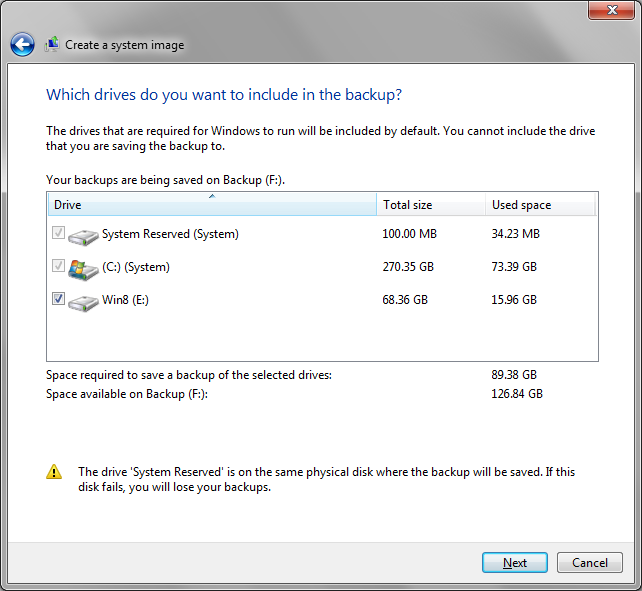
Click Next.
Click "Start backup".