Create your course at:
https://canvas.instructure.com/
Click the "Need a Canvas Account?" link.
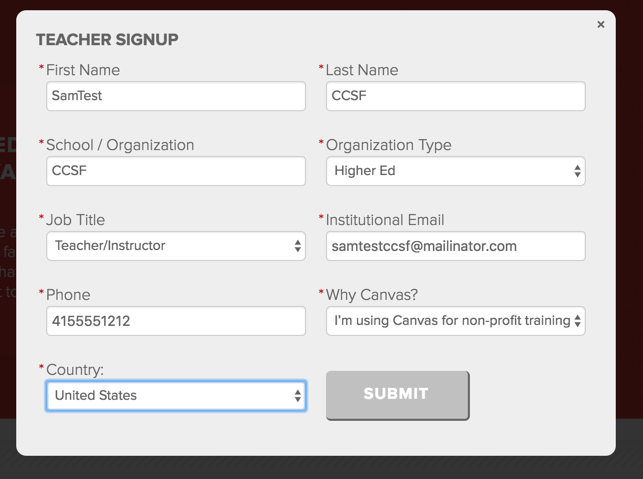
Then click "I'm a TEACHER" Creat a free account, as shown below.
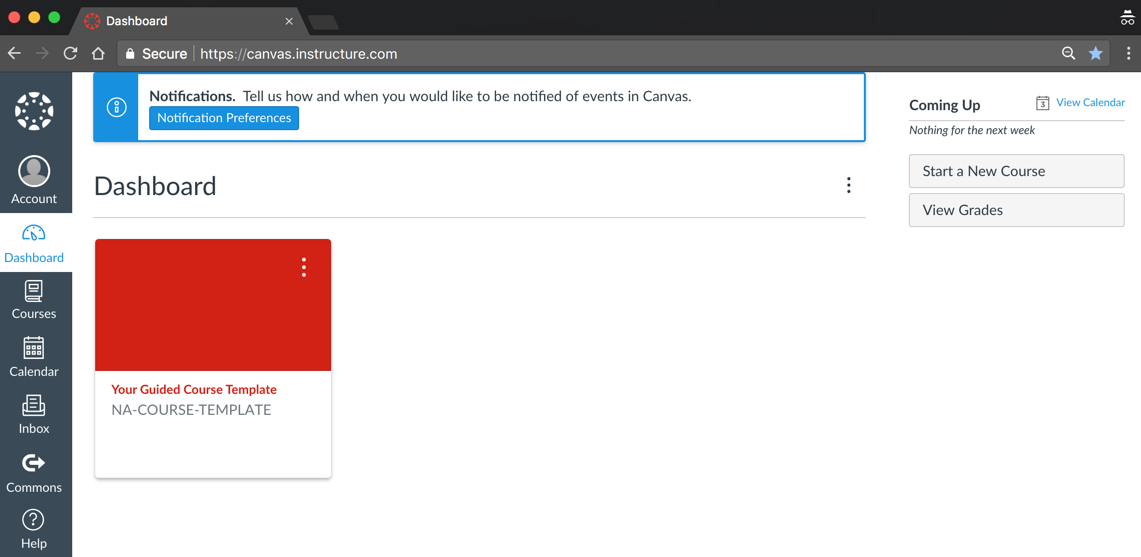
The Canvas dashboard appears, as shown below.
In the top right, click "Start a New Course".
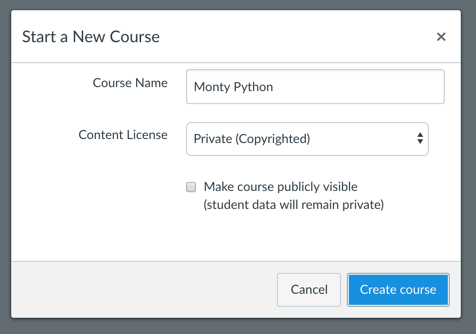
Enter a course name, as shown below, and click "Create course".
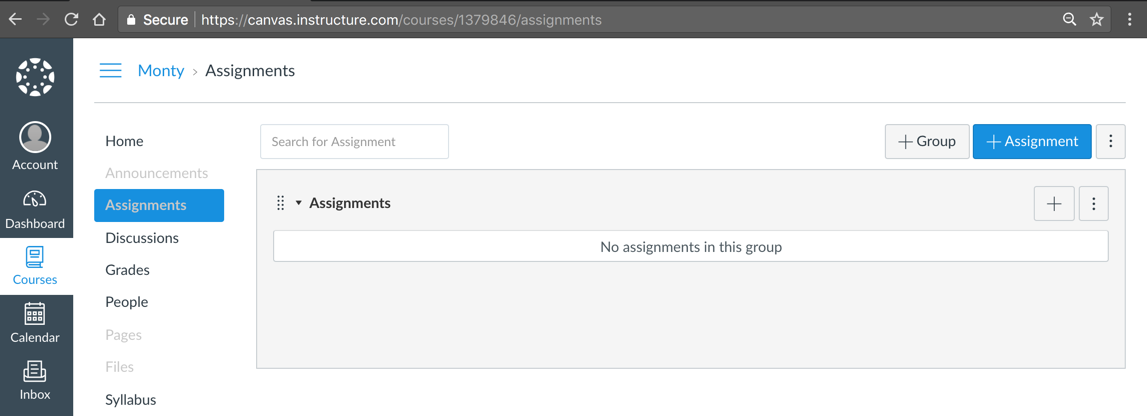
On the left side, click Assignments. On the top right, click "+ Assignment", as shown below.
Give the assignment an unique name and a number of points, as shown below.

Under "Submission Type", choose "No Submission", as shown below.

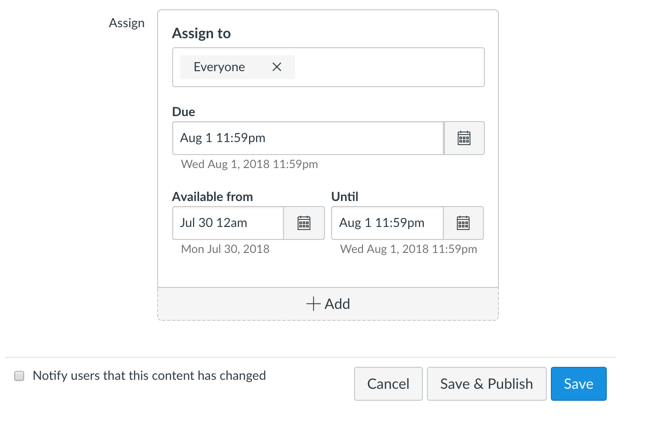
Scroll to the bottom, and enter dates in the "Due", "Available from" and "Until" fields, as shown below.
Leave the other settings at defaults.
Click "Save & Publish".
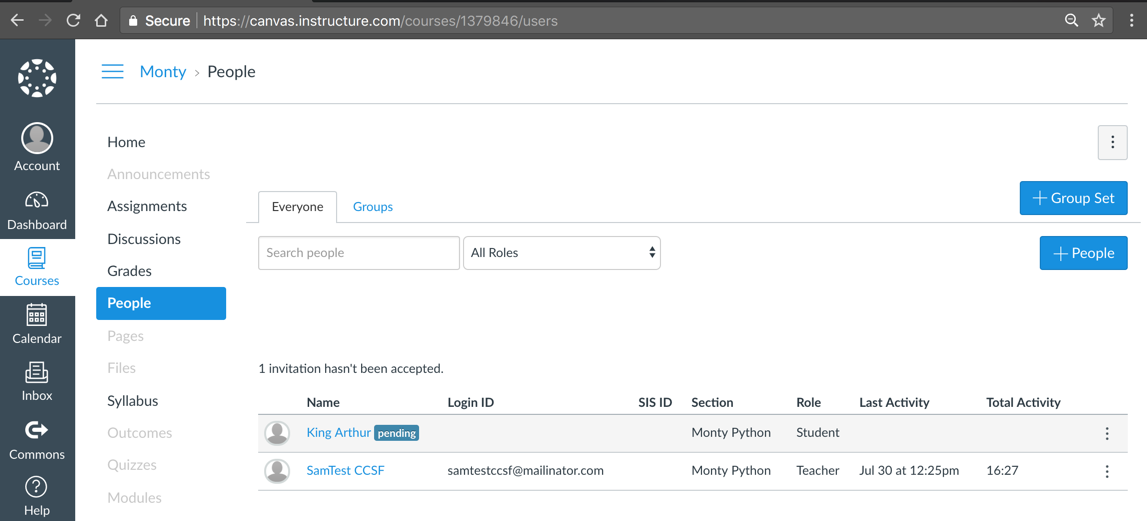
On the right side, click "+ People", as shown below.
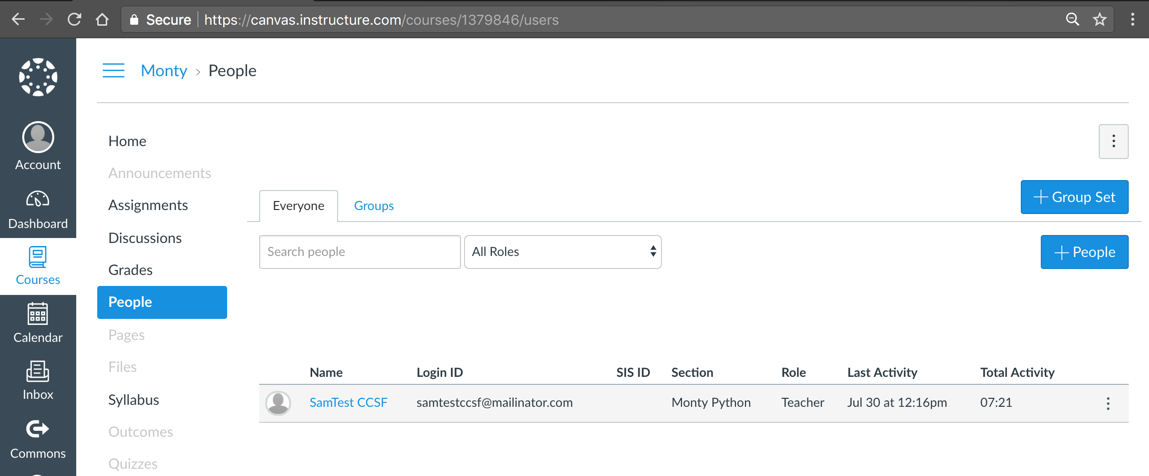
Adding them by email address works best. The new user has "Pending" status, as shown below. That student must read their email and approve joining the course to change their status.
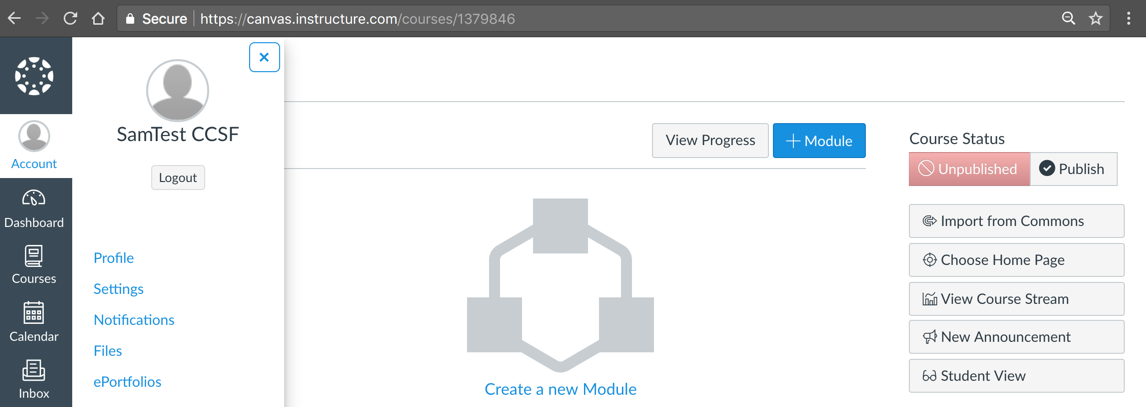
In your Canvas dashboard, on the left, click the Account icon. In te box that pops up, click Profile, as shown below.
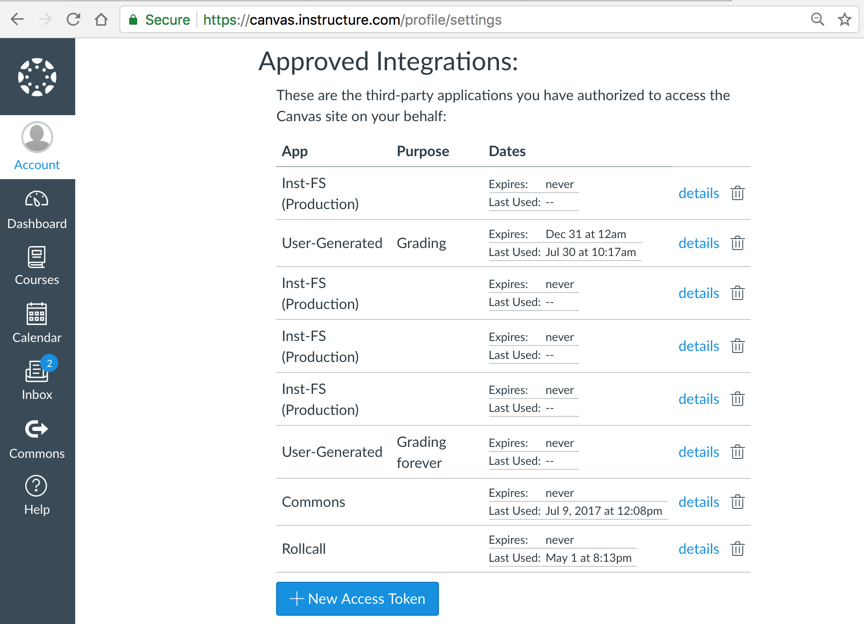
On the right side, click Settings, as shown below.

In the Settings page, scroll down to the "Approved Integrations" section, and click the "+ New Access Token" button, as shown below.
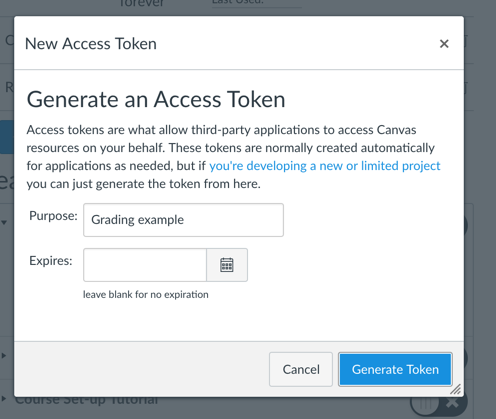
In the "Generate an Access Token" box, enter a purpose for your token, as shown below.
Click the "Generate Token" button.
Your token appears, as shown below. Copy this token and save it to insert in the Python code later.

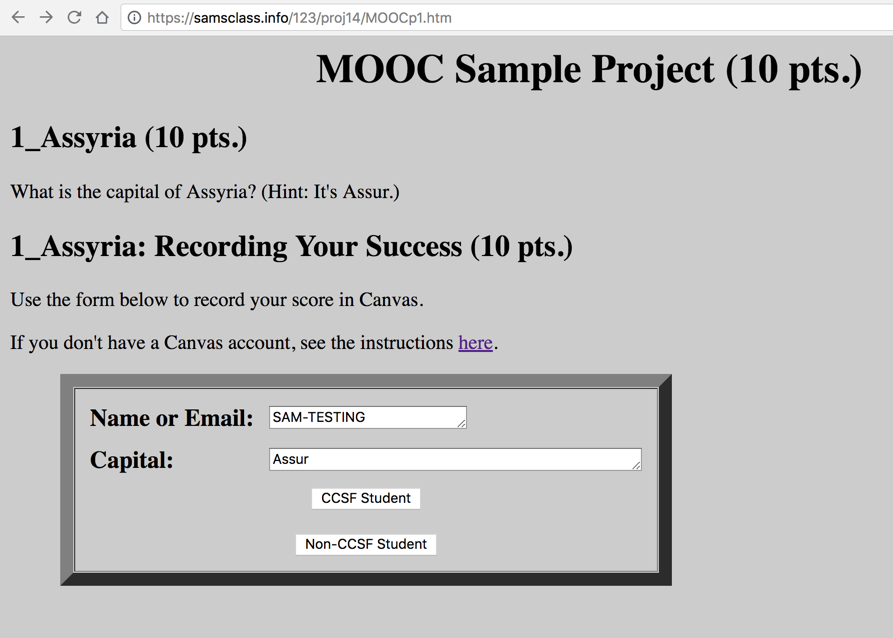
https://samsclass.info/123/proj14/MOOCp1.htm
It contains this HTML code:
<html>
<head><title>MOOC Sample Project (10 pts.)</title></head>
<body bgcolor="#cccccc">

<h1 align="center">MOOC Sample Project (10 pts.)</h1>

<h2>1_Assyria (10 pts.)</h2>

What is the capital of Assyria?  (Hint: It's Assur.)

<h2>1_Assyria: Recording Your Success (10 pts.)</h2>

Use the form
below to record your score in Canvas.
<p>
If you don't have a Canvas account, see
the instructions
<a href="https://samsclass.info/123/123_F18.shtml">here</a>.
<p>

<blockquote>
<form action="http://samlol.samsclass.info/123/pMOOC.php" method="post">
<table cellpadding=5 border=10><tr><td>

<table cellpadding=5>
<tr><td><big><b>Name or Email:</b></big></td>
  <td><textarea name="u" rows="1" cols="25"></textarea></td></tr>
<tr><td><big><b>Capital:</b></big></td>
  <td><textarea name="p" rows="1" cols="50"></textarea></td></tr>
<tr><td colspan=2 align="center"><big><b>
<input type="submit" name="canvas" value="CCSF Student">
<p>
<input type="submit" name="canvas" value="Non-CCSF Student">
</td></tr>
</table>

</td></tr></table>
</form>
</blockquote>

</body>
</html>
<?php

# CHANGE THESE FOR EACH PROJECT
$course_name = "Monty";
$project_name = "1_Assyria";
$project_pts = "10";
$project_verbose = "0";
$correct_answer = "assur"; # Note: use lowercase

# DO NOT CHANGE ANYTHING BELOW THIS LINE


$u = strip_tags($_POST['u']);
$p = strip_tags($_POST['p']);
$canvas = strip_tags($_POST['canvas']);

# Block command injection
$u = str_replace(array('|', ';', '<', '>'), '' , $u);

# Make lowercase

$p = strtolower($p);

$ccsf = "0";
if ($canvas === "CCSF Student")
   {
   	$ccsf = "1";
   }

echo "You entered: <b>" .$u . "</b> and <b>" . $p .  "</b> and <b>" . $canvas . "</b><p>";


$pos = strpos($p, $correct_answer);

if ($pos === false)
   {
  echo "<h1>Answer incorrect!</h1>";
  echo "<h3>Click your browser's back button to try again.</a></h3>";
  }
else  {
  echo "<h1>Answer correct!</h1>";

  $cmd = "/usr/local/bin/record.py $ccsf $course_name $project_name '$u' $project_pts $project_verbose 2>&1 ";
  # echo "Executing cmd: <p><b><i>$cmd</i></b><p>";
  system($cmd);

  }

?>
You can download my sample file here. Note that the filename extension has been changed to "pyx" to make it downloadable.
https://samsclass.info/123/proj14/record-1.06.pyx
The only modification you need to make to that file is to insert your API key, as shown below. as shown below.

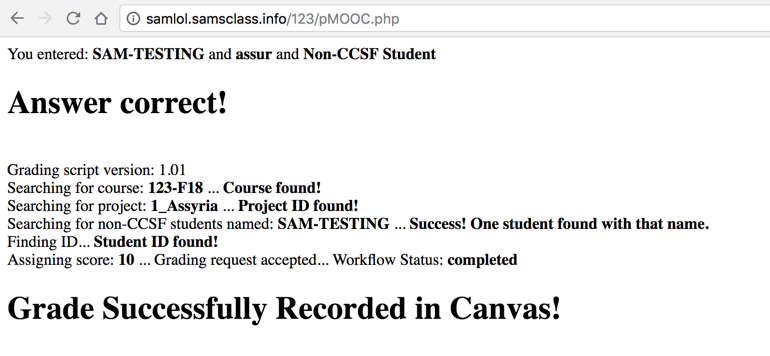
Clicking "Non-CCSF Student" shows this:
The score appears in Canvas Grades, as shown below.
