I am following this tutorial: Kubernetes Bootcamp (CKAD).
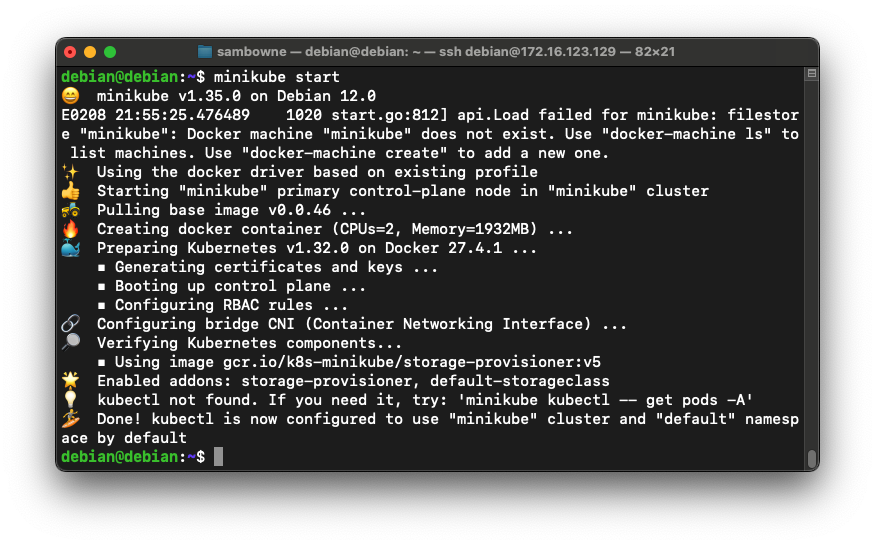
Your cluster starts, showing several messages, ending with "Done! kubectl is now configured...", as shown below.minikube start
Troubleshooting
If minkube just hangs and won't start, press Ctrl+C and execute these commands:minikube delete minikube start
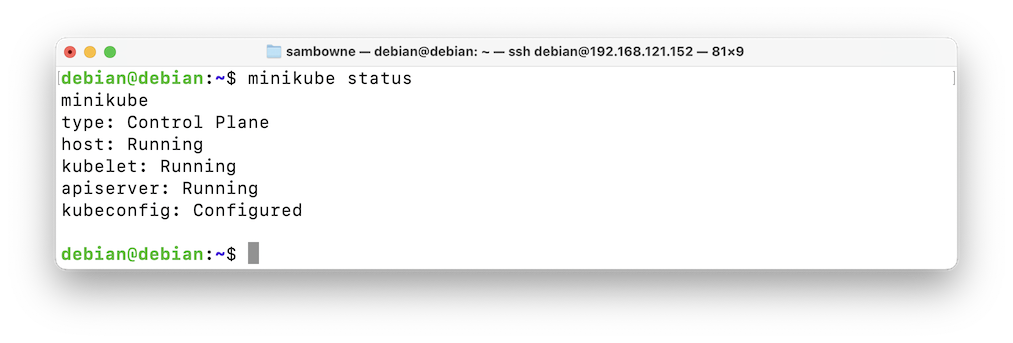
You should see several "Running" items, as shown below.minikube status
Kubernetes tracks the phase of a Pod
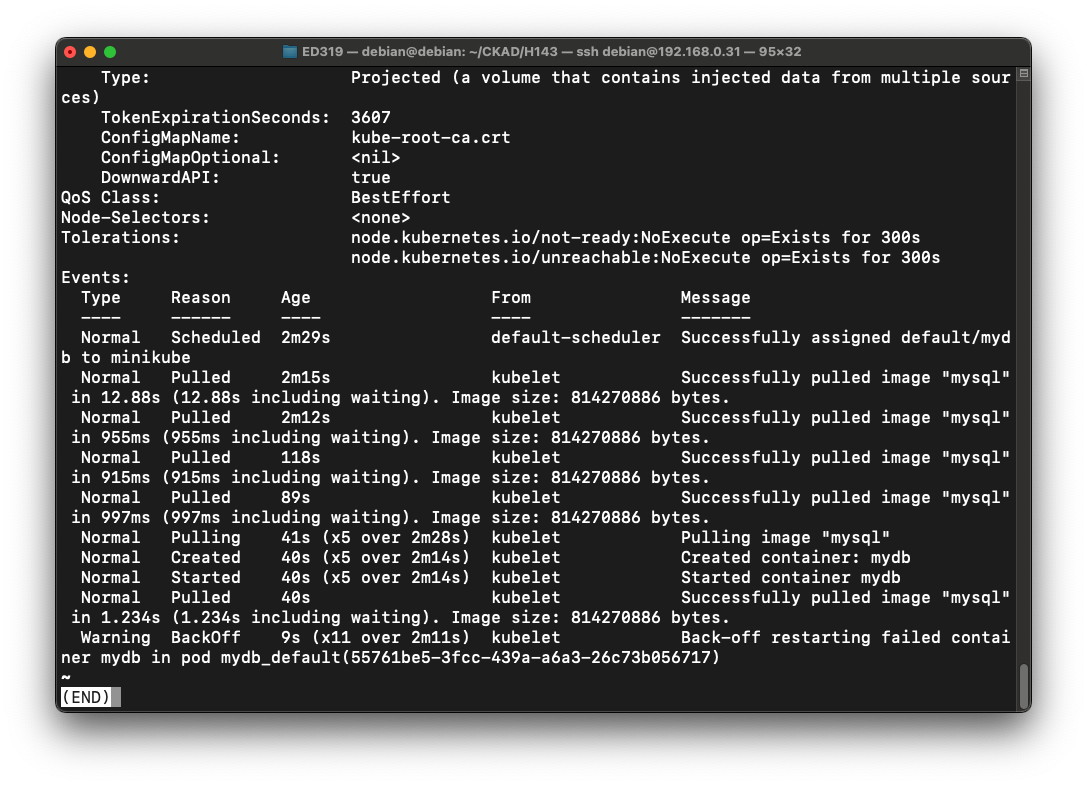
The first screen of data shows that the pod has been crashing, with Restart Count rising and a Reason of "CrashLoopBackOff", as shown below:kubectl run mydb --image=mysql --dry-run=client -o yaml > db1.yaml kubectl apply --filename db1.yaml kubectl get pods kubectl describe --filename db1.yaml | less

Press the SPACEBAR until you reach the end of the output.
The Events show several "Successfully pulled image" messages, but the time between them keeps increasing, as shown below.
This is what the "CrashLoopBackOff" does.
Press q to exit from "less."
kubectl run mydb --image=mysql --dry-run=client -o yaml > db1.yaml
kubectl apply --filename db1.yaml
kubectl get pods
kubectl describe --filename db1.yaml | less
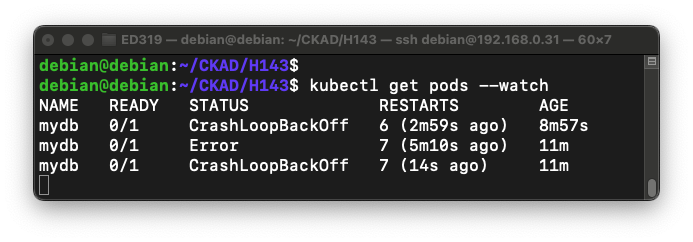
You see a live view of the pod status.kubectl get pods --watch
If you wait for a few minutes, you should see the status change when the pod restarts, as shown below.
Press Ctrl+c to stop the watch view.
Execute these commands:
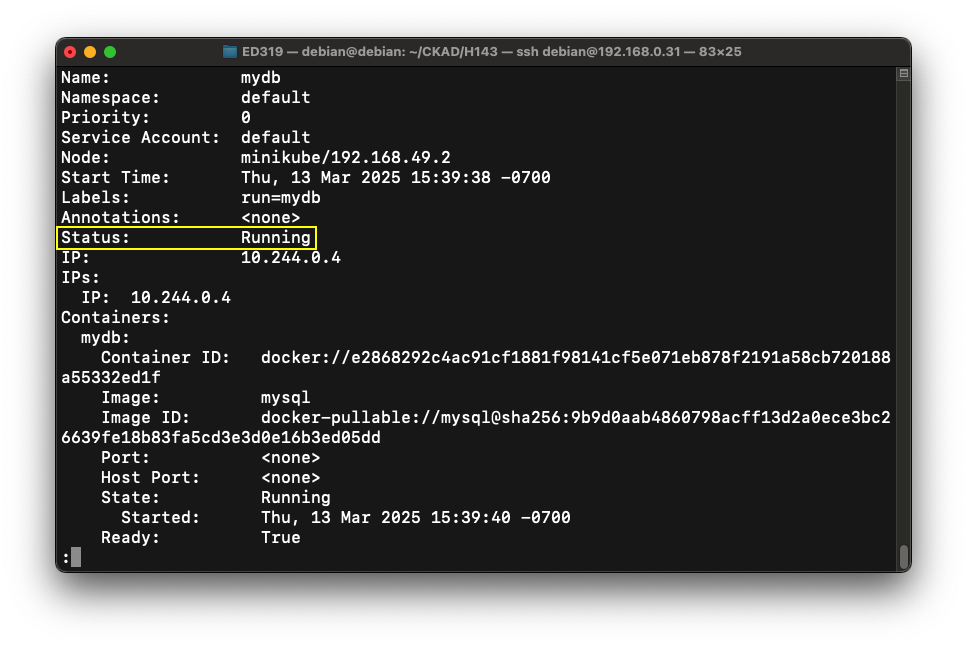
The first screen of data shows that the pod has a Status of "Running", as shown below.kubectl delete --filename db1.yaml kubectl run mydb --image=mysql --env="MYSQL_ROOT_PASSWORD=secret" \ --dry-run=client -o yaml > db2.yaml kubectl apply --filename db2.yaml kubectl get pods kubectl describe --filename db2.yaml | less
(If it shows "Pending", wait a minute and try again.)
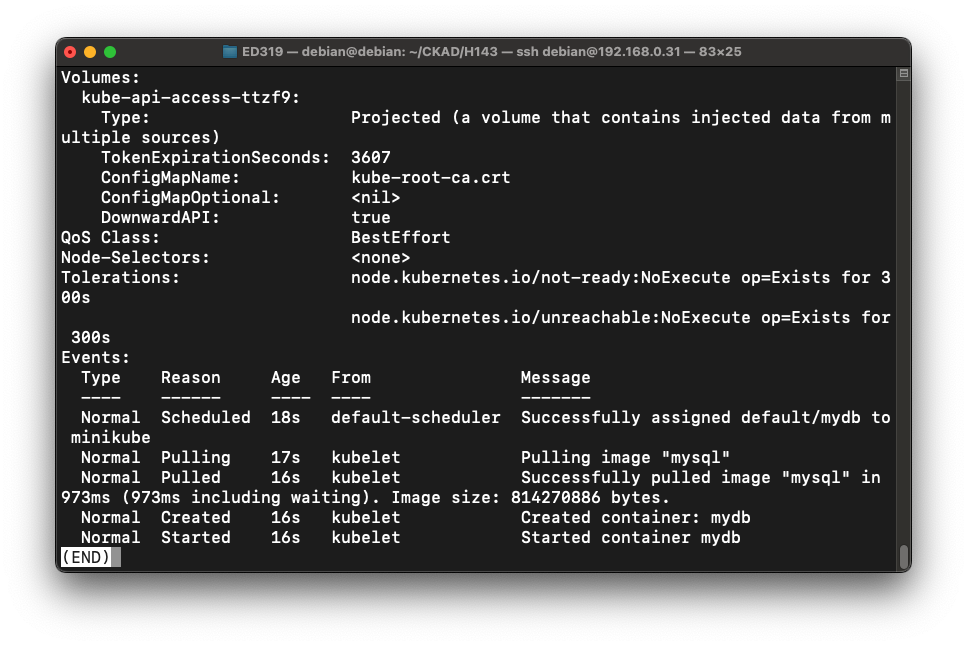
The Events show one "Pulling image" action, without any crashing and restarting, as shown below:
kubectl delete --filename db2.yaml
Here are some important security context parameters:
| runAsNonRoot | $boolean - specifies whether the containers run as a non-root user at image level - containers will not start if set to true while image uses root (pod and container) | |
| runAsUser | $UID - sspecifies the UID of logged-in user in pod containers (pod and container) | |
| fsGroup | $GID - specifies additional GID used for filesystem (mounted volumes) in pod containers (pod level) | |
| privileged | $boolean - controls whether containers will run as privileged or unprivileged (container level) | |
| allowPrivilegeEscalation | $boolean - controls whether a process can gain more privileges than its parent process - always true when the container is run as privileged, or has CAP_SYS_ADMIN (container level) | |
| readOnlyRootFilesystem | $boolean - controls whether the container has a read-only root filesystem (container level) |
kubectl explain pod.spec.securityContext | less

kubectl explain pod.spec.containers.securityContext | less
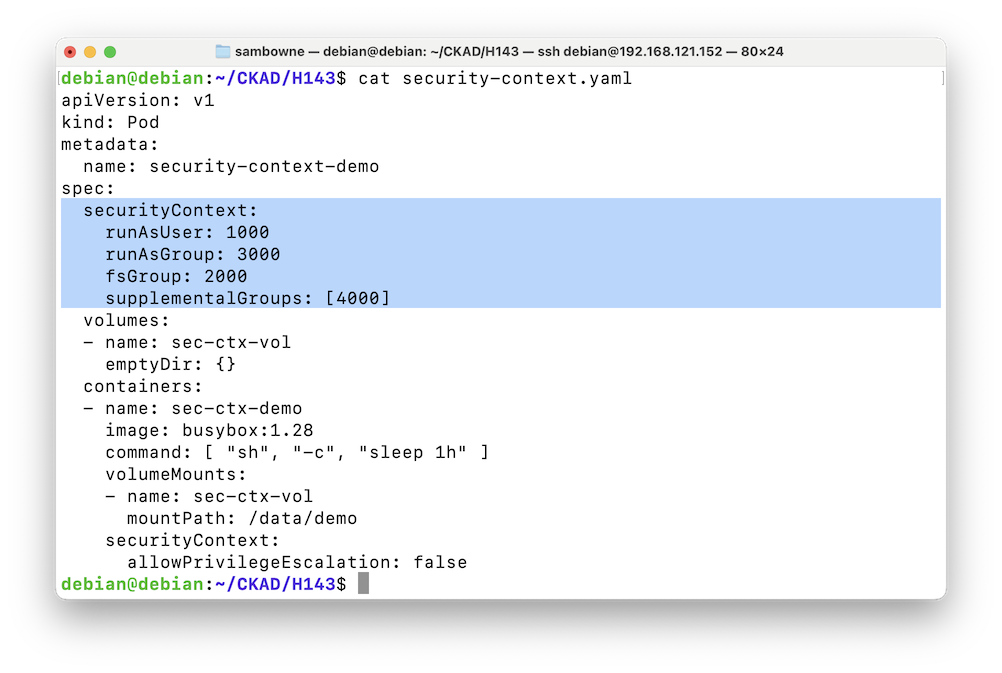
Notice the "securityContext" settings, highlighted in the image below.wget https://kubernetes.io/examples/pods/security/security-context.yaml cat security-context.yaml
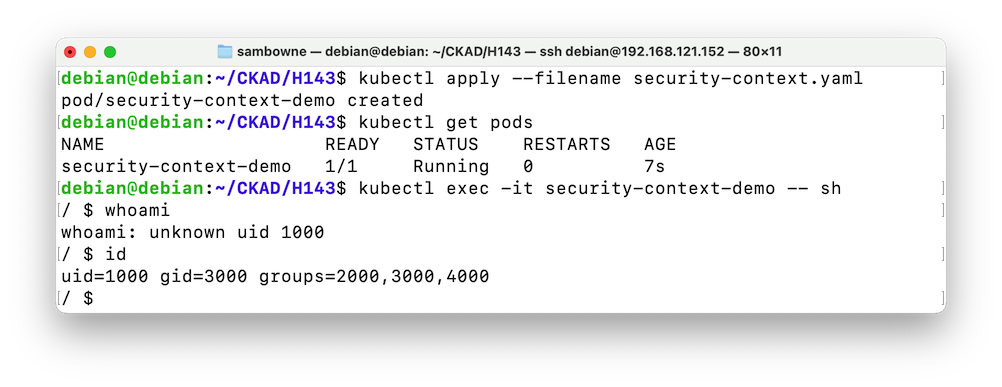
Execute these commands to create a pod based on the "security-context.yaml" file and examine its security properties:
The user inside the container is "unknown" and has uid 1000, as shown below.kubectl apply --filename security-context.yaml kubectl get pods kubectl exec -it security-context-demo -- sh whoami id cat /etc/passwd
To see why this user is "unknown", execute this command:
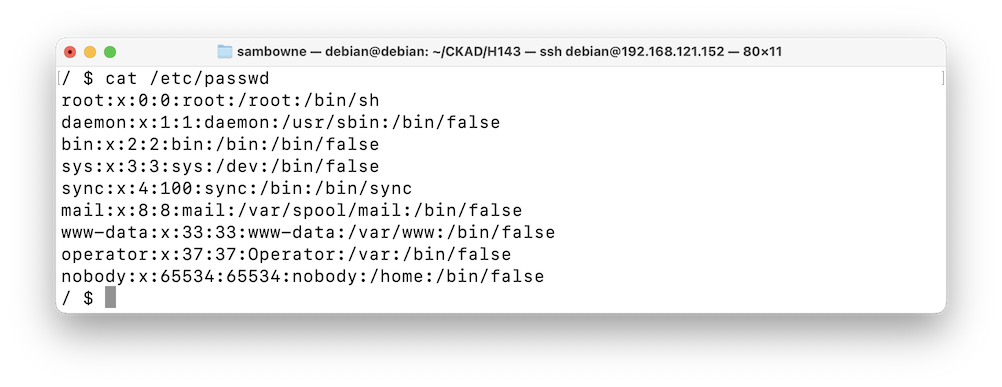
This pod is based on "busybox," and doesn't have an actual user 1000 in its /etc/passwd file, as shown below.cat /etc/passwd
You can use the system as this user, but there's no way to log in with this account--a strange situation!
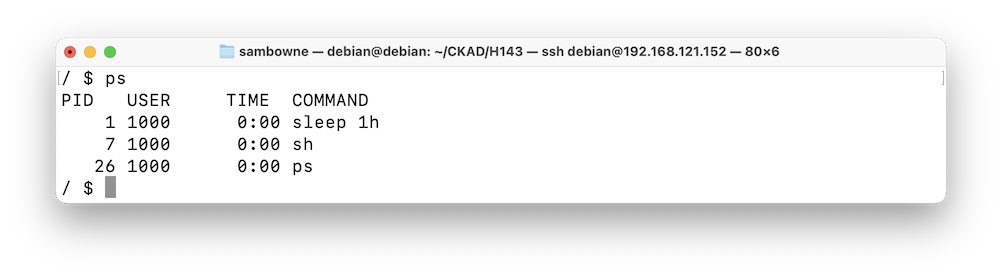
Several processes are running under the uid 1000, as shown below.ps
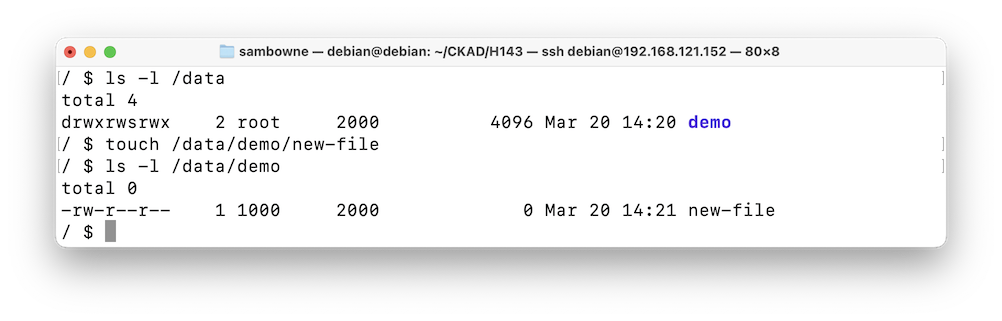
As shown below, the /data/demo directory has permissions rwxrwxrwx, meaning everyone can read and write there.ls -l /data touch /data/demo/new-file ls -l /data/demo
The file you created is owned by your current user, 1000.
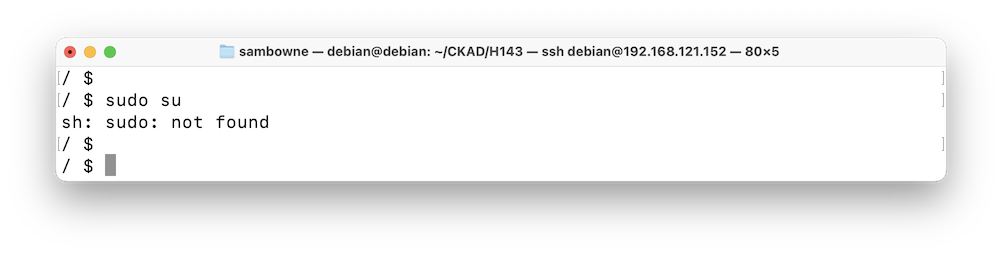
As shown below, there is no "sudo" executable in this image, so you're stuck with limited privileges.sudo su
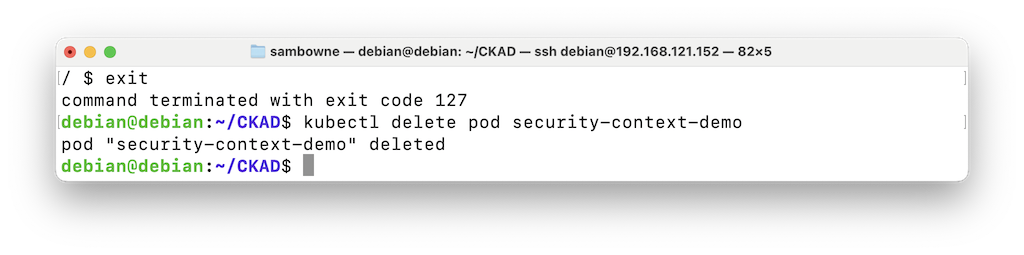
The pod is gone, as shown below.exit kubectl delete pod security-context-demo
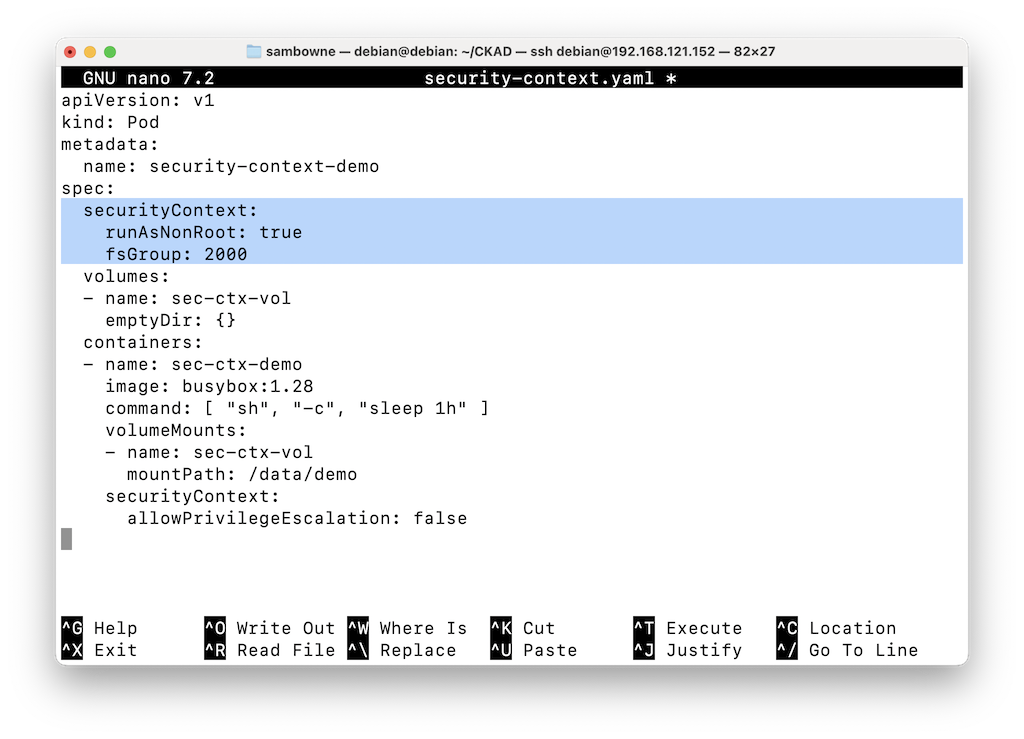
Adjust the securityContext section, as shown below, to:nano security-context.yaml
To save the file, press Ctrl+x, y, Enter.runAsNonRoot: true fsGroup: 2000
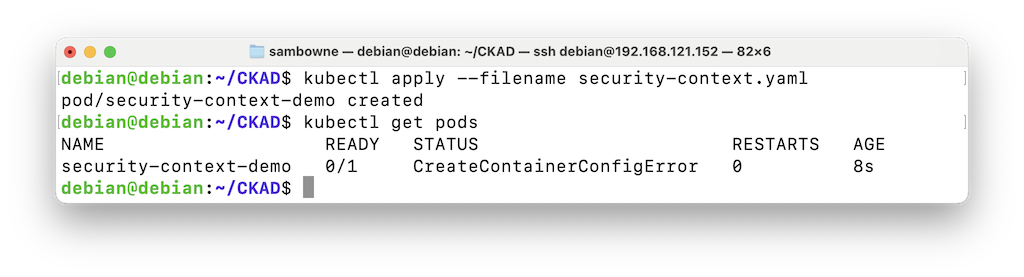
There's a configuration error, as shown below.kubectl apply --filename security-context.yaml kubectl get pods
To learn about the error, execute this command:
The problem is that you cannot set "runAsNonRoot" without specifying a non-root user with the "runAsUser: $UID" line, as shown below.kubectl describe pods security-context-demo
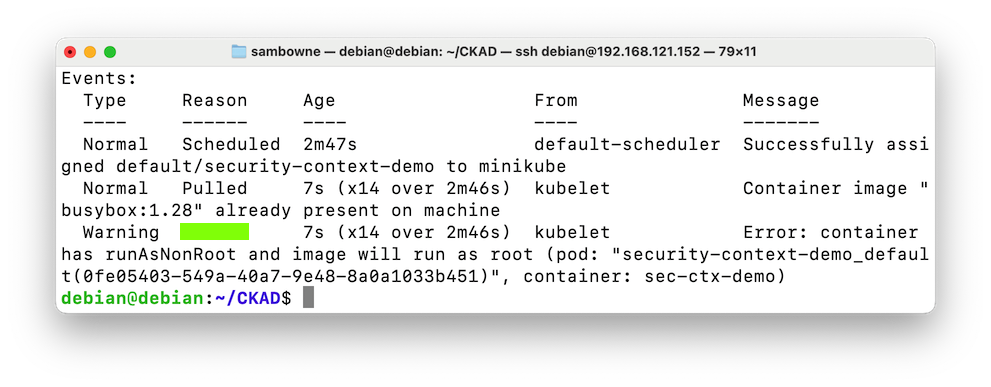
Flag H 143.1: Reason (10 pts)
The flag is covered by a green rectangle in the image above.
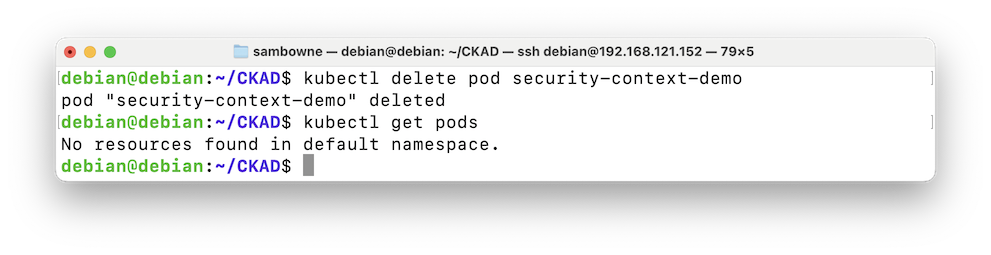
The pod is gone, as shown below.kubectl delete pod security-context-demo kubectl get pods
Posted 4-17-25