I am following this process: Quick Tunnels.
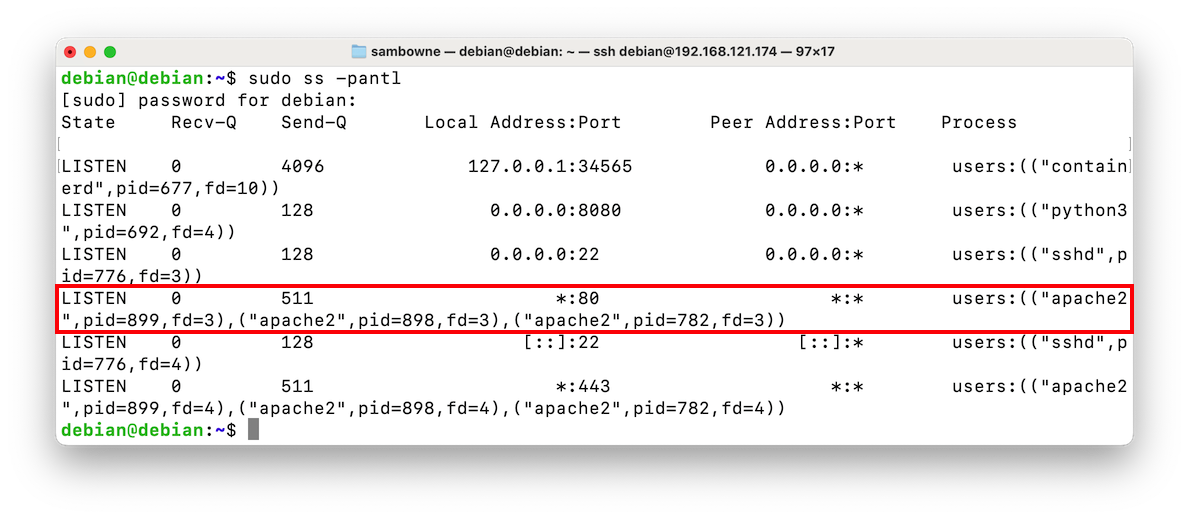
You see the apache2 process listening on port 80, as shown below.sudo apt update sudo apt install apache2 -y sudo ss -pantl
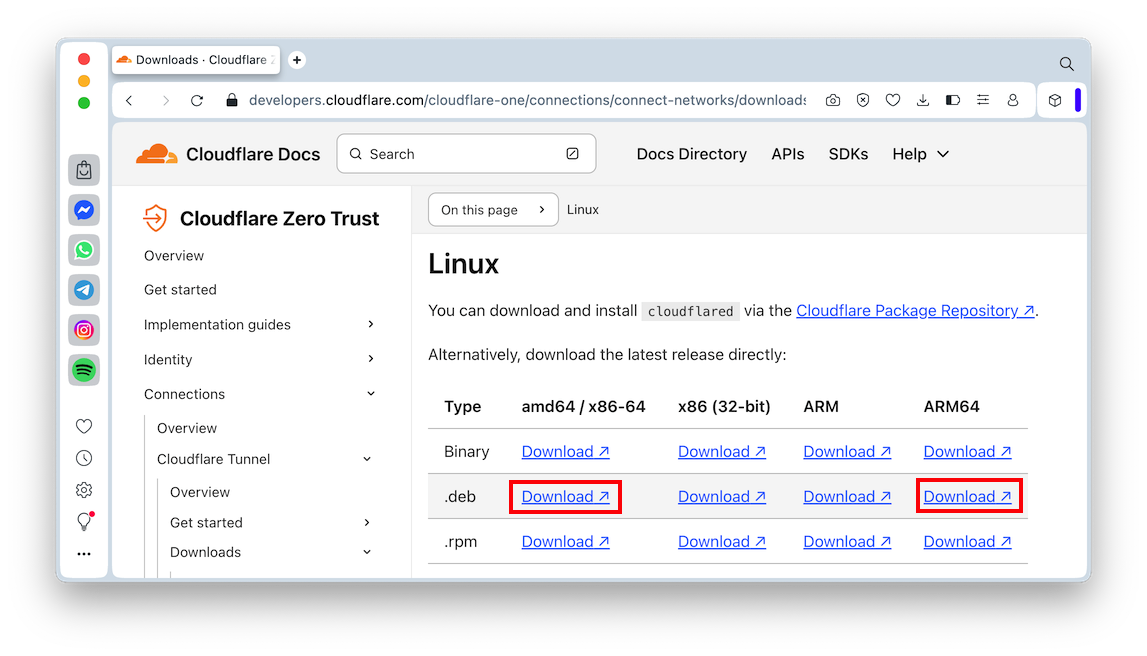
In the Linux section, find the .deb link appropriate for your processor type, as shown below.
If you are using a Mac M1 or later, use the ARM64 version. Otherwise, use the "amd64/x86-64" version.
Right-click the Download link and copy the URL.
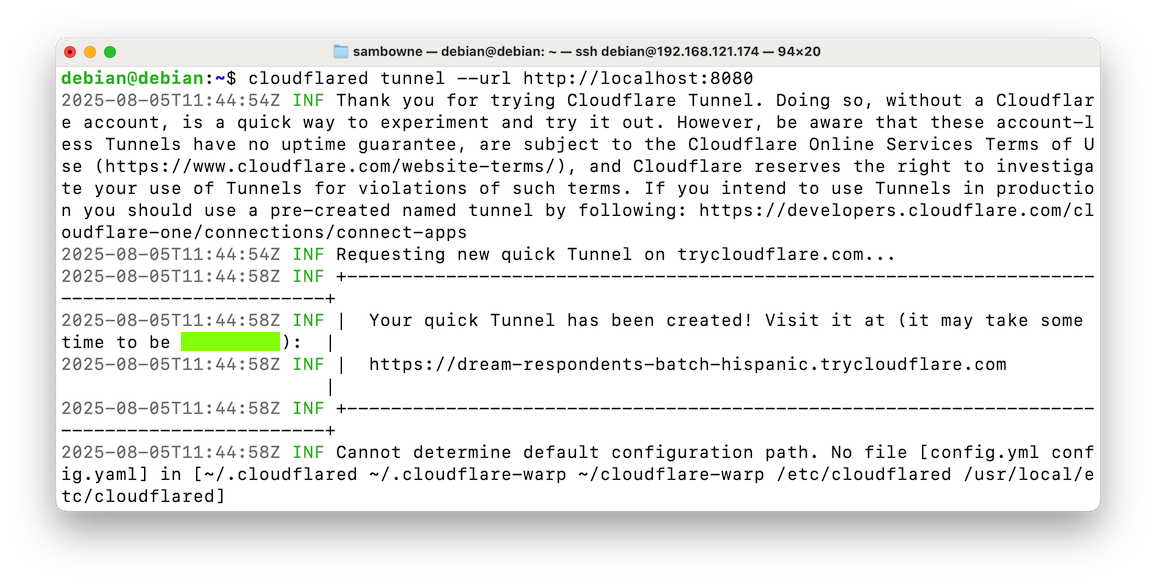
On your Linux server, execute these commands, pasting in the URL you copied as the argument for the "wget" command:
You should see your tunnel's URL, as shown below.wget https://github.com/cloudflare/cloudflared/releases/latest/download/cloudflared-linux-amd64.deb sudo dpkg -i cloudflare* cloudflared tunnel --url http://localhost:80
Flag H 112.1: Message (10 pts)
The flag is covered by a green rectangle in the image above.
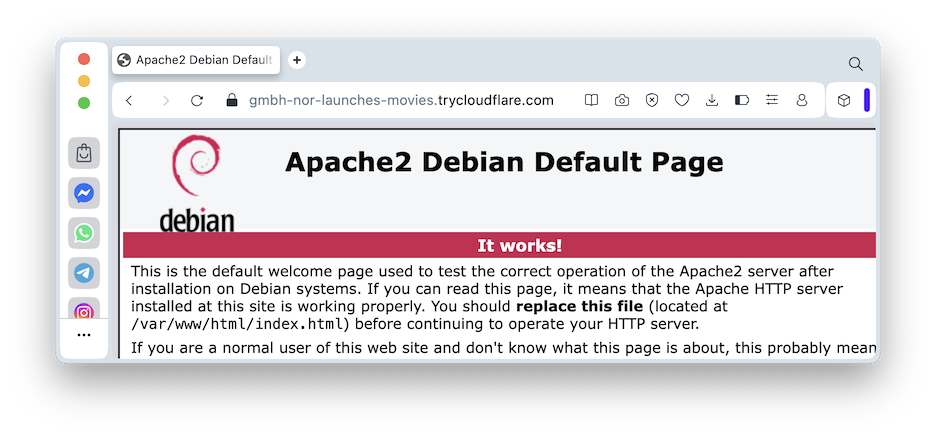
You should see the default Apache page, as shown below.
You'll need to create an account at cloudflare.com, register your domain there, and set cloudflare as your authoritative DNS servers.
More details are at Add a site.
Log in with your Cloudflare account.
On the left side, click Networks, Connectors.
Click the "Create a tunnel" button.
Click the Cloudflared connector type.
Enter a name for your tunnel, such as persistent.
Click the "Save tunnel" button.
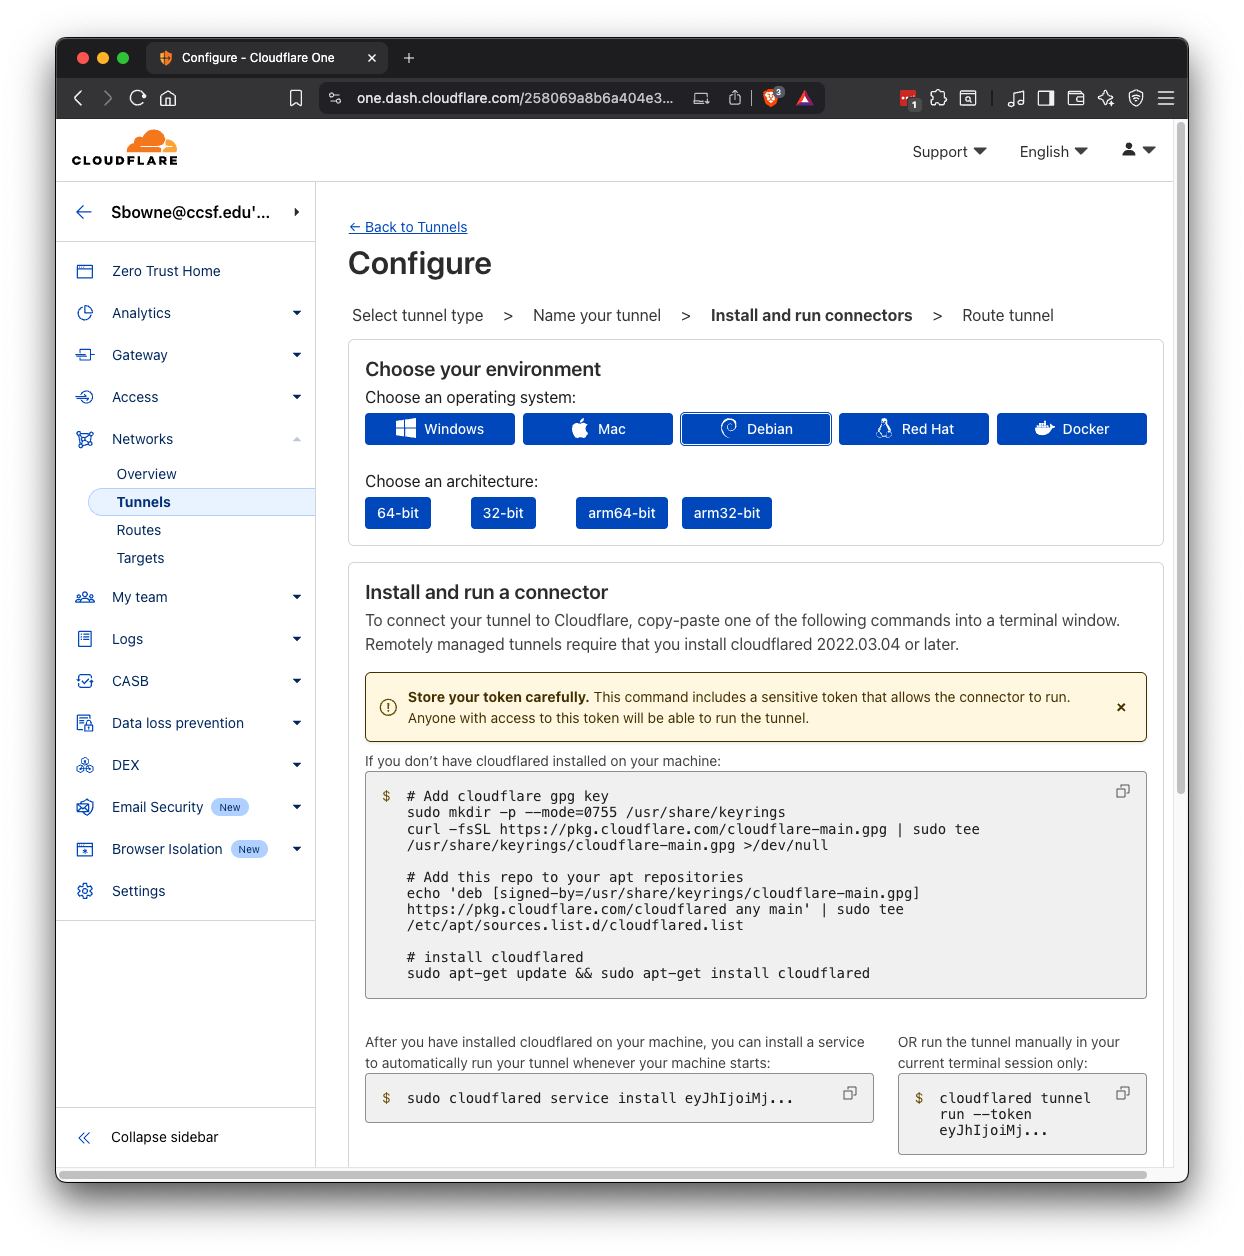
In the "Choose your environment" section, click the Debian button.
The boxes below that button give you the commands to run on your Debian server, as shown below. Run them.
At the bottom right, click Next.
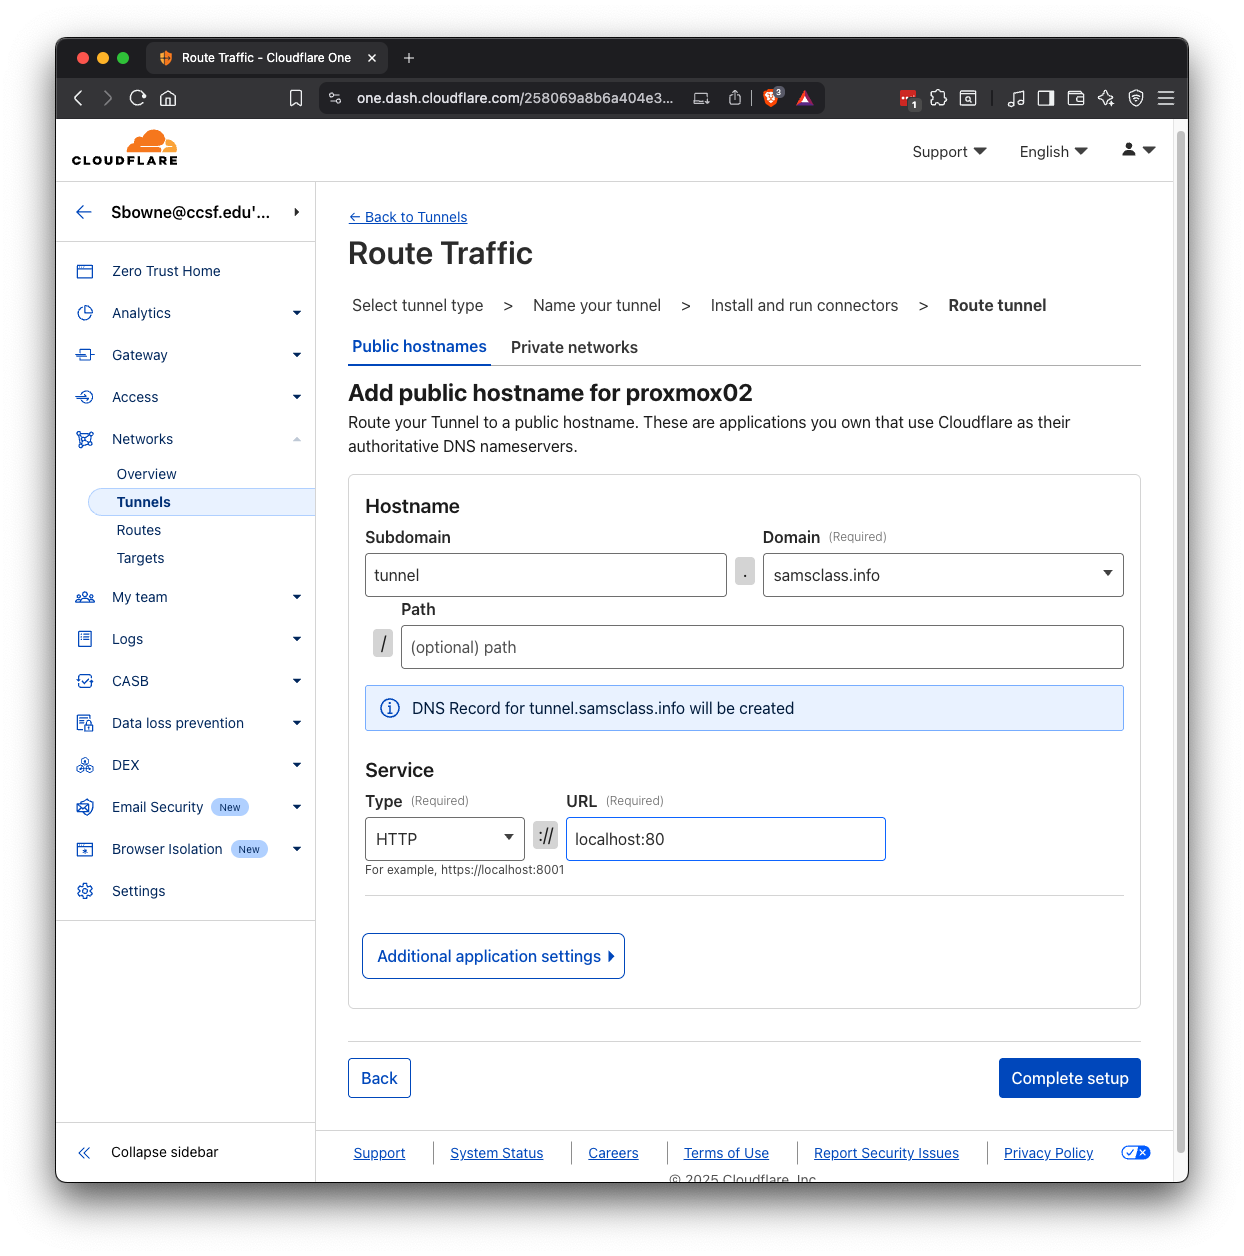
In the "Route Traffic" page, make these entries, as shown below.
At the bottom right, click "Complete setup".
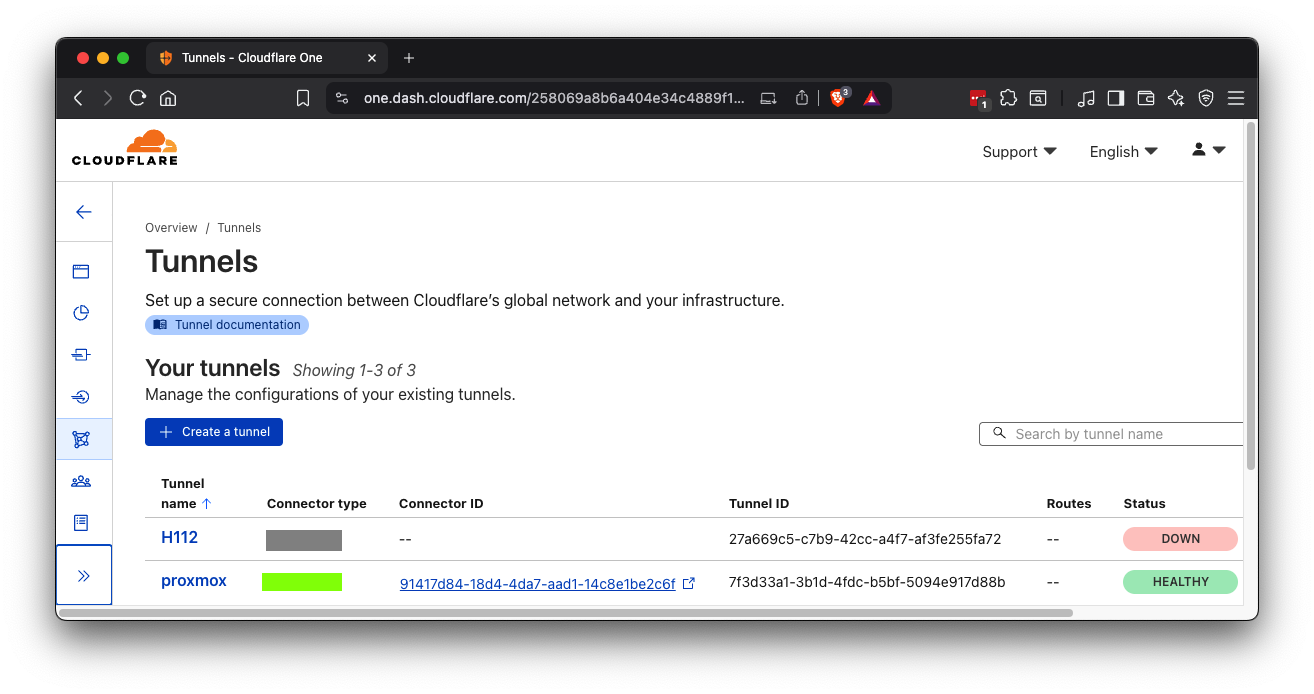
Flag H 112.2: Message (15 pts)
The flag is covered by a green rectangle in the image below.Note that I named my persistent tunnel "proxmox" instead of "tunnel".
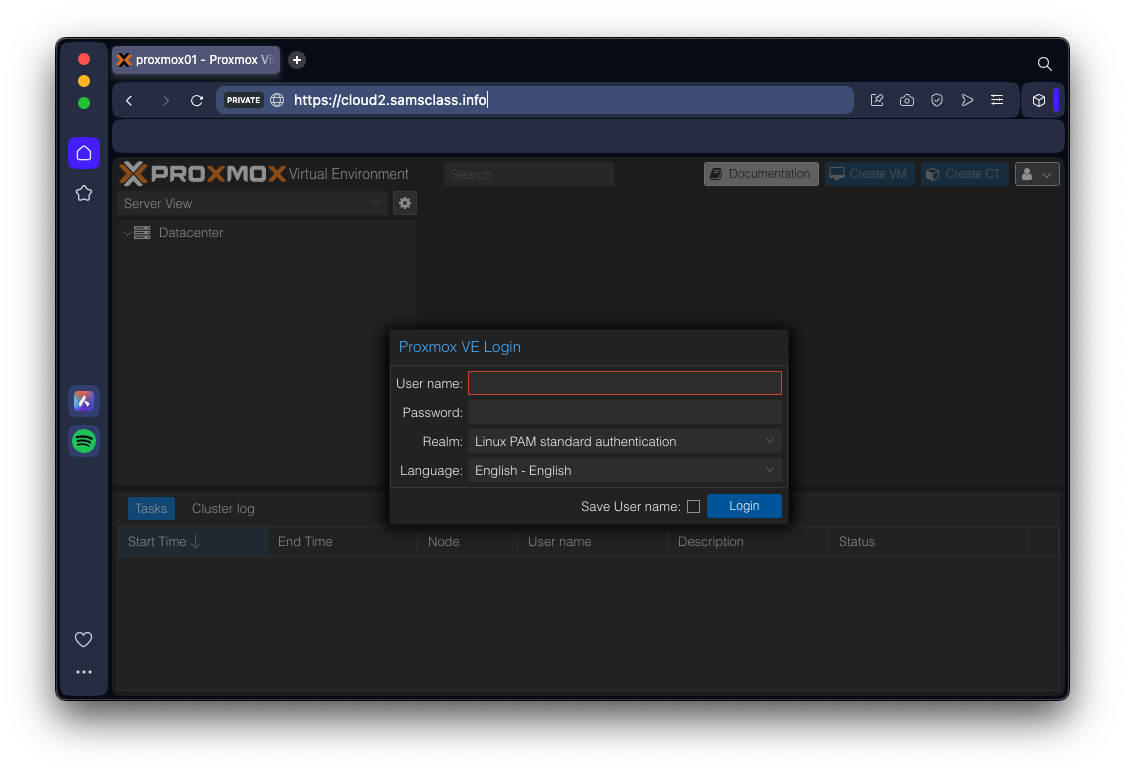
In my case, I used a subdomain named "cloud2" and put a Proxmox server there. You may have a different subdomain name, and may have an Apache page there.
Posted 8-6-25
Updated 3-1-26