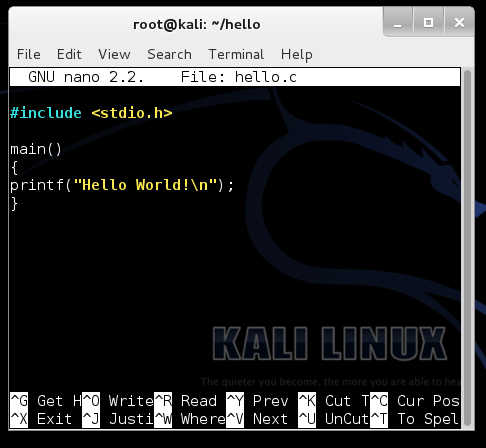
nano hello.c
#include <stdio.h>

main()
{
   printf("Hello World!\n");
}
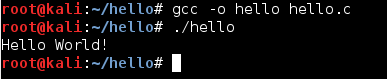
gcc hello.c -o hello

./hello
You should see "Hello World!", as shown below.
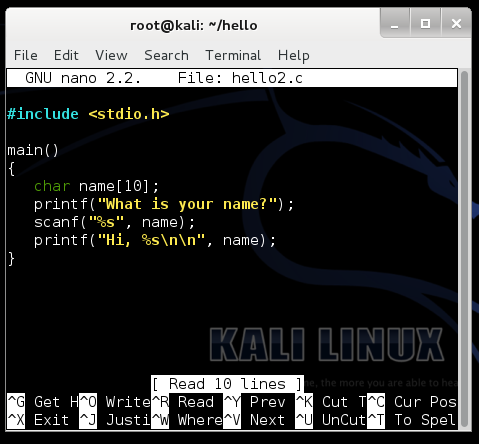
This program works, but it would be nicer if it greeted you by name, and if it put a couple of newline characters after the greeting to make it cleaner-looking. The next version, hello2, will add these features.
nano hello2.c
#include <stdio.h>

main()
{
   char name[10];
   printf("What is your name?");
   scanf("%s", name);
   printf("Hi, %s\n\n", name);
}
 Save your file with Ctrl+X, Y, Enter.
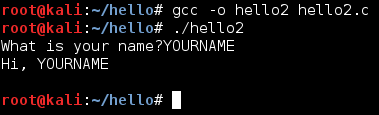
gcc hello2.c -o hello2

./hello2
It should ask you for your name. When you type in your name (no longer than 10 characters), you should be greeted by name, as shown below:
./hello2
1234567890123456789012345678901234567890
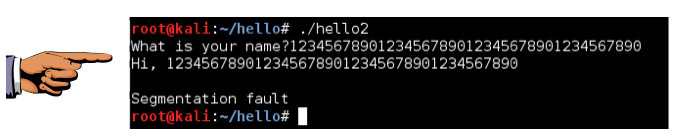
Although this just crashes the machine, which could result in a denial of service, with carefully crafted false data it is often possible to use such errors to open a shell on the host, giving you complete control over it. That's how many of the Metasploit exploits work.
Click the taskbar at the bottom of your host Windows 7 desktop, to make the host machine listen to the keyboard, instead of the virtual machine.
Press the PrintScrn key in the upper-right portion of the keyboard. That will copy the whole desktop to the clipboard.
YOU MUST SUBMIT A FULL-SCREEN IMAGE FOR FULL CREDIT!
On the host machine, not the virtual machine, click Start.
Type mspaint into the Search box and press the Enter key.
Click in the untitled - Paint window, and press Ctrl+V on the keyboard. The desktop appears in the Paint window.
Save the document with the filename "YOUR NAME Proj 8a", replacing "YOUR NAME" with your real name.
In a Terminal window, execute this command:
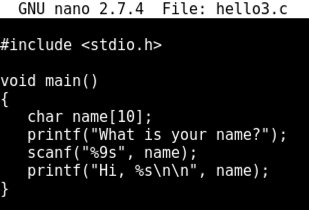
nano hello3.c
#include <stdio.h>

void main()
{
   char name[10];
   printf("What is your name?");
   scanf("%9s", name);
   printf("Hi, %s\n\n", name);
}
gcc hello3.c -o hello3

./hello3
1234567890123456789012345678901234567890

The program now just ignores any characters after the first nine. There is no error message, and no stack overflow. The program is patched. This is what many Microsoft security patches do--correct code to remove buffer overflow vulnerabilities.
By the way, this is a sloppy patch, because it leaves some keyboard characters in an input buffer which could lead to unexpected results later in the program. For a more thorough way of patching scanf, see link Ch 7i.
Capture a whole-desktop image as before, and save it with the filename "YOUR NAME Proj 8b", replacing "YOUR NAME" with your real name.
traceroute google.com

ping 172.16.1.2

ress Ctrl+C to stop the pings. In a Terminal window, execute this command, replacing the IP address with your gateway address:
ping 172.16.1.2 -w1
This makes ping end faster--it stops after one second.
In a Terminal window, execute this command:
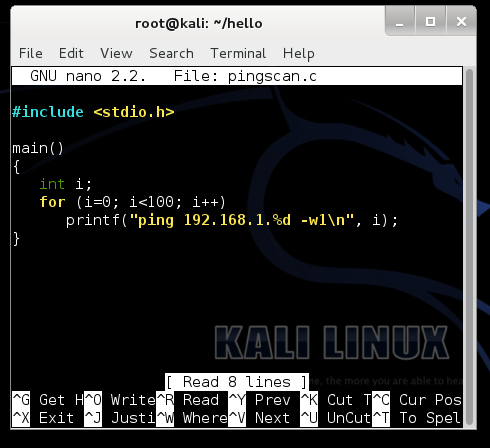
nano pingscan.c
#include <stdio.h>

main()
{
   int i;
   for (i=0; i<100; i++)
      printf("ping 192.168.1.%d -w1\n", i);
}
Note that the last two characters in the printf format string are the letter w and the numeral 1. (If you are on a different subnet, replace 192.168.1 with the first 3 numbers in your LAN's IP address.)
Save your file with Ctrl+X, Y, Enter.
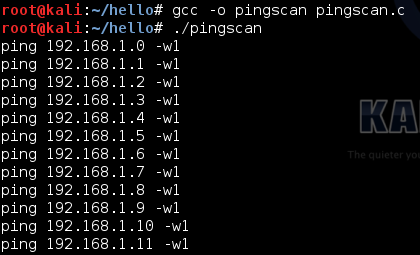
gcc pingscan.c -o pingscan

./pingscan
In a Terminal window, execute this command:
./pingscan > ping100
In a Terminal window, execute this command:
nano ping100
Press Ctrl+X to close nano.
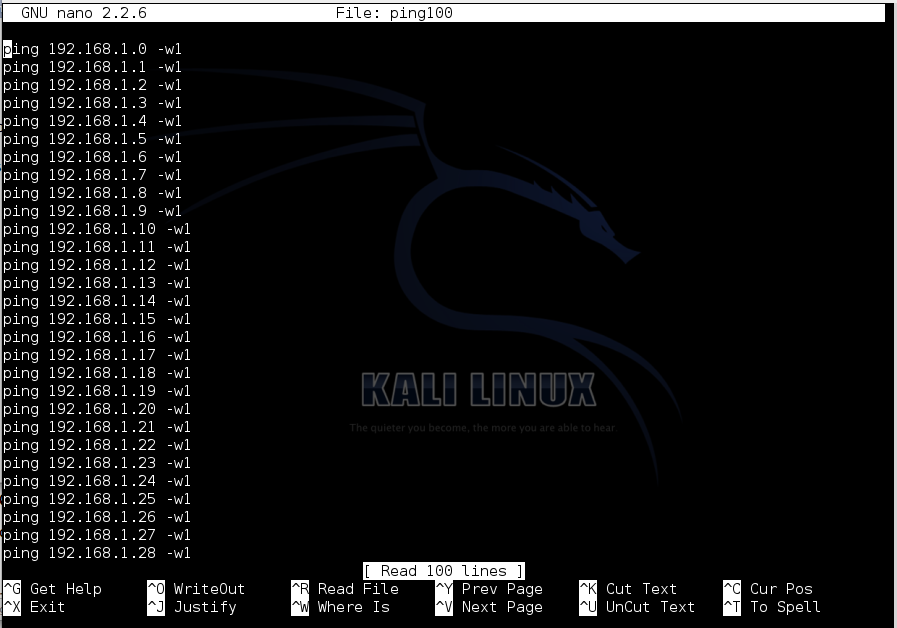
chmod a+x ping100
In a Terminal window, execute this command:
./ping100
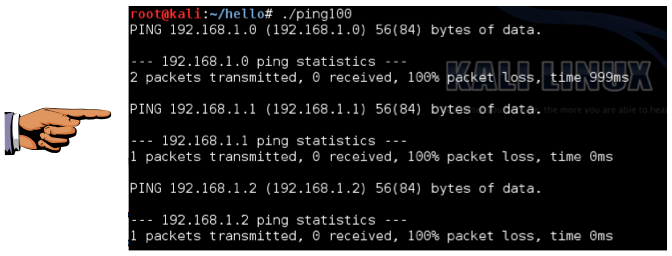
Capture a whole-desktop image as before, and save it with the filename "YOUR NAME Proj 8c", replacing "YOUR NAME" with your real name.
Send a Cc to yourself.
Last Modified: 10-18-17