In the Command Prompt window, enter the IPCONFIG command and press the Enter key. Several IP addresses appear.
Find the adapter that goes to your LAN. In S214, it's the adapter with an IP address starting with "192.168.1". Make a note of that IP address.
In the "Control Panel" section of the results, click "Windows Firewall".
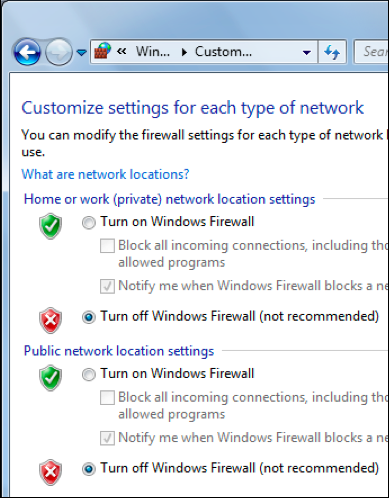
On the left side of the "Windows Firewall" box, click "Turn Windows Firewall on or off". Click both of the "Turn off Windows Firewall (not recommended)" buttons, as shown below.
Click the OK button.
In the Terminal window, after the # prompt, enter this command, replacing the IP address with the IP address of your Windows machine.
Then press the Enter key.
ping 192.168.1.101
If you don't see replies, you need to troubleshoot your VMware networking. There are tips to guide you through that in Project 2.
When the ping is working properly, type Ctrl+C to stop the pinging.
On your Kali Linux desktop, in the Terminal window, execute this command:
ping google.com
If you don't see replies, you need to fix your networking before proceeding.
On your Kali Linux desktop, in the Terminal window, execute this command:
apt-get install zenmap -y
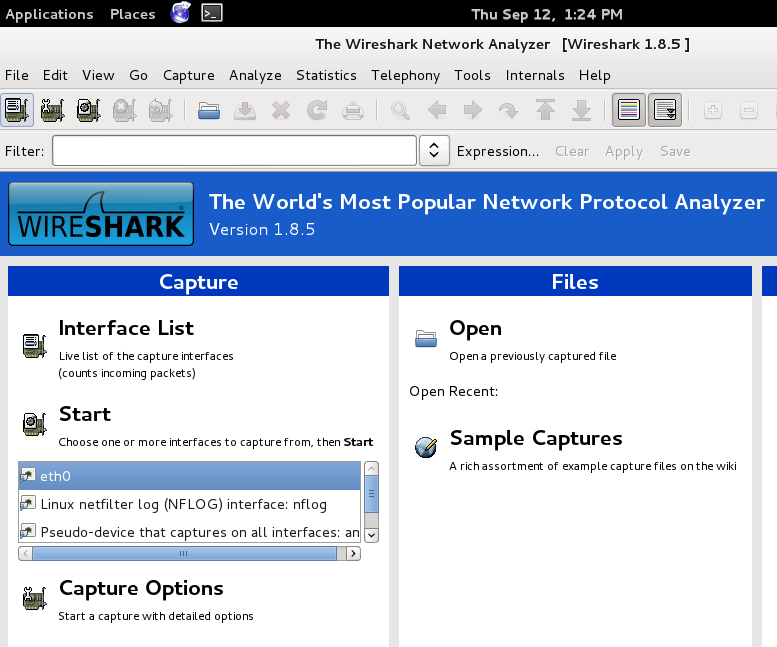
wireshark
In the Wireshark window, verify that "eth0" is highlighted, as shown below, and click Start.
In the Terminal window, execute this command:
zenmap
In the Target box, enter the network address of the network containing both your Kali and Windows machines, followed by the CIDR notation number (usually 24), like this:
192.168.1.0/24Click Scan.
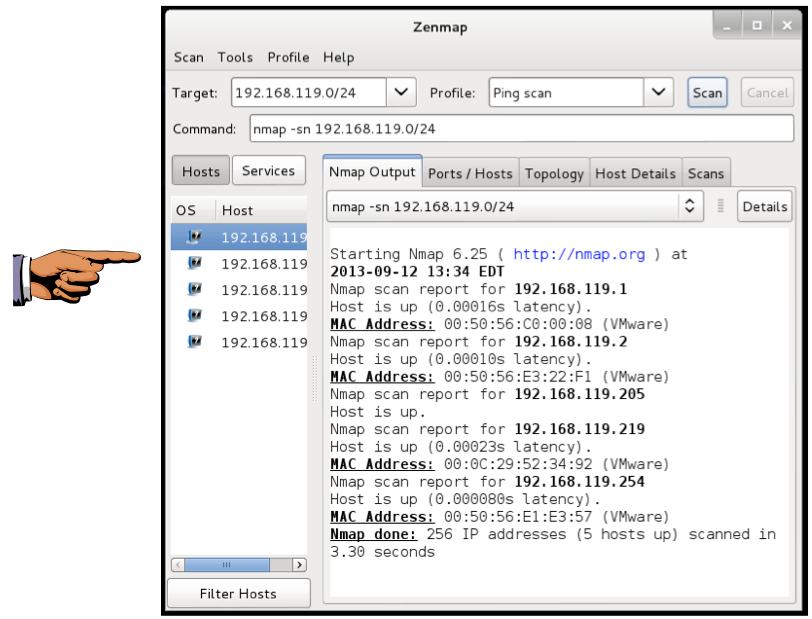
Nmap pings the whole LAN.
When the sweep completes, you should see a list of the hosts that were found on the left side of the Nmap window, as shown above. The IP addresses and the total number of hosts may be different, but you should detect at least two hosts—your Linux and Windows machines.
Click the taskbar at the bottom of your host Windows 7 desktop, to make the host machine listen to the keyboard, instead of the virtual machine.
Press the PrintScrn key in the upper-right portion of the keyboard. That will copy the whole desktop to the clipboard.
YOU MUST SUBMIT A FULL-SCREEN IMAGE FOR FULL CREDIT!
On the host machine, not the virtual machine, click Start.
Type mspaint into the Search box and press the Enter key.
Click in the untitled - Paint window, and press Ctrl+V on the keyboard. The desktop appears in the Paint window.
Save the document with the filename "YOUR NAME Proj 6a", replacing "YOUR NAME" with your real name.
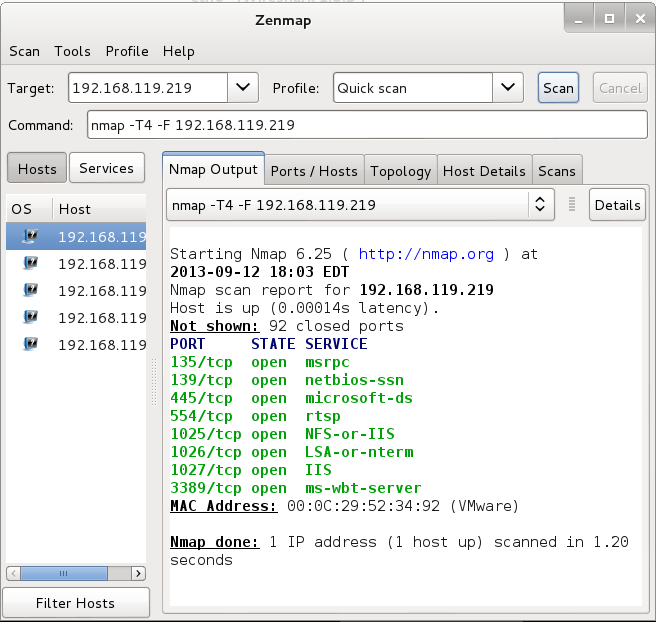
Select a Profile of "Quick Scan", as shown below on this page.
Click Scan.
When the scan completes, you should see a list of open ports including "135/tcp open", as shown below.
Notice the Command line. It currently shows this command, as shown below:
nmap -p 1-65535 -T4 -A -v 192.168.119.219
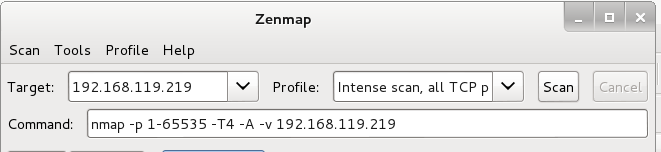
Make these three changes in this line:
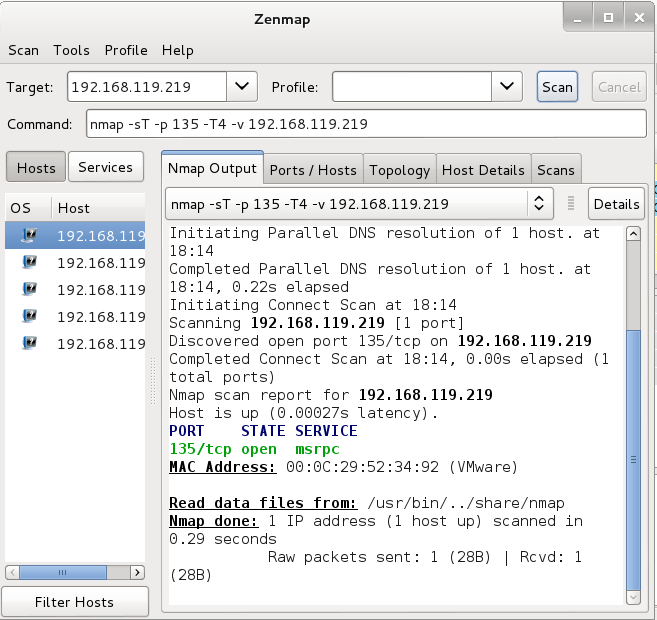
Click the Scan button.
You should see one line of green text, showing port "135/tcp open", as shown above.
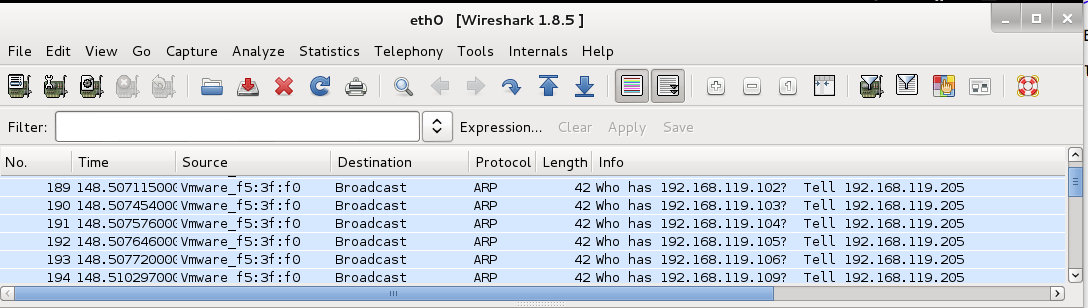
In the Filter box, type this filter:
tcp.port==135
[SYN]

[SYN, ACK]

[ACK]

[RST, ACK]
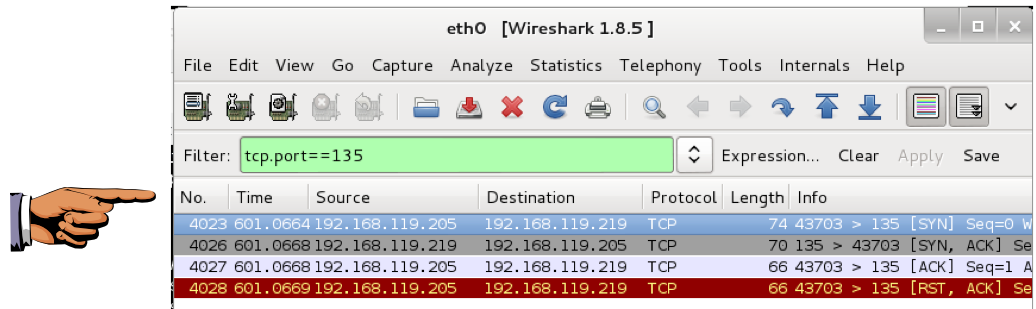
This is a complete TCP three-way handshake, followed by a RST to end the session.
Click the taskbar at the bottom of your host Windows 7 desktop, to make the host machine listen to the keyboard, instead of the virtual machine.
Press the PrintScrn key in the upper-right portion of the keyboard. That will copy the whole desktop to the clipboard.
YOU MUST SUBMIT A FULL-SCREEN IMAGE FOR FULL CREDIT!
On the host machine, not the virtual machine, click Start.
Type mspaint into the Search box and press the Enter key.
Click in the untitled - Paint window, and press Ctrl+V on the keyboard. The desktop appears in the Paint window.
Save the document with the filename "YOUR NAME Proj 6b", replacing "YOUR NAME" with your real name.
Send a Cc to yourself.
Last Modified: 3:22 pm 9-12-13