https://my.vmware.com/web/vmware/free#desktop_end_user_computing/vmware_player/5_0
Click the "Free Java Download" button. On the next screen, click the "Agree and Start Free Download" button.
When the installer has downloaded it, run it and install Java with the default options.
and follow the prompts on your screen to install Java.
If you have antivirus running, it will freak out when you install Metasploit. This hacking tool contains hundreds of attack tools, which contain virus signatures.
In your Windows 7 host machine, open a Web browser and go to http://www.metasploit.com
On the upper right, click DOWNLOAD.
In the "For Windows" section, click the "Free Download" button. It's a 222 MB download when I did it (Jan. 17, 2013), so it might take a while.
When the file downloads, run it and click through the installer, accepting all the default selections. It will take several minutes. When it reaches the end, "Setting Windows Permissions", it freezes for about 3 minutes. That's OK, just wait.
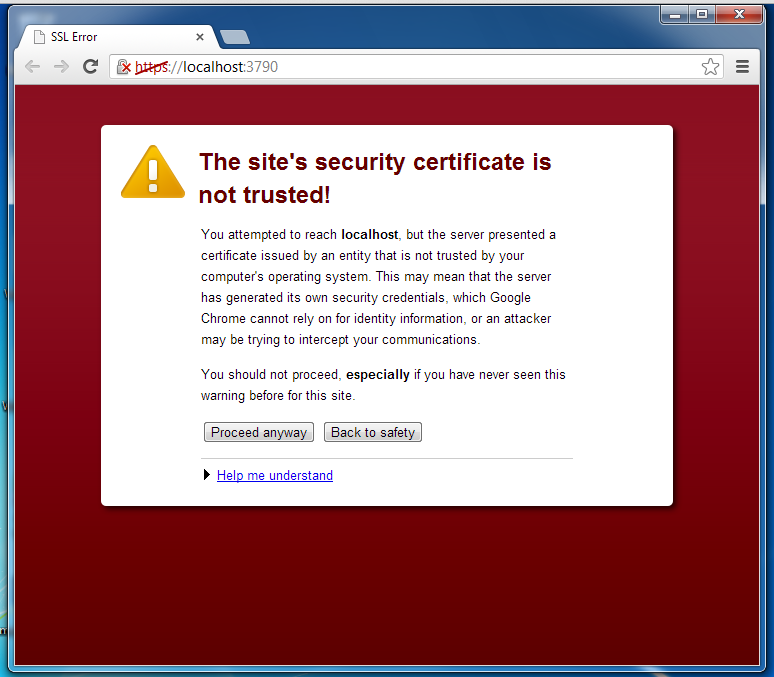
When the installation is done, a Web browser pops up with a warning about an untrusted security certificate, as shown below.
Just close the browser.
Wait till the updates are complete. When I did it, no updates were available.
On your Windows 7 host machine's desktop, click Start, "All Programs", Metasploit, "Metasploit Console".
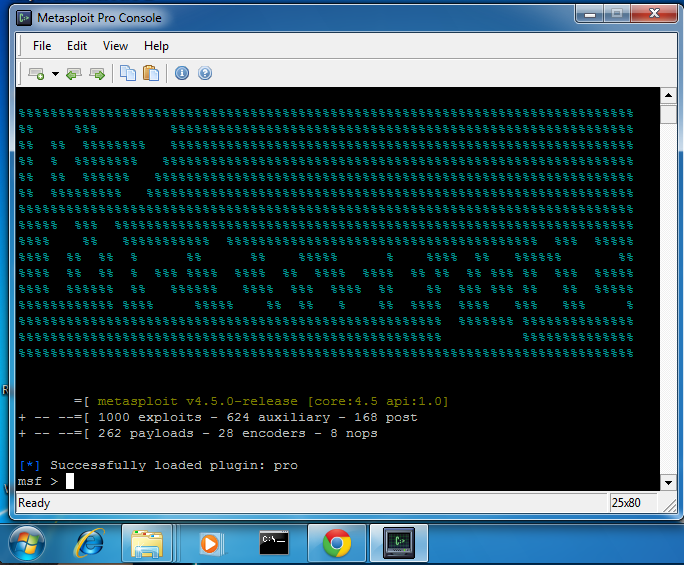
Wait for a minute or two, as white text appears in the black "Metasploit Pro Console" window.
When you see the msf > prompt, as shown below, it's done.
Close the "Metasploit Pro Console" window.
In the "Connect..." box, accept the default values and click the Connect button.
In the "Start Metasploit?" box, click the Yes button.
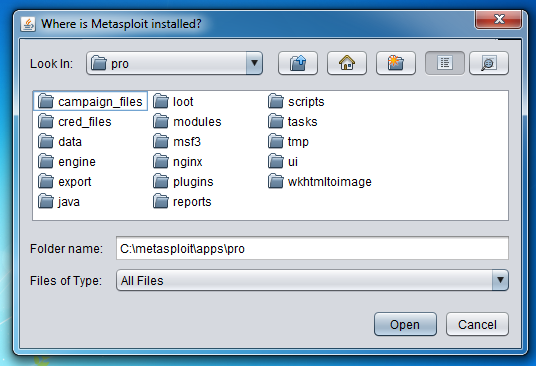
A box pops up asking "Where is Metasploit installed?".
Navigate to C:\metasploit\apps\pro, as shown below, and click the Open button.
Wait a minute or so while a progress bar moves.
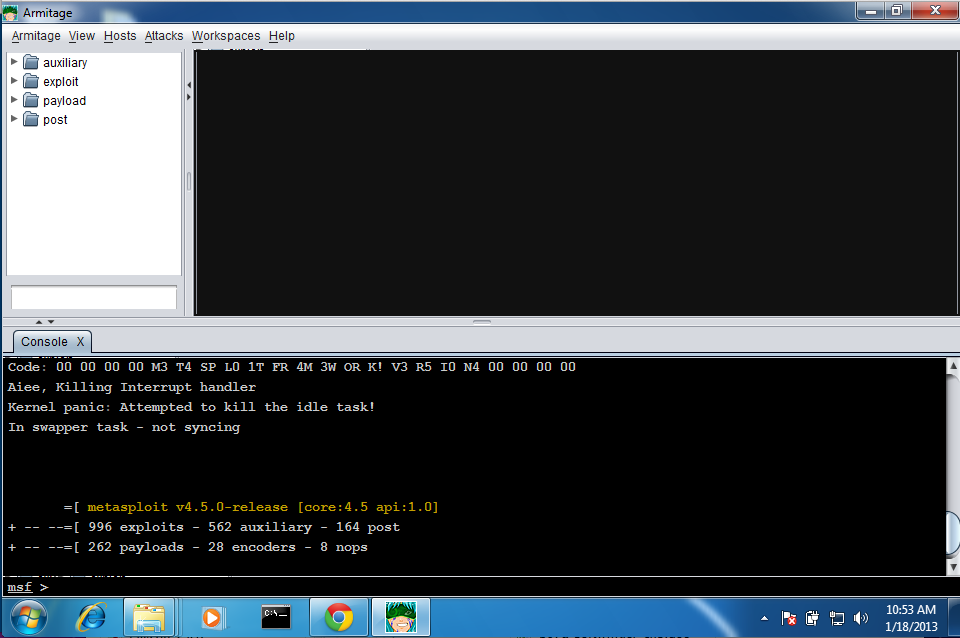
Armitage opens, as shown below.
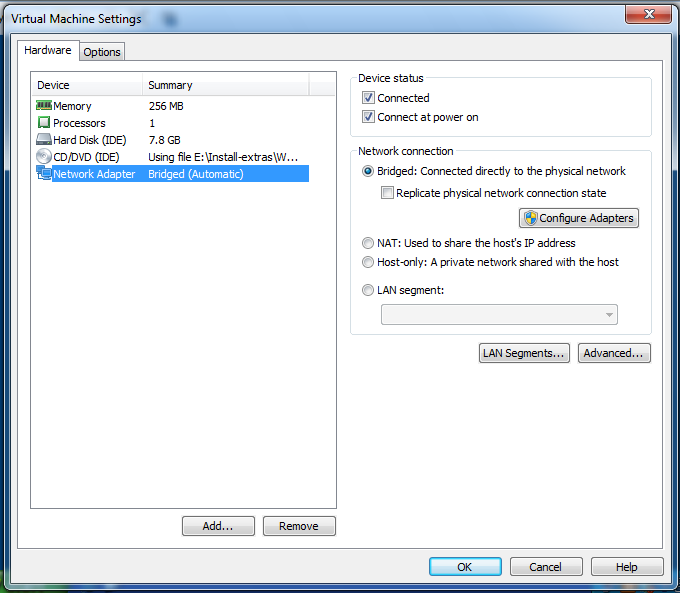
In VMware Player, on the top left, click Player, Manage, "Virtual Machine Settings".
In the "Virtual Machine Settings" box, on the left side, click "Network Adapter".
On the right side, click "Bridged: Connect directly to the physical network", as shown below. Click OK.
Troubleshooting a VMware Network Connection
- RESTART: Restart the virtual machine
- USE DHCP: In the virtual machine, click Start, Control Panel, Network Connections. Right-click "Local Area Connection" and click Properties. Double-click "Internet Protocol (TCP/IP)" and make sure both the "Obtain an IP address automatically" and "Obtain DNS server address automatically" buttons are selected. Click OK. Click OK.
- REPAIR THE CONNECTION: In the virtual machine, click Start, Control Panel, Network Connections. Right-click "Local Area Connection" and click Repair.
- VMWARE BRIDGE PROTOCOL: In the Host machine, click Start and type "NETWORK CONNECTIONS" into the Search box. In the results, click "View network connections". Right-click "Local Area Connection" and click Properties. Make sure the "VMware Bridge Protocol" item is checked. Click OK.
- MAKE A NEW VIRTUAL MACHINE: When all these actions fail, which is very common, you need to discard the virtual machine and extract a fresh one from the original .7z file.
Type in CMD and press the Enter key.
In the Command Prompt screen, type in IPCONFIG and press the Enter key.
Write down your IP address.
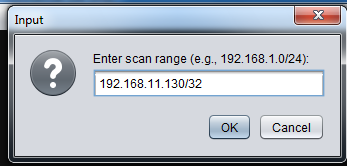
A box pops up saying "Enter scan range (e.g., 192.168.1.0/24):". Type in your target machine's IP address with a /32 added to the end of it, as shown below. Click the OK button.
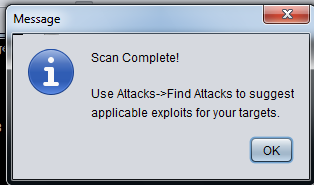
When the scan is done, a box pops up saying "Scan Complete!", as shown below. Click OK.
Scroll down and double-click windows.
Scroll down and double-click smb.
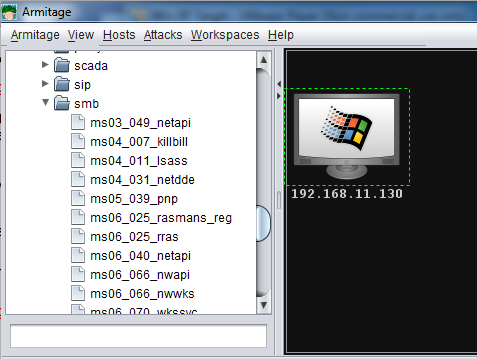
Find ms04_011_lsass, as shown below.
Click ms04_011_lsass, hold down the left mouse button, drag it onto the computer icon showing your target's IP address, and drop it there.
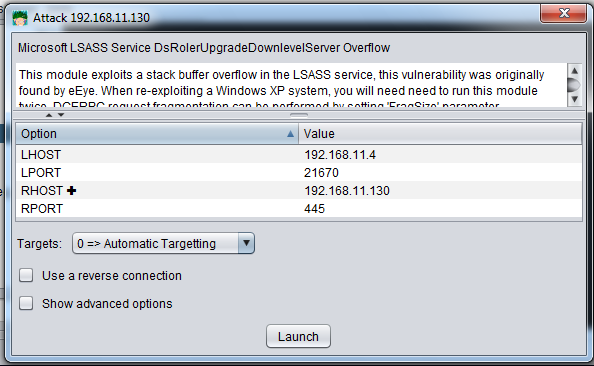
An Attack box pops up with details about the attack, as shown below. Click Launch.
When the attack succeeds, the bottom pane will show "Meterpreter session 1 opened", (or some other session number) as shown below. (Even though it says "Exploit failed", it worked!)
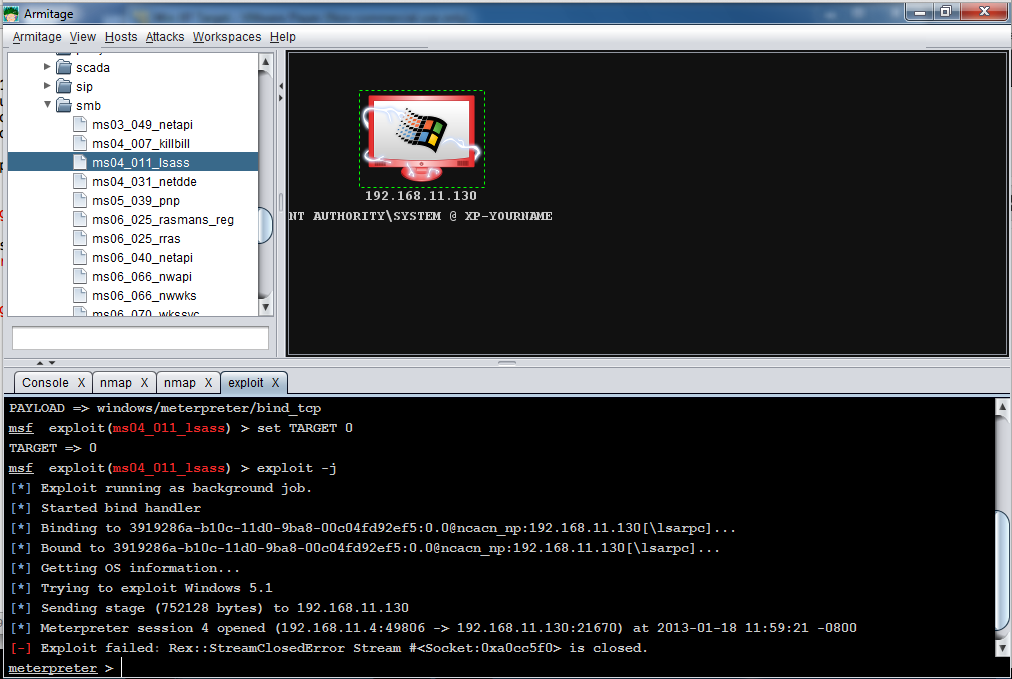
The target machine now shows electric arc graphics on it, indicating this box is owned!
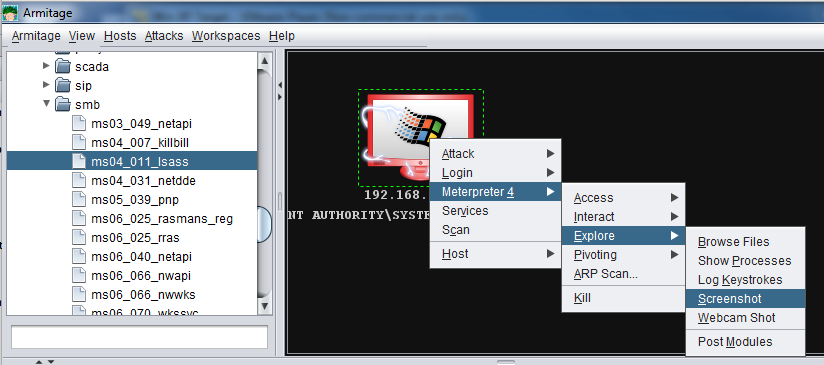
Right-click the target computer icon, and click Meterpreter, Explore, Screenshot, as shown below.
The Target machine's screen appears in the lower pane of Armitage, as shown below.

Click the taskbar at the bottom of your host Windows 7 desktop, to make the host machine listen to the keyboard, instead of the virtual machine.
Press the PrintScrn key in the upper-right portion of the keyboard. That will copy the whole desktop to the clipboard.
YOU MUST SUBMIT A FULL-SCREEN IMAGE FOR FULL CREDIT!
On the host machine, not the virtual machine, click Start.
Type mspaint into the Search box and press the Enter key.
Click in the untitled - Paint window, and press Ctrl+V on the keyboard. The desktop appears in the Paint window.
Save the document with the filename "YOUR NAME Proj 2a", replacing "YOUR NAME" with your real name.
If it freezes, in the upper left portion of the VMware Player window, click Player, Power, "Power Off" to force it to shut down.
Start the target machine again.
In the Target Machine, click Start, "My Documents".
Double-click the WindowsXP-KB835732-x86-ENU.EXE file. Some files are extracted, and the "Windows XP KB83572 Setup Wizard" opens. Click through the wizard to install the patch.
Restart your Target machine when prompted to.
An Attack box pops up with details about the attack, as shown below. Click Launch.
In the lower pane of Armitage, you see the message "Server appears to have been patched", as shown below.

Click the taskbar at the bottom of your host Windows 7 desktop, to make the host machine listen to the keyboard, instead of the virtual machine.
Press the PrintScrn key in the upper-right portion of the keyboard. That will copy the whole desktop to the clipboard.
YOU MUST SUBMIT A FULL-SCREEN IMAGE FOR FULL CREDIT!
On the host machine, not the virtual machine, click Start.
Type mspaint into the Search box and press the Enter key.
Click in the untitled - Paint window, and press Ctrl+V on the keyboard. The desktop appears in the Paint window.
Save the document with the filename "YOUR NAME Proj 2b", replacing "YOUR NAME" with your real name.
Send a Cc to yourself.
Last Modified: 12 pm 1-18-13