
root
with the password toor .
Start graphics with the startx command.
At the top left of the BackTrack desktop, click the little black square icon to open
a Terminal window.
# prompt, enter these commands
followed by the Enter key:
/etc/init.d/mysql restart

netstat -an | more
# prompt, enter this command
followed by the Enter key:
dpkg-reconfigure mysql-server-5.1
password is OK. (We are deliberately creating an insecure application for testing
purposes.)
# prompt, enter this command
followed by the Enter key:
mysql -u root -p
At the "Enter password" prompt, type:
password
At the mysql> prompt, enter this command
followed by the Enter key:
CREATE DATABASE store;
mysql> prompt, enter this command
followed by the Enter key:
SHOW DATABASES;
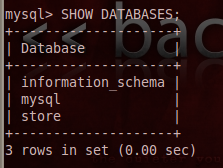
At the mysql> prompt, enter this command
followed by the Enter key:
USE store;
store>
database.
At the mysql> prompt, enter these commands
followed by the Enter key:
 CREATE TABLE customers (name VARCHAR(20), SSN VARCHAR(11));
SHOW TABLES;
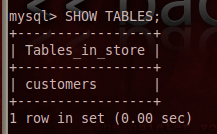
At the mysql> prompt, enter these commands
followed by the Enter key:
(In the last record, use your own name, not the literal string "YOUR NAME".)
 INSERT INTO customers VALUES('Joe Green', '11-222-3333');

 INSERT INTO customers VALUES('Sue Smith', '22-345-1122');

 INSERT INTO customers VALUES('YOUR NAME', '34-345-3456');
 SELECT * FROM customers;
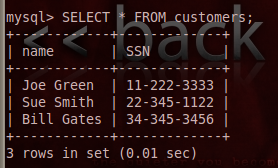
At the mysql> prompt, press Ctrl+C to exit MySQL.
#> prompt, enter these commands
followed by the Enter key:
 /etc/init.d/apache2 restart

 netstat -an | more

#> prompt, enter these commands
followed by the Enter key:
cd /var/www
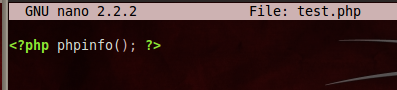
nano test.php
<?php phpinfo(); ?>
Your screen should look like this:
Press Ctrl+X, then
press Y, then press the Enter key.
This saves your file.
From the menu bar in the top left of the BackTrack desktop, click Applications, Internet, Firefox Web Browser.
In the Firefox address bar, enter localhost/test.php
and then press the Enter key. You should see a PHP configuration page,
as shown below:
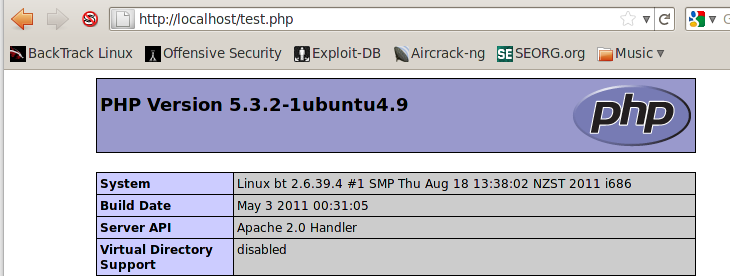
This verifies that Apache and PHP are running correctly.
#> prompt, enter these commands
followed by the Enter key:
cd /var/www
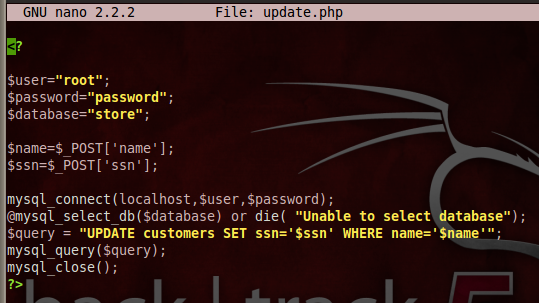
nano update.php
<?


$user="root";

$password="password";

$database="store";


$name=$_POST['name'];

$ssn=$_POST['ssn'];


mysql_connect(localhost,$user,$password);

@mysql_select_db($database) or die( "Unable to select database");

$query = "UPDATE customers SET ssn='$ssn' WHERE name='$name'";

mysql_query($query);

mysql_close();

?>
Your screen should look like this:
Press Ctrl+X, then
press Y, then press the Enter key.
This saves your file.
#> prompt, enter these commands
followed by the Enter key:
cd /var/www
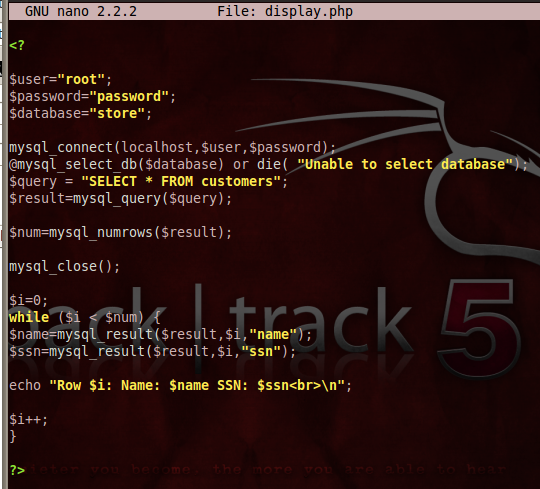
nano display.php
<?


$user="root";

$password="password";

$database="store";


mysql_connect(localhost,$user,$password);

@mysql_select_db($database) or die( "Unable to select database");

$query = "SELECT * FROM customers";

$result=mysql_query($query);


$num=mysql_numrows($result);


mysql_close();


$i=0;

while ($i < $num) {


$name=mysql_result($result,$i,"name");

$ssn=mysql_result($result,$i,"ssn");


echo "Row $i: Name: <b>$name</b> SSN: <b>$ssn</b><br>\n";


$i++;

}


?>
Your screen should look like this:
Press Ctrl+X, then
press Y, then press the Enter key.
This saves your file.
#> prompt, enter these commands
followed by the Enter key:
cd /var/www
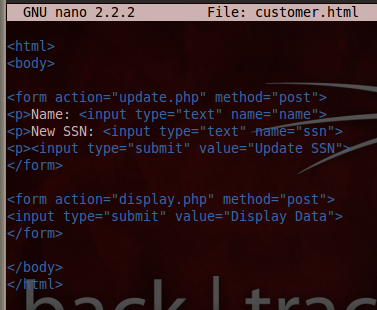
nano customer.html
<html>

<body>


<form action="update.php" method="post">

<p>Name: <input type="text" name="name">

<p>New SSN: <input type="text" name="ssn">

<p><input type="submit" value="Update SSN">

</form>


<form action="display.php" method="post">

<input type="submit" value="Display Data">

</form>


</body>

</html>
Your screen should look like this:
Press Ctrl+X, then
press Y, then press the Enter key.
This saves your file.
localhost/customer.html
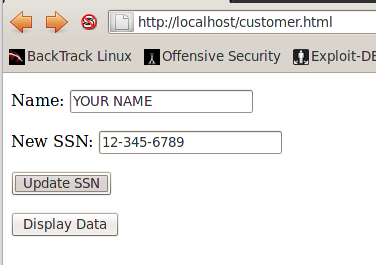
You should see a Web form, as shown below:

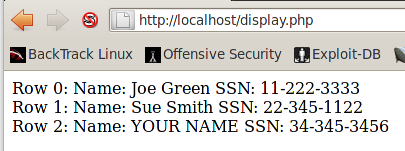
Click the button labelled "Display Data". You should see the three rows of data, as shown below:
In Firefox, click the Back button to return to the customer.html page.
Type in your own name (not the literal text "YOUR NAME"), and a fake SSN of 12-345-6789, as shown below. Click the "Update SSN" button.
Click the Back button. Click the "Display Data" button. You should your name in the last row, with a SSN of 12-345-6789, as shown below:
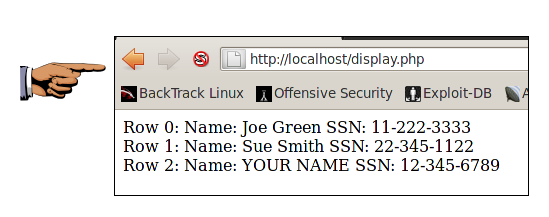
Make sure you can see your own name in the last row, with a SSN of 12-345-6789, as shown in the image above on this page.
Save a screen image with the filename "Proj 3 from Your Name".
Email the image to cnit.122sam@gmail.com with a Subject line of Proj 3 from Your Name.
Last modified: 9:30 am 9-1-11
https://help.ubuntu.com/community/ApacheMySQLPHP
http://www.freewebmasterhelp.com/tutorials/phpmysql/4