In a Terminal window, enter this commands, and then press Enter:
ping samsclass.info
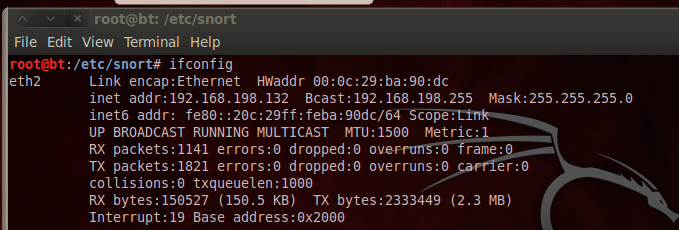
In a Terminal window, enter this commands, and then press Enter:
ifconfig
apt-get update

apt-get install snort -y
After Snort installs, a blue screen appears asking for the "Address range for your local network". In S214, it's 192.168.1.0/24
Troubleshooting
If you see a message saying "Unable to locate package snort", execute this command:Add this line to the end of the file, as shown below:nano /etc/apt/sources.listdeb http://ftp.us.debian.org/debian wheezy main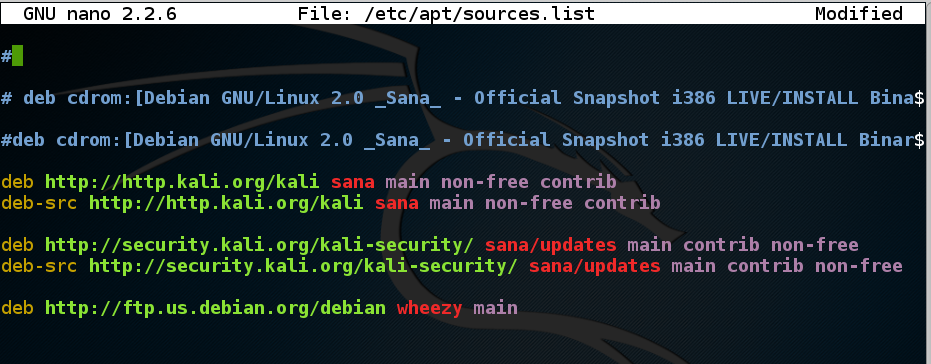
Press Ctrl+X, Y, Enter to save the file.
Then execute these commands:
apt-get updateapt-get install snort -y
Enter the range, press Tab to highlight Ok, and press Enter.
In a Terminal window, enter these commands, pressing Enter after each one:
  cd /etc/snort

  nano snort-test.conf
include /etc/snort/icmp-test.rules
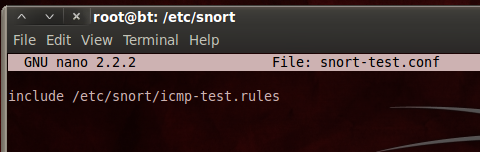
Save the file with Ctrl+X, Y, Enter.
In a Terminal window, execute this command:
nano icmp-test.rules
alert icmp any any -> any any (msg:"ICMP Packet"; sid:477; rev:3;)
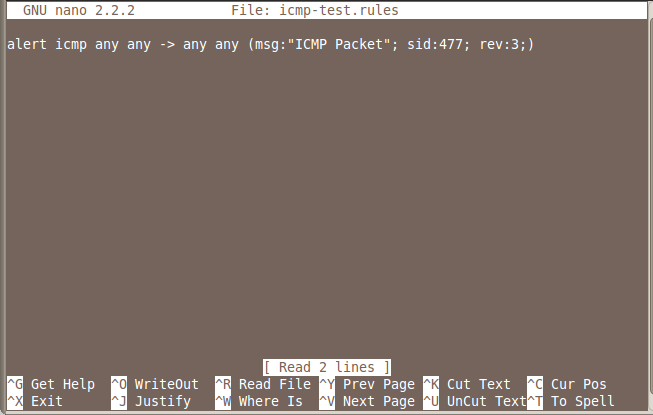
Save the file with Ctrl+X, Y, Enter.
This is the structure of an alert:
<Rule Actions> <Protocol> <Source IP Address> <Source Port> <Direction Operator> <Destination IP Address> <Destination > (rule options)
| Structure | Example |
|---|---|
| Rule Actions | alert |
| Protocol | icmp |
| Source IP Address | any |
| Source Port | any |
| Direction Operator | -> |
| Destination IP Address | any |
| Destination Port | any |
| (rule options) | (msg:”ICMP Packet”; sid:477; rev:3;) |
In a Terminal window, enter this command, followed by the Enter key:
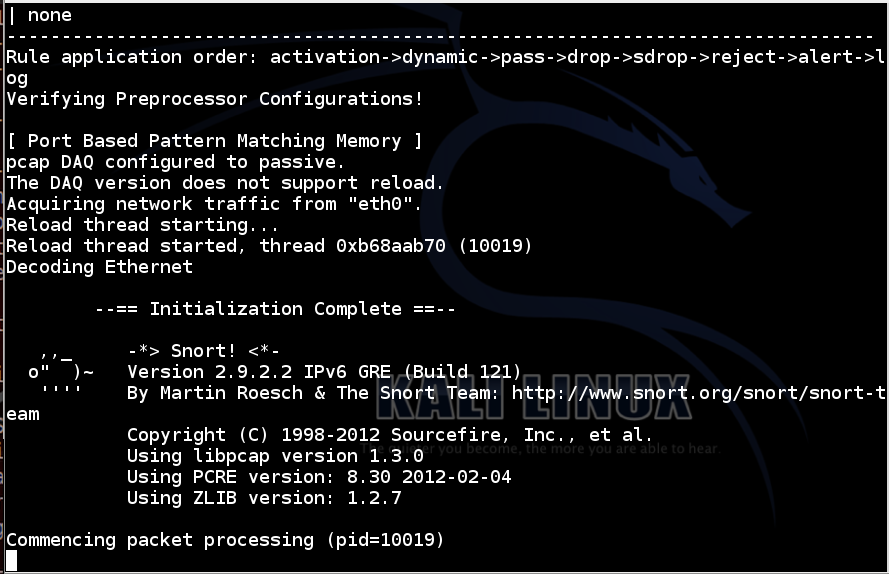
snort -i eth0 -c /etc/snort/snort-test.conf -l /var/log/snort
Your interface name may be different from eth0.
Snort starts, showing an "Initialization Complete" message, as shown below:
Open another Terminal window or tab and enter this command, followed by the Enter key:
ping -c 1 8.8.8.8
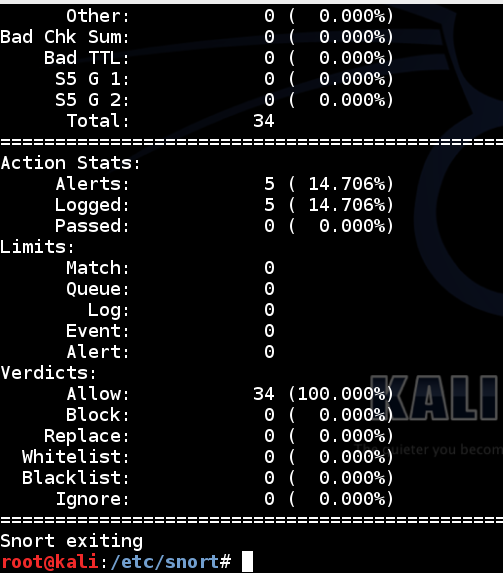
cat /var/log/snort/alert
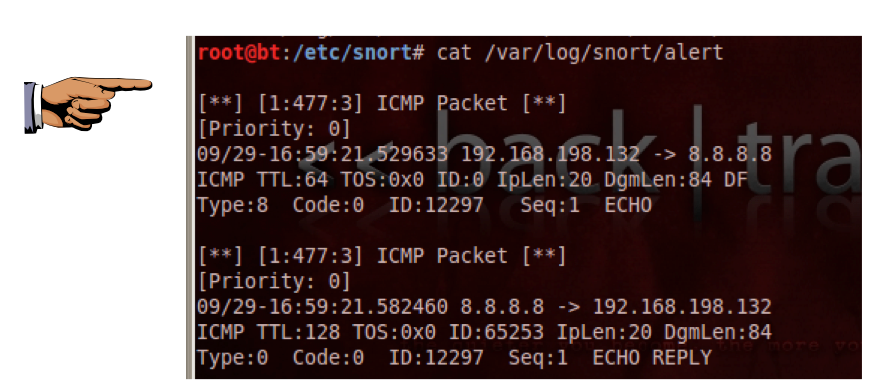
Snort prints out a page of statistics about the packets it saw, as shown below:
In a Terminal window, enter this command, followed by the Enter key:
snort -i eth0 -l /var/log/snort -c /etc/snort/snort.conf
Snort starts, showing an "Commencing packet processing" message.
Open another Terminal window or tab and enter this command, followed by the Enter key:
tail -f /var/log/snort/alert
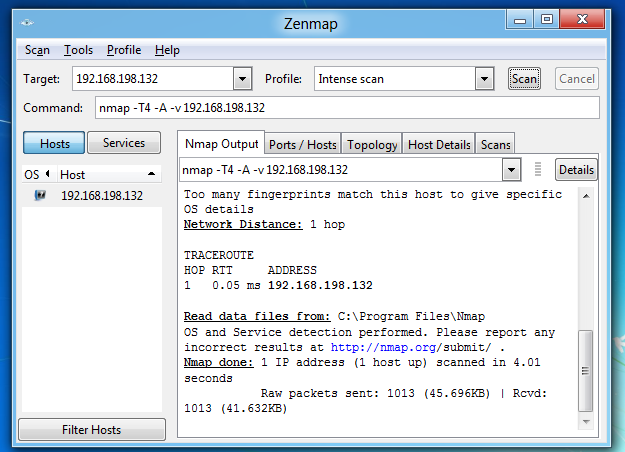
You should see messages scroll by on the Linux machine as snort sends alerts about the scans.
Troubleshooting
If Snort doesn't detect the Nmap scan, you may have the wrong "address range for your local network" configured.To fix that problem, execute this command:
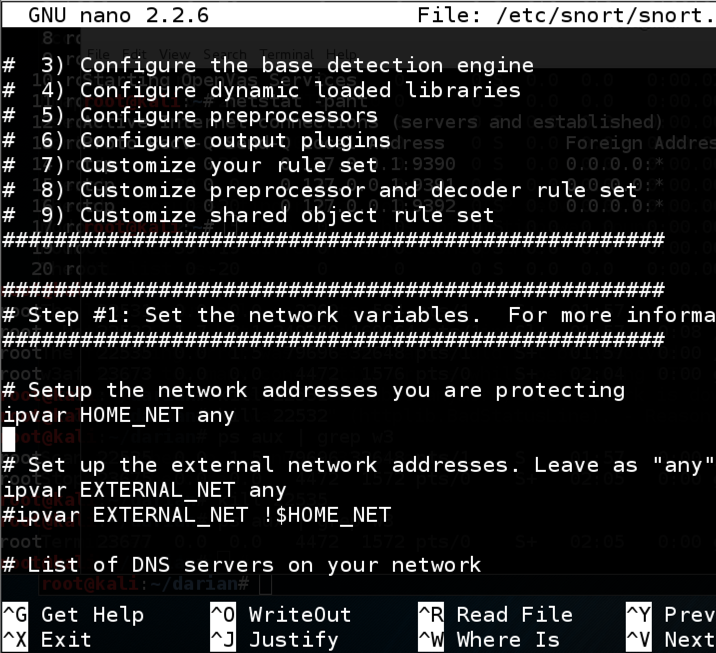
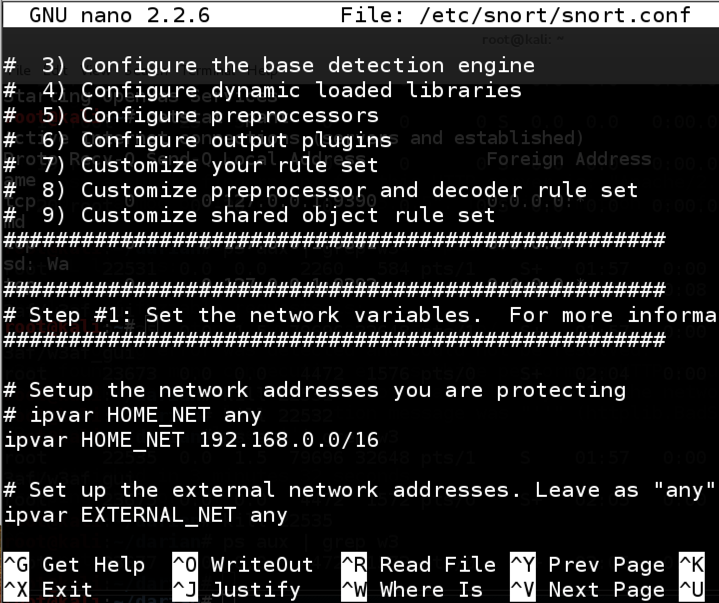
Scroll down to find the "Step #1: Set the network variables" section, as shown below:nano /etc/snort/snort.conf
Add a # to the existing "ipvar HOME_NET any" line and add this line below it, as shown below. If you are using S214, the correct network specifier is 192.168.0.0./16. If you are using some other network, you need to specify its CIDR network address here.
ipvar HOME_NET 192.168.0.0/16
Press Ctrl+X, Y, Enter to save the file.
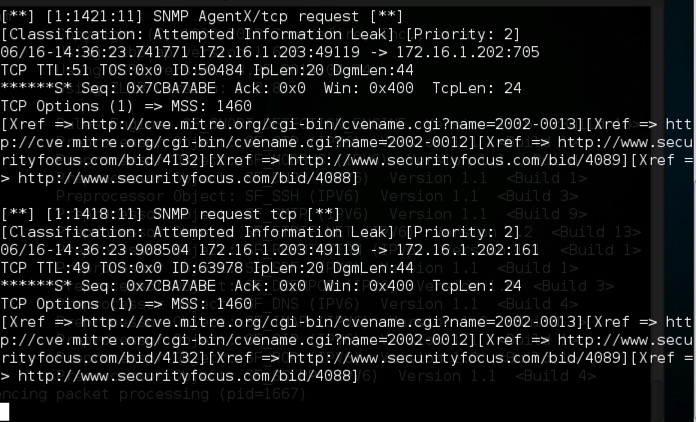
When the scan is complete,
When the scan is complete, the Kali64 machine shows alerts, as shown below.
Save a whole-desktop image with a filename of "Proj 15b from YOUR NAME".
Email the images to cnit.120@gmail.com with a subject of "Project 15 from YOUR NAME".
http://people.umass.edu/cs415/labs/lab2/415-lab2-Snort.pdf
Last modified 6-16-16