Open Settings and connect to a wireless network.
On the iPad, open the Mail app. Click Google, or whatever email service you used. Follow the on-screen directions to connect to your email.
Send a test message to yourself.
Click "Download iTunes".
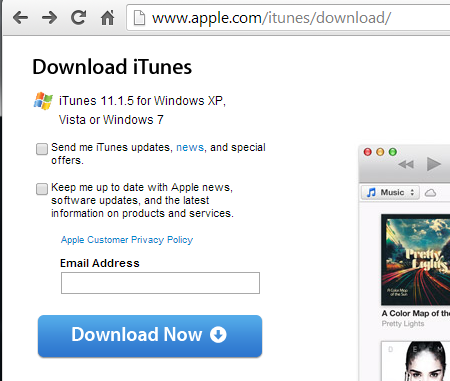
On the left side, uncheck the two boxes and click the blue "Download Now" button, as shown below.
Run the downloaded file.
In the "Welcome to iTunes" box, click Next.
In the "Installation Options" box, accept the default selections and click Install.
Wait while software installs. If boxes pop up asking for permission to install software, allow it to install.
In the "Congratulations" box, click Finish. iTunes will launch.
In the "iTunes Software License Agreement" box, click Agree.
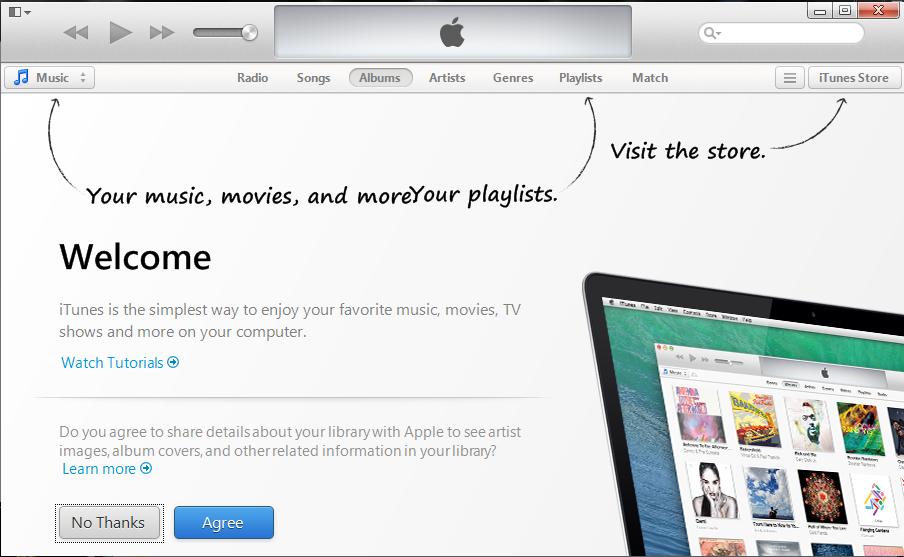
iTunes opens as shown below.
Click "No Thanks".
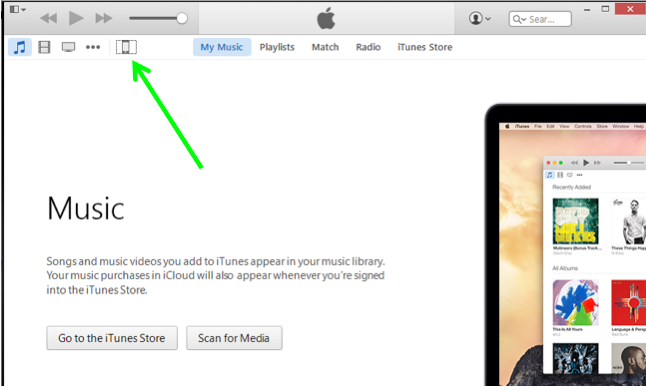
It now shows a "Music" page. Just leave that page open.
A box pops up on the iPad, saying "Trust this computer?". Click Trust.
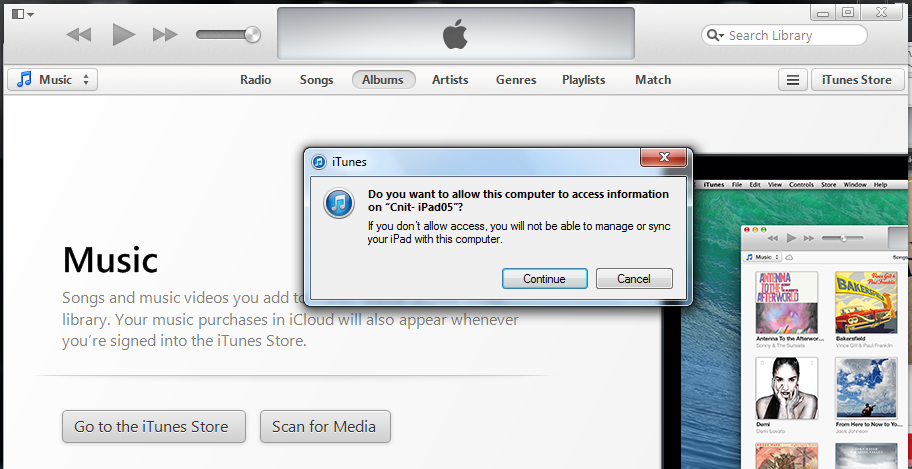
A box pops up on your computer, asking 'Do you want to allow this computer to access information on "Cnit-iPad05"?', as shown below.
Troubleshooting
If a box pops up on your computer saying "iTunes: an unknown error occurred (0xe8000084)" leave the iPad plugged in and restart the computer. Wait for iTunes to launch automatically.When iTunes launches, click the little icon for your iPad or iPhone, as shown below.
This gets you to the "Welcome to Your New iPad" page.
Click Continue.
On your computer, a page opens saying "Welcome to Your New iPad". Click Continue.
A page opens titled "Sync with iTunes". Click "Get Started".
If nothing seems to be happening, look at the top center of iTunes. It should show "Syncing", as shown below. Wait till the process finishes.

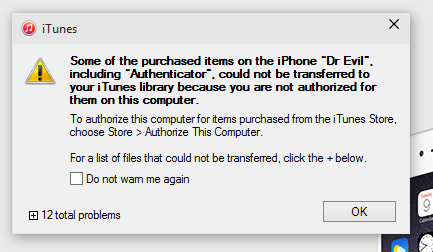
If you see the message below saying some files could not be backed up, just click OK to accept an incomplete backup, or press the Alt key to display the menu bar in iTunes and click Store, "Authorize this Computer...". to get a complete backup.
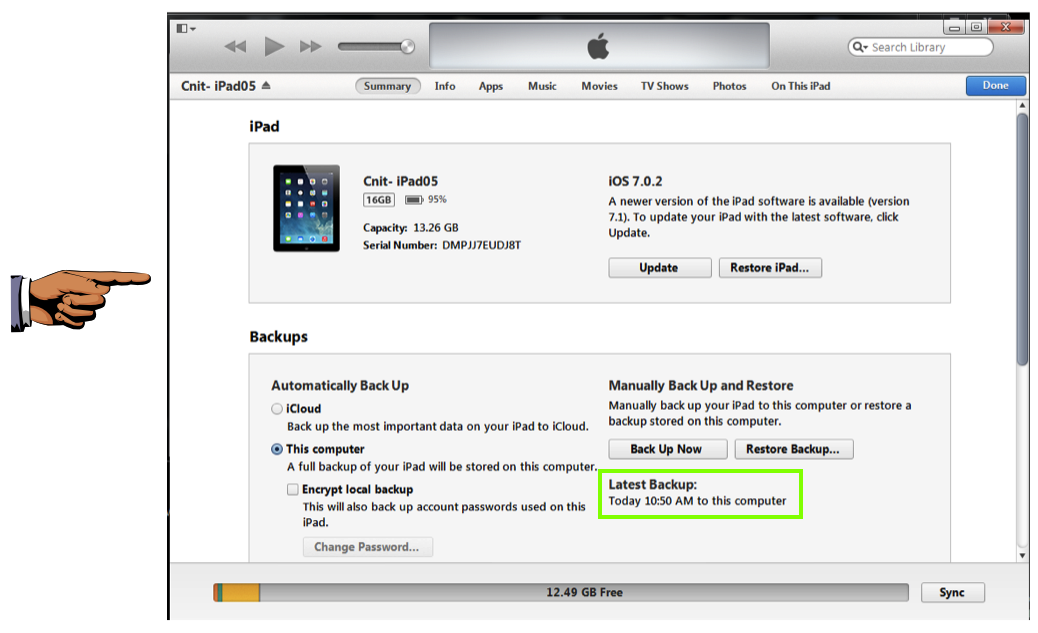
On the next page, in the "Backups" section, you should see a message saying "Latest Backup", showing that the iPad automatically backed up when you plugged it in. If that did not automatically happen, click "Back Up Now".
Press the PrntScrn key to capture the whole desktop. Open Paint and paste in the image.
Save the image as "Proj X4a from YOUR NAME".
YOU MUST SEND IN A WHOLE-DESKTOP IMAGE FOR FULL CREDIT
Unplug the iPad from your computer. Close the iPad's lid.
Find and manage your iTunes backups
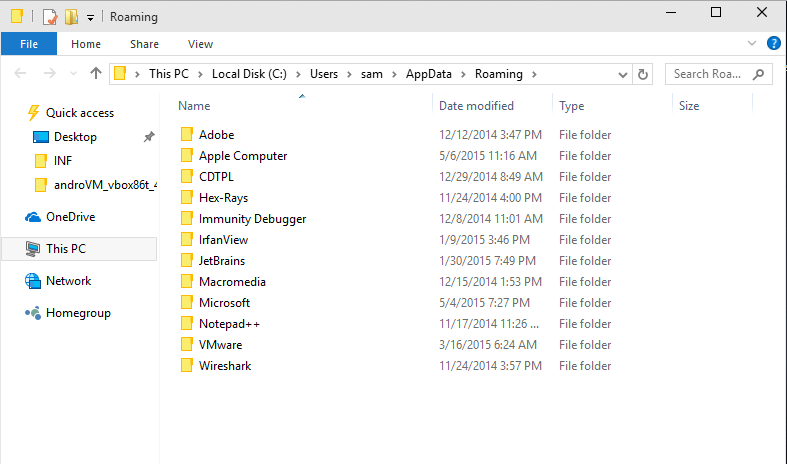
Click Start. In the Search bar, type:
%AppData%
Press Enter.
The "AppData > Roaming" folder should appear, as shown below.
Double-click these folders:
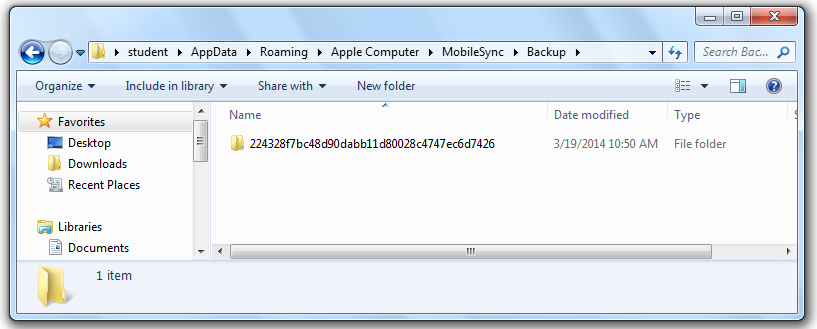
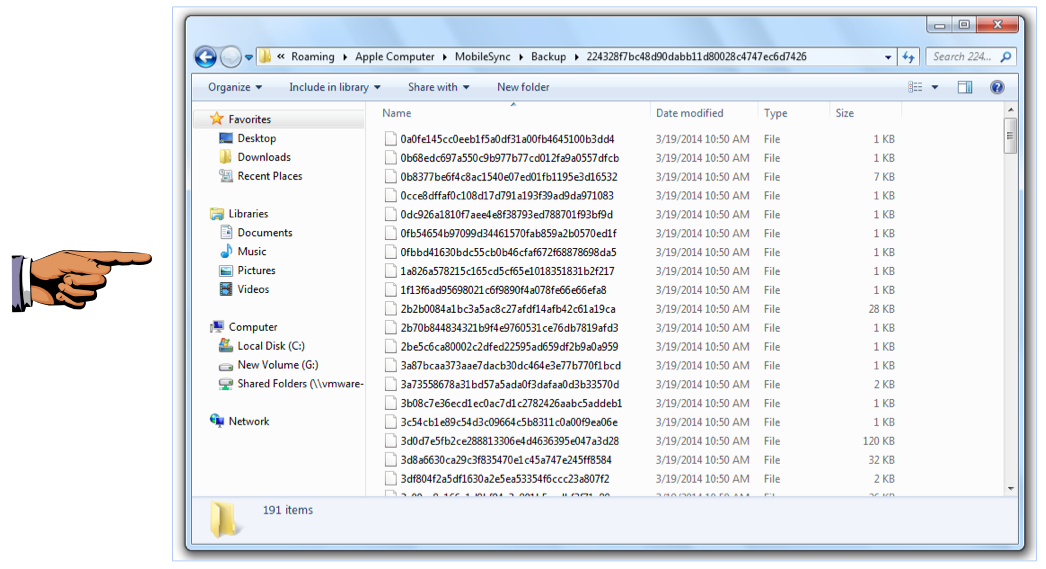
Double-click that folder to open it. It contains a lot of files with hexadecimal names and no filename extensions, as shown below.
You need special tools to view those files, which we'll use in a future project.
Press the PrntScrn key to capture the whole desktop. Open Paint and paste in the image.
Save the image as "Proj X4b from YOUR NAME".
YOU MUST SEND IN A WHOLE-DESKTOP IMAGE FOR FULL CREDIT