http://samsclass.info/121/proj/nps-2009-canon2-gen6.dd
Copy the nps-2009-canon2-gen6.dd file into the C:\YOURNAME folder.
Create another new folder on the root of C: with your name on it followed by a 2: C:\YOURNAME2
http://www.cgsecurity.org/wiki/TestDisk_Download
Click the green "TestDisk 7.0 Free Download" button.
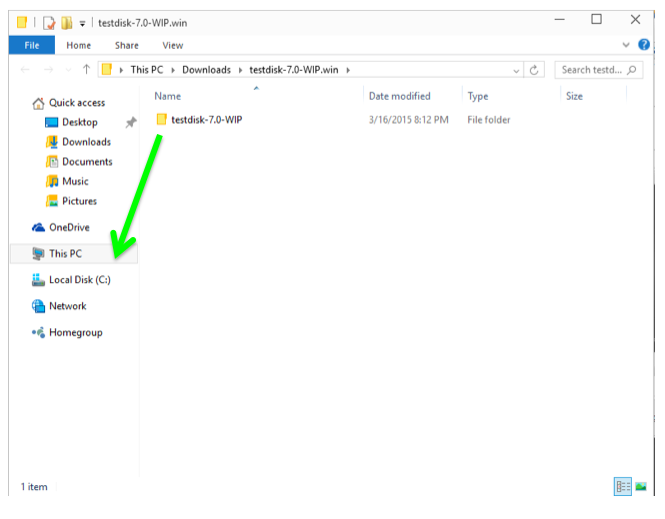
Click Start, Computer. Navigate to the folder you downloaded that file into, which is probably the Downloads folder.
Right-click the downloaded file and click "Extract All..", Extract.
Drag the testdisk-7.0-WIP folder and drop it on the root of C:, as shown below.
Click Start, type CMD, and press Shift+Ctrl+Enter to open an Administrator Command Prompt.
Execute these commands, changing the foldername in the second command to the name you assigned to your folder:
cd \testdisk-7.0-WIP

photorec_win C:\YOURNAME\nps-2009-canon2-gen6.dd
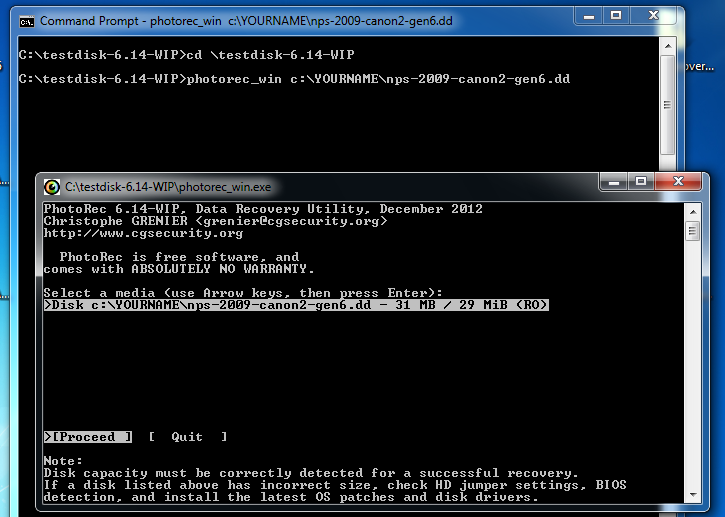
Click in the Photorec window, and press Enter to accept the default selection of the nps-2009-canon2-gen6.dd file.
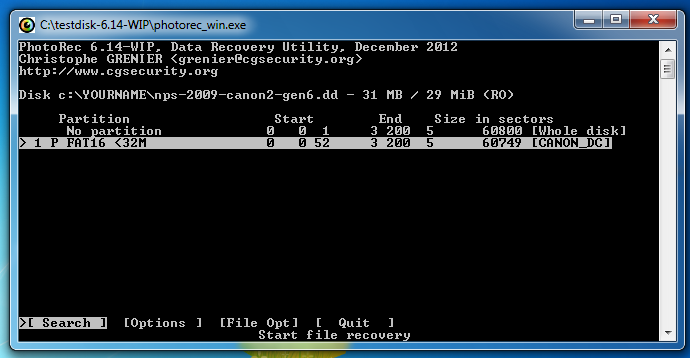
The next screen asks you which partition to search, as shown below. Press Enter again to accept the default selection.
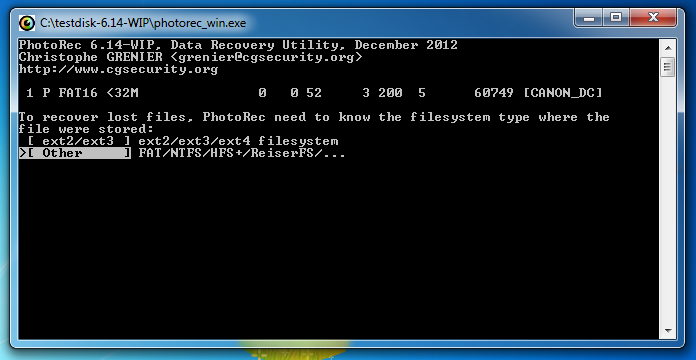
The next window asks what the file system is. It's usually FAT for Canon SD cards, so press Enter to accept the default choice.
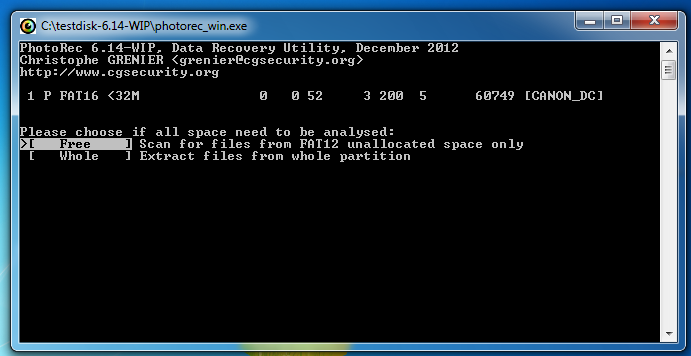
In the next window, press Enter to search unallocated space only. We don't need to recover the images that are still intact.
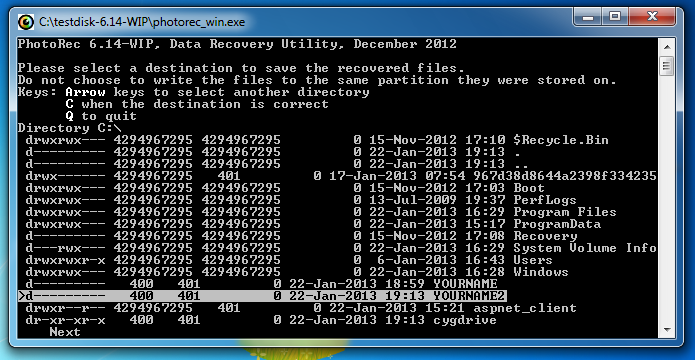
The next window asks where to store the recovered files. This is a really clumsy interface--press the left-arrow key once on the keyboard to move to C: and press the down-arrow key till the C:\YOURNAME2 folder is highlighted, as shown below. Then press Enter.
In the next window, press C.
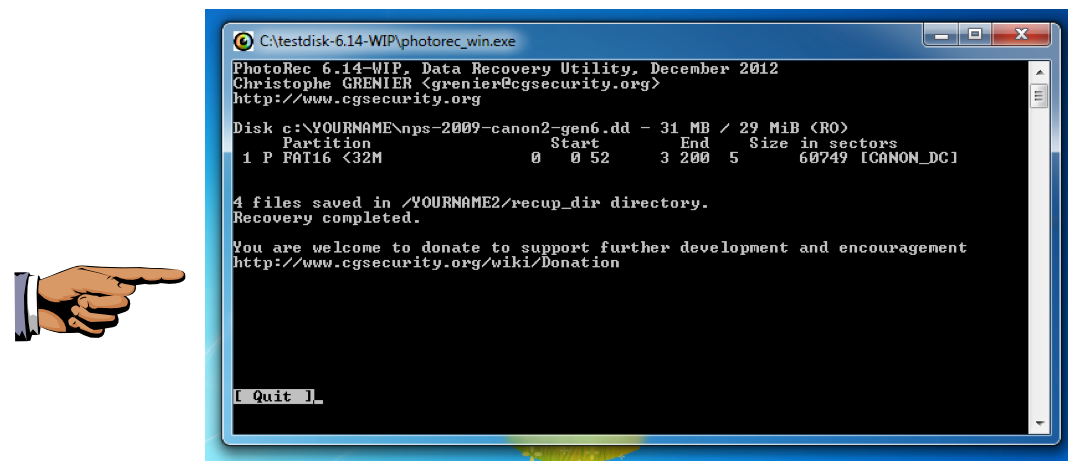
The files are recovered, and listed as shown below:
Press the PrintScrn key in the upper-right portion of the keyboard. That will copy the whole desktop to the clipboard.
YOU MUST SUBMIT A FULL-SCREEN IMAGE TO GET FULL CREDIT!
Open Paint and paste in the image.
Save the image with the filename "Your Name Proj 6". Use your real name, not the literal text "Your Name".
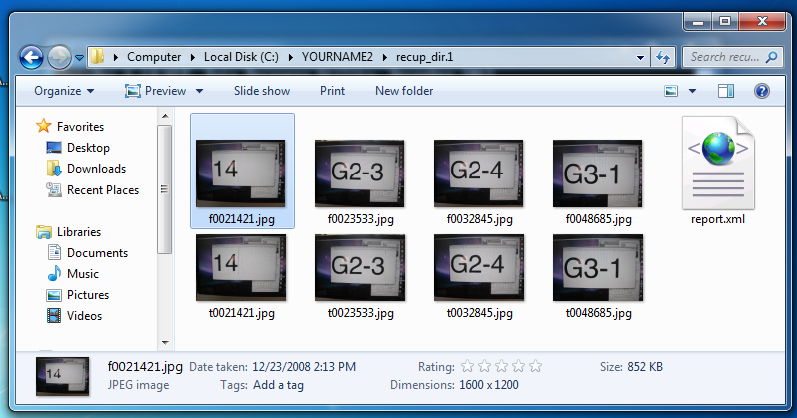
Open the C:\YOURNAME2\recup_dir.1 folder.
You see four recovered images, a report, and four thumbnail versions, as shown below.
Send it to: cnit.121@gmail.com with a subject line of "Proj 6 From Your Name", replacing "Your Name" with your own first and last name.
Send a Cc to yourself.
Last Modified: 3-16-15 8:16 PM