cd
cd Desktop
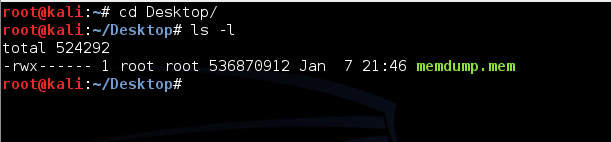
ls -l
You should see the memdump.mem file, which should be approximately 500 MB in size, as shown below. If you do not, you may need to repeat a previous project to create the memory image again.
Troubleshooting
If you can't get this to work, which is happening to a lot of students, try using my memory dump from here:Extract and check the file with these commands in Linux:
The correct hash is7z e memdump.7z md5sum memdump.memb50ae13dc659ec9c8af66b539e5768d8
If you use it, explain that in the text part of the email you send in so my grader knows your name won't be in the artifacts you find.
cd /usr/share/volatility

python vol.py -h
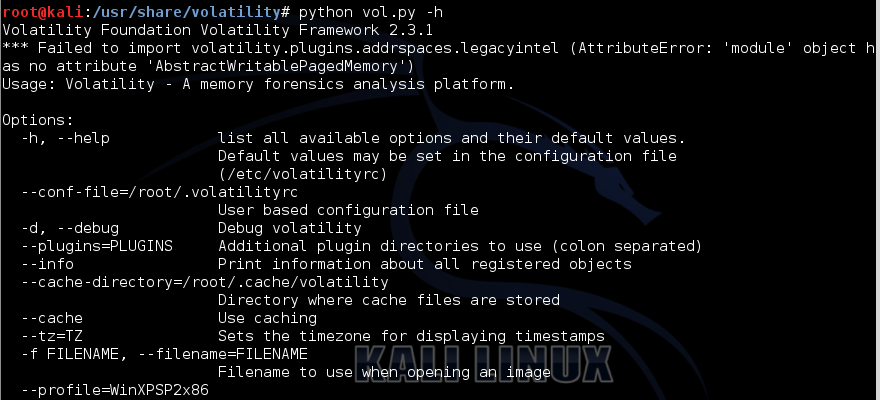
The volatility help is long and confusing.
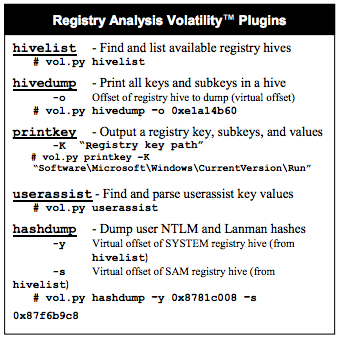
Fortunately, SANS has made a handy one-page cheat sheet which is much friendlier. The part that is important to us is shown below:
python vol.py imageinfo -f /root/Desktop/memdump.mem
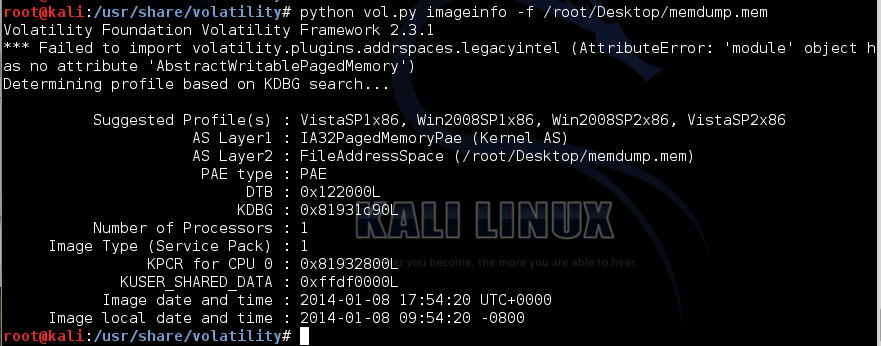
Volatility needs to know what operating system was imaged in order to interpret the memory image correctly. The default profile is WinXPSP2x86, but we used Win2008SP1x86, so we'll have to include that information in all future volatility command-lines.
python vol.py pslist --profile=Win2008SP1x86 -f /root/Desktop/memdump.mem
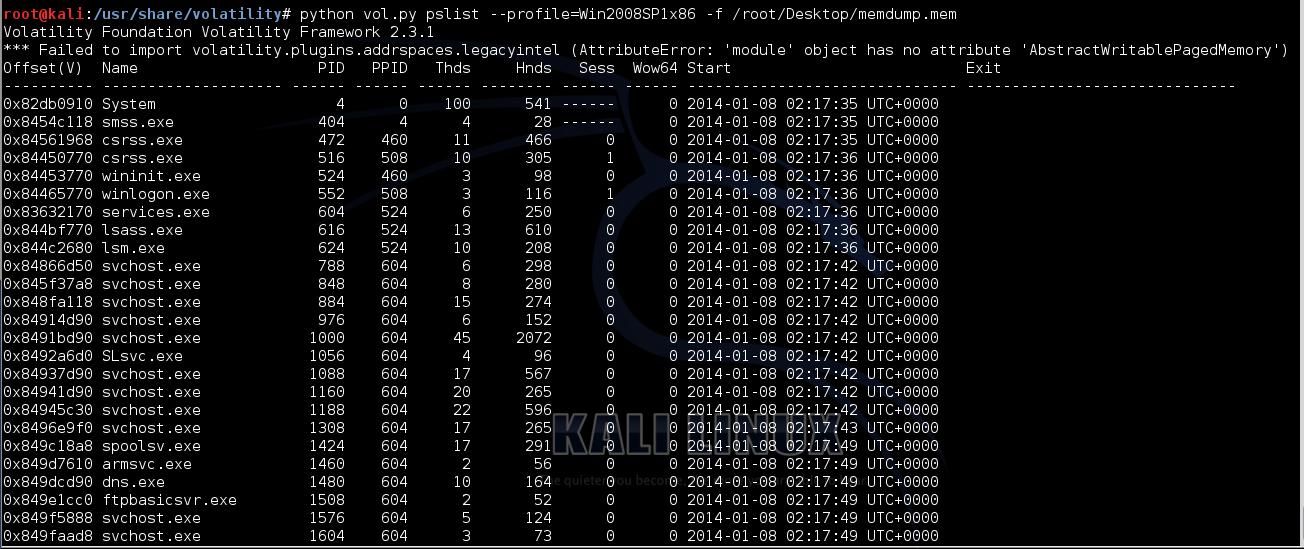
Notice these columns:
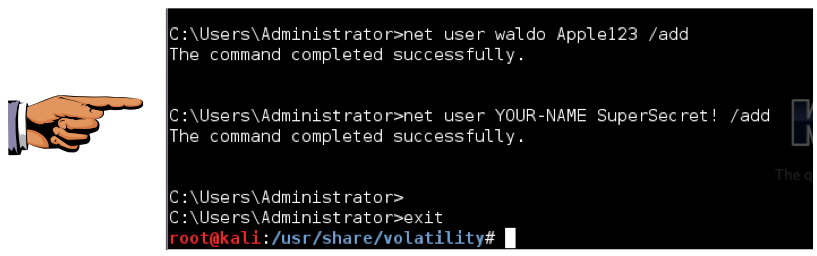
python vol.py consoles --profile=Win2008SP1x86 -f /root/Desktop/memdump.mem
You should see the command you executed to create the user account with your own name, as shown below:
Click the taskbar at the bottom of your host Windows 7 desktop, to make the host machine listen to the keyboard, instead of the virtual machine.
Press the PrintScrn key in the upper-right portion of the keyboard. That will copy the whole desktop to the clipboard.
YOU MUST SUBMIT A FULL-SCREEN IMAGE FOR FULL CREDIT!
On the host machine, not the virtual machine, click Start.
Type mspaint into the Search box and press the Enter key.
Click in the untitled - Paint window, and press Ctrl+V on the keyboard. The desktop appears in the Paint window.
Save the document with the filename "YOUR NAME Proj 4a", replacing "YOUR NAME" with your real name.
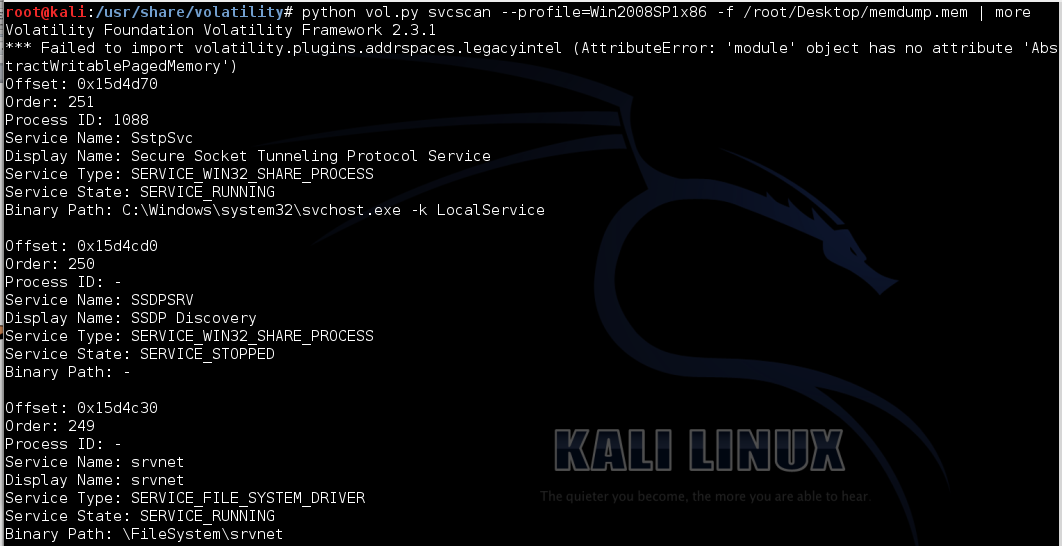
python vol.py svcscan --profile=Win2008SP1x86 -f /root/Desktop/memdump.mem | more
python vol.py hivelist --profile=Win2008SP1x86 -f /root/Desktop/memdump.mem
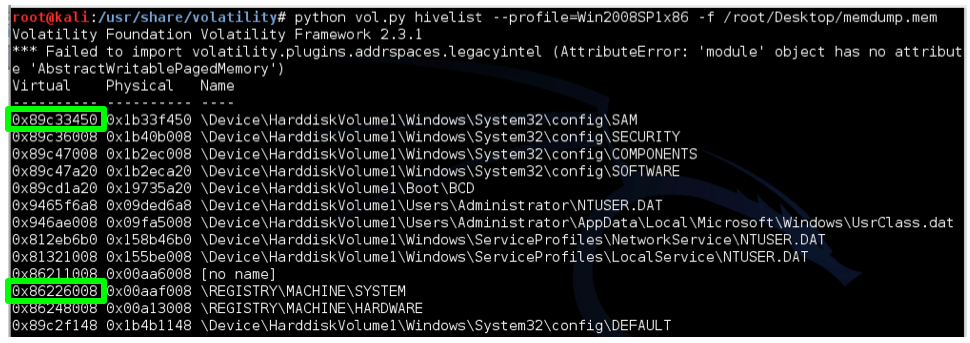
Examine your output and find the two addresses outlined in green above: the virtual addresses of the SAM and SYSTEM hives. Those two hives together contain enough information to extract Windows password hashes.
You will have to replace the two hexadecimal addresses with the correct virtual addresses of your hives, in this format:
-y SYSTEM -s SAM
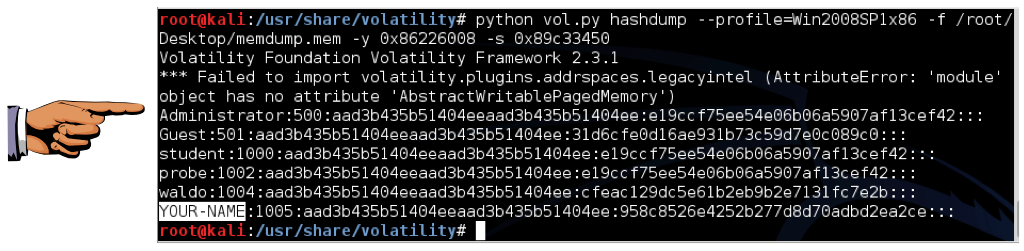
python vol.py hashdump --profile=Win2008SP1x86 -f /root/Desktop/memdump.mem -y 0x86226008 -s 0x89c33450
Click the taskbar at the bottom of your host Windows 7 desktop, to make the host machine listen to the keyboard, instead of the virtual machine.
Press the PrintScrn key in the upper-right portion of the keyboard. That will copy the whole desktop to the clipboard.
YOU MUST SUBMIT A FULL-SCREEN IMAGE FOR FULL CREDIT!
On the host machine, not the virtual machine, click Start.
Type mspaint into the Search box and press the Enter key.
Click in the untitled - Paint window, and press Ctrl+V on the keyboard. The desktop appears in the Paint window.
Save the document with the filename "YOUR NAME Proj 4b", replacing "YOUR NAME" with your real name.
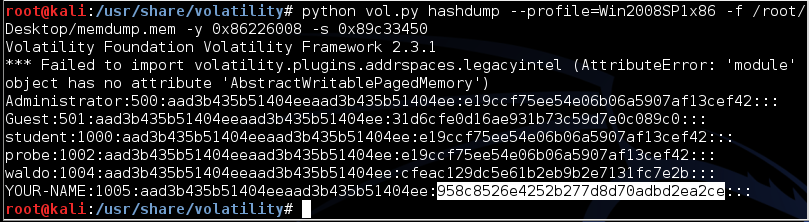
The second hash is the newer NTLM hash, which is much better than LANMAN hashes, but still extremely insecure and much more easily cracked than Linux or Mac OS X hashes.
To crack your password, highlight the hash value, as shown below, right-click it, and click Copy.
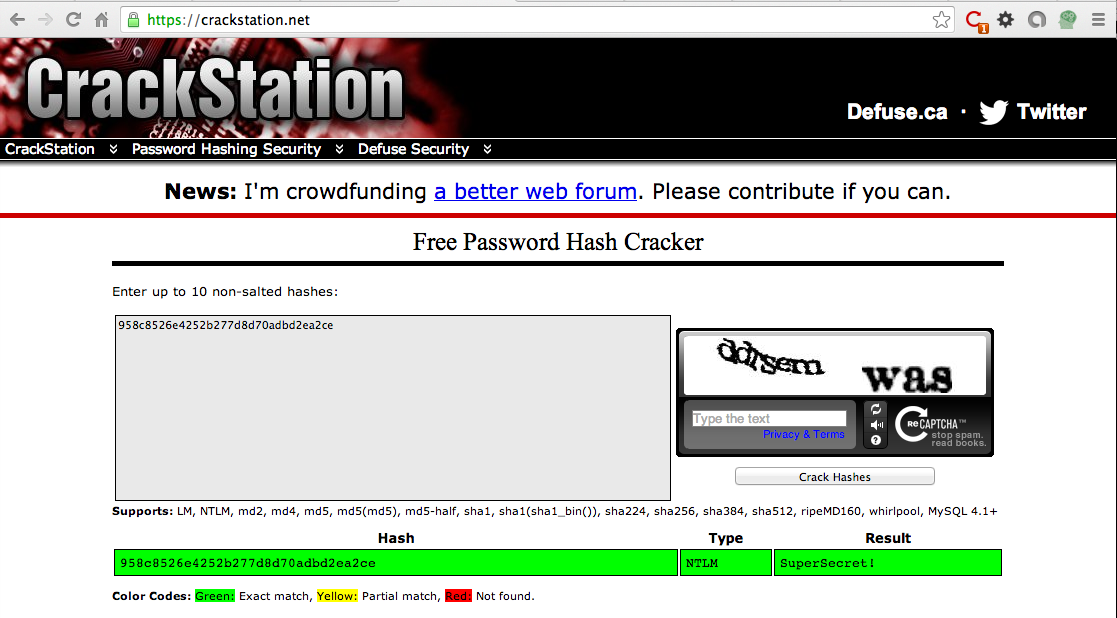
On your host Windows 7 machine, open a Web browser and go to
Paste in the hash. On the right side, fill in the CAPTCHA and click the "Crack Hashes" button.
The hash should crack, revealing the password of "SuperSecret!", as shown below.
Send a Cc to yourself.
Memory Forensics and Analysis Using Volatility
SANS Memory Forensics Cheat Sheet
Basic Volatility Usage - An advanced memory forensics framework - Google Project Hosting