
http://www.emc.com/security/rsa-netwitness.htm#!freeware
Click "Download NetWitness Investigator Freeware"
Fill in the form and click Submit.
A NwInvestigatorSetup.exe file downloads (131 MB).
Install the software with the default options.
On your desktop, double-click the "NetWitness Investigator 9.6" icon.
A "NetWitness Investigator 9" window opens. Warning boxes pop up, saying "Revocation information for the security certificate for this site is not available...".
Click Yes to bypass the warnings.
Fill in the registration form.
Check your email for the product activation code. Follow the instructions in that email to activate NetWitness.
NetWitness is now activated, as shown below:
Close the Register tab.
Run Wireshark. Select the network adapter that goes to the Internet
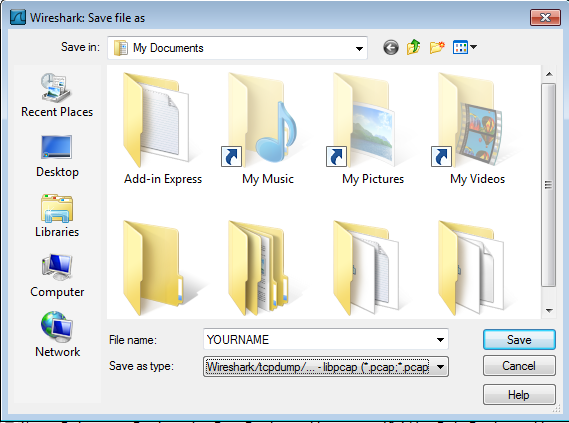
Enter a Collection Name of YOURNAME (using your own name, not the literal string "YOURNAME", 'as shown below:
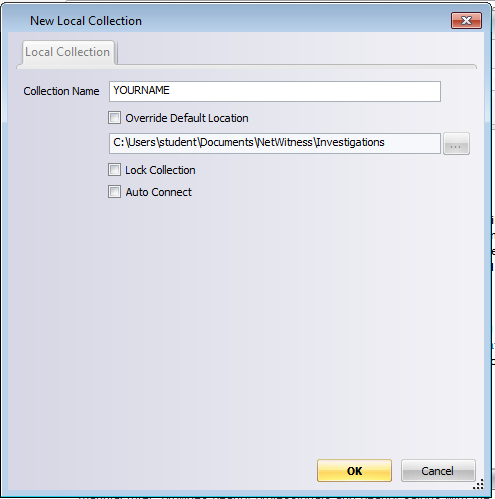
Click OK
In the left pane of NetWitness, double-click YOURNAME as shown below:
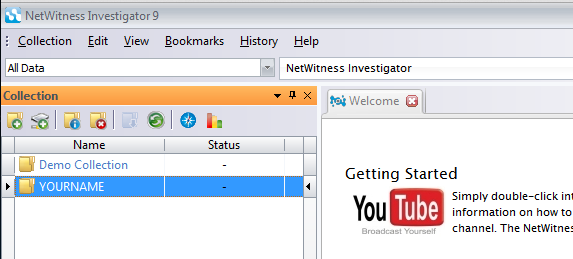
The status should show "Connecting", and after a few seconds, change to "Ready".
In NetWitness, from the menu bar, click Collection, "Import Packets".
Navigate to the YOURNAME.pcap file and double-click it.
The Status field shows progress--when I did it, I saw 1%, then 99%, then Done.
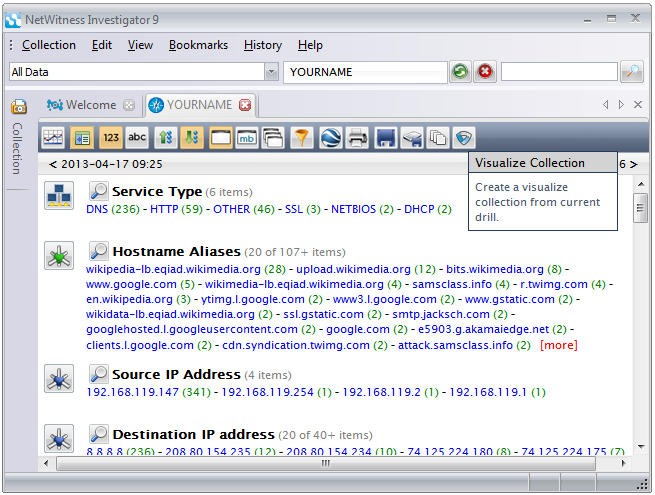
A Report appears, showing a list of traffic types, as shown below.
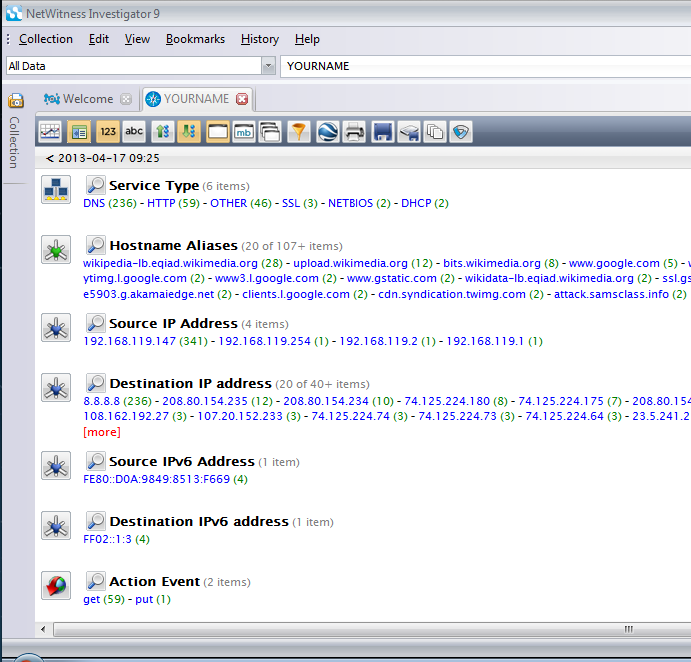
Note the items shown below:
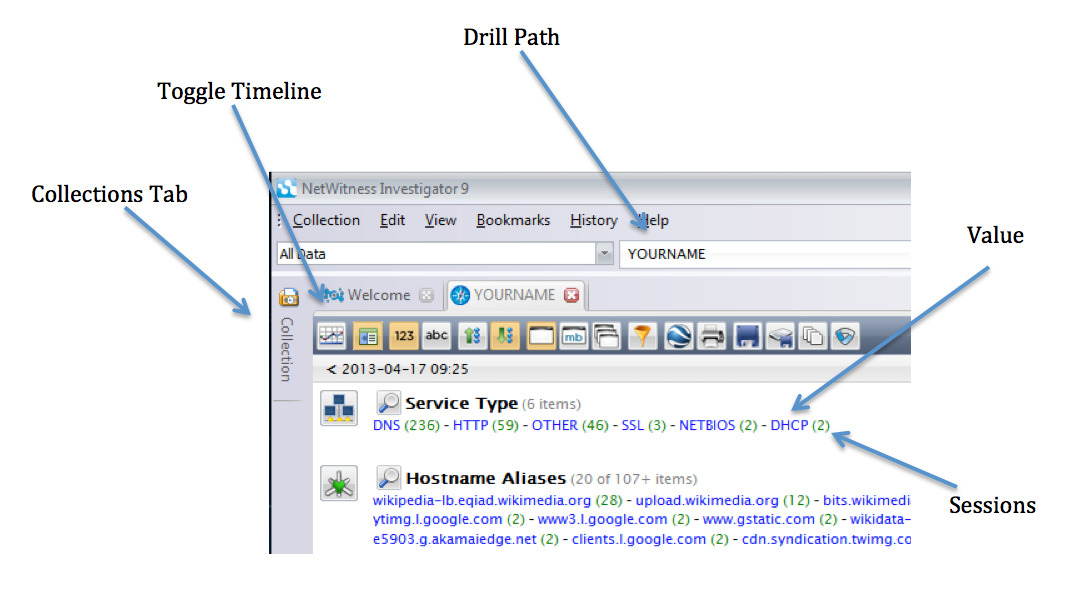
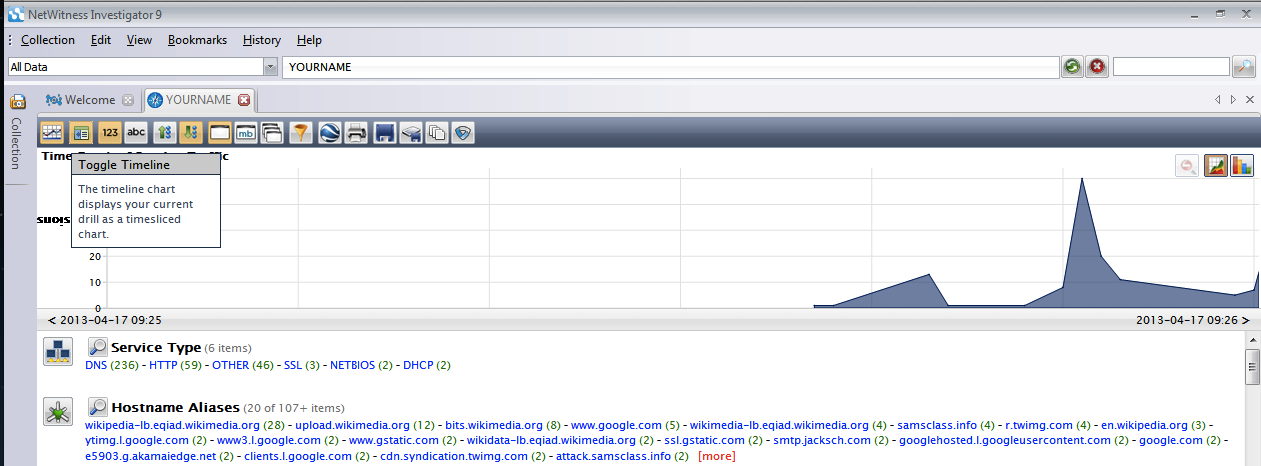
Click the Toggle Timeline button to show the Timeline, as shown below.
This shows the traffic as a graph, and can be used to focus down on particular intervals of time. It's not helpful in this project, so click the Toggle Timeline button again to hide it.
This filters out all non-HTTP traffic. Notice that the Drill Path changes to "YOURNAME > HTTP", as shown below:
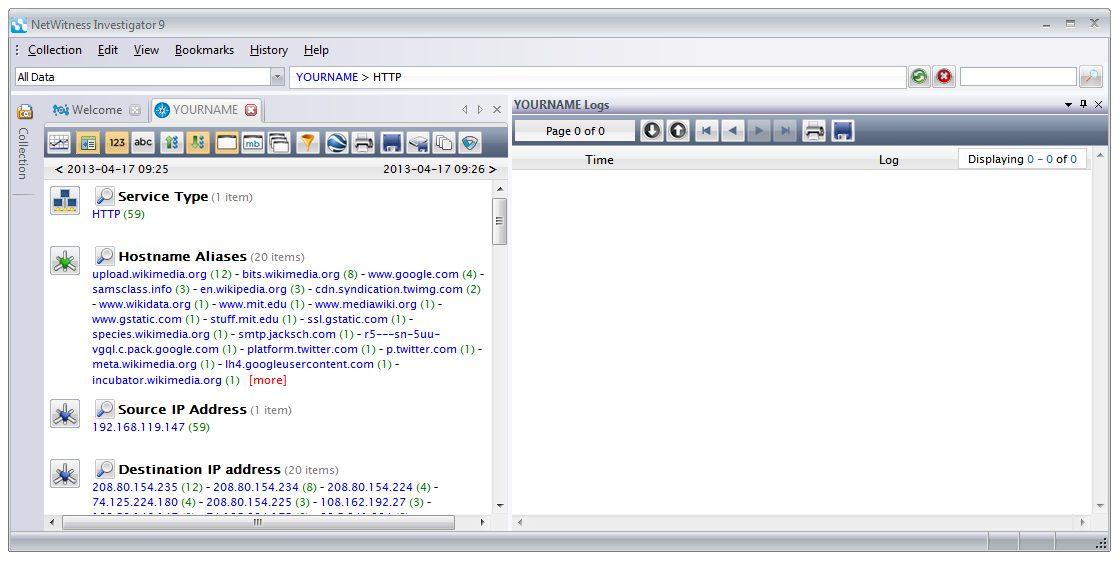
The right half of the window shows an empty Log pane. If we had log files included in the collection, this would be helpful, but in our case the data contains only a PCAP file and no logs, so this pane is useless.
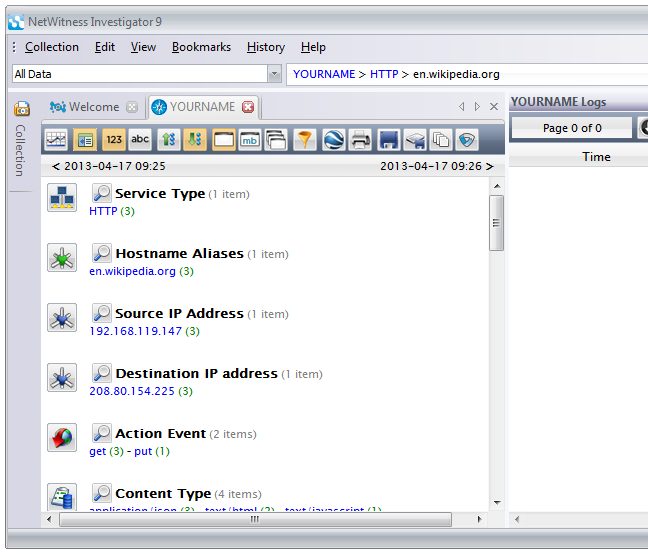
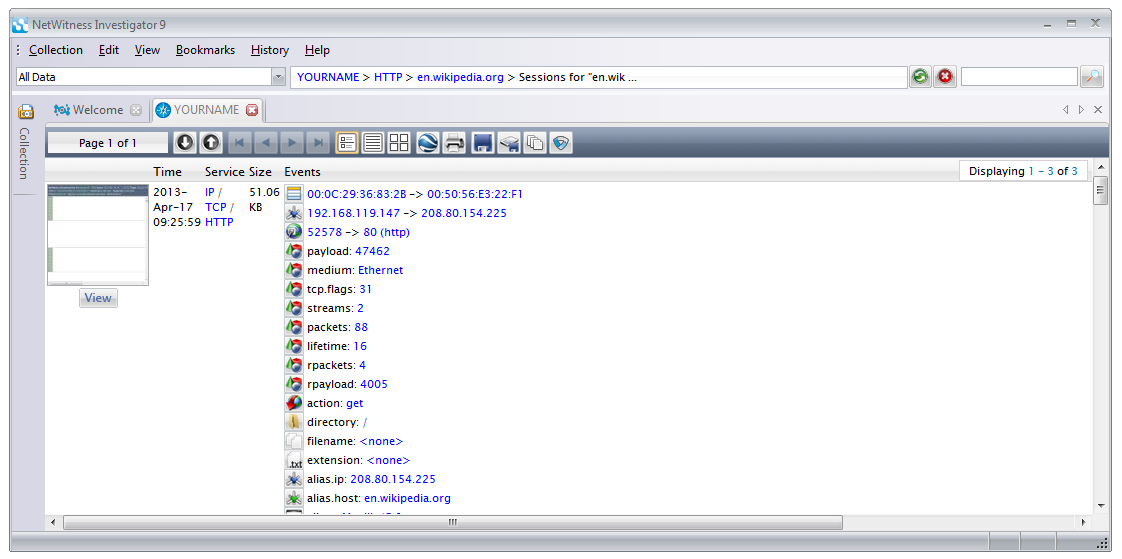
In the Report, in the second section titled "Hostname Aliases", click the blue en.wikipedia.org link.
This filters out all traffic to other hosts. Notice that the Drill Path changes to "YOURNAME > HTTP > en.wikipedia.org", as shown below:
Now click the blue number in parentheses to the right of en.wikipedia.org -- in my case, it was "3". Your number may be different.
This shows the sessions with many details, as shown below. The Logs pane on the right is wasting space--close it by clicking on its X button.
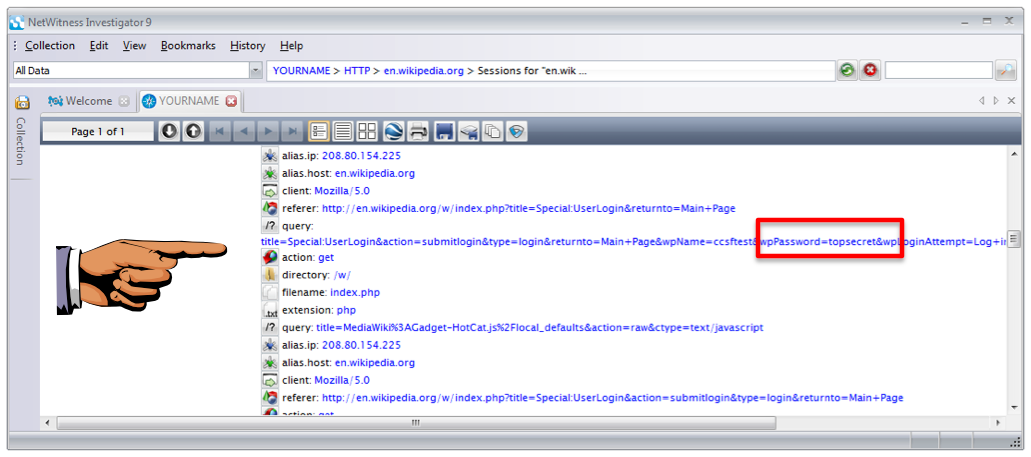
Scroll down and find "Password=topsecret", as shown below.
Press the PrintScrn key. Save a whole-desktop image with the name "Proj 17a from YOUR NAME".
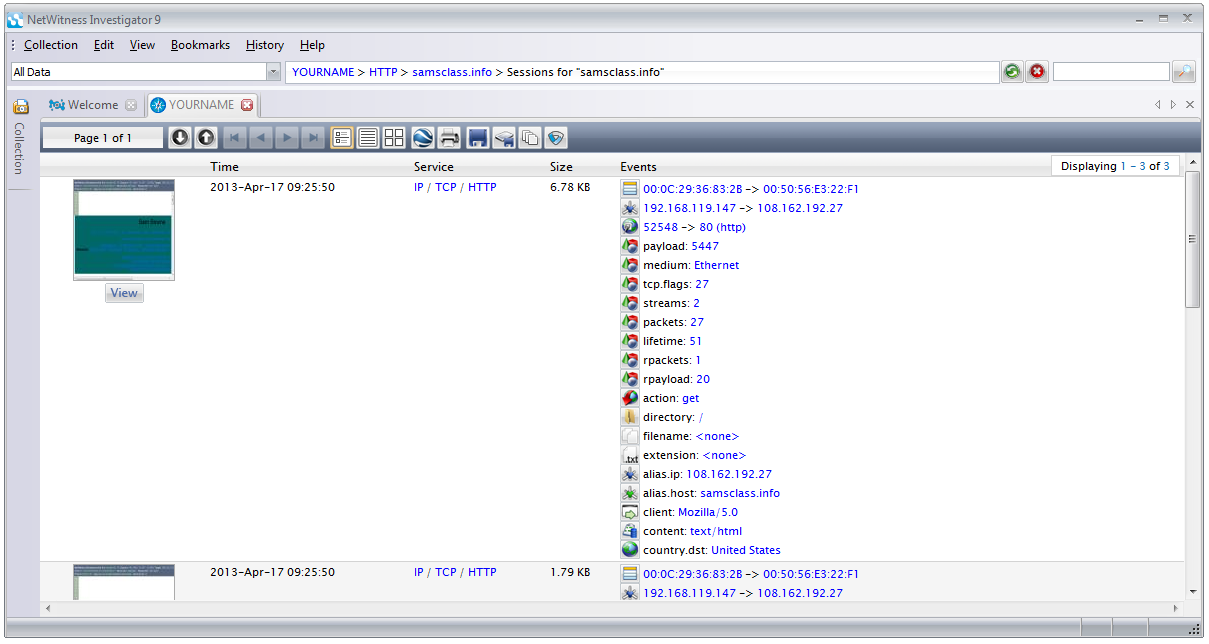
In the "Hostname Aliases" section, click samsclass.info
In the "Hostname Aliases" section, click the number to the right of "samsclass.info"--in my case, it was a 3
Once again, the Logs pane is in the way--close it.
The HTTP sessions with the samsclass.info server are displayed, as shown below:
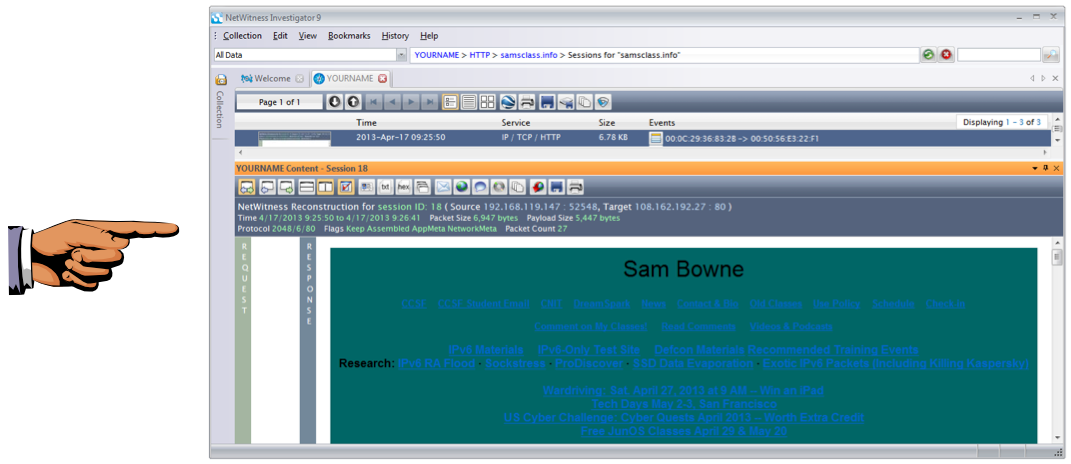
On the left side of the Report for each session, there is an icon showing how the Web page looks, with a gray View button.
Click the gray View button.
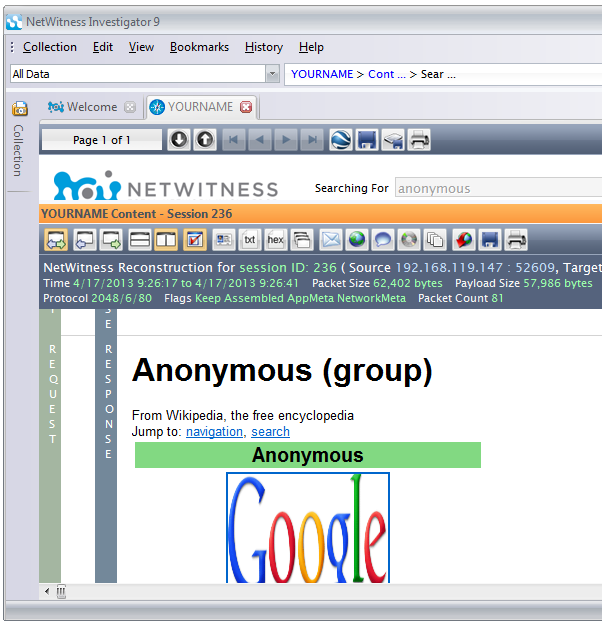
You see a "NetWitness Reconstruction" of the Web page from the packets, as shown below.
Press the PrintScrn key. Save a whole-desktop image with the name "Proj 17b from YOUR NAME".
Close the "NetWitness Reconstruction" pane by clicking its X button.
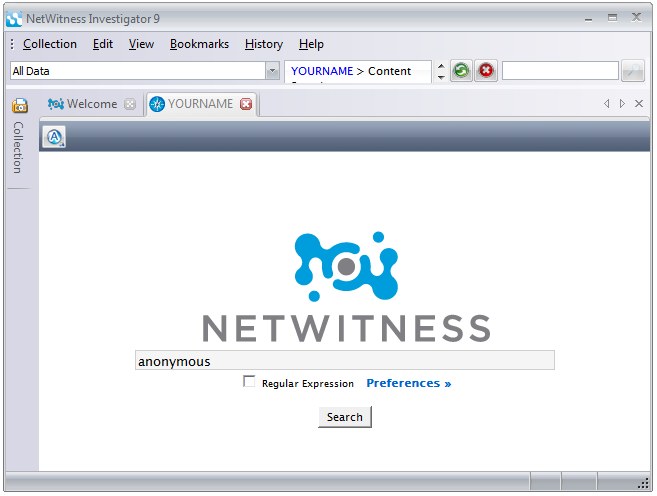
On the right side of the window, on the same line as "YOURNAME", click the magnifying glass icon, as shown below:
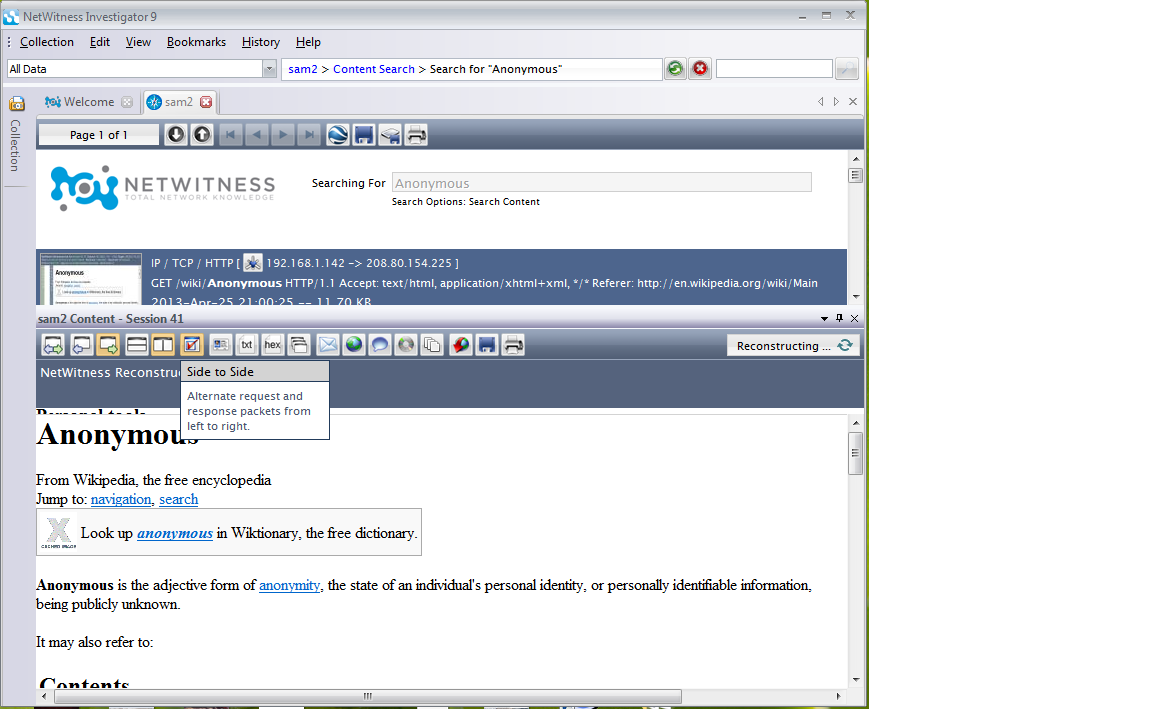
In the center of the screen, in the search field, type anonymous as shown below. Click the Search button.
A report appears, showing the results, with thumbnails of the pages on the left side, as shown below:
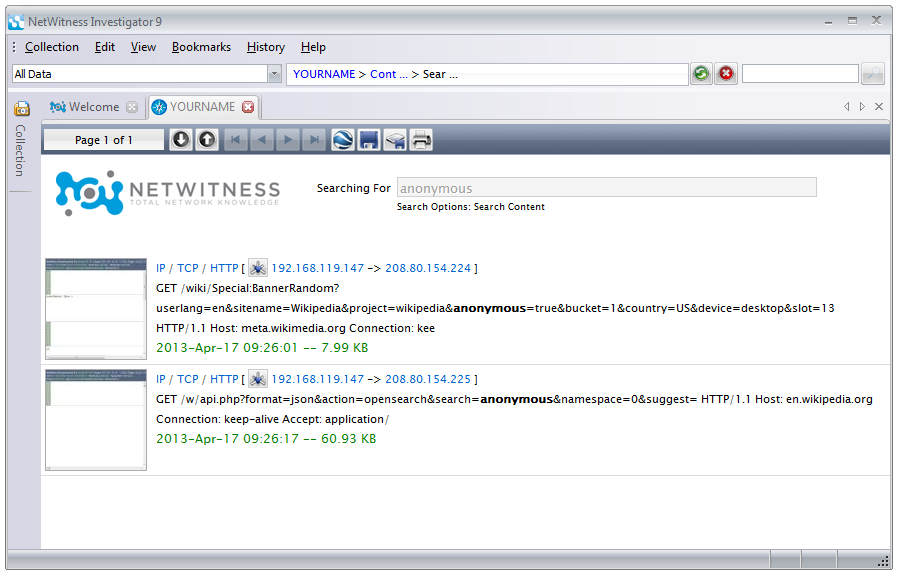
Click the thumbnails one at a time, until you find the Reconstruction of the Anonymous Wikipedia page shown below:
NOTE: If you cannot find that page, try clicking the "Side to Side" button as shown below.
Email the images to cnit.121@gmail.com with a Subject line of Proj 17 from Your Name. Send a Cc: to yourself.