
Enter this command, followed by the Enter key:
startx
They download the file, extract it, rename it to remove the .001 file extension, and calculate the MD5 hash of the evidence disk.
cd /

mkdir anon

cd anon

wget http://samsclass.info/121/proj/anon-dd.7z

7z x  anon-dd.7z

cd dd

mv anon1.dd.001 anon1.dd

md5sum anon1.dd
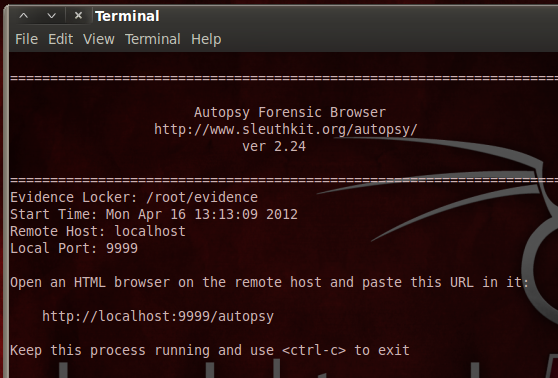
cd /pentest/forensics/autopsy

./autopsy
Troubleshooting: On some older versions of BackTrack, Autopsy won't launch this way. We solved that problem with this process in the lab: First execute this command to install autopsy:
Now find the directory that contains autopsy with these commands:apt-get install autopsyUse cd to move to the directory that contains autopsy. Execute this command to see what files are there:cd /find -name autopsy
If there is no autopsy executable, there should be a file named configurelsExecute these commands:
Now answer two questions: the first answer is n because we aren't using a known file database, and the second answer is a working directory: enter /a (the directory you just created).mkdir /a./configure
After the .configure is done, it should create the autopsy executable. Start it with this command:
./autopsy
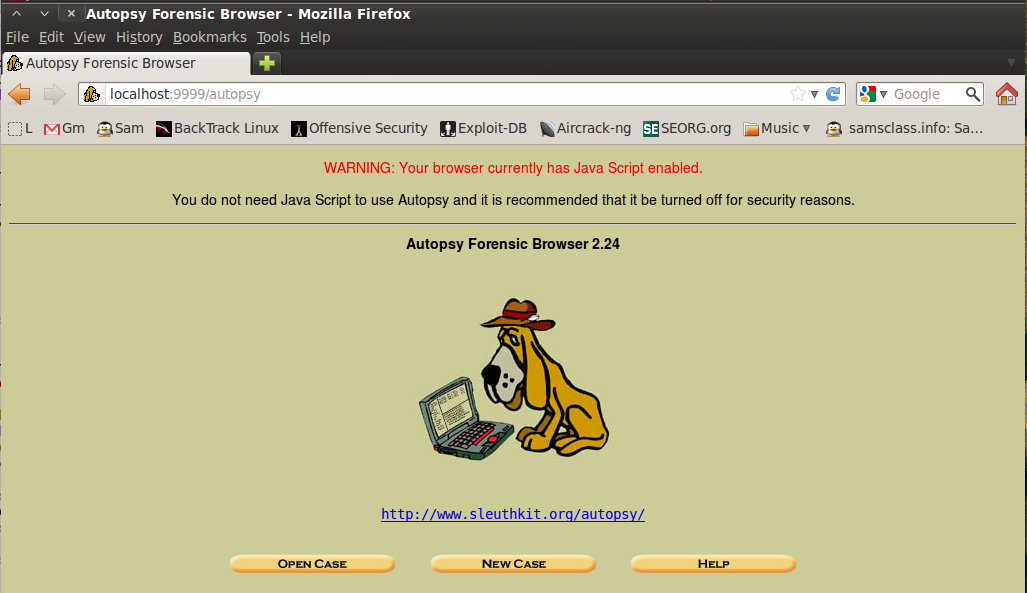
From the BackTrack menu, click Applications, Internet, "Firefox Web Browser".
When Firefox opens, go to this address:
http://localhost:9999/autopsyAutopsy opens, as shown below on this page. You will see a warning that Javascript is enabled. You can just ignore it.
Fill in the form as shown below, replacing "Your-Name" with your own name.
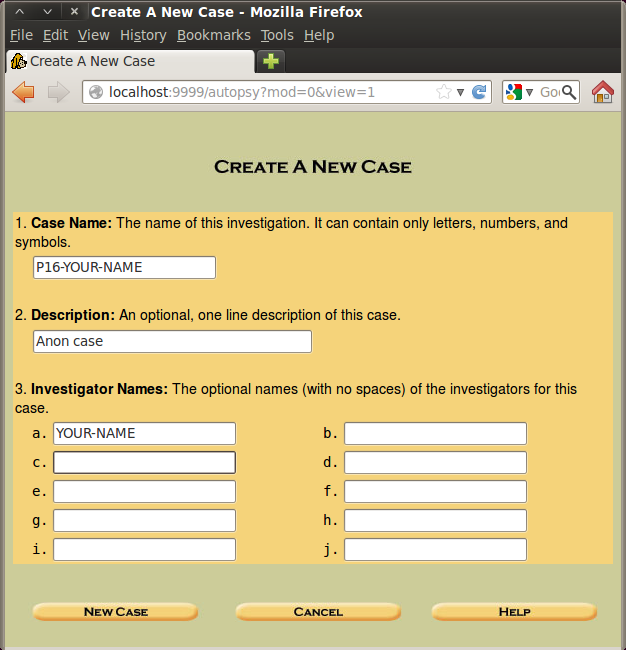
Click the "New Case" button.
In the "Creating Case" window, click the "Add Host" button.
In the "Add a New Host" window, accept the default options and click the "Add Host" button.
In the "Adding host" window, click the "Add Image" button.
In the next window, click the "Add Image File" button.
In the "Add a New Image" window, enter in these options, as shown below on this page:

Click Next.
In the "Image File Details" section, click the "Calculate the hash value for this image" button, as shown below. Click Add.
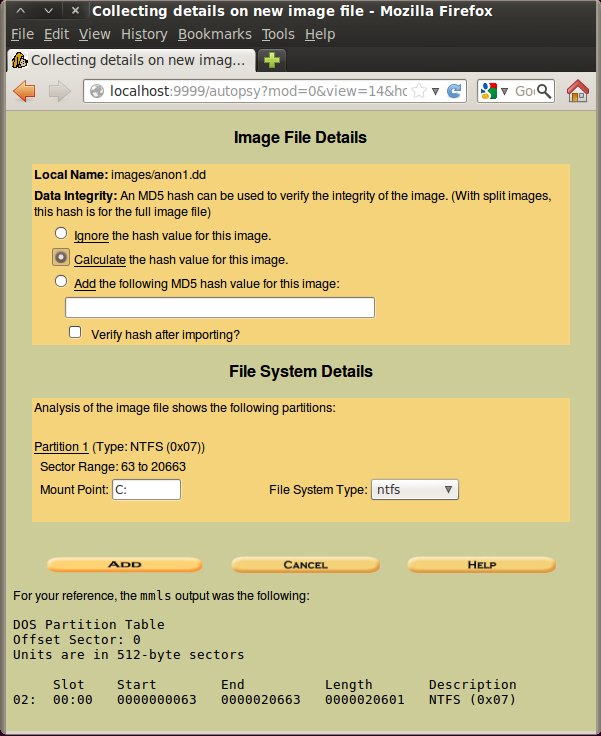
The next screen shows the MD5 hash, ending in 4419, as shown below on this page.
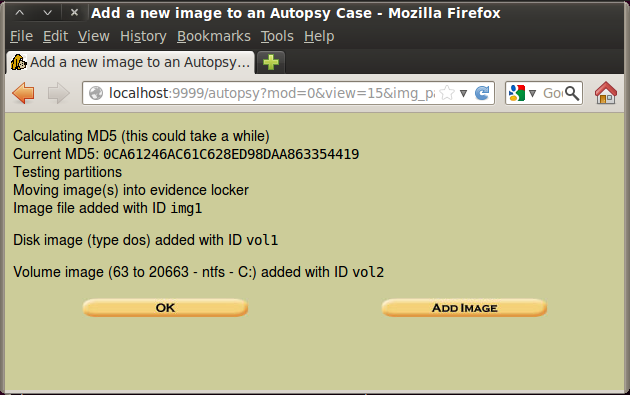
Click OK.
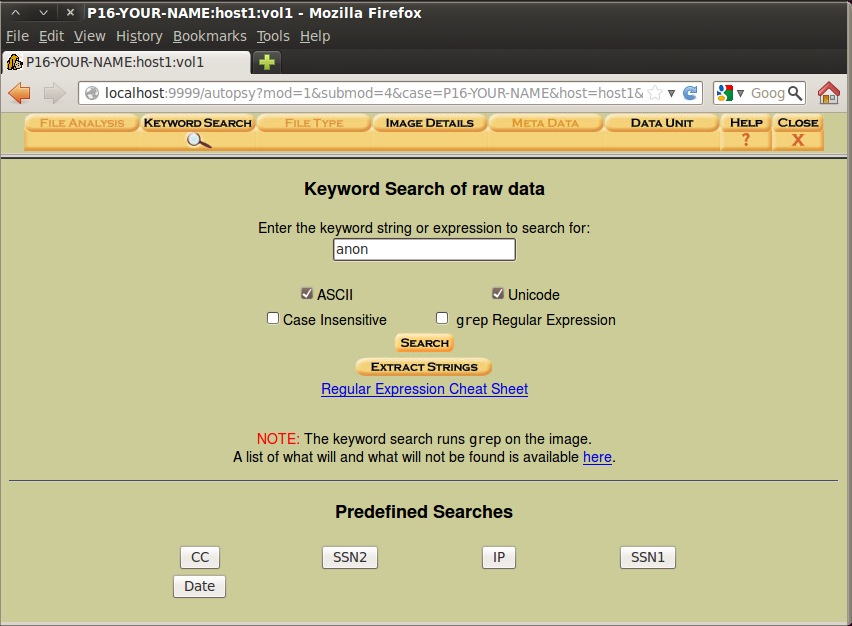
In the next window, click the "Keyword Search" tab.
In the search box, type anon as shown below. Click the Search button.
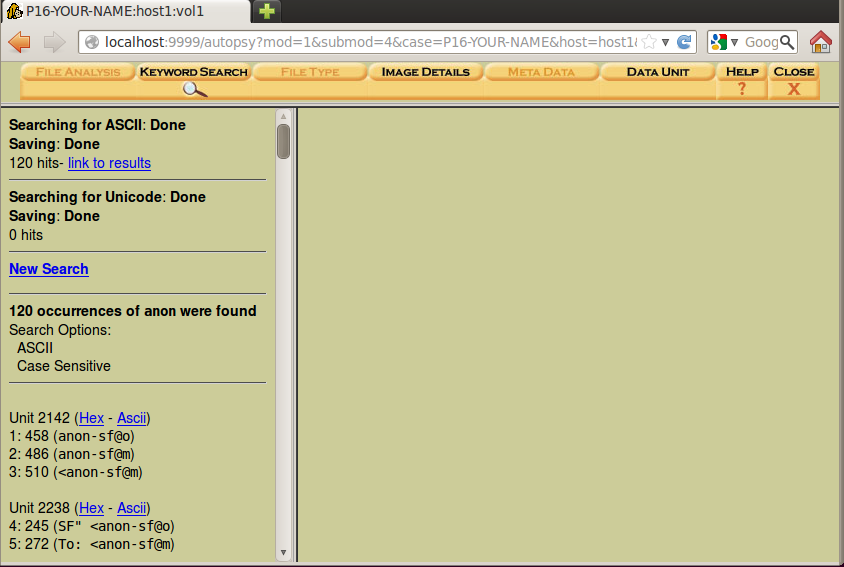
Notice how clumsy this is--you need to use the mouse to click each item; they aren't grouped into the 22 files for you the way FTK did, and the preview is poorly formatted so you can only see a small part of a horizontal line.
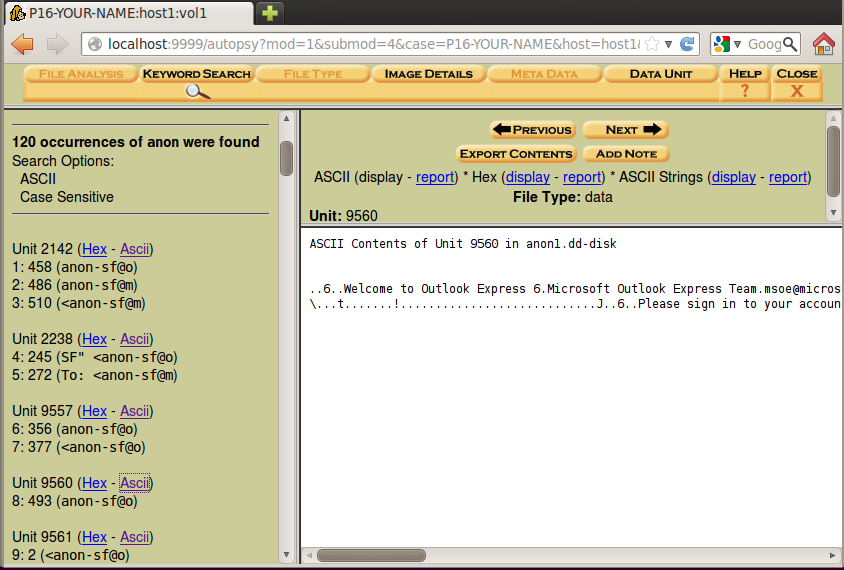
Even with those inconveniences, you should be able to find the incriminating email message you found in the FTK project--clear evidence of a crime.
When you find an incriminating email message, save a screen image.
Click in the host system, on the taskbar. Capture the whole desktop with the PrintScrn button.
YOU MUST SUBMIT A WHOLE-DESKTOP IMAGE FOR FULL CREDIT.
Save the image with the filename "Your Name Proj 16".
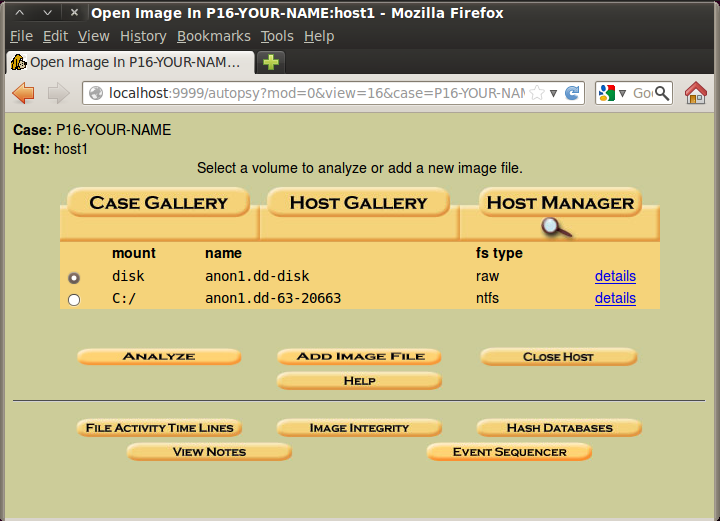
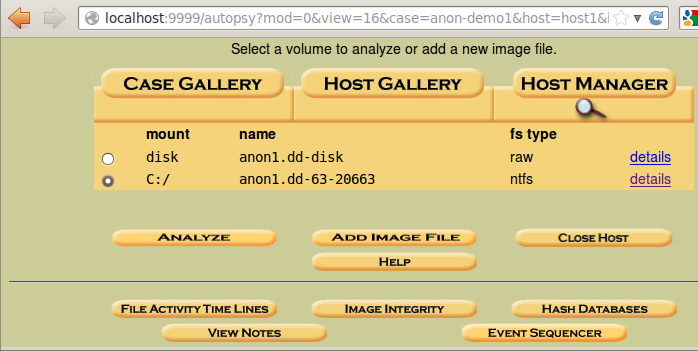
In the Case Gallery page, click C:\, as shown below:
At the lower left, click the Analyze button.
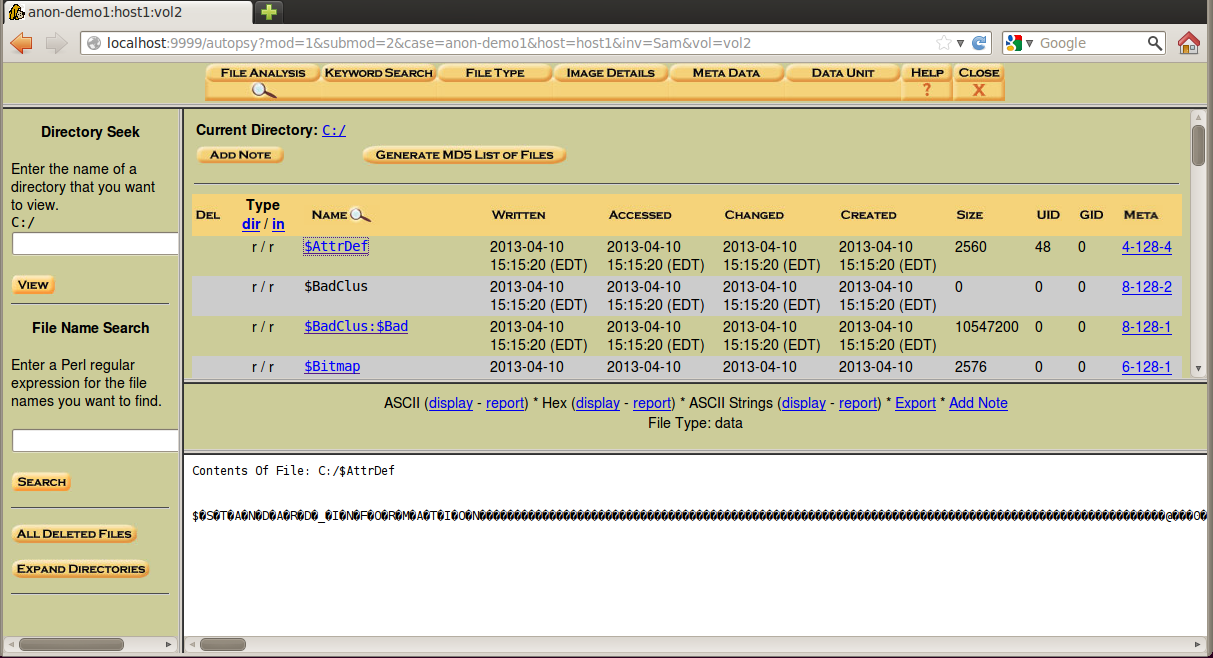
At the top left of the next screen, click the "File Analysis" button.
A list of files appears, as shown below.
Notice the four timestamps on each file: Written, Accessed, Changed, and Created. This is a strong point of Autopsy: it finds all four timestamps, while FTK finds only three of them.
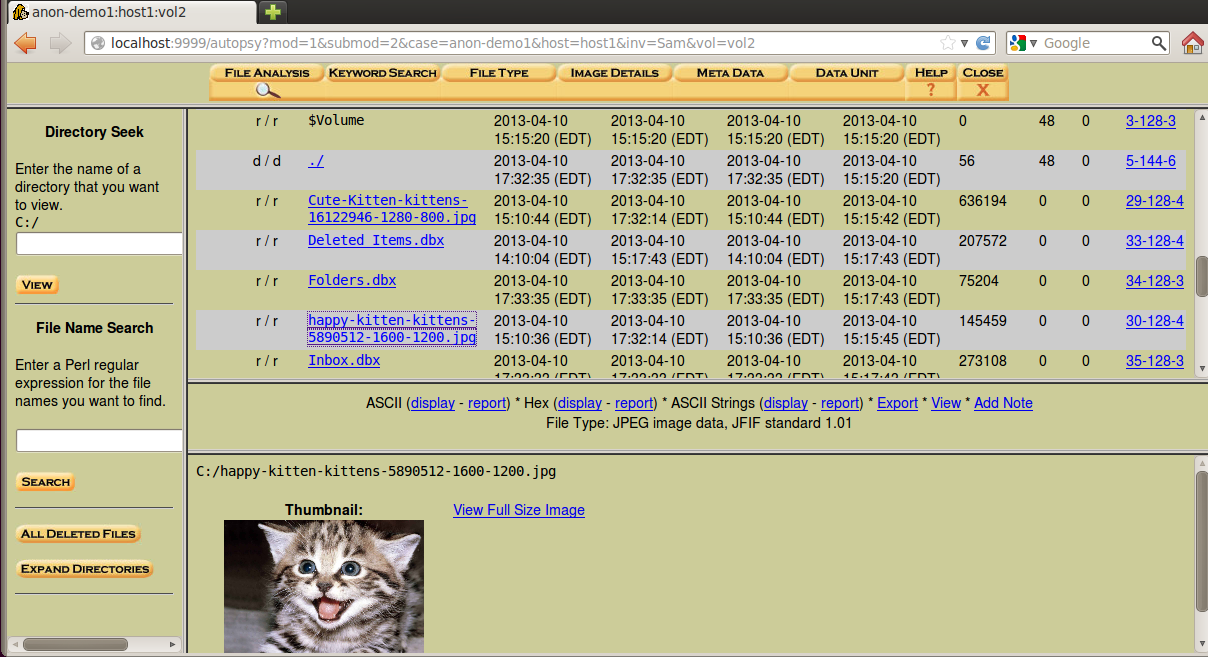
Try searching through the files for images. I was able to view the kittens, as shown below, but I could not find the incriminating image, because it is a deleted file.
I think Sleuthkit is able to do some file carving, reconstructing deleted files, but it is very clumsy to use compared FTK.