https://code.google.com/p/pmem/wiki/OSXPmem
Apple, System Preferences, Energy Saver
Move Computer sleep to Never
Move Display sleep to Never
Click the padlock in the lower left and enter password.
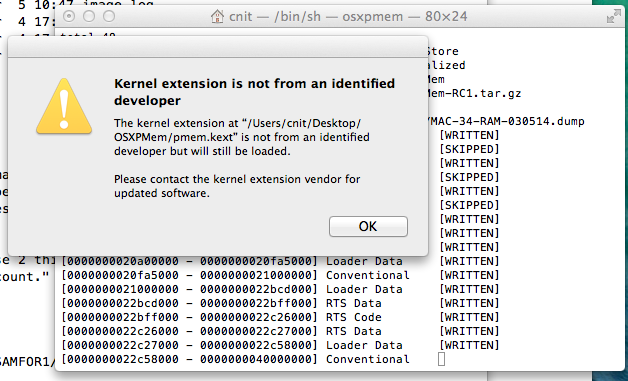
On the "General" tab, click the button to "Allow apps downloaded from: Anywhere".
In the pop-up box, click the "Allow From Anywhere" button.
Close "Security and Privacy".
When I did it, the Terminal window was unusable--it just showed a "process completed" message.
If that happens, do this:
If Terminal shows "Process completed", use the Terminal menu bar and click Shell, "New Command...".
Enter this command:
/bin/bash
To capture RAM, in Finder, plug in the USB hard drive.
Double-click its icon to open a Finder window showing the contents of the USB hard drive.
Drag OSXPMem-RC1.tar.gz from the USB disk to the evidence Mac's desktop.
In the Terminal window, execute these commands:
cd

pwd
In a Terminal, execute this command:
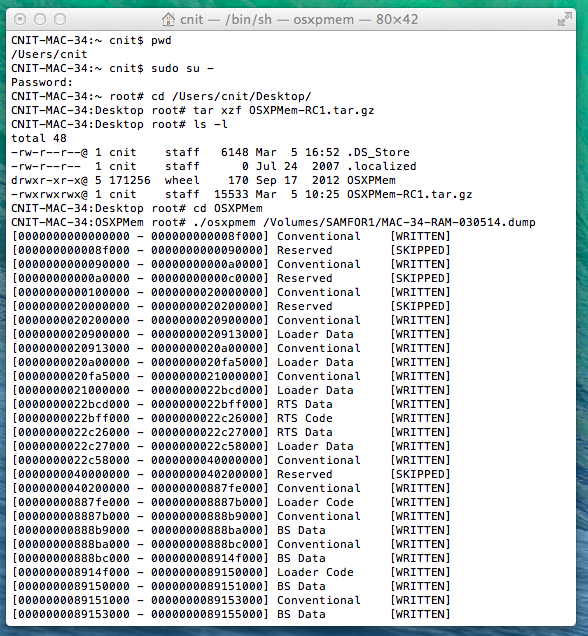
sudo su -
When prompted, enter the password of cnit
In a Terminal, execute these commands:
cd /Users/cnit/Desktop
tar xzf OSXPmem-RC1.tar.gz
cd OSXPMem
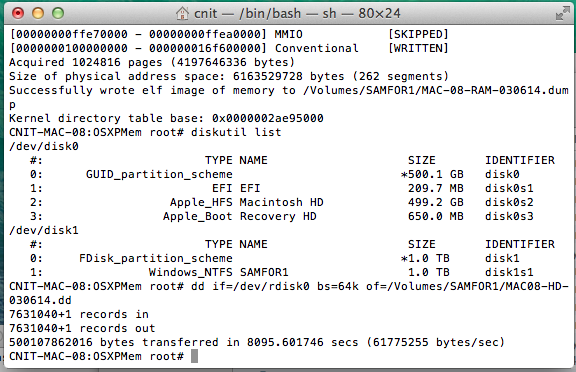
./osxpmem /Volumes/SAMFOR1/MAC-08-RAM-030614.dump
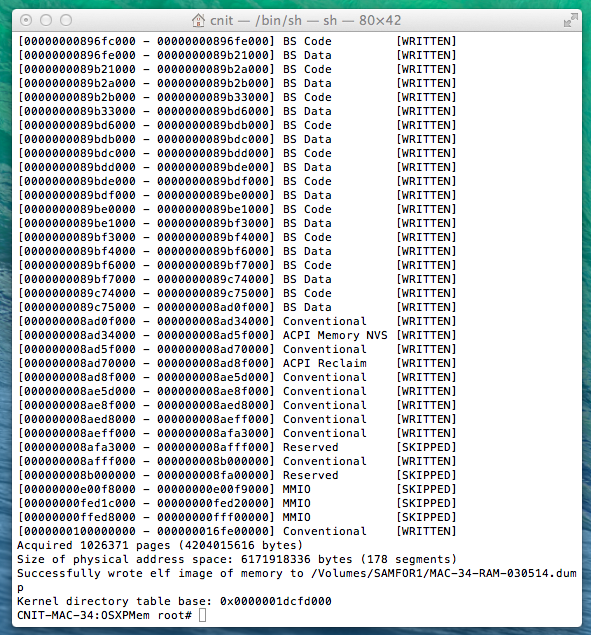
Lines start appearing on the screen showing sections of RAM as they are copied, as shown below.
When the process finishes, you will see the "Successfully wrote elf image" message shown below.
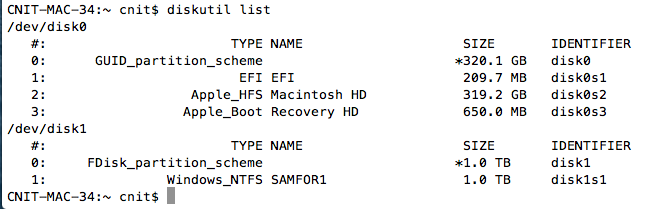
diskutil list
/dev/rdisk0You could use /dev/disk0 but that was about 20% slower in my tests.
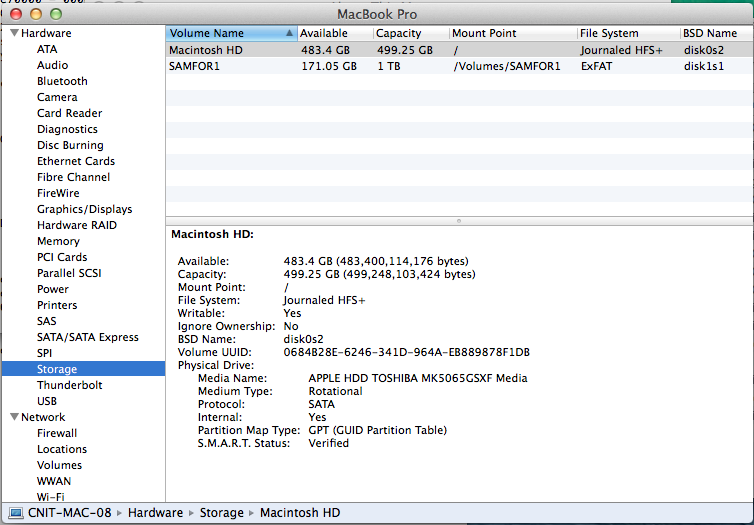
Look at the desktop icon to see the name of the USB drive. In my case it was named "SAMFOR1".
The path to it will be /Volumes/SAMFOR1.
In the Terminal, execute this command:
dd if=/dev/rdisk0 bs=64k of=/Volumes/SAMFOR1/MAC08-HD-030614.dd
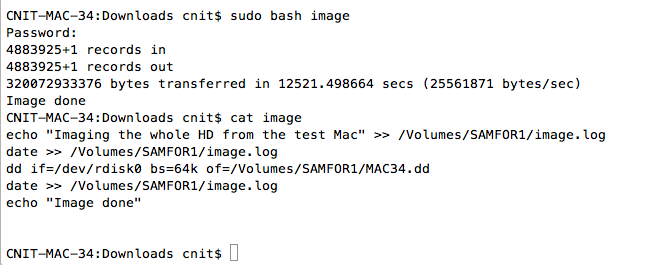
Real image started at 5:54 am.
At 6:26 I noticed the screen saver was on and moved the mouse to look at the desktop; the copy was proceeding.
At 8:40, the screen saver was on, I moved the mouse to see the message. The image was done!
I saw that the image was larger than I expected, and finished sooner. So I took these two screenshots, from the evidence computer:
I copied those images to the USB hard drive.
exit
Tests:

/dev/disk0 > USB, bs=64k : 22 MBps
/dev/disk0 | md5, bs=64k : 23 MBps

/dev/rdisk0 > USB, bs=1k : 6 MBps
/dev/rdisk0 | md5, bs=1k : 6 MBps

/dev/rdisk0 > USB, bs=64k : 27 MBps
/dev/rdisk0 | md5, bs=64k : 69 MBps

/dev/rdisk0 > USB, bs=1m : 25 MBps
/dev/rdisk0 | md5, bs=1m : 55 MBps

Whole disk is 320 GB = 320*1024 MB, so it will take
320*1024/27 sec = 12,100 sec = 3.4 hrs.