https://www.exterro.com/ftk-imager
Download FTK Imager.
If that file is unavailable, use this one:
Exterro_FTK_Imager_(x64)-4.7.3.81.exe
Run the installer file you downloaded. Install the software with the default options.
Note: Using the "Lite" version from a USB stick is a better practice. This project uses the full version for student convenience.
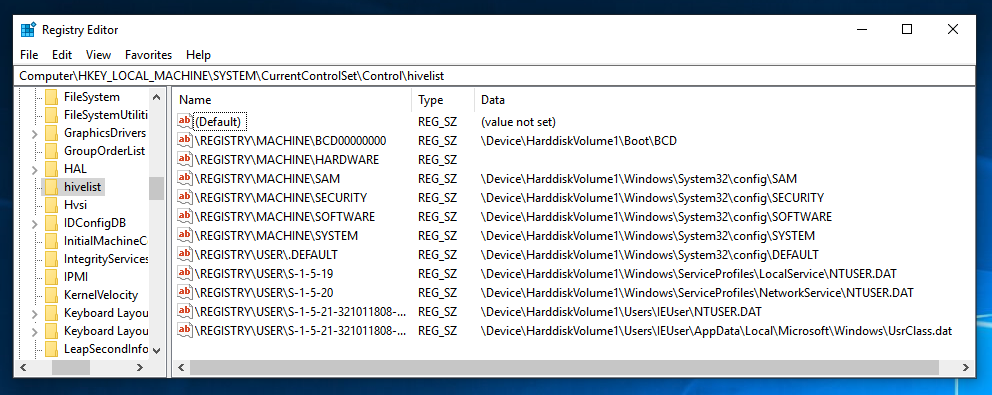
In Registry Editor, navigate to
HKEY_LOCAL_MACHINE\System\CurrentControlSet\Control\HiveList
You should see a list of the files that store the Registry, as shown below. For this project, we want to capture those files, and not all the other files on the disk. FTK Imager will make that really easy!
In the "AccessData FTK Imager" window, click File, "Obtain Protected Files".
The "Obtain System Files" box opens. Notice the Warning at the top of this box. You are obtaining data from your own computer, not from an evidence image. At least one forensic examiner actually went to court and submitted data accidentally gathered from his own forensic workstation by ignoring this warning.
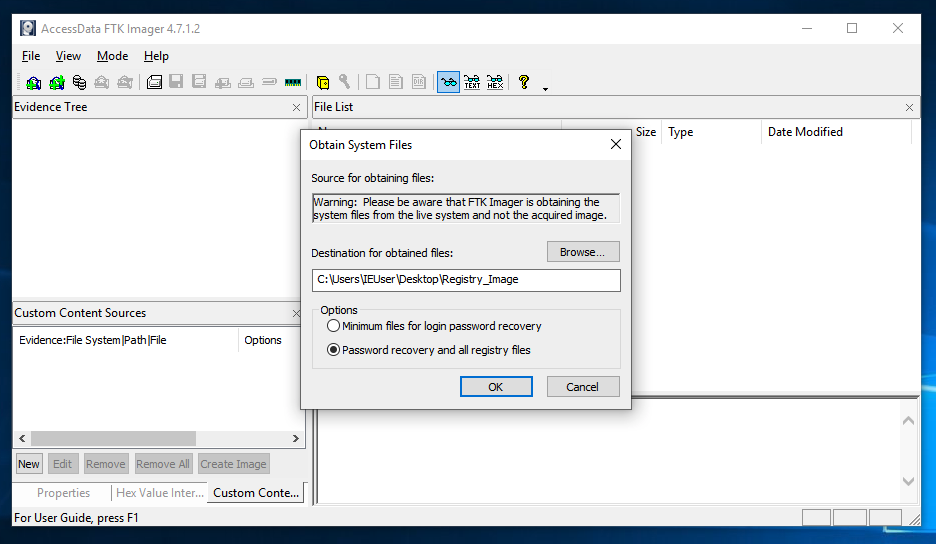
Click the "Password recovery and all registry files" radio button, as shown in the image above. Click OK.
Wait until the process finishes. It should only take a few seconds. Close FTK Imager.
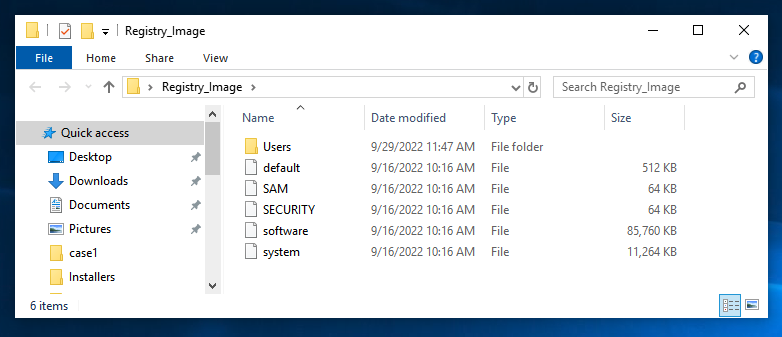
On your desktop, open the Registry_Image folder. It should contain the five files and one folder shown below. You should get used to seeing these names--they are the Hive Files, and a lot of forensics involves working with them.
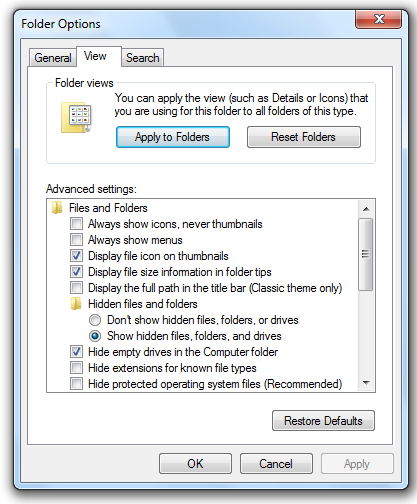
In the Folder Options box, on the View tab, click the "Show hidden files, folders, and drives" button and clear the "Hide protected operating system files (Recommended)" box, as shown below.
If a "Warning" box pops up, click Yes.
In the "Folder Options" box, click OK.
Enter a Case Name of Registry.
Click the Next button.
Click the Finish button.
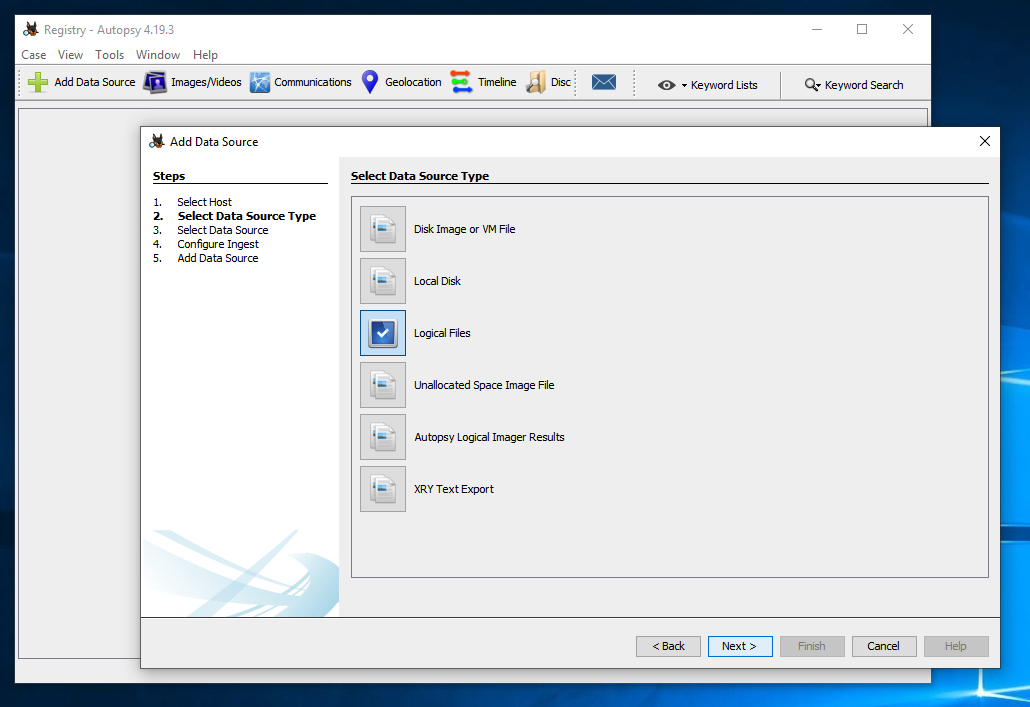
At step 2. Select Data Source Type, click "Logical Files", as shown below.
Click the Next button.
At step 3. Select Data Source, click the Add button. Navigate to your desktop. Click the Registry_Imagefolder and click Select.
Click the Next button.
At step 4. Configure Ingest, click the Next button.
At step 5. Add Data Source, click the Finish button.
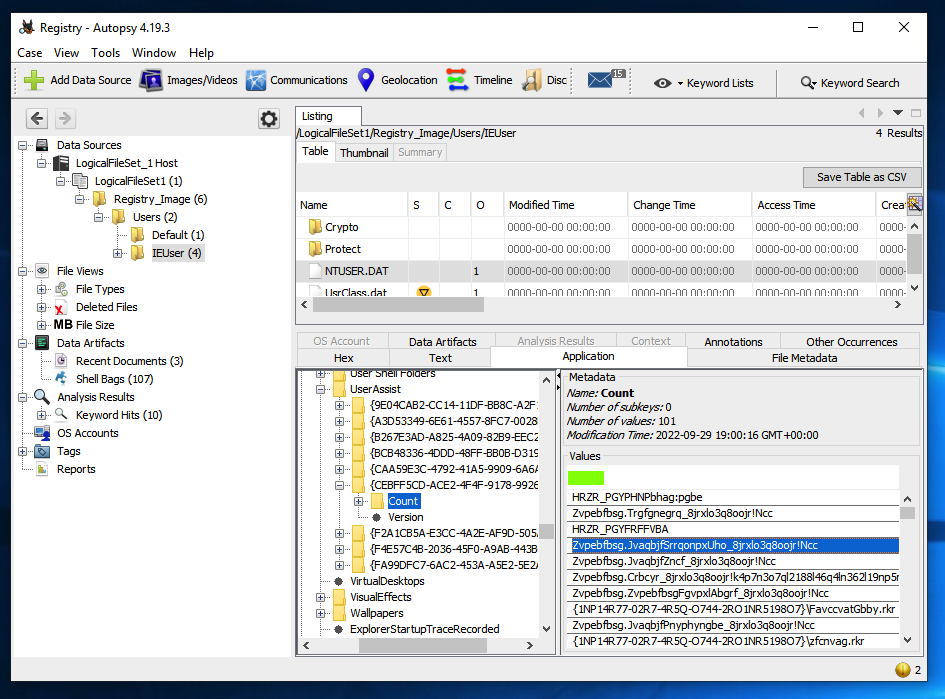
In the lower right pane of Autopsy, navigate to:
ROOT\Software\Microsoft\Windows\CurrentVersion\Explorer\UserAssist
In the lower right pane of Autopsy,
click the + sign to expand the
UserAssist key.
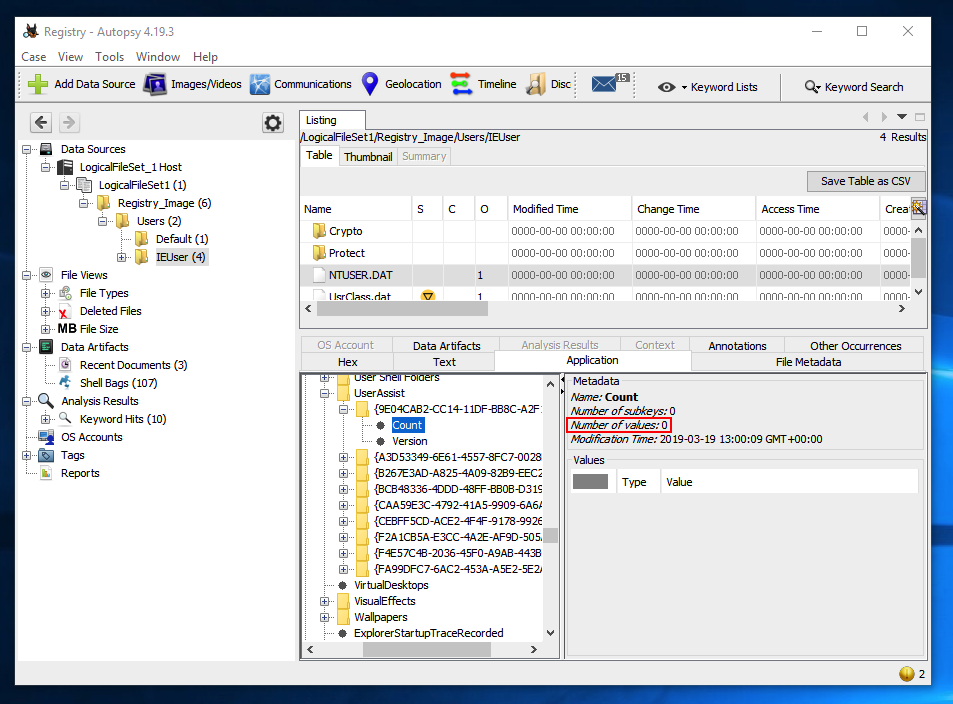
One or more subkeys with long names consisting of random letters and numbers appear, as shown below.
Expand one of the subkeys and click the Count subkey.
If you see "Number of values: 0", as outlined in red in the image below, try expanding another subkey.
When you find a subkey containing program names, they are unreadable, as shown below.
Believe it or not, these are obfuscated with ROT-13--moving each letter 13 values in the alphabet, an ancient and very weak form of encryption.
You can decrypt them at https://rot13.com/
F 220.2: UserAssist (15 pts)
The flag is covered by a green rectangle in the image below.