memdump.7z (130 MB)
Right-click the file, and click 7-Zip, "Extract Here".A file named memdump.mem appears.
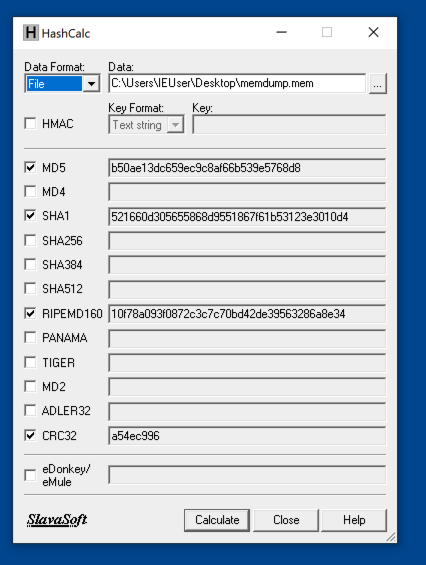
Use Hashcalc to verify the hash of the file. Your hash values should match the image below.
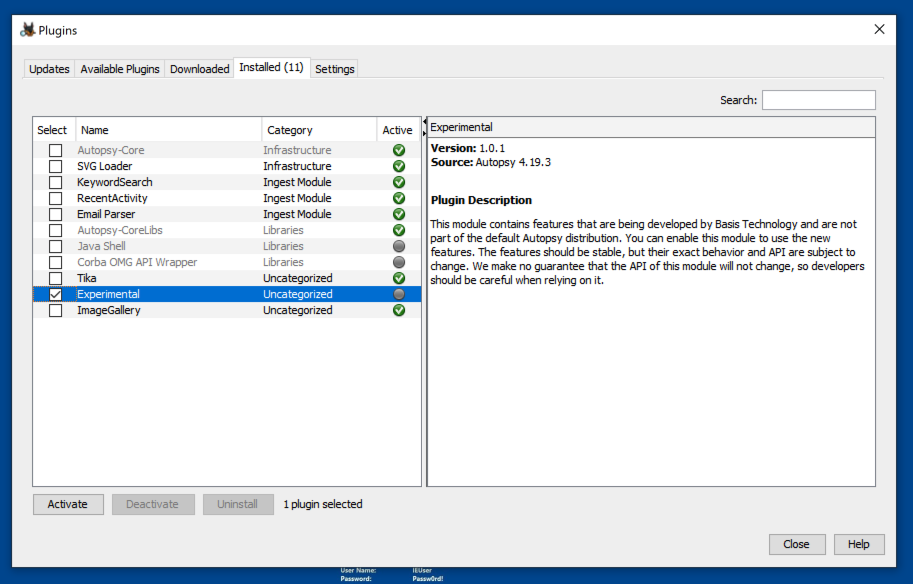
Check the box next to "Experimental", as shown below.
Click the Activate button. Click the Activate button. Click the Finish button.
In the Plugins window, click the Close button.
Enter a Case Name of memory.
Click the Next button.
Click the Finish button.
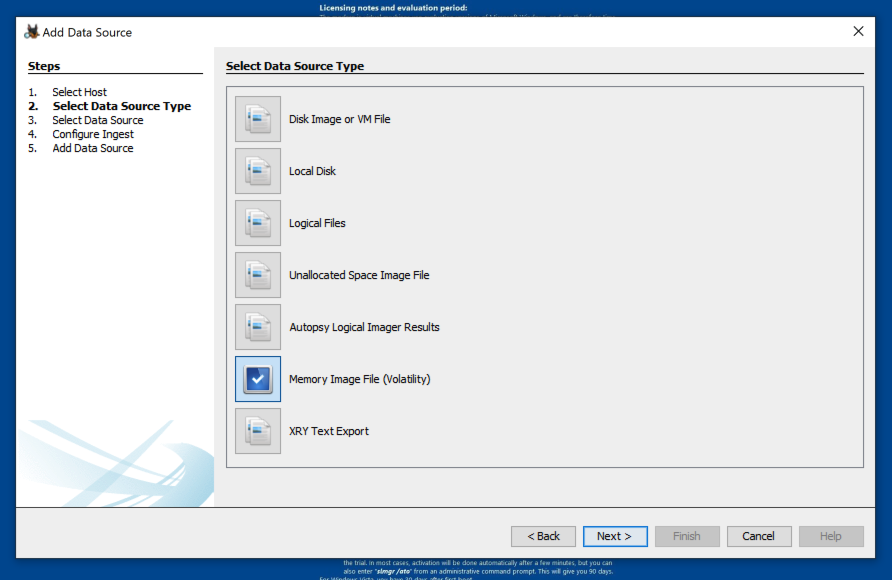
At step 2. Select Data Source Type, click "Memory Image File (Volatility)", as shown below.
Click the Next button.
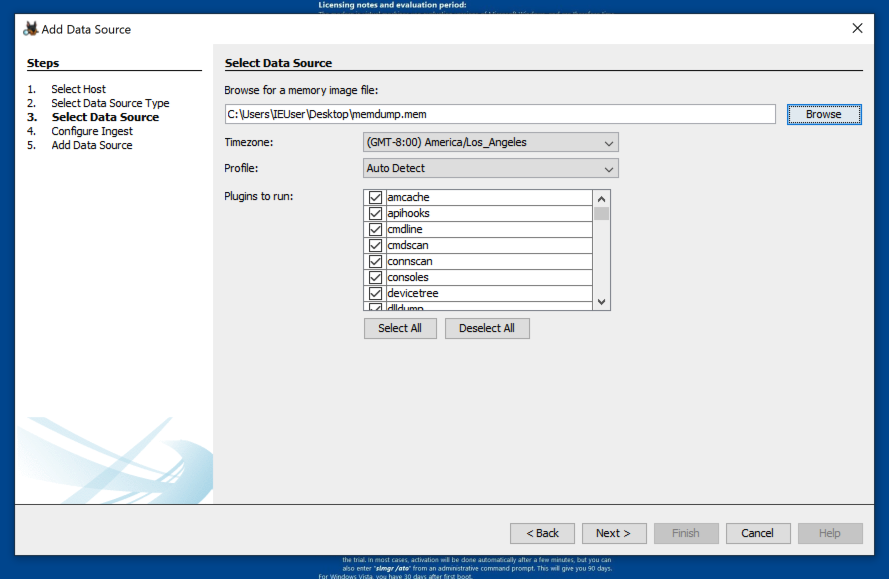
At step 3. Select Data Source, click the Browse button and navigate to the memdump.mem file, as shown below.
If you want a thorough analysis, simply click the Next button, but be warned: it will take a long time, perhaps an hour, to run all those plugins.
If you want to speed up the process, clear all the plugins except these:
At step 4. Configure Ingest, click the Next button.
When the analysis is complete, at the top left, expand "Data Sources" and navigate to the ModuleOutput, as shown in the images below.
Examine the output to find the flags shown below.
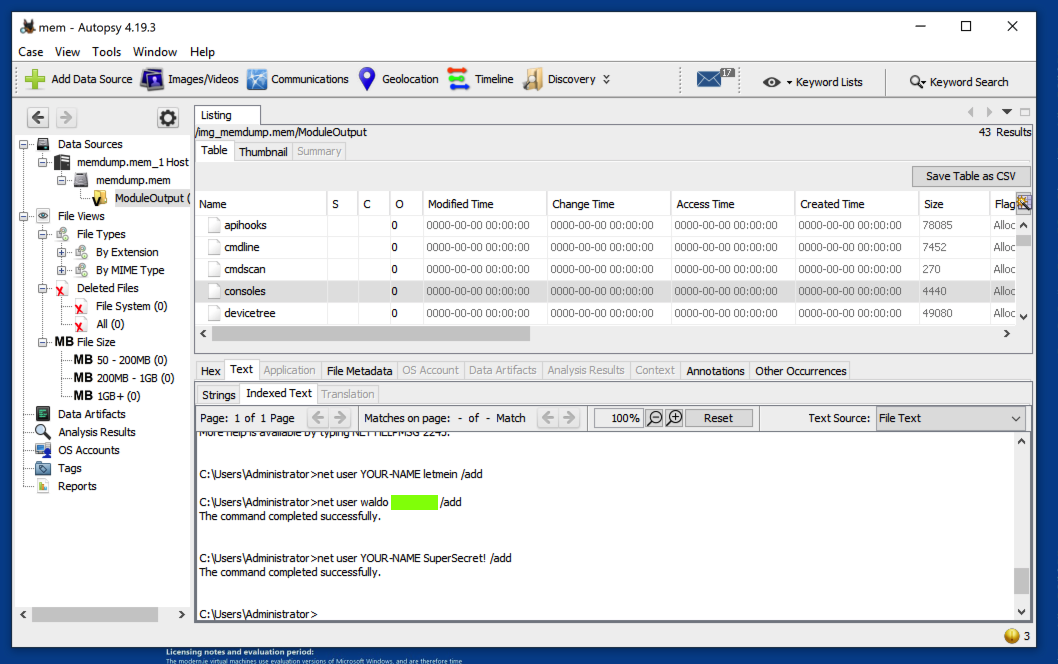
F 210.1: Consoles (5 pts)
In the consoles section, find Waldo's password, covered by a green rectangle in the image below.
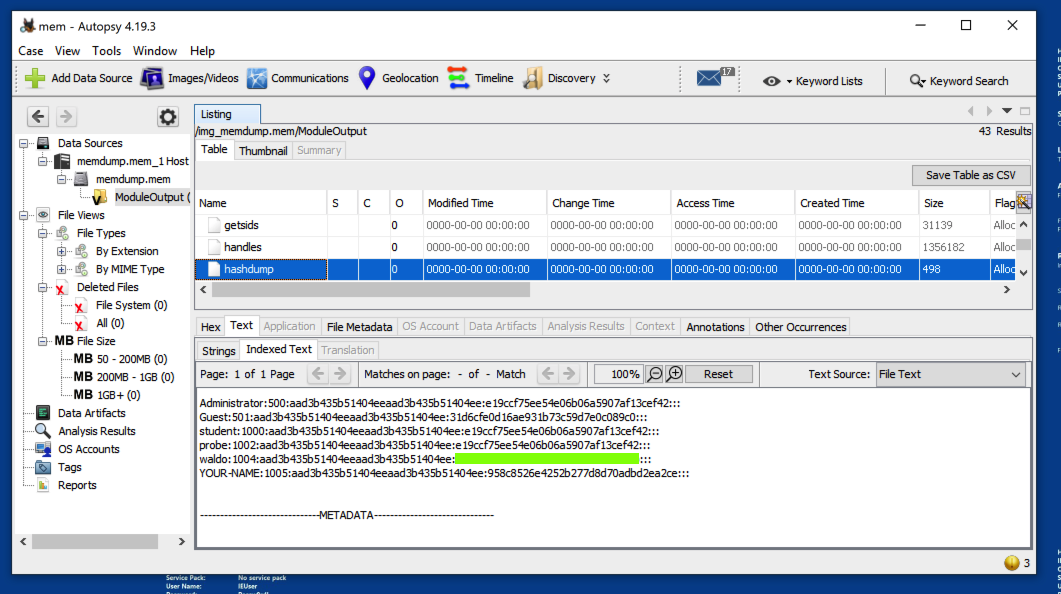
F 210.2: Hashdump (5 pts)
In the hashdump section, find Waldo's password hash, covered by a green rectangle in the image below.
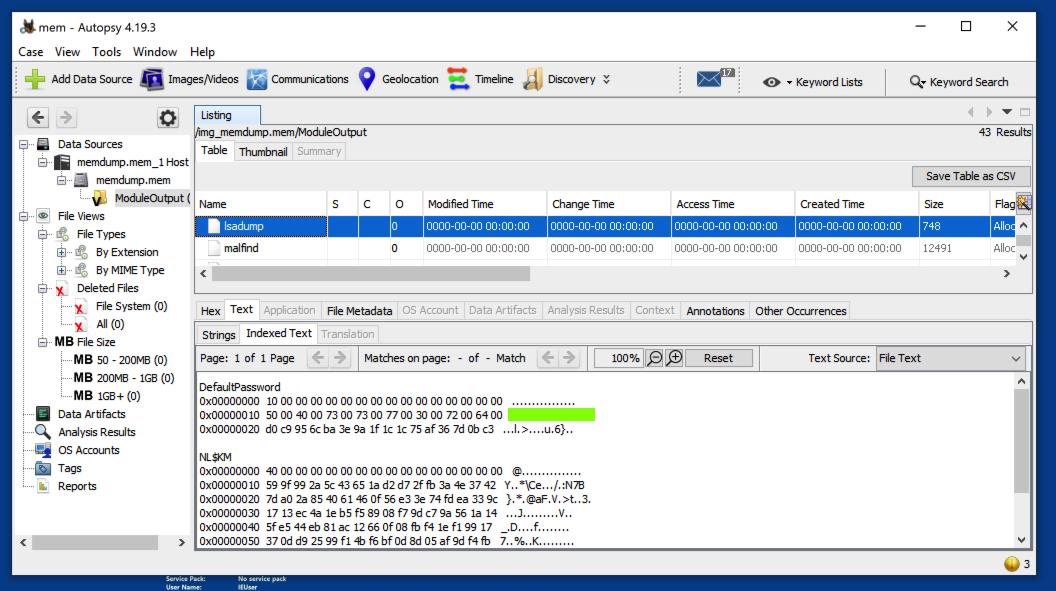
F 210.3: LSAdump (5 pts)
In the lsadump section, find the default password, covered by a green rectangle in the image below.
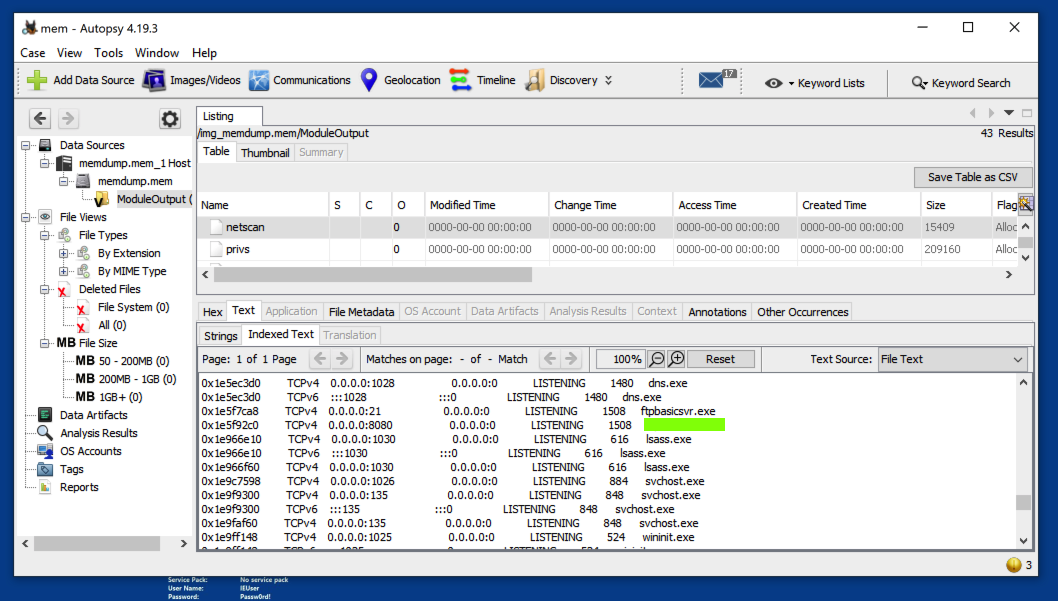
F 210.4: Netscan (5 pts extra)
In the netscan section, find the name of the executable listening on port 8080, covered by a green rectangle in the image below.
F 210.5: pslist (5 pts extra)
In the pslist section, find the name of the executable covered by a green rectangle in the image below.
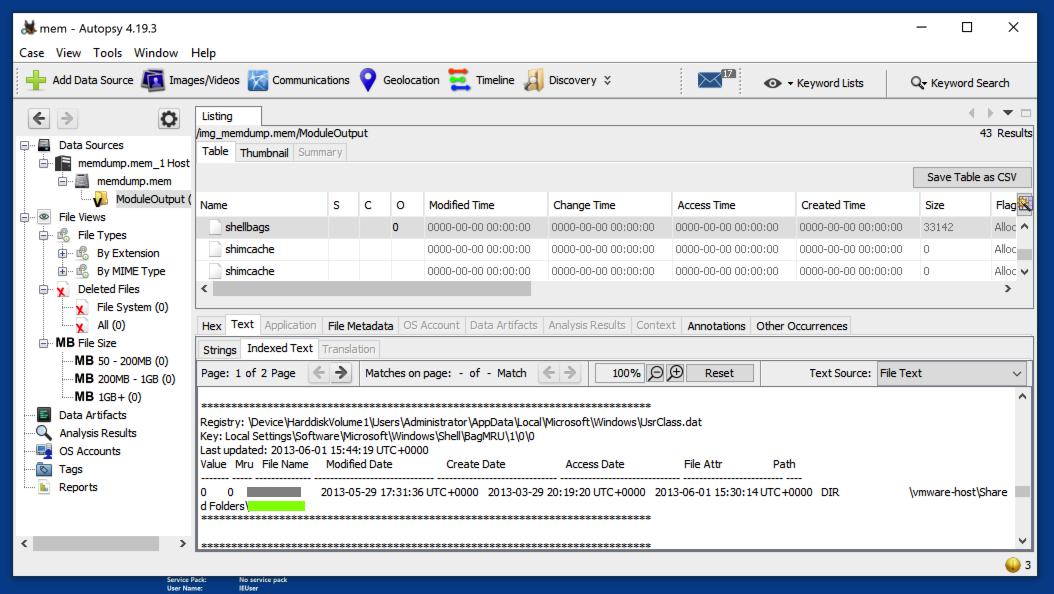
F 210.6: shellbags (5 pts extra)
In the shellbags section, find the name of the shared folder this machine connected to, covered by a green rectangle in the image below.
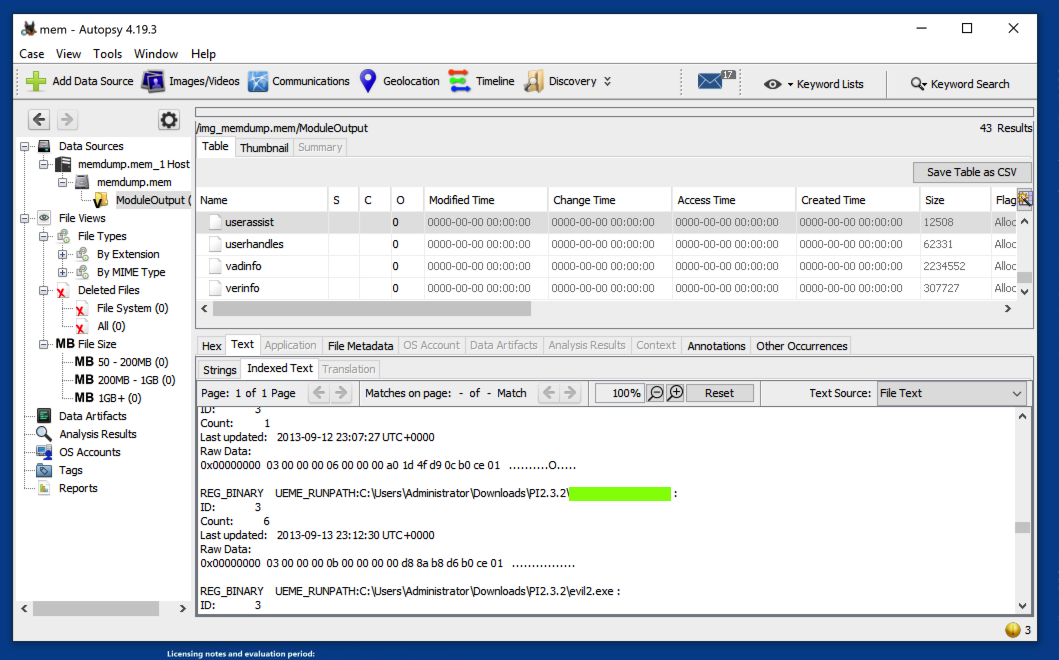
F 210.7: userassist (5 pts extra)
In the userassist section, find the name of the dangerous executable that ran on 9-13-2013 at 23:12:30, covered by a green rectangle in the image below.
Posted: 9-7-22
F 210.8: Probe Password (10 pts extra)
Find the password for the probe account, which appeared in the hashdump section.You will need to crack the hash.
That's the flag.