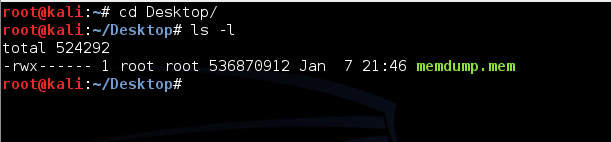
Project 5: Analyzing a RAM Image with Volatility (15 Points)

What You Need for This Project

Start Your Kali Linux Machine

Launch your Kali Linux machine. If necessary, log in as root with the password toor


Introduction: Basic Volatility Usage

Finding the RAM Image to Examine

In your Kali Linux machine, open a Terminal window and execute these commands:
cd
cd Desktop
ls -l
Note that the last command is "LS -L" in lowercase.

You should see the memdump.mem file, which should be approximately 500 MB in size, as shown below. If you do not, you may need to repeat a previous project to create the memory image again.

Starting Volatility

In your Kali Linux machine, in a Terminal window, execute this command:
volatility -h
You see a long help message, as shown below:

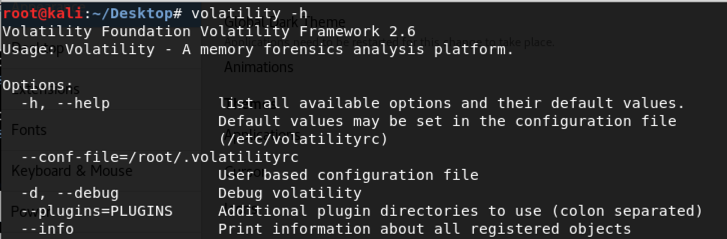
The volatility help is long and confusing.

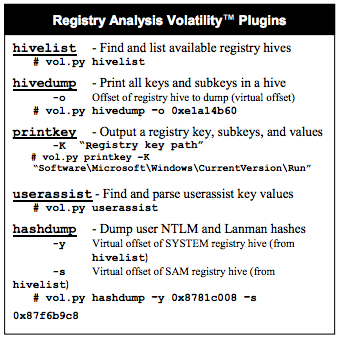
Fortunately, SANS has made a handy one-page cheat sheet which is much friendlier. The part that is important to us is shown below:

Basic Volatilty Usage

Image Information

In your Kali Linux machine, in a Terminal window, execute this command:
volatility imageinfo -f /root/Desktop/memdump.mem
This shows basic information about the image, such as the operating system of the machine that was imaged, and when the image was made, as shown below:

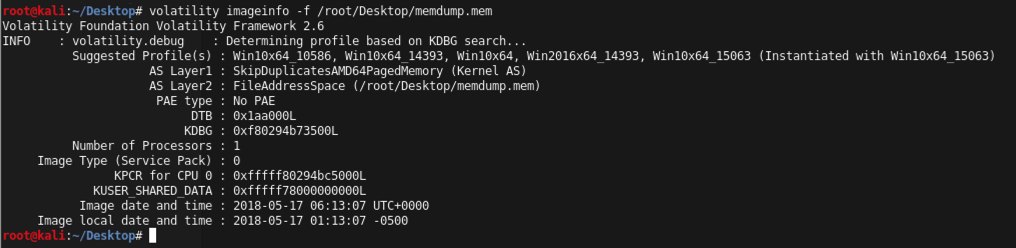
Volatility needs to know what operating system was imaged in order to interpret the memory image correctly. The default profile is WinXPSP2x86, but we used Win2008SP1x86, so we'll have to include that information in all future volatility command-lines.

Running Processes

In your Kali Linux machine, in a Terminal window, execute this command:
volatility pslist --profile=Win2016x64_14393 -f /root/Desktop/memdump.mem
This shows the processes that were running on the machine when the RAM image was made, as shown below:

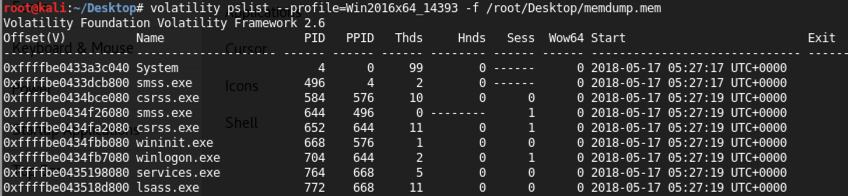
Notice these columns:

Network Connections

In your Kali Linux machine, in a Terminal window, execute this command:
volatility netscan --profile=Win2016x64_14393 -f /root/Desktop/memdump.mem
This shows the network connections on the Windows machine, as shown below:

Services

In your Kali Linux machine, in a Terminal window, execute this command:
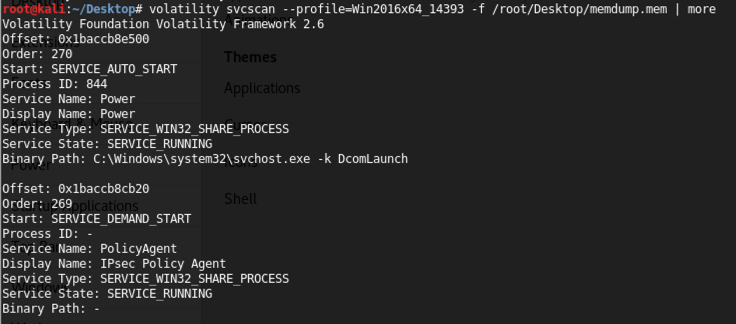
volatility svcscan --profile=Win2016x64_14393 -f /root/Desktop/memdump.mem | more
This shows the first page of a long list of services, as shown below:


5.1: Extracting Password Hashes (5 pts)

Getting the Windows Server 2008 Memory Dump

If you didn't already do it in a previous project, download and unzip this file:

memdump.7z

The file is 130,398,701 bytes in size, and its MD5 hash is 364fed484bcdd1a1f81a3538a4b1cd9a.

To unzip a .7z file in Kali, use "7z x filename"

Registry Hives

In your Kali Linux machine, in a Terminal window, with the working directory in the directory containing Windows Server 2008 Memory Dump, execute this command:
volatility hivelist --profile=Win2008SP1x86 -f memdump.mem
This shows the location in RAM of the Registry hives, as shown below:

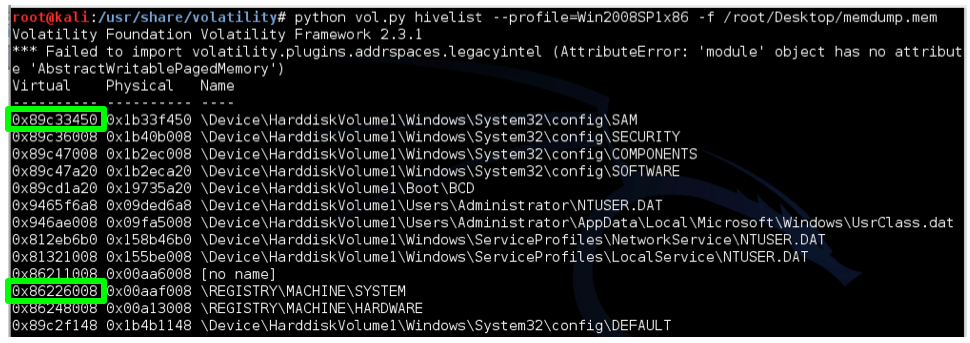
Examine your output and find the two addresses outlined in green above: the virtual addresses of the SAM and SYSTEM hives. Those two hives together contain enough information to extract Windows password hashes.

Password Hashes

In your Kali Linux machine, in a Terminal window, execute the command below.

Notice that the two hexadecimal addresses you found above are used in this format:

-y SYSTEM -s SAM

volatility hashdump --profile=Win2008SP1x86 -f memdump.mem -y 0x86226008 -s 0x89c33450
When you get the command correct, you will see the login account names and hashed passwords, as shown below.

Windows stores two hashes with each password, delimited by colons. The first one is an extremely insecure, obsolete hash using the LANMAN algorithm. Windows operating systems since Vista no longer use LANMAN hashes, so they are filled with a dummy value starting with "aad".

The second hash is the newer NTLM hash, which is much better than LANMAN hashes, but still extremely insecure and much more easily cracked than Linux or Mac OS X hashes.

5.1 Recording Your Success (5 pts.)

Find the NT hash for the "student" account, which is partially redacted in the image above. It begins with e19c.

Use the form below to record your score in Canvas.

If you don't have a Canvas account, see the instructions here.

Name or Email:
Hash:


5.2: Cracking the Password Hash (5 pts.)

On your host machine, open a Web browser and go to

https://crackstation.net/

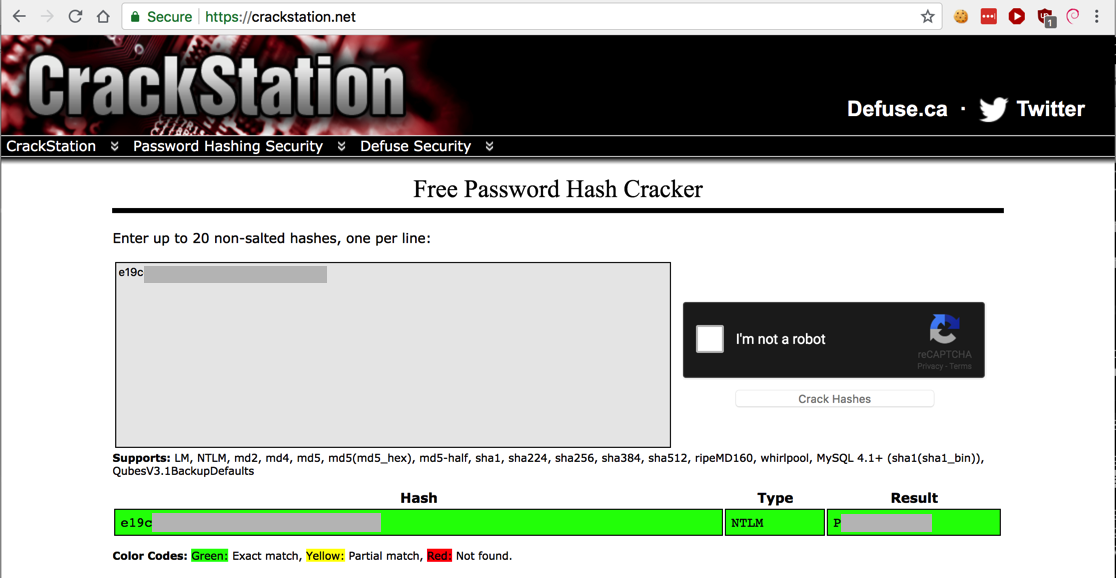
Paste in the hash. On the right side, fill in the CAPTCHA and click the "Crack Hashes" button.

The hash should crack, revealing the plaintext password, as shown below.

5.2: Recording Your Success (5 pts.)

Use the form below to record your score in Canvas.

If you don't have a Canvas account, see the instructions here.

Name or Email:
Password:


5.3: Extracting Console Commands (5 pts)

Console Commands

In your Kali Linux machine, in a Terminal window, with the working directory in the directory containing Windows Server 2008 Memory Dump, execute this command:
volatility consoles --profile=Win2008SP1x86 -f memdump.mem
This shows the console commands that were recently executed on the Windows machine, beginning with the "csrss" process, as shown below:

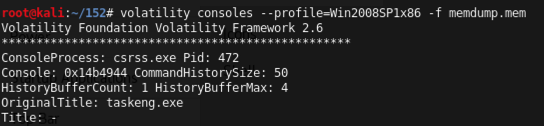
Find the "net user" command shown below, which attempted to set a password on the "waldo" account that violated the complexity requirement.

The password is redacted in the image below.

5.3: Recording Your Success (5 pts.)

Use the form below to record your score in Canvas.

If you don't have a Canvas account, see the instructions here.

Name or Email:
Password:


Sources

Volatility Memory Forensics | Basic Usage for Malware Analysis

Memory Forensics and Analysis Using Volatility

SANS Memory Forensics Cheat Sheet

Basic Volatility Usage - An advanced memory forensics framework - Google Project Hosting


Updated to Server 2016 5-18-18
Integrated with Canvas 8-20-18