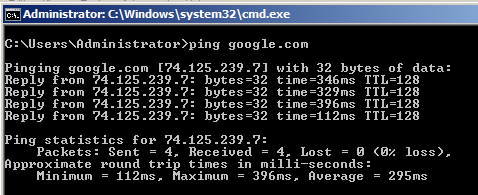
In the Command Prompt window, type this command, and then press Enter:
ping google.com

Repeat the process on your Windows Server 2008 machine.
If either machine fails this test, you need to troubleshoot your network and fix it before you can proceed with this project.
ipconfig

Repeat this process on your other computer.
Compare the two addresses to see if they are on the same subnet. Most networks have a subnet mask of 255.255.255.0, so the first three octets must match.
In the example above, the address is 192.168.119.129, so the other machine's address must start with 192.168.119 to match.
If the machines are not on the same subnet, change your virtual networking mode to "Bridged" as explained in project 7.
If you cannot connect with bridged networking, you could make a second virtual machine on the same host and set the networking to "NAT" on both machines instead.
ipconfig /all
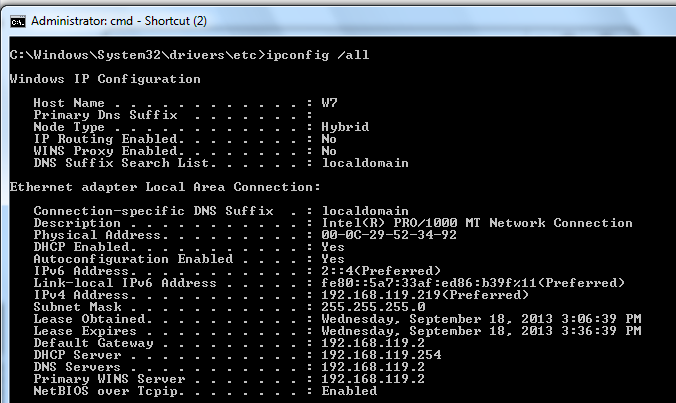
Make a note of these settings:
Near the top of the search results, click "View network connections".
The Network Connections window opens, as shown below:
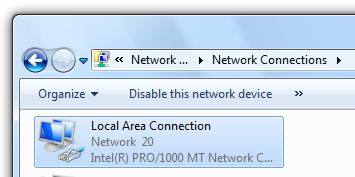
Right-click "Local Area Connection" and click Properties.
In the "Local Area Connection Properties" box, double-click "Internet Protocol Version 4 (TCP/IPv4)".
In the "Internet Protocol Version 4 (TCP/IPv4) Properties" box, click the "Use the following IP address" button.
Carefully enter these values, just as you recorded them previously, as shown below:
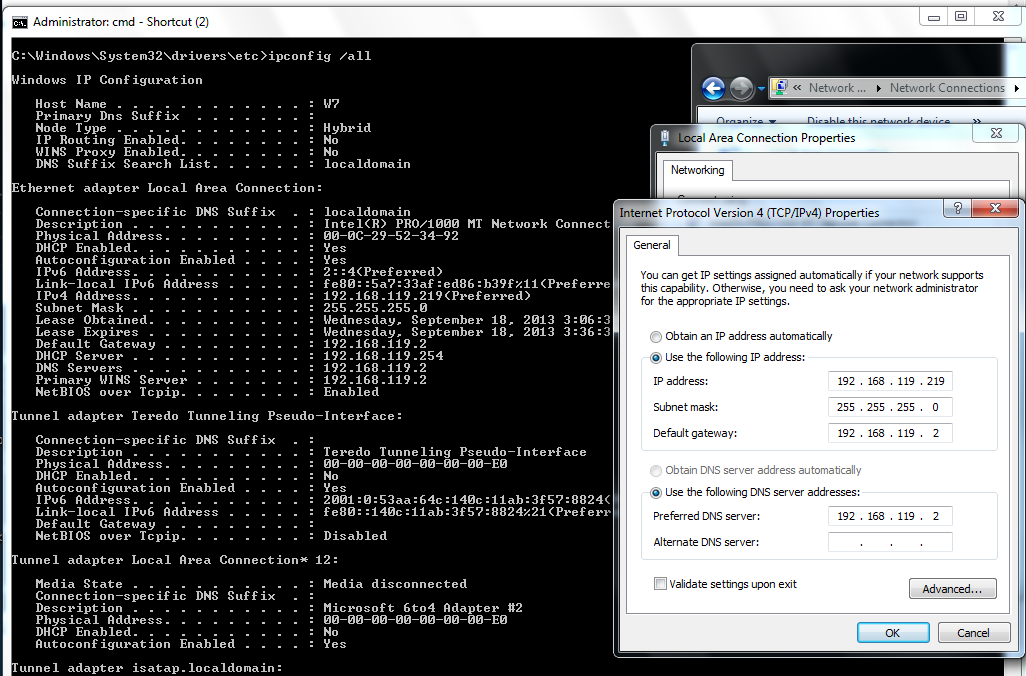
In the "Internet Protocol Version 4 (TCP/IPv4) Properties" box, click OK.
In the "Local Area Connection Properties" box, click OK.
In the Command Prompt window, type this command, and then press Enter:
ping google.com

Near the top of the search results, click "View network connections".
Right-click "Local Area Connection" and click Properties.
In the "Local Area Connection Properties" box, double-click "Internet Protocol Version 4 (TCP/IPv4)".
In the "Internet Protocol Version 4 (TCP/IPv4) Properties" box, change the IPv4 address to your Windows Server 2008 machine's IP address, which you noted previously.
In the "Internet Protocol Version 4 (TCP/IPv4) Properties" box, click OK.
In the "Local Area Connection Properties" box, click OK.
You have now created an impossible situation: two machines with the same address. Or have you?
In the "Local Area Connection Status" box, click the Details button.
The "Network Connection Details" box should now show two "Autoconfiguration IPv4 Address" values, one starting with 169.254, and the other one at the value you assigned, as shown below.
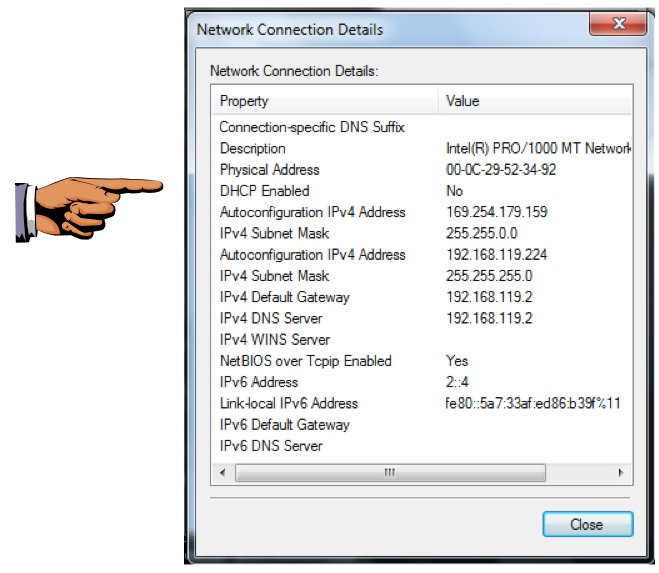
Windows 7 silently replaces the illegal IPv4 address with an autoconfiguration address, which will block Internet access.
Windows XP displays an error message when it detects an IP address conflicts, but Windows 7 does not.
Press the PrintScrn key in the upper-right portion of the keyboard. That will copy the whole desktop to the clipboard.
YOU MUST SUBMIT A FULL-DESKTOP IMAGE FOR FULL CREDIT!
On the host machine, not the virtual machine, click Start.
Type mspaint into the Search box and press the Enter key.
Click in the untitled - Paint window, and press Ctrl+V on the keyboard. The desktop appears in the Paint window.
In the upper left corner of the "untitled - Paint" window, click the little blue square icon (it looks like a floppy disk, something people used to use long ago--you might never have seen one).
Save the document with the filename "YOUR NAME Proj 9a", replacing "YOUR NAME" with your real name.
Near the top of the search results, click "View network connections".
In the Network Connections window, right-click "Local Area Connection" and click Properties.
In the "Local Area Connection Properties" box, double-click "Internet Protocol Version 4 (TCP/IPv4)".
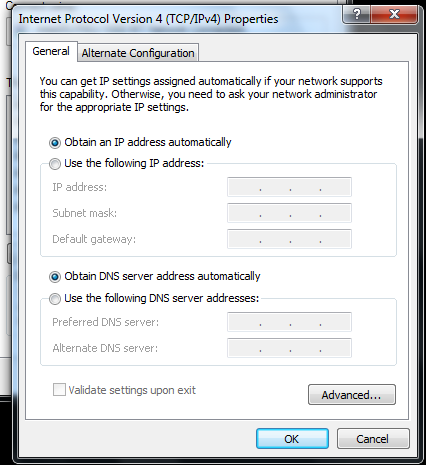
In the "Internet Protocol Version 4 (TCP/IPv4) Properties" box, click the "Obtain an IP address automatically" button.
In the "Internet Protocol Version 4 (TCP/IPv4) Properties" box, click the "Obtain DNS server address automatically" button, as shown below.
Click OK. Click OK.
ping google.com

On your keyboard, press the PrntScrn key.
Click Start, type in PAINT, and open Paint.
Press Ctrl+V to paste in the image of your desktop.
YOU MUST SUBMIT WHOLE-DESKTOP IMAGES TO GET FULL CREDIT.
Save the image with a filename of "Proj 9b from YOUR NAME".
Last Modified: 9-18-13 3:51 pm