I recommend skipping it for now.
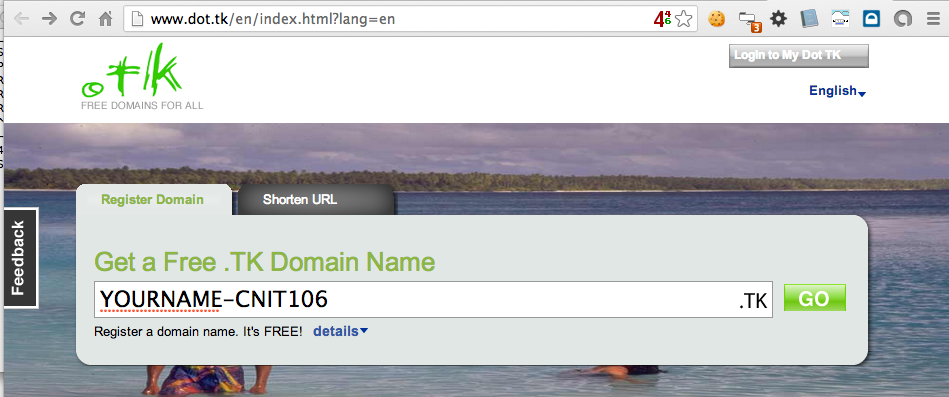
Enter a domain name containing your name, such as YOURNAME-CNIT40, as shown below. (Use CNIT40 instead of CNIT106.).
Click Go.
If your name is already taken, keep trying names till you find an unused one.
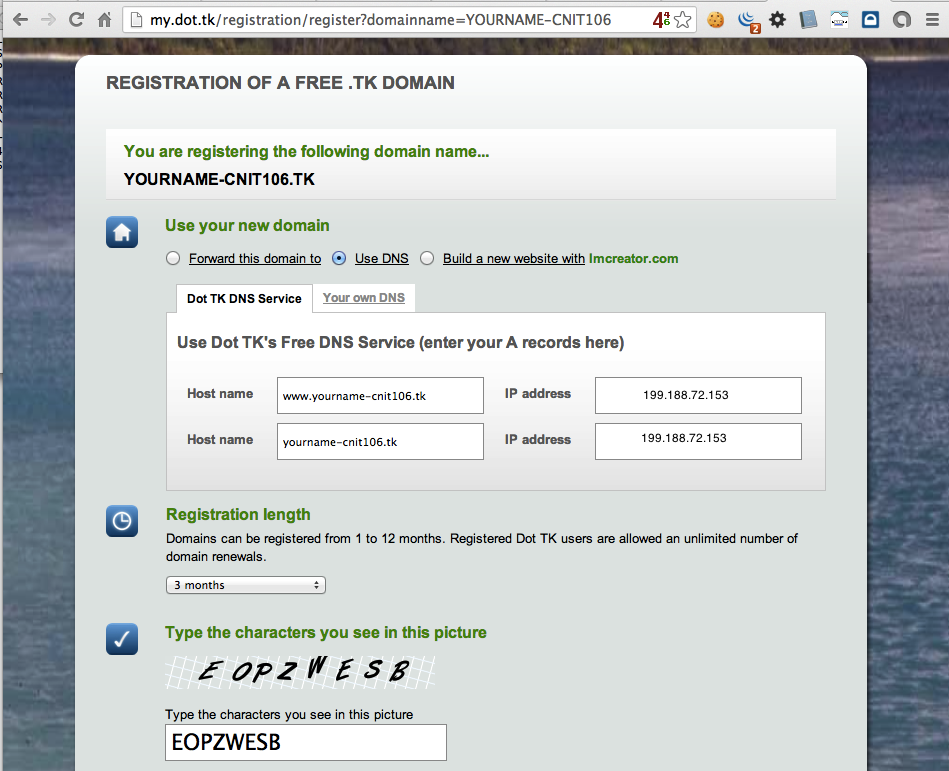
On the next page, click "Use DNS".
Enter 199.188.72.153 in both "IP address" fields, as shown below.
(This is one of my servers--I chose it just so something visible would appear in a browser. If you have a Web page, feel free to use the real address of your Web page instead.)
Fill in the characters, and, at the bottom, click Sign up.
Clear the "Share your new domain" check box.
At the bottom of the page, click the green "email address" link.
Enter your email address and click Next.
Enter a password and name when prompted to and click "Create Account".
Note: your password will be emailed to you in plaintext, so don't use anything important.
Open your email and click on the link.
Enter the confirmation code from the email message.
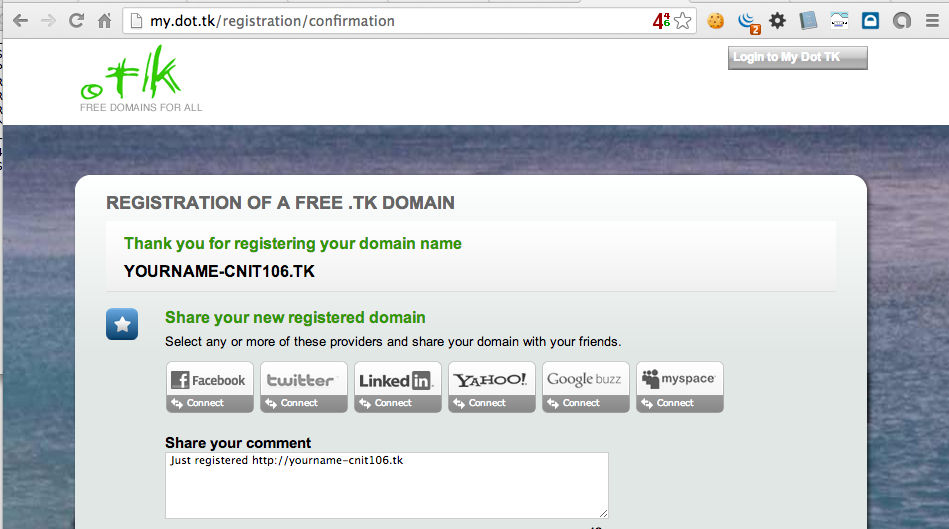
You see a message saying "Thank you for registering your domain name", as shown below.
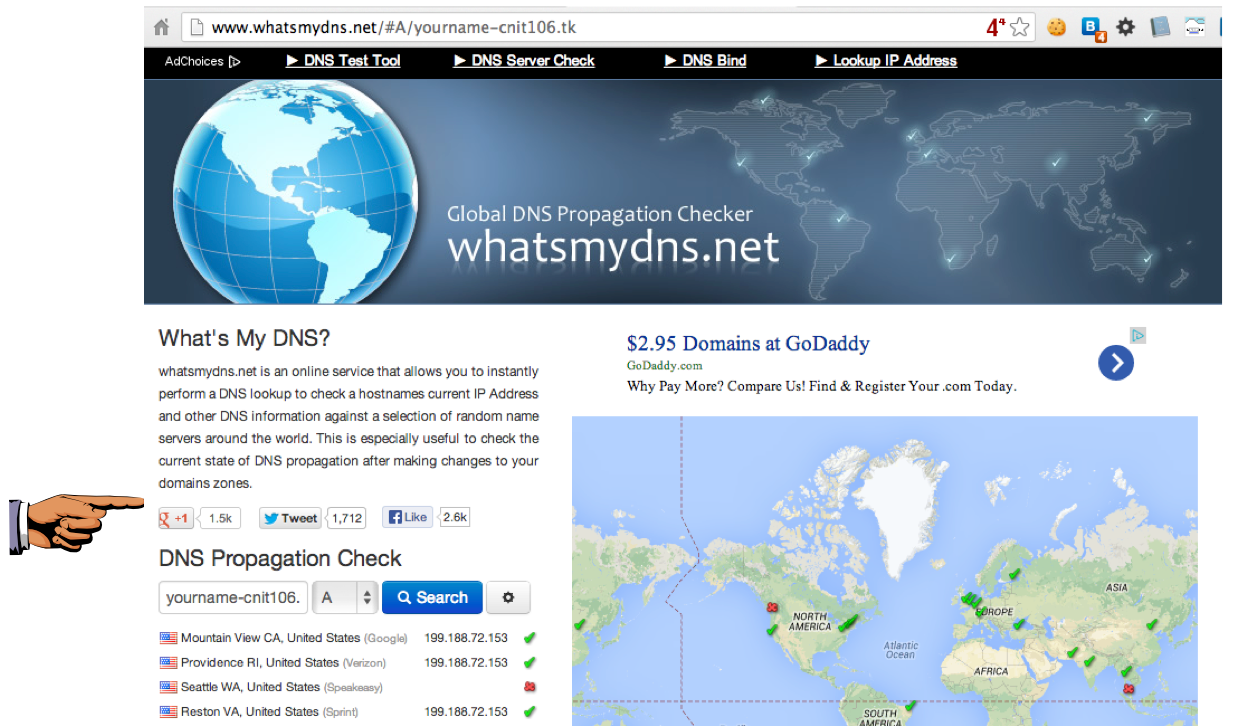
You may see a page like the one below, or you may get an error message, because the DNS records have not yet updated.

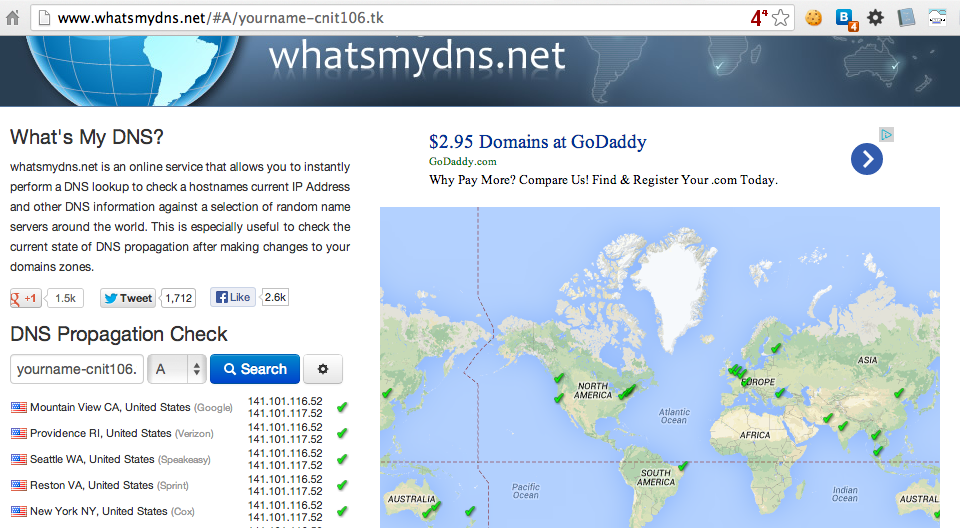
Enter your domain name, which should be something like YOURNAME-CNIT40.TK in the box and click the Search button.
You should see that some of the global servers now know about your domain, but probably not all of them, as shown below:
On your keyboard, press the PrntScrn key.
Click Start, type in PAINT, and open Paint.
Press Ctrl+V to paste in the image of your desktop.
YOU MUST SUBMIT WHOLE-DESKTOP IMAGES TO GET FULL CREDIT.
Save the image with a filename of "Proj 6xa from YOUR NAME".
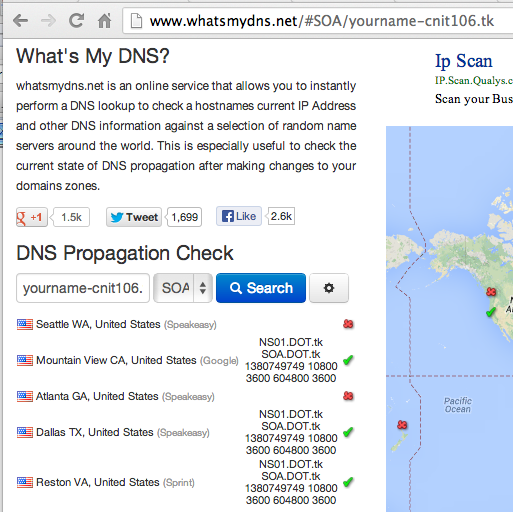
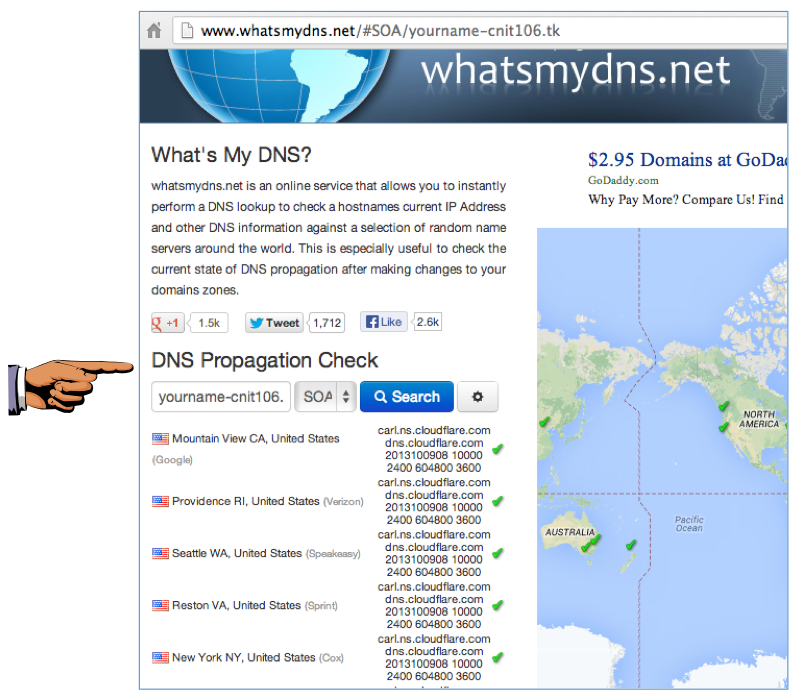
To find your SOA servers, in the whatsmydns.net page, change the query from A to SOA, as shown below.
Enter your domain name, which should be something like YOURNAME-CNIT40.TK and click Search.
You should see that your SOA servers are in the DOT.tk domain, as shown below.
In a browser, go to http://cloudflare.com
At the upper right, click "Sign up".
Fill in the form and click the "Create account now" button.
On the "Add a website" page. enter your domain name, as shown below.
Click the "+ Add website" button.

Wait while a little video plays.
When the "Scan complete" message appears, click the green Continue button.
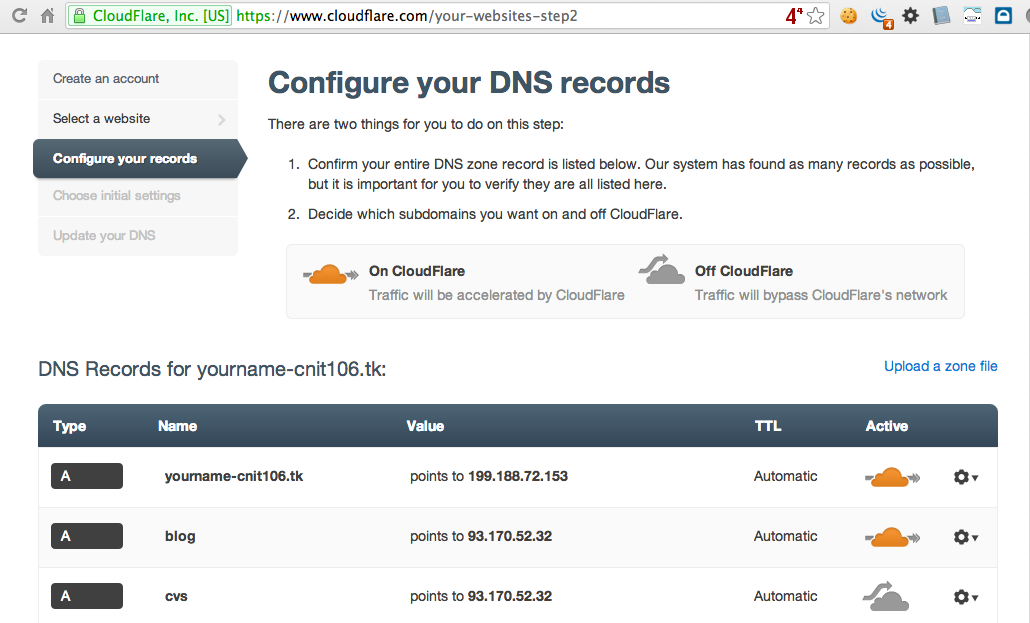
The "Configure your DNS records" page appears, as shown below.
The important record is the first one, assigning an IP address to the root of your domain, yourname-cnit40.tk.
Notice the yellow cloud icon next to your root domain record. This indicates that this server will be protected by Cloudflare.
Dot.tk has made a lot of records you aren't using, like "blog" and "cvs", which is sort of rude, but not important right now.
Scroll to the bottom of this page and click the green "I've added all my missing records, continue" button.
On the "Settings for yourname-cnit40.tk" page, accept the default settings, scroll to the bottom, and click the green Continue button.
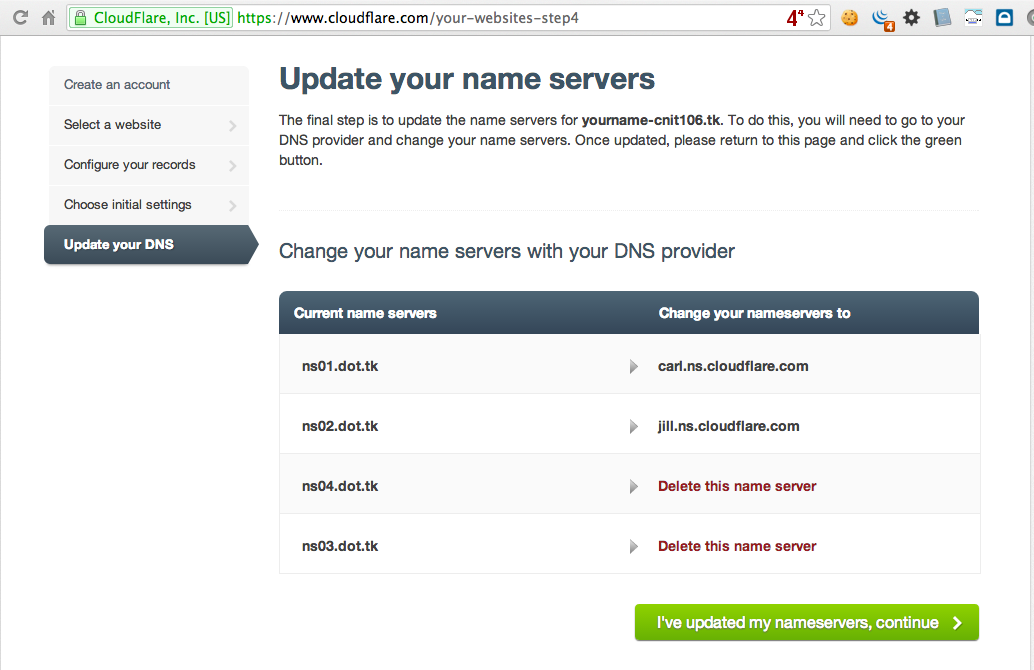
The next page tells you to update your nameservers, as shown below.
Leave this page open.
Open a new browser tab and go to
Log in with the credentials you chose previously in this project.
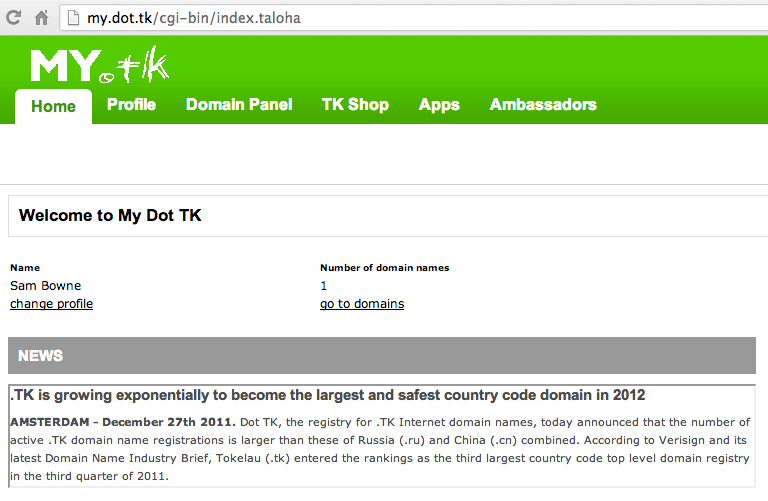
In the "Welcome to My Dot TK" page, click the "go to domains" link, as shown below.
On the "Domain Panel" page, click your domain name, which is something like yourname-cnit40.tk.
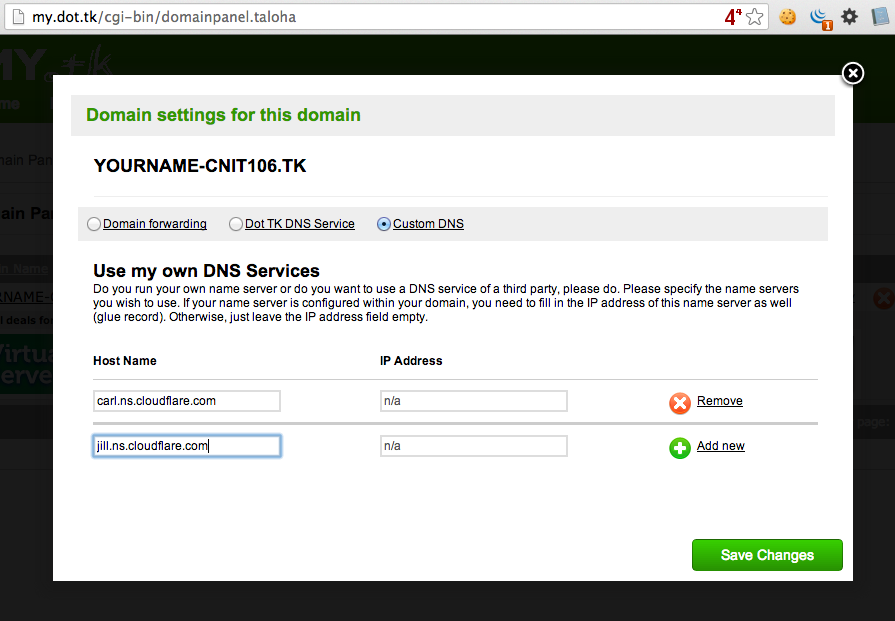
In the "Domain settings for this domain" box, at the top, click the "Custom DNS" button.
Enter the first hostnames Cloudflare told you to use in the "Host Name" box, as shown below.
Leave the "IP Address" box empty.
On the right side, click the "Add new" button.
Enter the second server Cloudflare specified.
Click the green "Save Changes" button. A message appears saying "Your settings are updated successfully".
Return to the Cloudflare page and click the green "I've updated my nameservers, continue" button.
A page appears saying "Congratulations! You've completed the setup...".
Enter your domain name, select a search of A, and click the blue Search button.
You should see two IPv4 records for your domain, both different from the IPv4 address you saw previously.
These are reverse proxy servers controlled by Cloudflare. No user will directly connect to your webserver anymore--all traffic passes through Cloudflare first.
You should see that your SOA servers are now cloudflare.com servers, as shown below.
On your keyboard, press the PrntScrn key.
Click Start, type in PAINT, and open Paint.
Press Ctrl+V to paste in the image of your desktop.
YOU MUST SUBMIT WHOLE-DESKTOP IMAGES TO GET FULL CREDIT.
Save the image with a filename of "Proj 6xb from YOUR NAME".
Last Modified: 11-17-16