udp
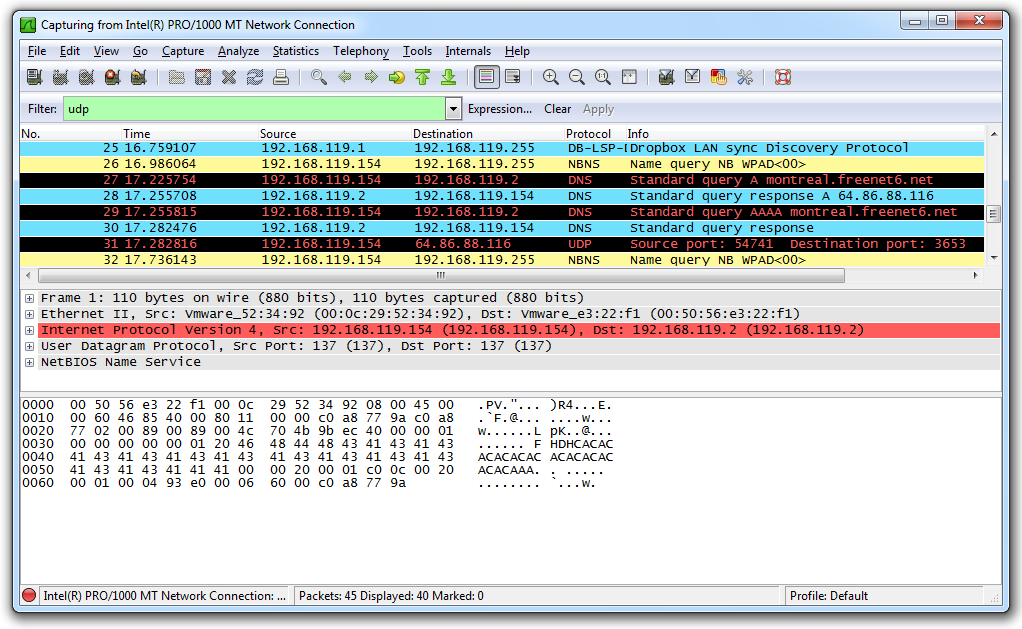
Packets scroll by, as shown below. These are background processes like Windows file-sharing and Dropbox running.
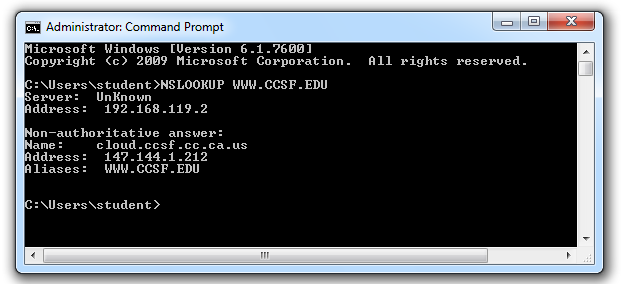
A Command Prompt window opens, as shown below. Type this command, followed by the Enter key:
NSLOOKUP WWW.CCSF.EDU
From the Wireshark menu bar, click Capture, Stop.
Look for these two DNS packets, as shown below:
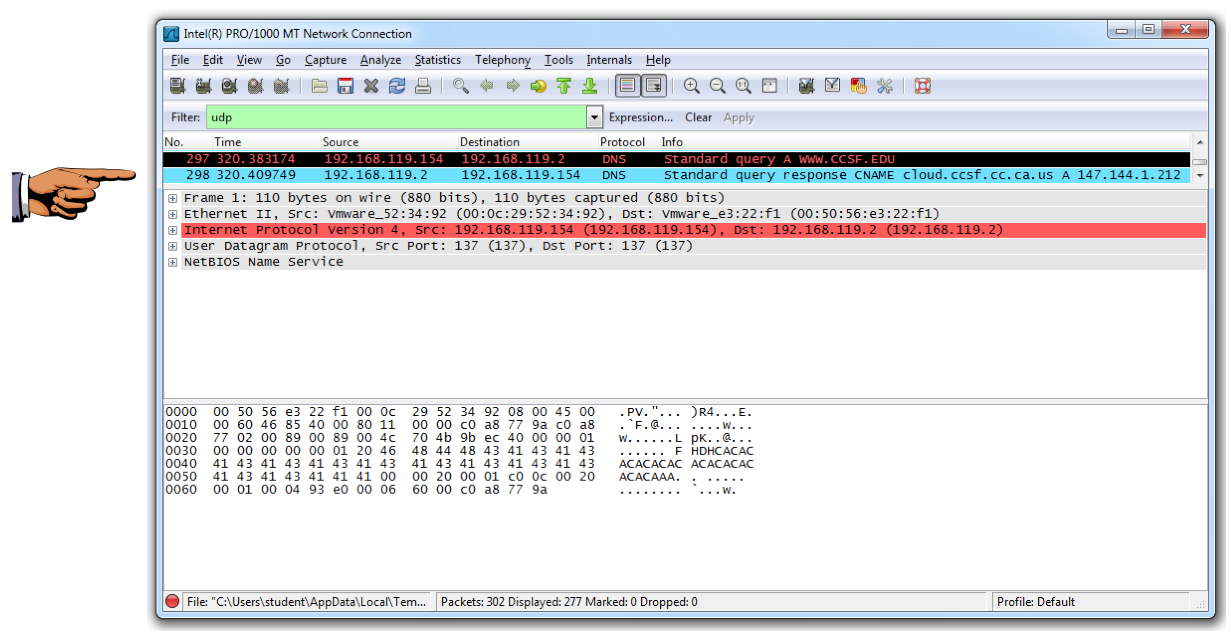
These packets show a request to find the numerical IP address for the domain name WWW.CCSF.EDU and the response, delivering that request.
On your keyboard, press the PrntScrn key.
Click Start, type in PAINT, and open Paint.
Press Ctrl+V to paste in the image of your desktop.
YOU MUST SUBMIT WHOLE-DESKTOP IMAGES TO GET FULL CREDIT.
Save the image with a filename of "Proj 2a from YOUR NAME".
At the upper left of the Wireshark window, in the "Filter" bar, delete the "udp" filter and type
tcp.port==23
This hides all the packets except TCP to or from port 23.
TELNET HILLS.CCSF.EDU
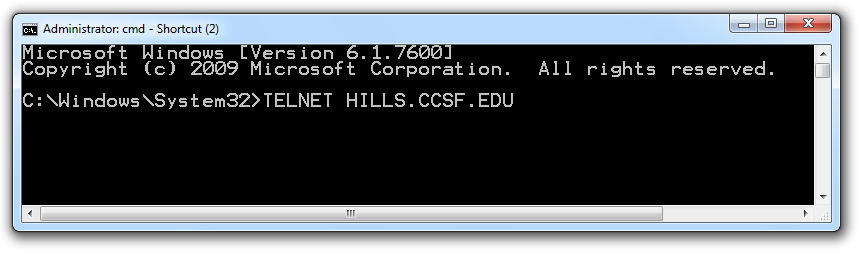
You see a screen asking you to log in. Ignore that and switch to the Wireshark window.Troubleshooting
If telnet is not recognized, you need to install it:Click Start, "Control Panel", Programs, "Turn Windows features on or off", and turn on the "Telnet Client".
You should see the three packets shown below, followed by other packets that aren't important right now.
Make sure you see these three packets in order, as described in the Info column:
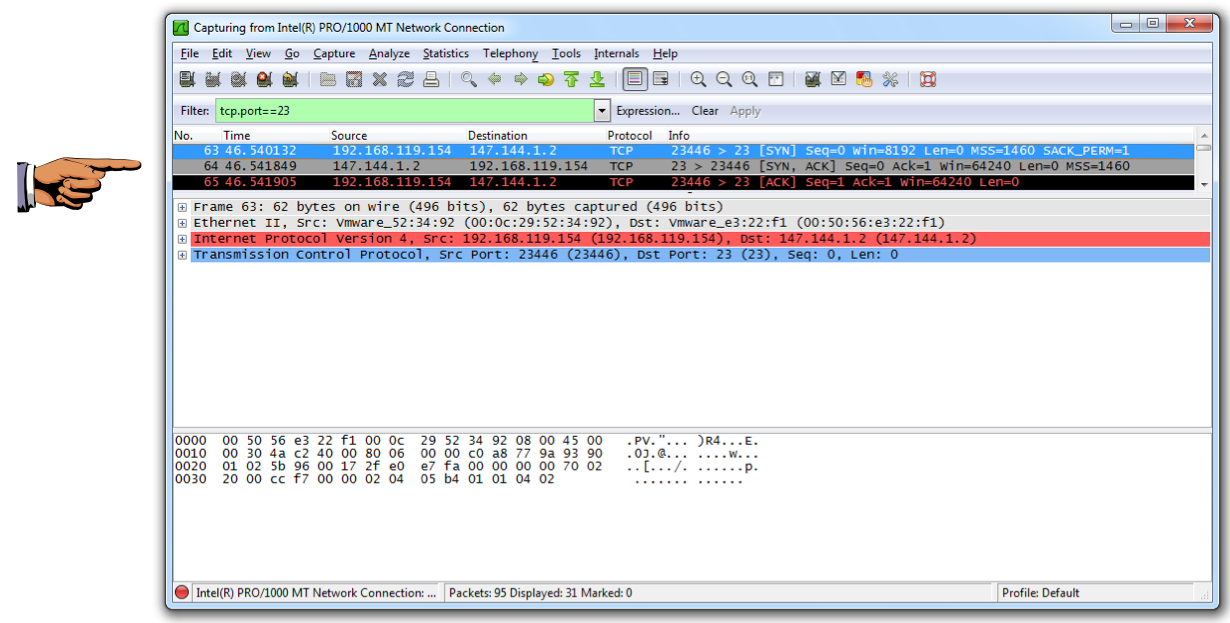
This is a TCP Handshake, opening a reliable channel of communication between two devices.
This particular one lets you use a very old command-line tool named Telnet, which should have been abandoned decades ago but, unfortunately, still remains in use.
On your keyboard, press the PrntScrn key.
Click Start, type in PAINT, and open Paint.
Press Ctrl+V to paste in the image of your desktop.
YOU MUST SUBMIT WHOLE-DESKTOP IMAGES TO GET FULL CREDIT.
Save the image with a filename of "Proj 2b from YOUR NAME".
Email the images to cnit.106sam@gmail.com with a subject of "Project 2 from YOUR NAME".
Last modified: 8-21-13 9 pm