In the search results, click "Windows Firewall".
Be careful not to click "Windows Firewall with Advanced Security".
On the left side of the "Windows Firewall" box, click "Turn Windows Firewall on or off".
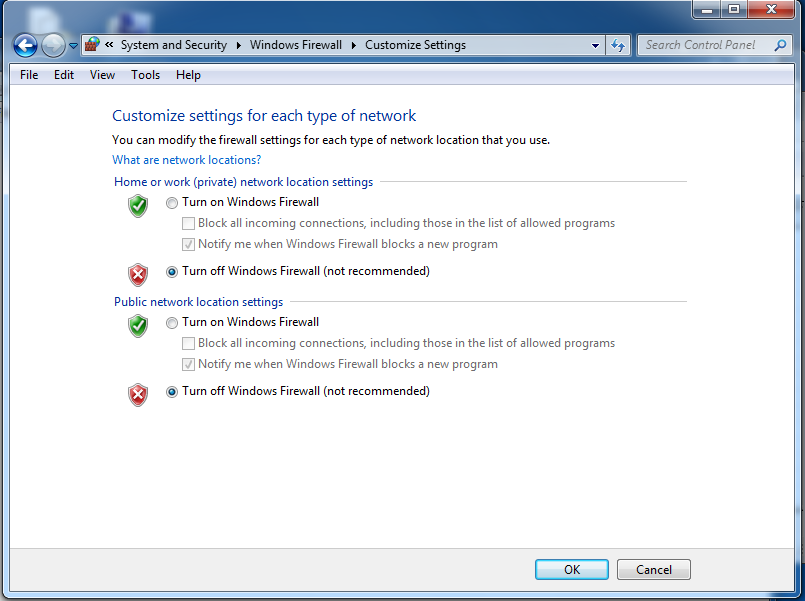
Click both "Turn off Windows Firewall (not recommended)" buttons, as shown below:
In the "Customize Settings" box, click the OK button.
In the search results, click "Windows Firewall".
Be careful not to click "Windows Firewall with Advanced Security".
On the left side of the "Windows Firewall" box, click "Turn Windows Firewall on or off".
Click the Off" button, as shown below:
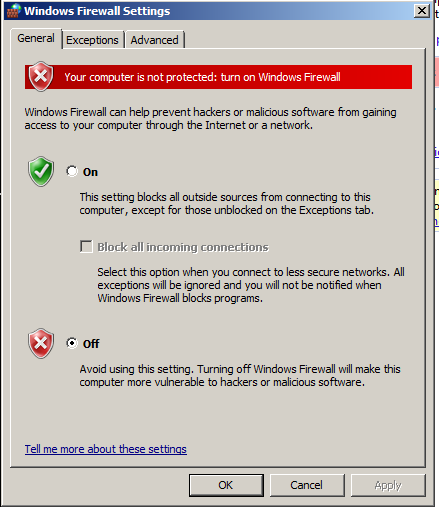
In the "Windows Firewall Settings" box, click the OK button.
Press the Enter key.
A Command Prompt window opens.
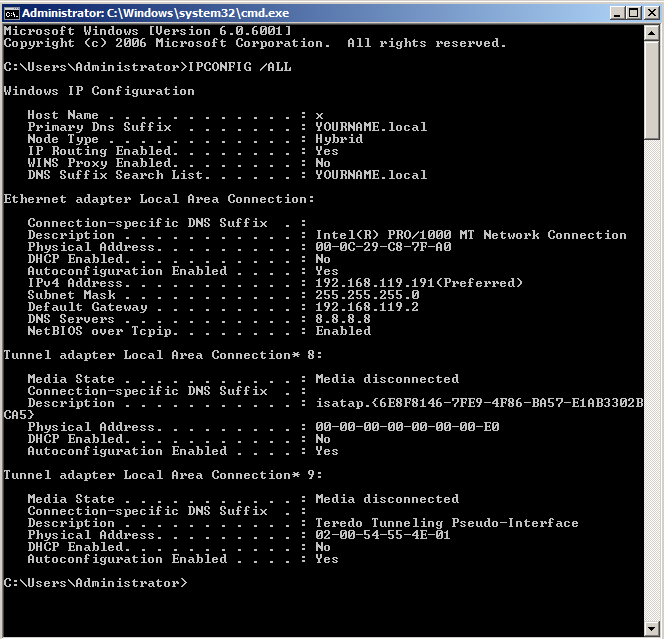
Execute this command:
IPCONFIG /ALL
Make a note of these addresses--you will need them later.
There are extra adapters below the real one in the output, such as "Tunnel adapter Local Area Connection* 8"--these are virtual adapter Windows makes for IPv6 tunneling. Just ignore them.
In the Search results, right-click cmd.exe and click "Run as administrator", as shown below:
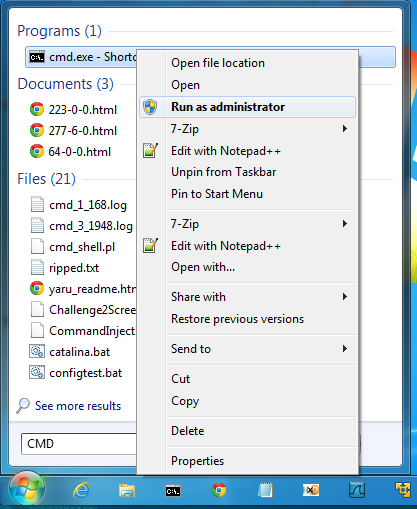
If a "User Account Control" box pops up, click Yes.
An Administrator Command Prompt window opens.
Execute this command:
IPCONFIG /ALL
Find your SCANNER's "IPv4 Address", as shown below.
There are extra adapters below the real one in the output, such as "VMwnet" and "Tunnel" adapters. Just ignore them.
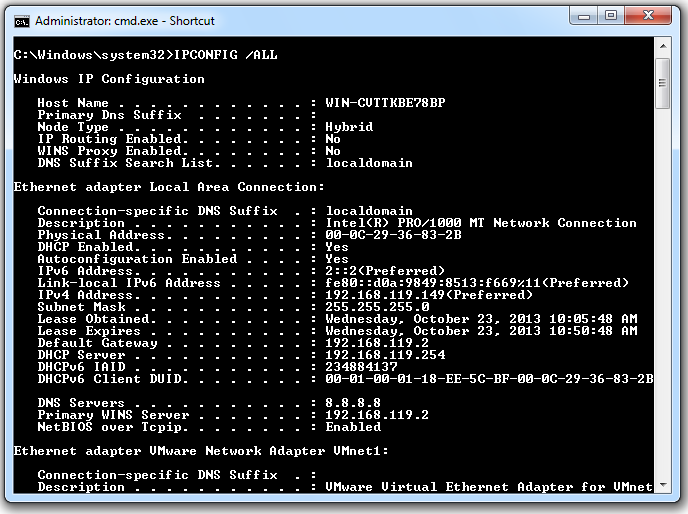
Make sure the SCANNER is on the same subnet as the TARGET. In the images above, they are both on the 192.168.119.0/24 network.
If the two machines are not on the same subnet, this project won't work. The most common cause of that is using virtual machines with different networking settings. To fix it, configure all virtual network adapters to "Bridged" mode, as you did in the earlier project introducing virtual machines.
PING 192.168.119.191
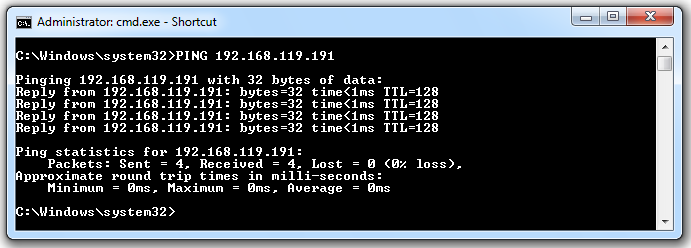
If you don't see replies, you need to troubleshoot your network before proceeding. Make sure all firewalls are off and that all virtual networks are set to "Bridged" mode.
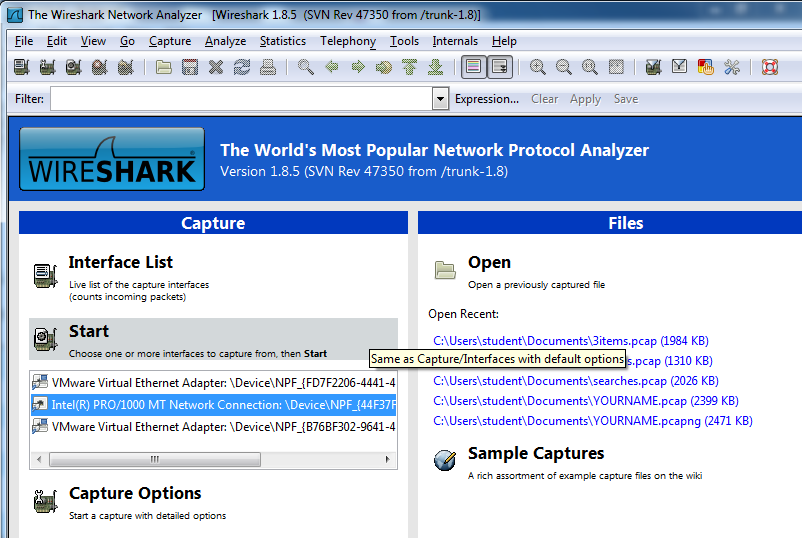
In Wireshark, on the left side, highlight your real network adapter (not a virtual one), as shown below, and click Start.
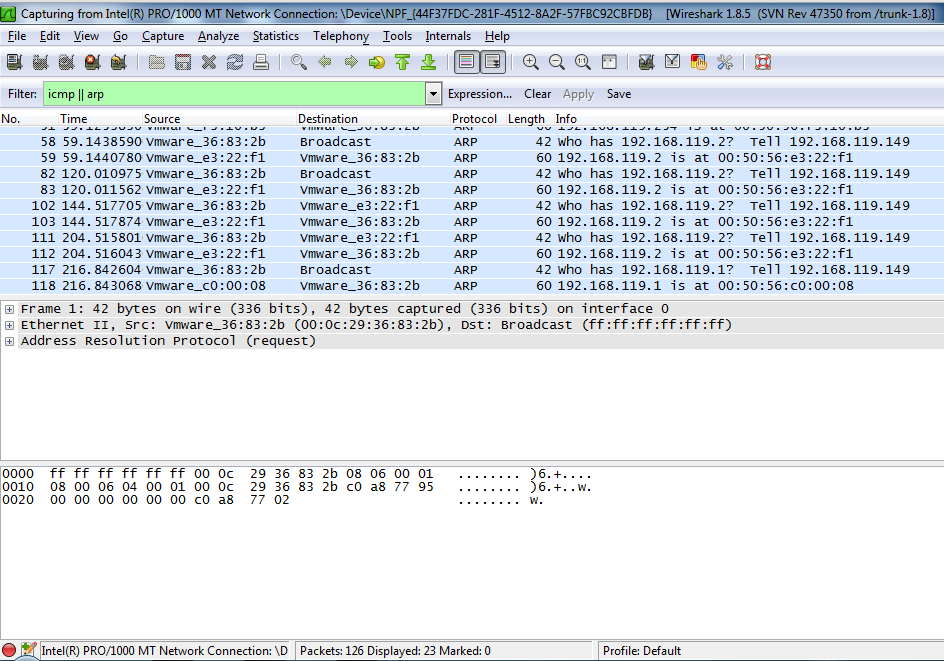
In Wireshark, at the top left, in the Filter bar, type in this text, and then press the Enter key:
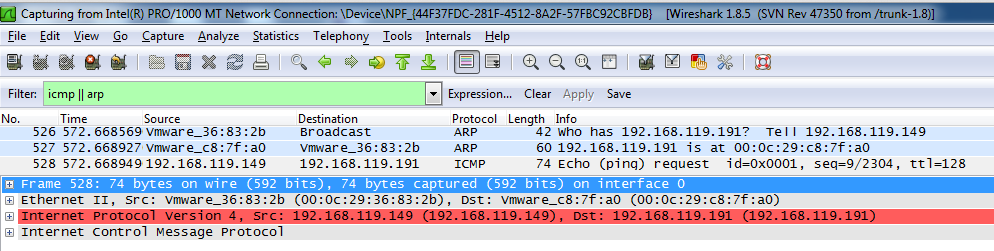
icmp || arp
The filter bar turns green, and you will probably see some ARP packets, as shown below.
Configure Wireshark to show ICMP traffic, as shown below.
Replace the IP address with the IP address of your TARGET machine.
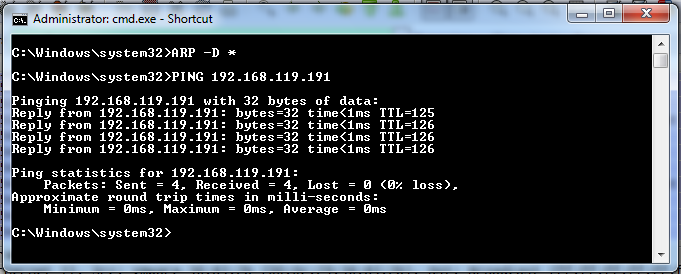
The first command clears the ARP cache, so your SCANNER machine forgets all its information about the TARGET machine.
Therefore, before it can send the PING, it must perform an ARP request and receive an ARP reply, which we will examine.
ARP -D *

PING 192.168.119.191
On the SCANNER machine, in the Wireshark window, click Capture, Stop.
Scroll up if necessary, and find the three packets shown below, in this order. Make sure you understand all the addresses in the packets:
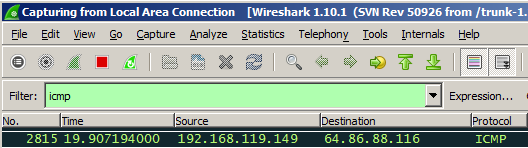
Scroll up if necessary, and find an ICMP Echo (ping) request from the SCANNER IP address, as shown below.
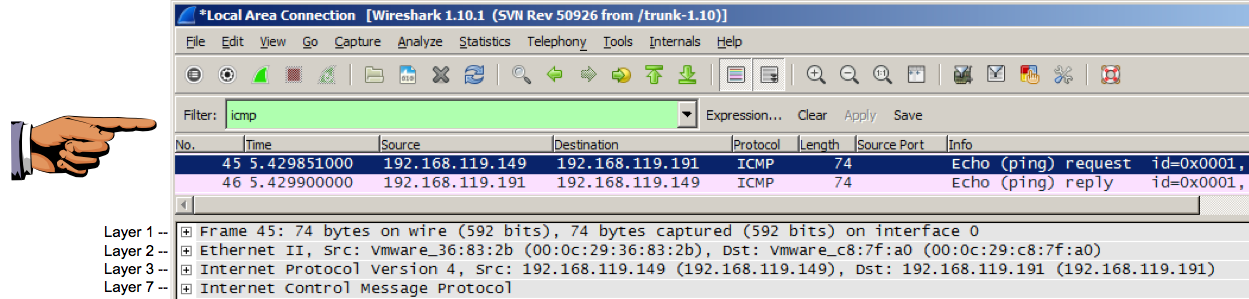
In the upper pane of Wireshark, click the "ICMP Echo (ping) request" line to highlight it.
In the middle pane of Wireshark, examine the four sections, labelled by OSI layers in the image below. Make sure you can find these things:
Click on the host machine's taskbar to make it the recipient of keypresses.
On your keyboard, press the PrntScrn key.
Click Start, type in PAINT, and open Paint.
Press Ctrl+V to paste in the image of your desktop.
YOU MUST SUBMIT WHOLE-DESKTOP IMAGES TO GET FULL CREDIT.
Save the image with a filename of "Proj 16a from YOUR NAME".
A box pops up, asking "Do you want to save...". Click "Continue without Saving".
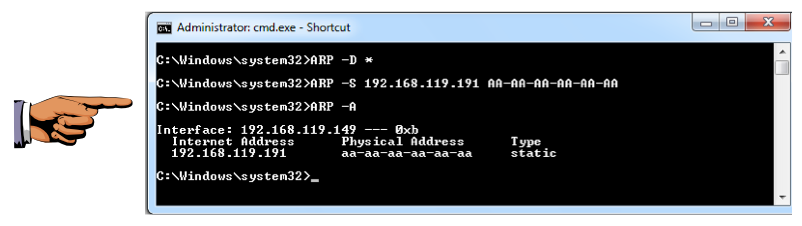
Replace the IP address with the IP address of your TARGET machine in the second and third command, but leave the strange MAC address "AA-AA-AA-AA-AA-AA" as it is.
The first command clears the ARP cache.
The second command adds a false entry to the ARP cache, saying the MAC address of the target is "AA-AA-AA-AA-AA-AA".
The third command displays the ARP cache, showing the new strange value "aa-aa-aa-aa-aa-aa", as shown below.
ARP -D *

ARP -S 192.168.119.191 AA-AA-AA-AA-AA-AA

ARP -A
Troubleshooting
You may see the correct MAC address in the cache instead of "aa-aa-aa-aa-aa-aa" if you execute the commands too slowly.If that happens, use the up-arrow key on the keyboard to repeat the three commands more quickly.
Click on the host machine's taskbar to make it the recipient of keypresses.
On your keyboard, press the PrntScrn key.
Click Start, type in PAINT, and open Paint.
Press Ctrl+V to paste in the image of your desktop.
YOU MUST SUBMIT WHOLE-DESKTOP IMAGES TO GET FULL CREDIT.
Save the image with a filename of "Proj 16b from YOUR NAME".
Replace the IP address with the IP address of your TARGET machine.
PING 192.168.119.191
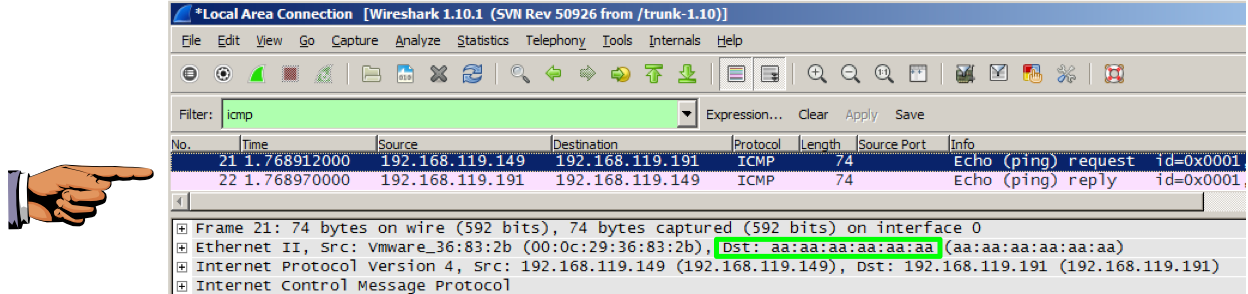
Scroll up if necessary, and find an ICMP Echo (ping) request from the SCANNER IP address, as shown below.
In the upper pane of Wireshark, click the "ICMP Echo (ping) request" line to highlight it.
In the middle pane of Wireshark, you should see "Dst: aa:aa:aa:aa:aa:aa", as shown below.
Click on the host machine's taskbar to make it the recipient of keypresses.
On your keyboard, press the PrntScrn key.
Click Start, type in PAINT, and open Paint.
Press Ctrl+V to paste in the image of your desktop.
YOU MUST SUBMIT WHOLE-DESKTOP IMAGES TO GET FULL CREDIT.
Save the image with a filename of "Proj 16c from YOUR NAME".
It happens because Wireshark places your network adapter into "promiscuous mode", so it accepts any packet that arrives, whether its destination MAC address is correct or not.
This is a simple way to detect network adapters in promiscuous mode. Send a packet with the correct IP address but the wrong MAC address. If the target replies, it is in promiscuous mode.
There is no reason to use promiscuous mode for normal networking, but hackers use it often, so it's useful to know which machines are using it.
Last Modified: 10-23-13 11:58 am