
To use IPv6, you must use a tunnel, which puts the IPv6 packets inside IPv4 packets.
You will configure a Freenet6 client on Windows to enable IPv6 access to the Internet.
Tunnels violate the OSI model, as explained below.
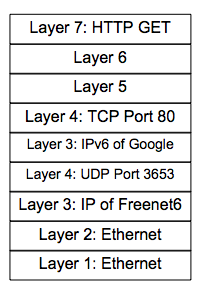
This 9-layer packet has a layer 3 address which is the IPv4 address of a Freenet server, and at layer 4 it uses UDP Port 3653.
The Freenet server is a gateway from the IPv4 internet to the IPv6 internet.
It takes the IPv6 packet inside the 9-layer packet and sends it off on the IPv6 Internet.
Click the "DOWNLOAD latest gogoCLIENT" button.
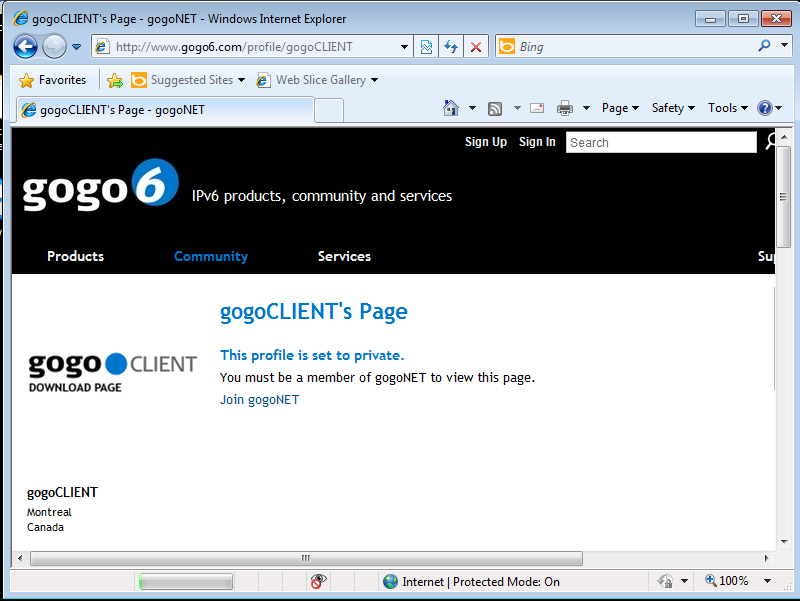
A message appears, saying "You must be a member of gogoNET to view this page", as shown below:
Click "join gogoNET".
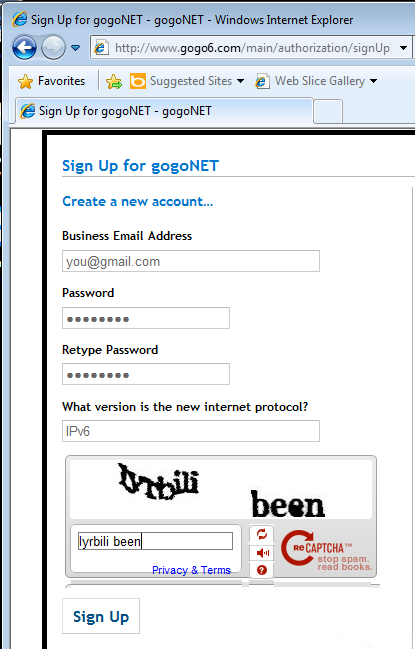
Fill in the form, as shown below. The answer to the question "What version is the new Internet protocol?" is IPv6.
Check your email. Click the link sent to you by gogoNET.
A "Profile" page appears. Fill it in.
When you manage to answer all the annoying questions, you get to the download page.
Download the correct version for your OS; most likely, the 32-bit Windows version.
Install the gogoCLIENT with the default options.
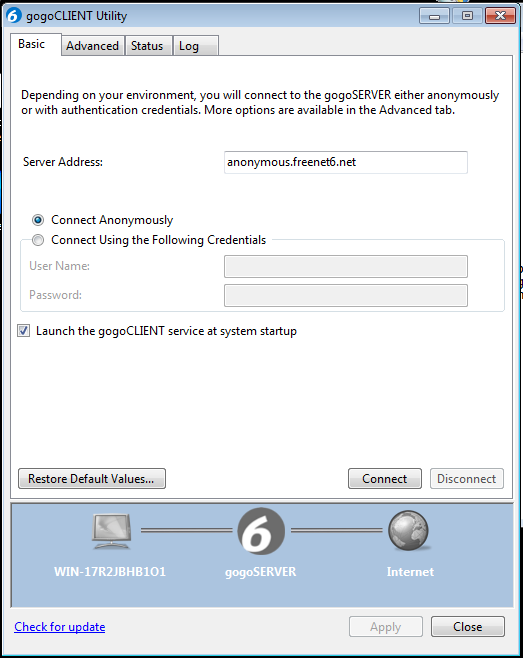
It should launch, as shown below.
If it connects, you can proceed with the project.
But it fails more often than it works. That's because the freenet6 servers go down a lot.
If it won't connect, try changing the server address from anonymous.freenet6.net to one of these:
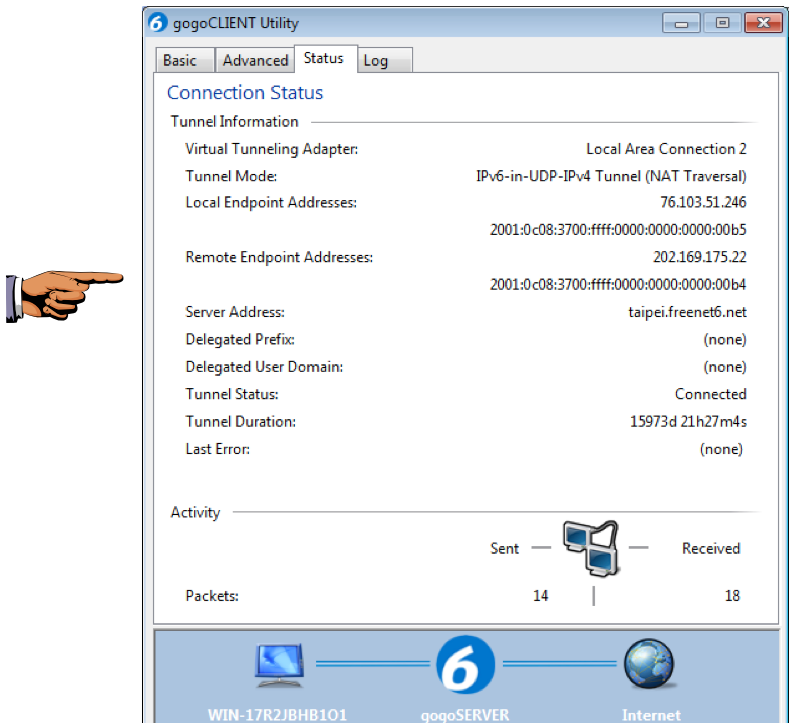
Once you are connected, click the Status tab to show your addresses, as shown below:
On your keyboard, press the PrntScrn key.
Click Start, type in PAINT, and open Paint.
Press Ctrl+V to paste in the image of your desktop.
YOU MUST SUBMIT WHOLE-DESKTOP IMAGES TO GET FULL CREDIT.
Save the image with a filename of "Proj 11a from YOUR NAME".
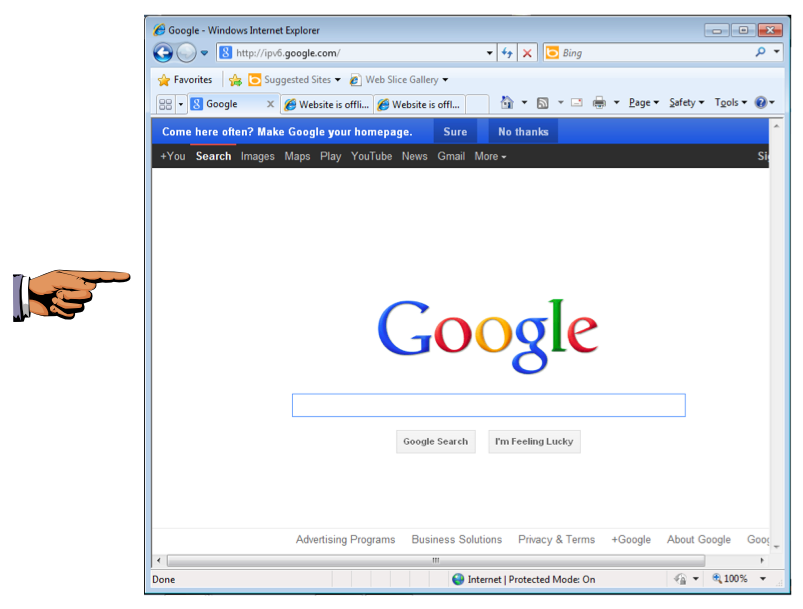
The page should load, as shown below:
On your keyboard, press the PrntScrn key.
Click Start, type in PAINT, and open Paint.
Press Ctrl+V to paste in the image of your desktop.
YOU MUST SUBMIT WHOLE-DESKTOP IMAGES TO GET FULL CREDIT.
Save the image with a filename of "Proj 11b from YOUR NAME".
In the Web browser, click the Refresh button (it is at the top, with two curved arrows).
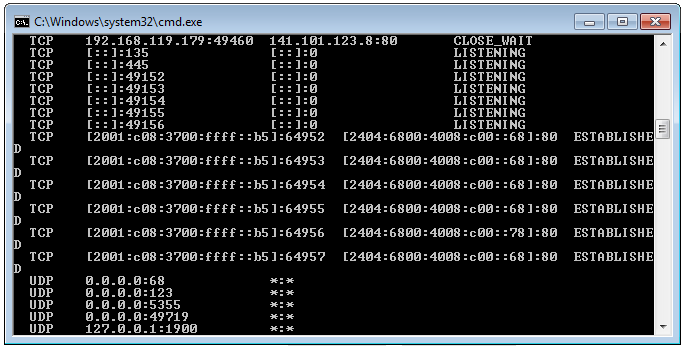
In the Command Prompt window, execute this command:
NETSTAT -AN
In the Command Prompt window, execute this command:
TRACERT IPV6.GOOGLE.COM
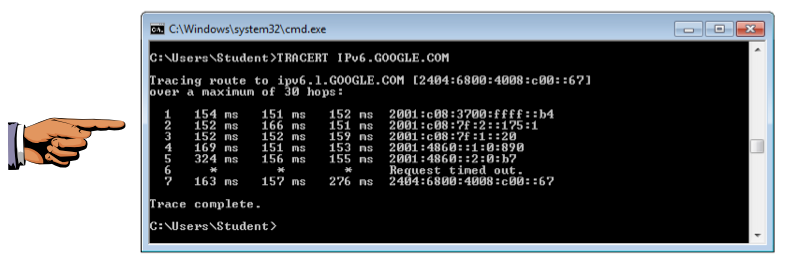
The number of hops may be different, and the address on the endpoint may be different, because Google has many servers, but you should see an IPv6 address on the last hop, as shown above.
On your keyboard, press the PrntScrn key.
Click Start, type in PAINT, and open Paint.
Press Ctrl+V to paste in the image of your desktop.
YOU MUST SUBMIT WHOLE-DESKTOP IMAGES TO GET FULL CREDIT.
Save the image with a filename of "Proj 11c from YOUR NAME".
Last Modified: 10-3-13 12:35 pm