Project 10: TeamViewer (10 pts. extra credit)
Warning!
As of Oct 9, 2013, CCSF has apparently blocked TeamViewer so you
can't do this project on the campus network.
So I made it an optional extra-credit project.
You'll have to do it at home or through some
other network.
What You Need
- Two Windows computers, real or virtual. They both need Internet access, but they don't need to be on the same LAN. The instructions assume you are using two Windows 7 machines.
Purpose
TeamViewer is a great free way to remotely control
a computer. That helps perform technical support,
and it's also a good security measure if you
are in an untrusted network, like public
Wi-Fi.
Selecting Two Machines
Choose one machine to be the Server. The other one is the Client.
Downloading Team Viewer--Do This on Both Machines
On the Server machine, open a browser and go to
http://teamviewer.com
Click the "Download" button. Save the TeamViewer_Setup.exe file to your desktop.
Double-click the installer and install the software with the default options. When it asks "How do you want to use TeamViewer?", select "personal / non-commercial use".
Repeat the installation on the Client machine.
Waiting for a Session--Do This on the Server
On the Server machine, TeamViewer should have started automatically after the installation completed. If it did not, click Start, type in TEAM, and click "TeamViewer".
If a "Windows Firewall" box opens warning you that the firewall has blocked a connection, click "Allow Access".
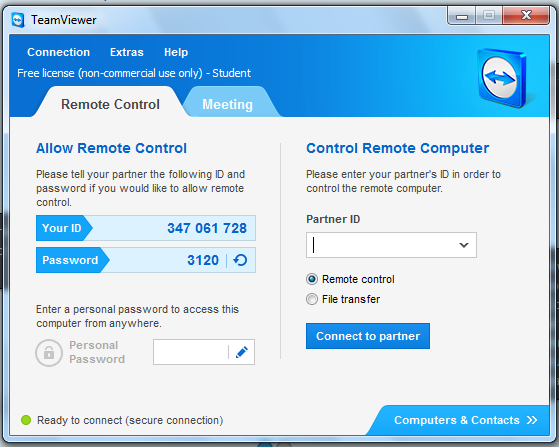
You should see a TeamViewer box with an ID and Password, as shown below.
Creating a Session--Do This on the Client
On the Client machine, TeamViewer should have started automatically after the installation completed. TeamViewer should have started automatically after the installation completed. If it did not, click Start, type in TEAM, and click "TeamViewer".
If a "Windows Firewall" box opens warning you that the firewall has blocked a connection, click "Allow Access".
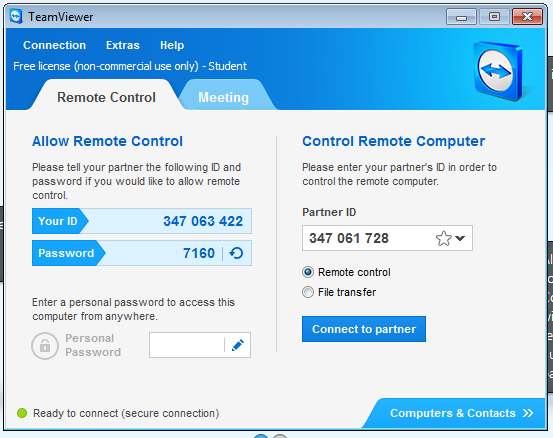
On the right side of the Teamviewer window,
in the Partner ID field, enter your Server
machine's TeamViewer ID, as shown below.
Click "Connect to Partner".
 When a box pops up asking for your password,
use the password shown on your Server
computer.
When a box pops up asking for your password,
use the password shown on your Server
computer.
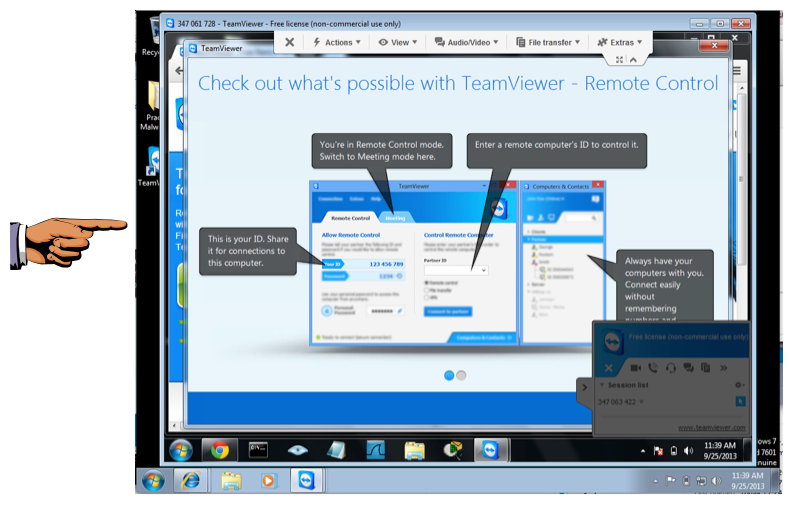
On the Client, you should see a "TeamViewer" window with the Server's desktop inside it, as shown below.
Saving the Screen Image
Click on the Client machine's taskbar or desktop,
to move the focus out of the TeamViewer window.
Make sure you can see the Teamviewer window,
as shown above.
On your keyboard, press the PrntScrn key.
Click Start, type in PAINT, and
open Paint.
Press Ctrl+V to paste in the image of your
desktop.
YOU MUST SUBMIT WHOLE-DESKTOP IMAGES TO GET FULL CREDIT.
Save the image
with a filename of "Proj 10 from YOUR NAME".
Turning in Your Project
Email the image to: cnit.106sam@gmail.com with a subject line of Proj 10 From Your Name, replacing Your Name with your own first and last name. Send a Cc to yourself.
Last Modified: 10-9-13 8:18 pm