Also, a later project will use the VPN connection to connect clients to the IPv6 Internet through NAT, so this project is necessary preparation.
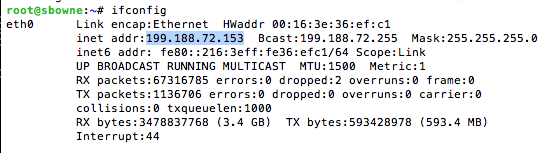
ifconfig
The image below shows mine, which was 199.188.72.153:
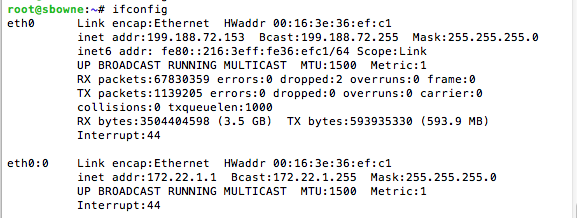
To add a second address to interface eth0, on your Linux server, execute these commands:
ifconfig eth0:0 172.22.1.1/24

ifconfig
sudo apt-get install openswan -y
"Use an X.509m certificate for this host?"
Accept the default selection of No and press Enter
A message appears saying
"Old runlevel management suspended"
Press Enter
sudo nano /etc/ipsec.conf
Paste in this code, replacing YOUR.SERVER.IP.ADDRESS with your server's IPv4 address:
version 2.0
config setup
    nat_traversal=yes
    virtual_private=%v4:10.0.0.0/8,%v4:192.168.0.0/16,%v4:172.16.0.0/12
    oe=off
    protostack=netkey

conn L2TP-PSK-NAT
    rightsubnet=vhost:%priv
    also=L2TP-PSK-noNAT

conn L2TP-PSK-noNAT
    authby=secret
    pfs=no
    auto=add
    keyingtries=3
    rekey=no
    ikelifetime=8h
    keylife=1h
    type=transport
    left=YOUR.SERVER.IP.ADDRESS
    leftprotoport=17/1701
    right=%any
    rightprotoport=17/%any
sudo nano /etc/ipsec.secrets
Paste in this code, replacing YOUR.SERVER.IP.ADDRESS with your server's IPv4 address, and YourSharedSecret with something only you know.
YOUR.SERVER.IP.ADDRESS %any: PSK "YourSharedSecret"
nano stop-redirects
for each in /proc/sys/net/ipv4/conf/*
do
    echo 0 > $each/accept_redirects
    echo 0 > $each/send_redirects
done
On your Linux server, execute this command:
sudo bash stop-redirects
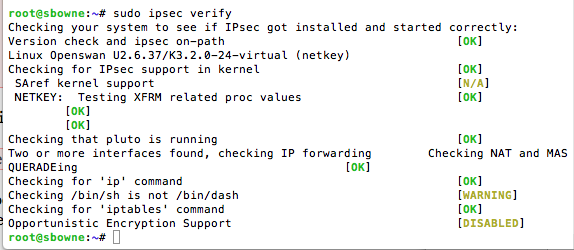
sudo ipsec verify
sudo /etc/init.d/ipsec restart
tail -f /var/log/auth.log
You can test the connection from any OS. I have instructions below for Windows 7 and Mac OS X below.
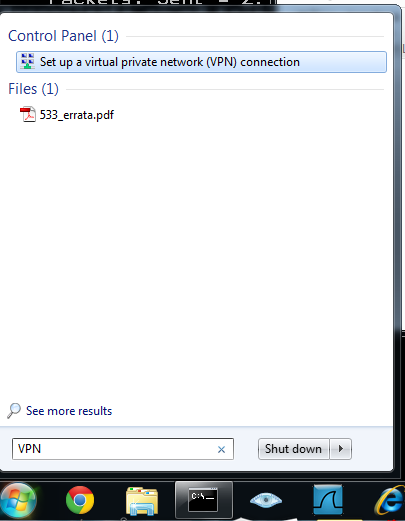
Click on "Set up a virtual private network (VPN) connection", as shown below:
In the "Create a VPN connection" box, enter your Linux server's IPv4 address in the "Internet Address" box.
Check the "Don't connect now" box, as shown below:
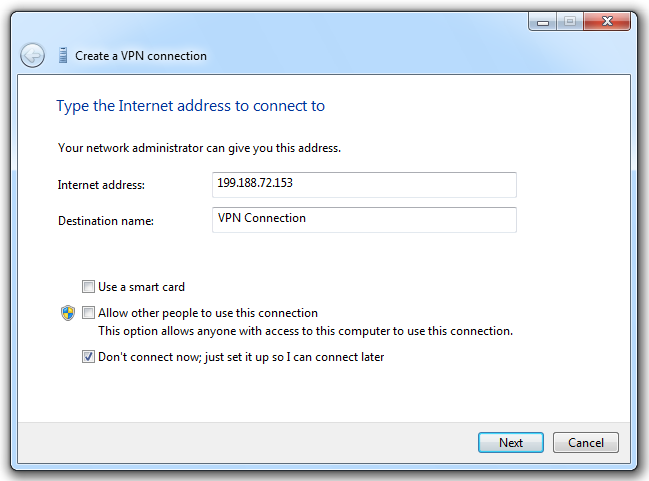
Click Next.
Enter username student and password "P@ssw0rd" as shown below:
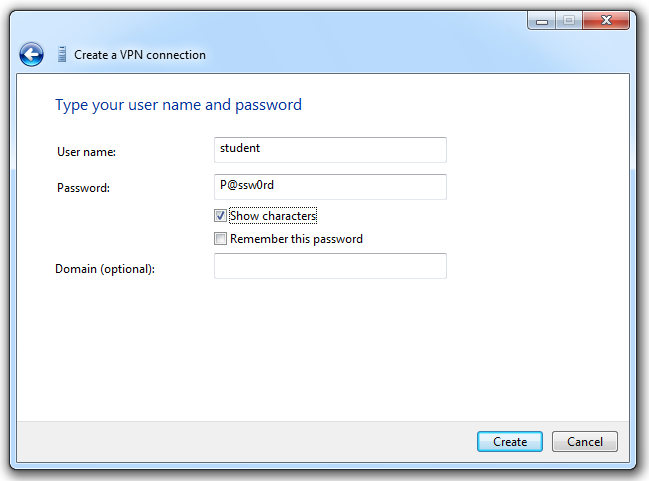
Click Create.
A box appears saying "The connection is ready to use".
Click Close.
On your Windows 7 desktop, click Start and type in CONNECTIONS
Click on "View network connections".
In the "Network Connections" window, right-click "VPN Connection" and click Properties.
In the "VPN Connection Properties" sheet, click the Security tab, as shown below:
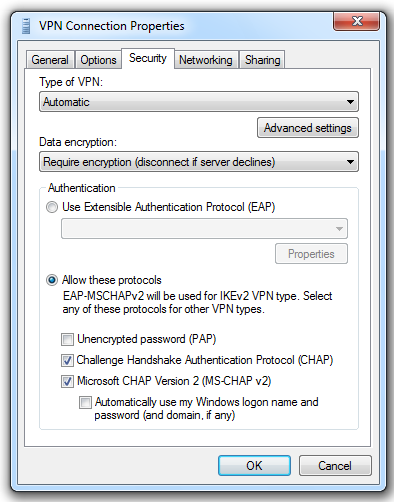
Click the "Advanced settings" button.
In the "Advanced Properties" box, click the "Use preshared key for authentication" button, and enter the key in the Key box, as shown below:
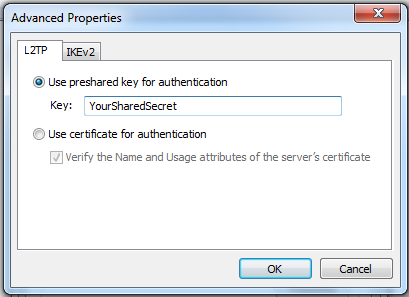
Click the OK button.
In the "VPN Connection Properties" sheet, click the OK button.
In the "Network Connections" window, right-click "VPN Connection" and click Connect.
In the "Connect VPN Connection" box, enter a username of student and a password of P@ssw0rd, as shown below:

Click the Connect button.
The connection will fail, because the VPN is not yet completely configured. That's normal at this point.
If you are using a PC, skip the Mac OS X instructions below, and resume at the "Observing the Correct Operation of IPsec" section below.
System Preferences opens, as shown below:
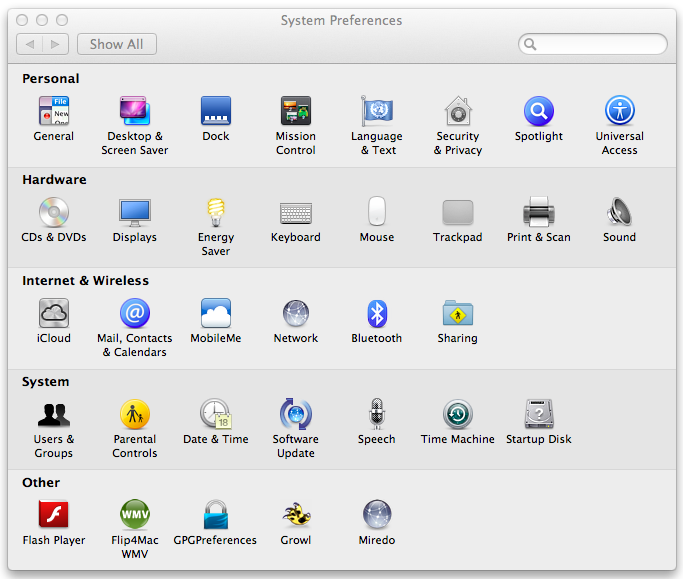
In the "Internet & Wireless" section, click Network.
The "Network" box opens, as shown below:
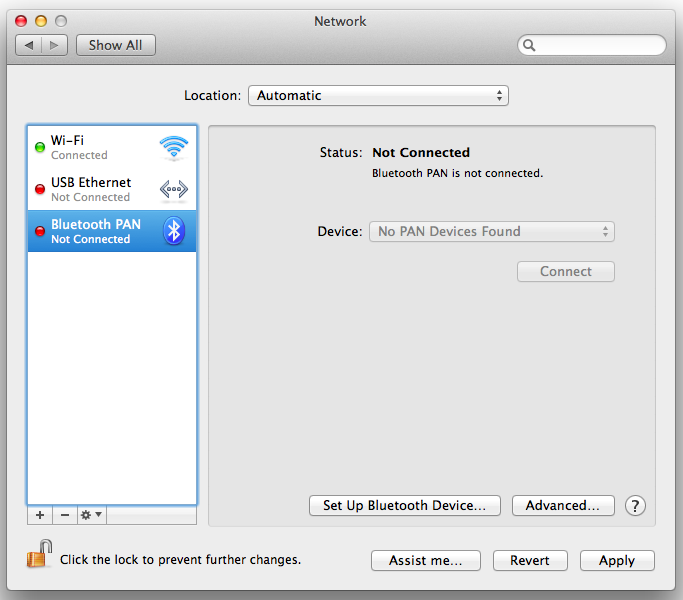
In the lower left corner, click the little + sign.
In the pop-up box, select an Interface of VPN, as shown below:
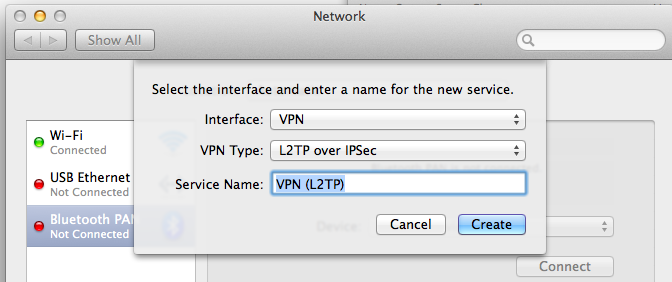
Click the Create button.
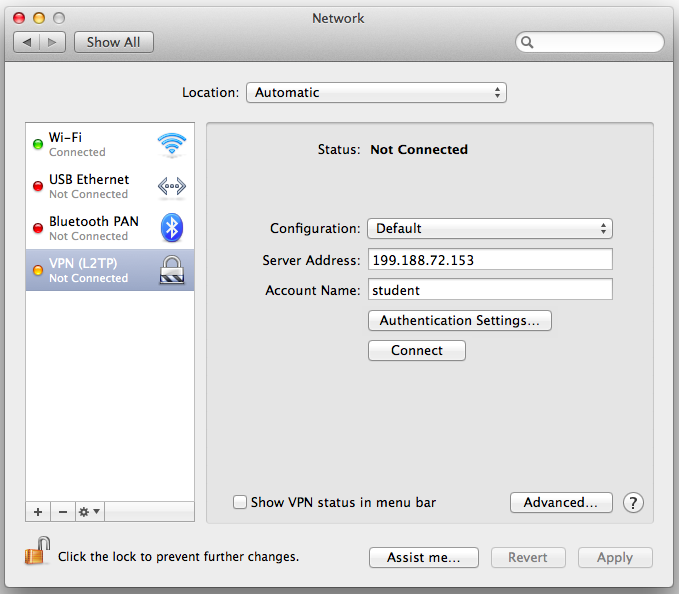
In the right pane, enter your Linux server's IPv4 address, which will be different from the IP address shown in the figure below, and an "Account Name" of student
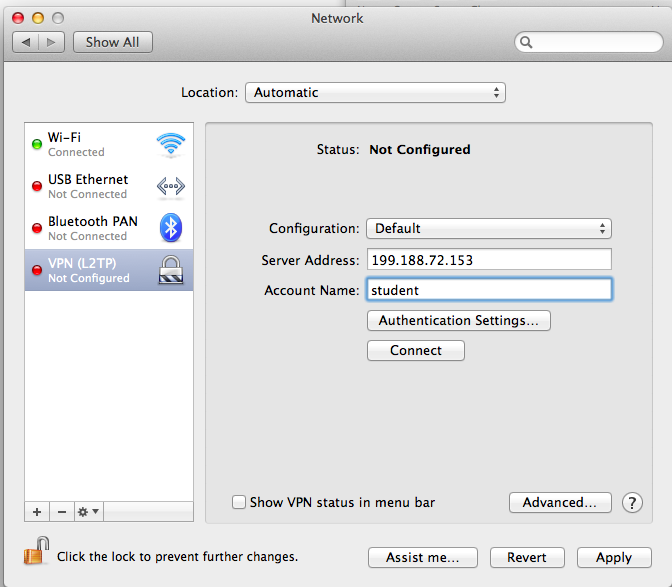
Click the "Authentication Settings..." button.
In the next box, enter your password of P@ssw0rd in the top box, and the shared secret in the lower box, as shown below:
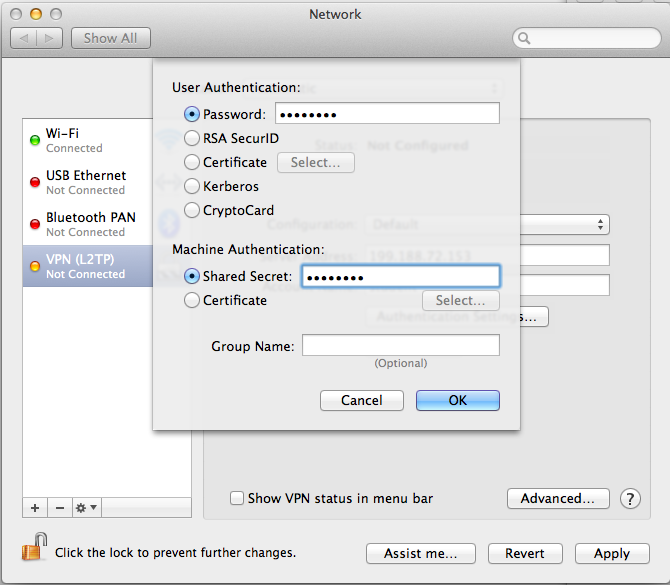
Click the OK button.
Click the Connect button.
Click the Apply button. The connection will fail, because the VPN is not yet completely configured. That's normal at this point.
Look on the Linux server. You should see this message:
STATE_QUICK_R2: IPsec SA established
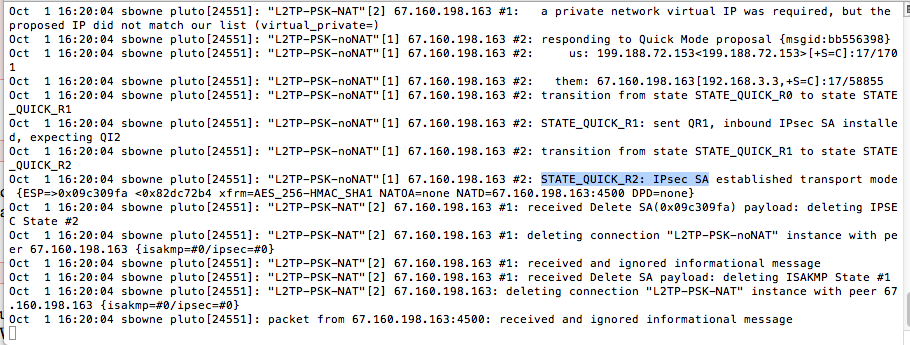
That shows that IPsec is working properly!
sudo apt-get install xl2tpd -y
nano /etc/xl2tpd/xl2tpd.conf
Paste in this code:
[global]
ipsec saref = no

[lns default]
ip range = 172.22.1.2-172.22.1.99
local ip = 172.22.1.1
refuse chap = yes
refuse pap = yes
require authentication = yes
ppp debug = yes
pppoptfile = /etc/ppp/options.xl2tpd
length bit = yes
sudo apt-get install ppp -y
nano /etc/ppp/options.xl2tpd
Paste in this code:
require-mschap-v2
ms-dns 8.8.8.8
ms-dns 8.8.4.4
asyncmap 0
auth
crtscts
lock
hide-password
modem
debug
name l2tpd
proxyarp
lcp-echo-interval 30
lcp-echo-failure 4
nano /etc/ppp/chap-secrets
Paste in this code (for better security, replace P@ssw0rd with a better password, of course):
# user         server      password        ip
student        l2tpd       P@ssw0rd        *
sudo /etc/init.d/xl2tpd restart
The "VPN Connection" icon should turn blue, indicating a connection, as shown below:

On your Windows 7 PC, in the "Network Connections" window, right-click "VPN Connection" and click Status.
In the "VPN Connection Status" box, click the Details tab.
You should see a connection with "Encryption" of "IPsec: AES 128", as shown below:
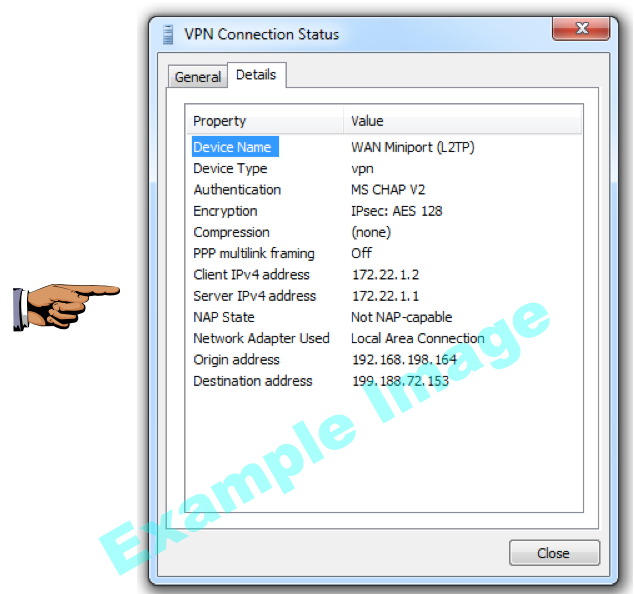
Save a screen shot of this image with the filename
Proj 4x from Your NameSince you are using Windows, skip ahead to the "Turning In your Project" section.
In the "Internet & Wireless" section, click Network.
The "Network" box opens, as shown below:
On the left, click "VPN (L2TP)".
On the right, click the Connect button.
You should see a green dot, with the message "VPN (L2TP) Connected", as shown below:
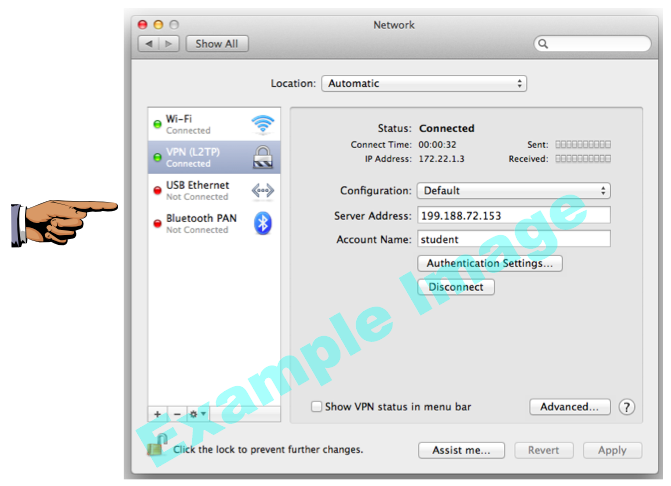
Save a screen shot of this image with the filename
Proj 4x from Your Name
Proj 4x from Your Name
http://www.cryptocracy.com/blog/2012/05/13/ipsec-slash-l2tp-vpn-server-with-ubuntu-precise/
https://blog.perfect-privacy.com/2010/08/28/l2tp-ipsec-vpn-with-windows-7/
http://comments.gmane.org/gmane.network.openswan.user/19249
https://www.publicvpn.com/support/MacOSX105.php
Last modified 7 pm 10-5-12