https://oasis-open.github.io/cti-documentation/
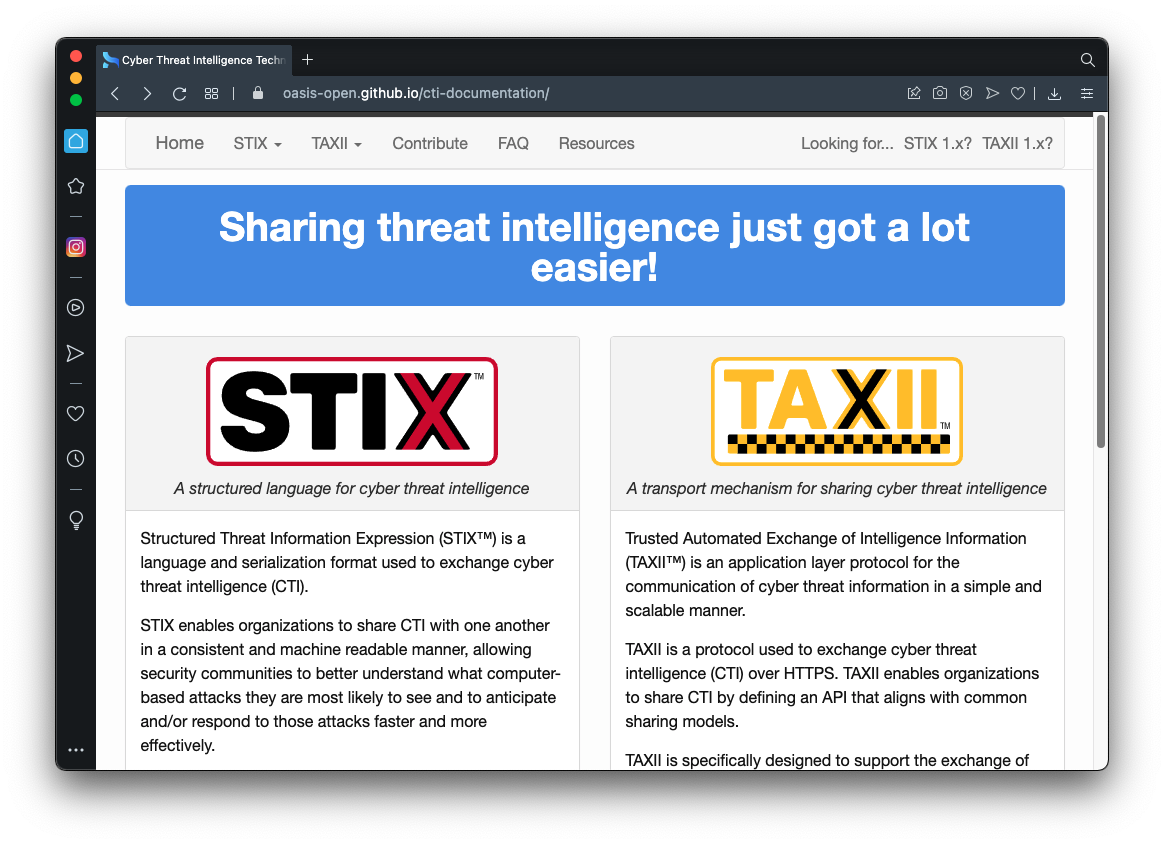
Read the description of TAXII, as shown below.
sudo apt update
sudo apt install curl -y
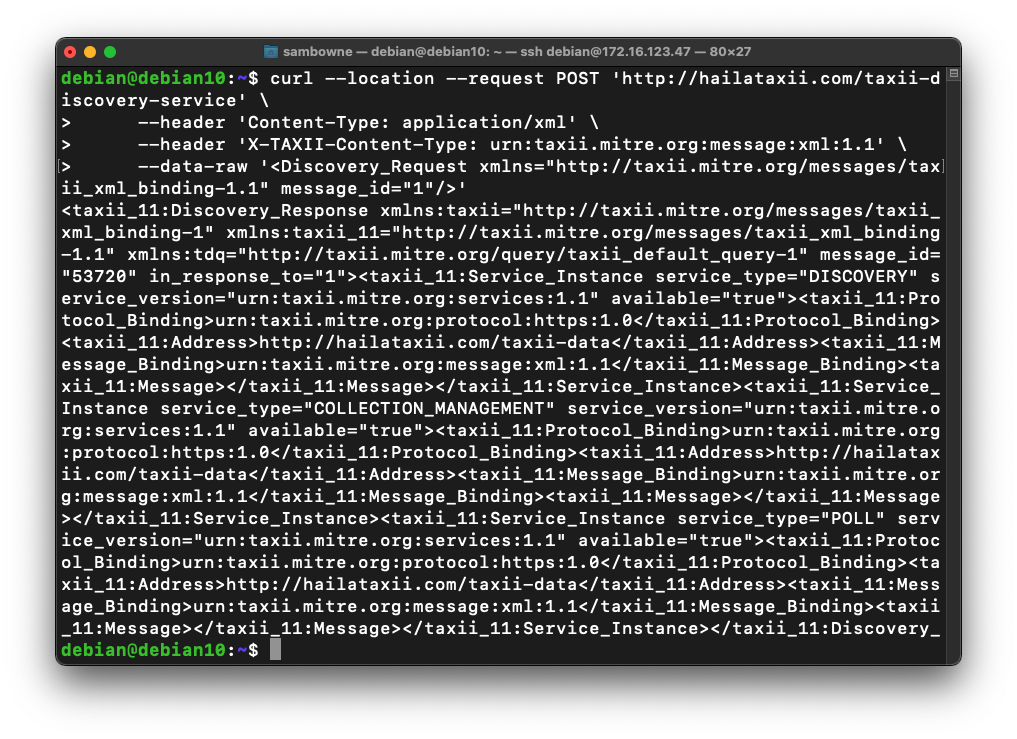
curl --location --request POST 'http://hailataxii.com/taxii-discovery-service' \
--header 'Content-Type: application/xml' \
--header 'X-TAXII-Content-Type: urn:taxii.mitre.org:message:xml:1.1' \
--data-raw '<Discovery_Request xmlns="http://taxii.mitre.org/messages/taxii_xml_binding-1.1" message_id="1"/>'
You can install it on the Linux machine itself if you prefer, as long as it's a desktop version with a GUI.
Download and install Burp Suite Community Edition here:
https://portswigger.net/burp/communitydownload
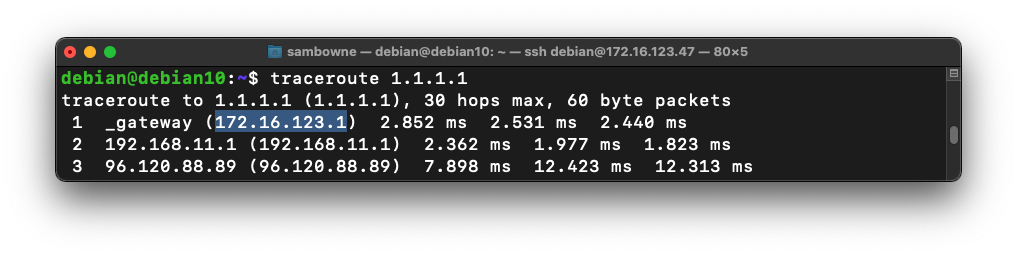
traceroute 1.1.1.1
At the "Welcome to Burp Suite" page click the orange Next button.
At the "Select the configuration" page click the orange "Start Burp" button.
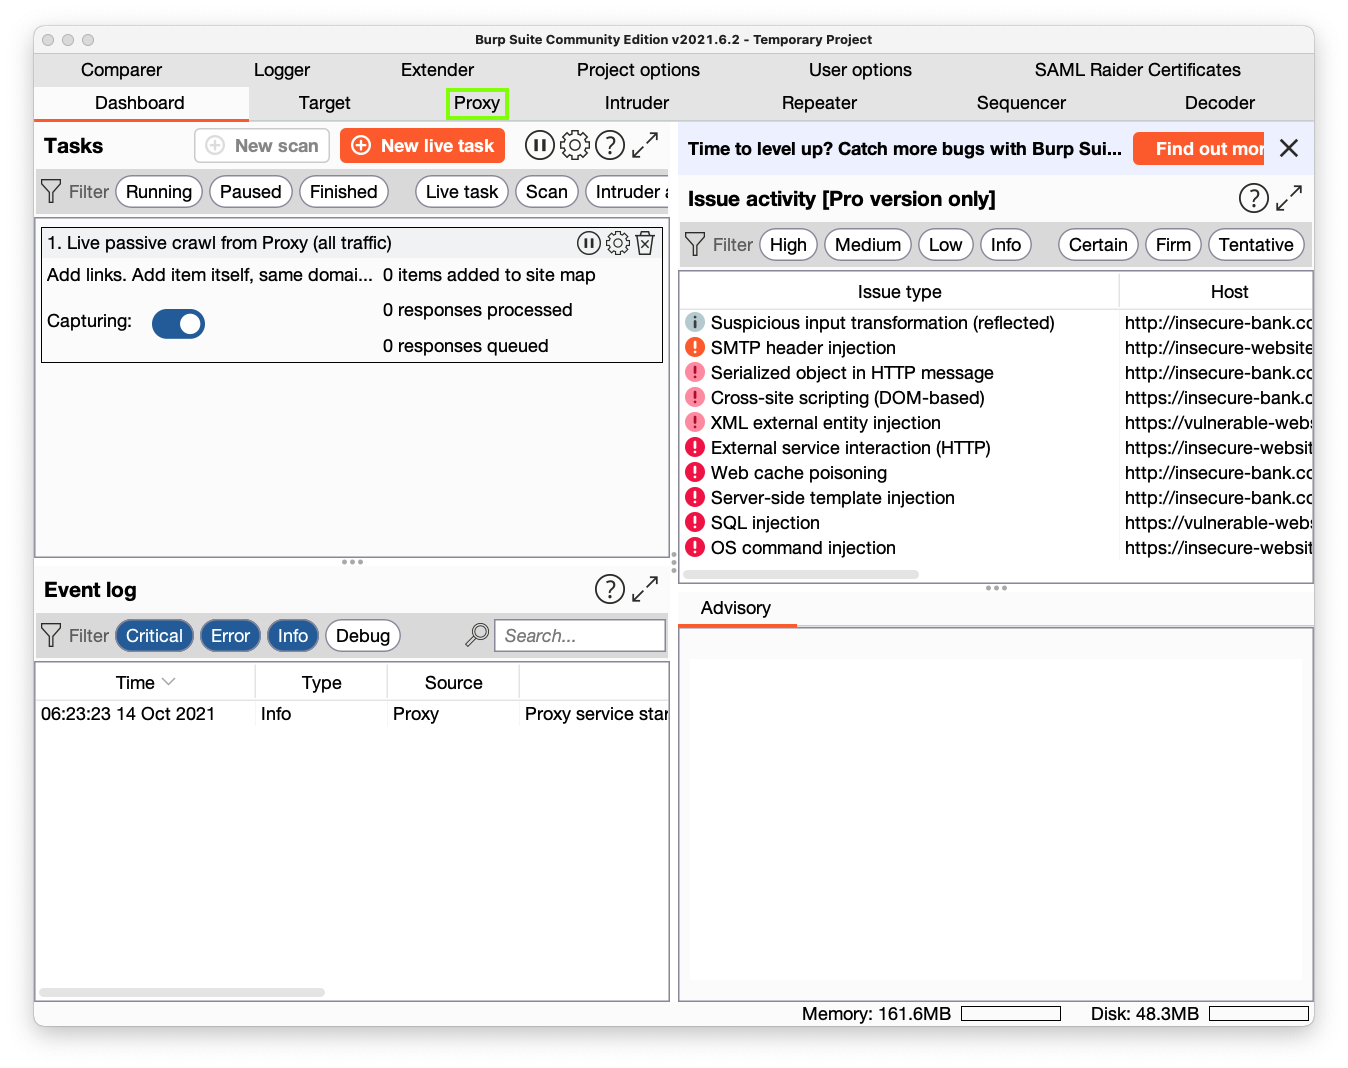
In the next window, at the top left, in the second row, click the Proxy tab, outlined in green in the image below.
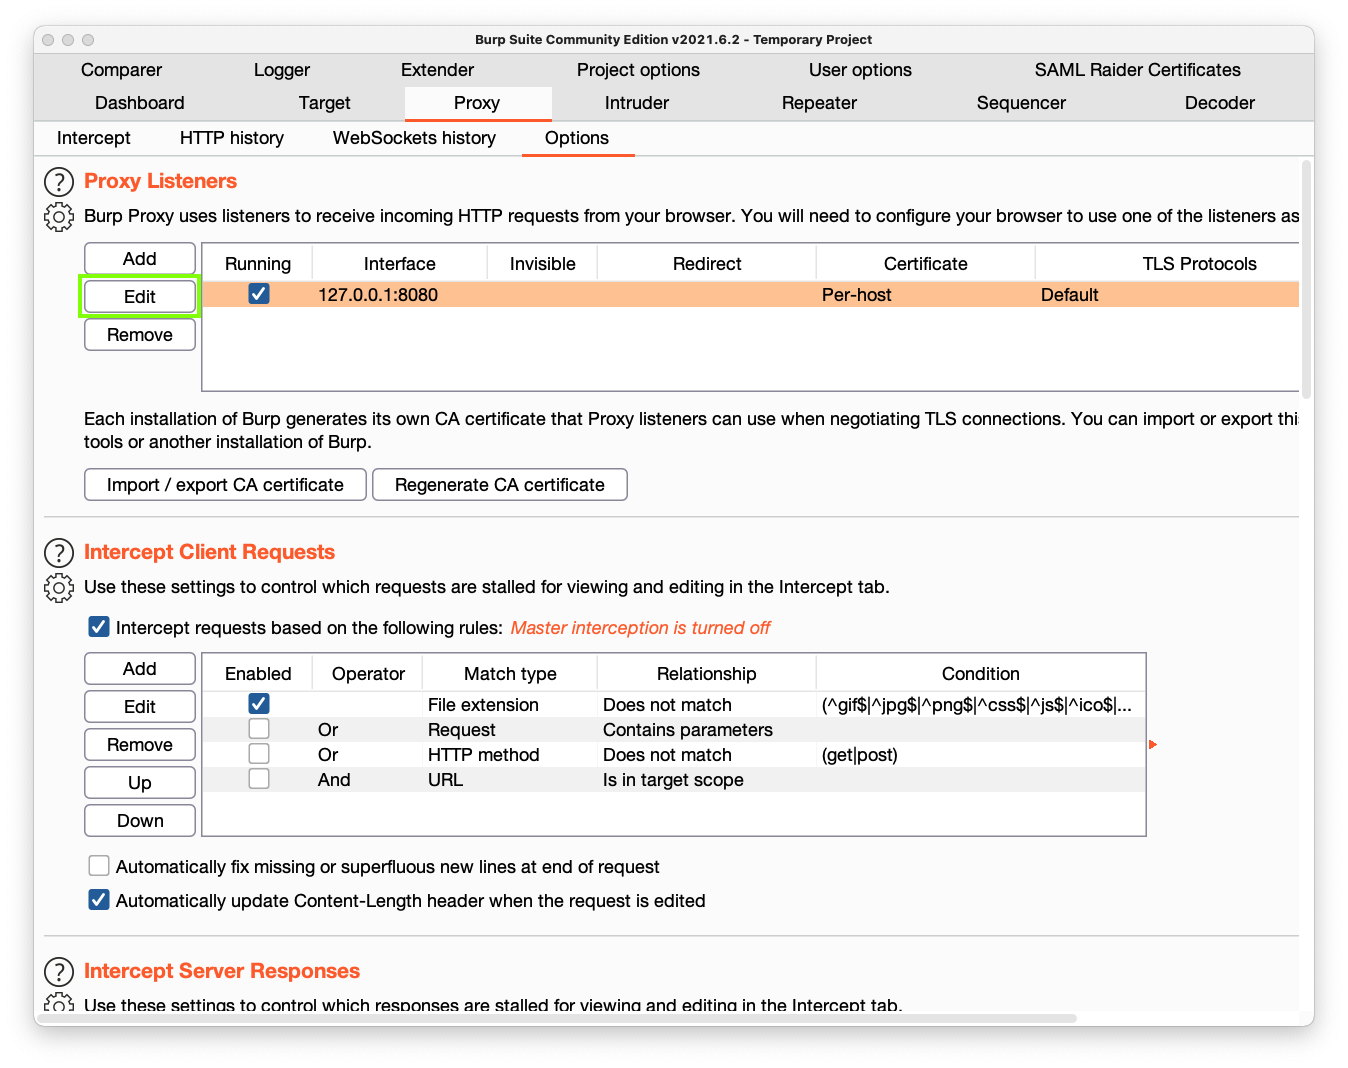
Then click the Options tab, outlined in green in the image below.

Then click the Edit button, outlined in green in the image below.
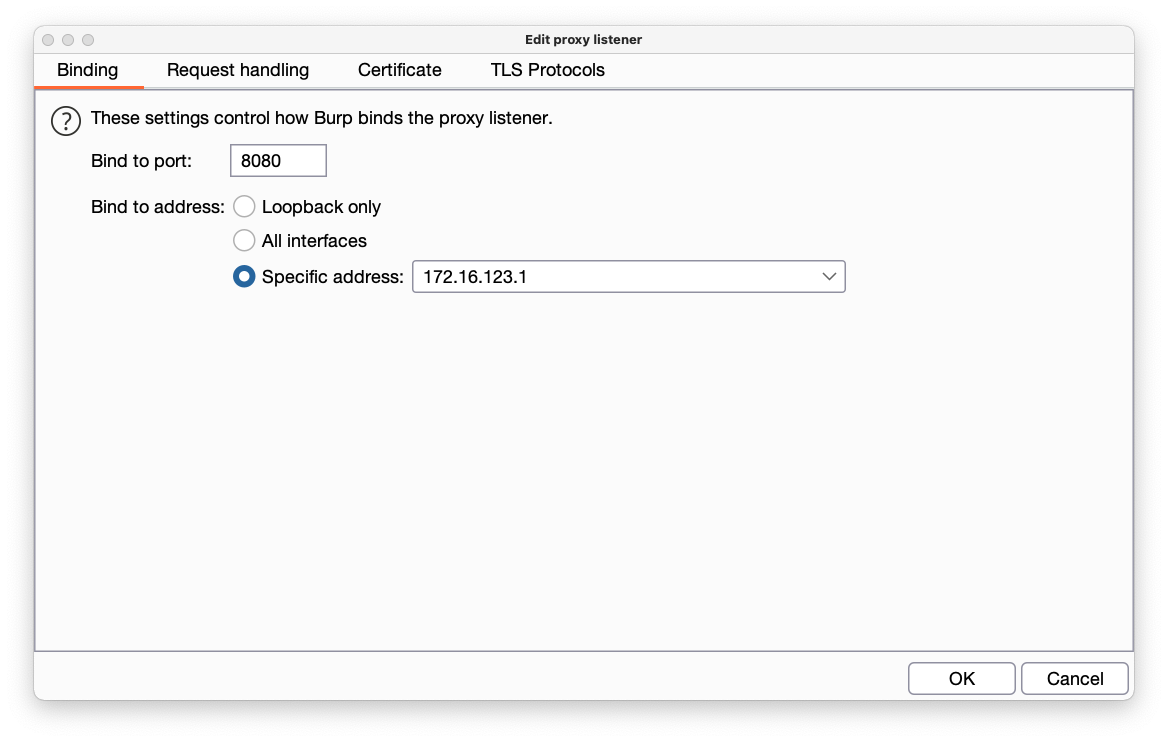
In the "Edit proxy listener" box, in the "Specific address" drop-down list box, select the gateway address you found earlier, as shown below.
Then click OK.
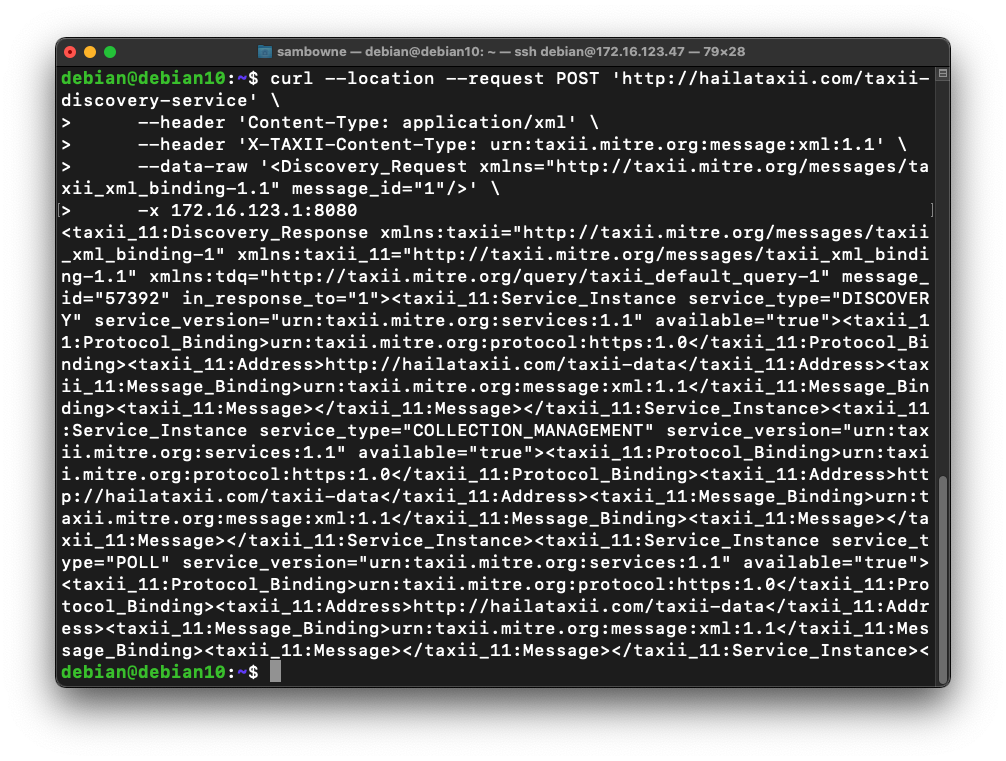
curl --location --request POST 'http://hailataxii.com/taxii-discovery-service' \
     --header 'Content-Type: application/xml' \
     --header 'X-TAXII-Content-Type: urn:taxii.mitre.org:message:xml:1.1' \
     --data-raw '<Discovery_Request xmlns="http://taxii.mitre.org/messages/taxii_xml_binding-1.1" message_id="1"/>' \
     -x 172.16.123.1:8080
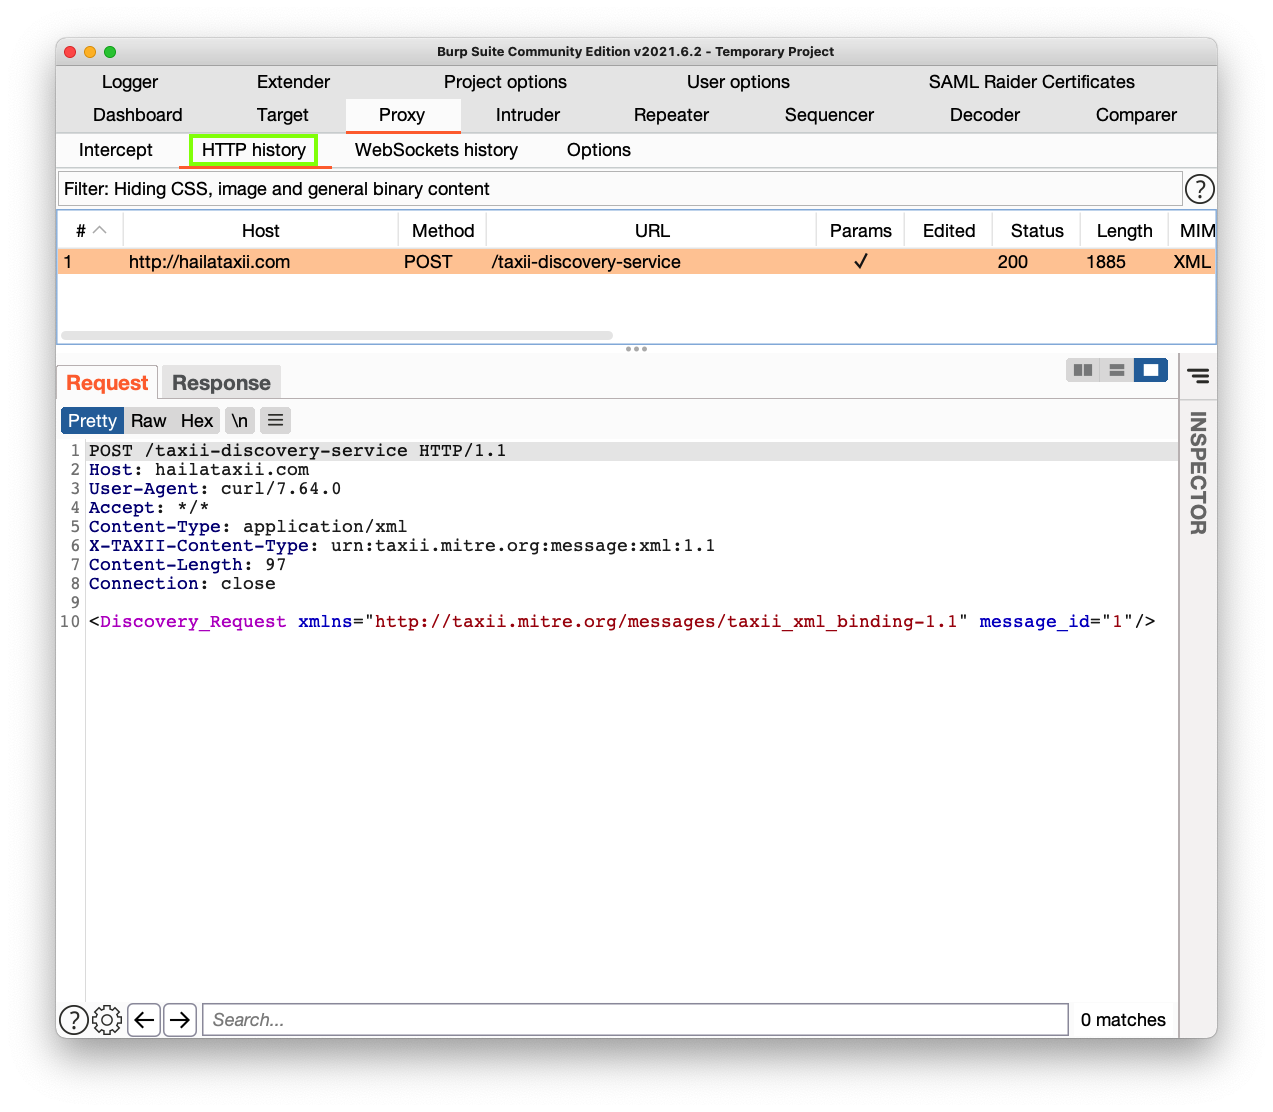
In the center pane, you see a line showing a POST request to "http://hailataxii.com". Click that line to highlight it, as shown below.
The lower pane shows the HTTP request you sent, in a more readable form than the Curl command, as shown below.
Notice that the last line begins with Discovery_Request.
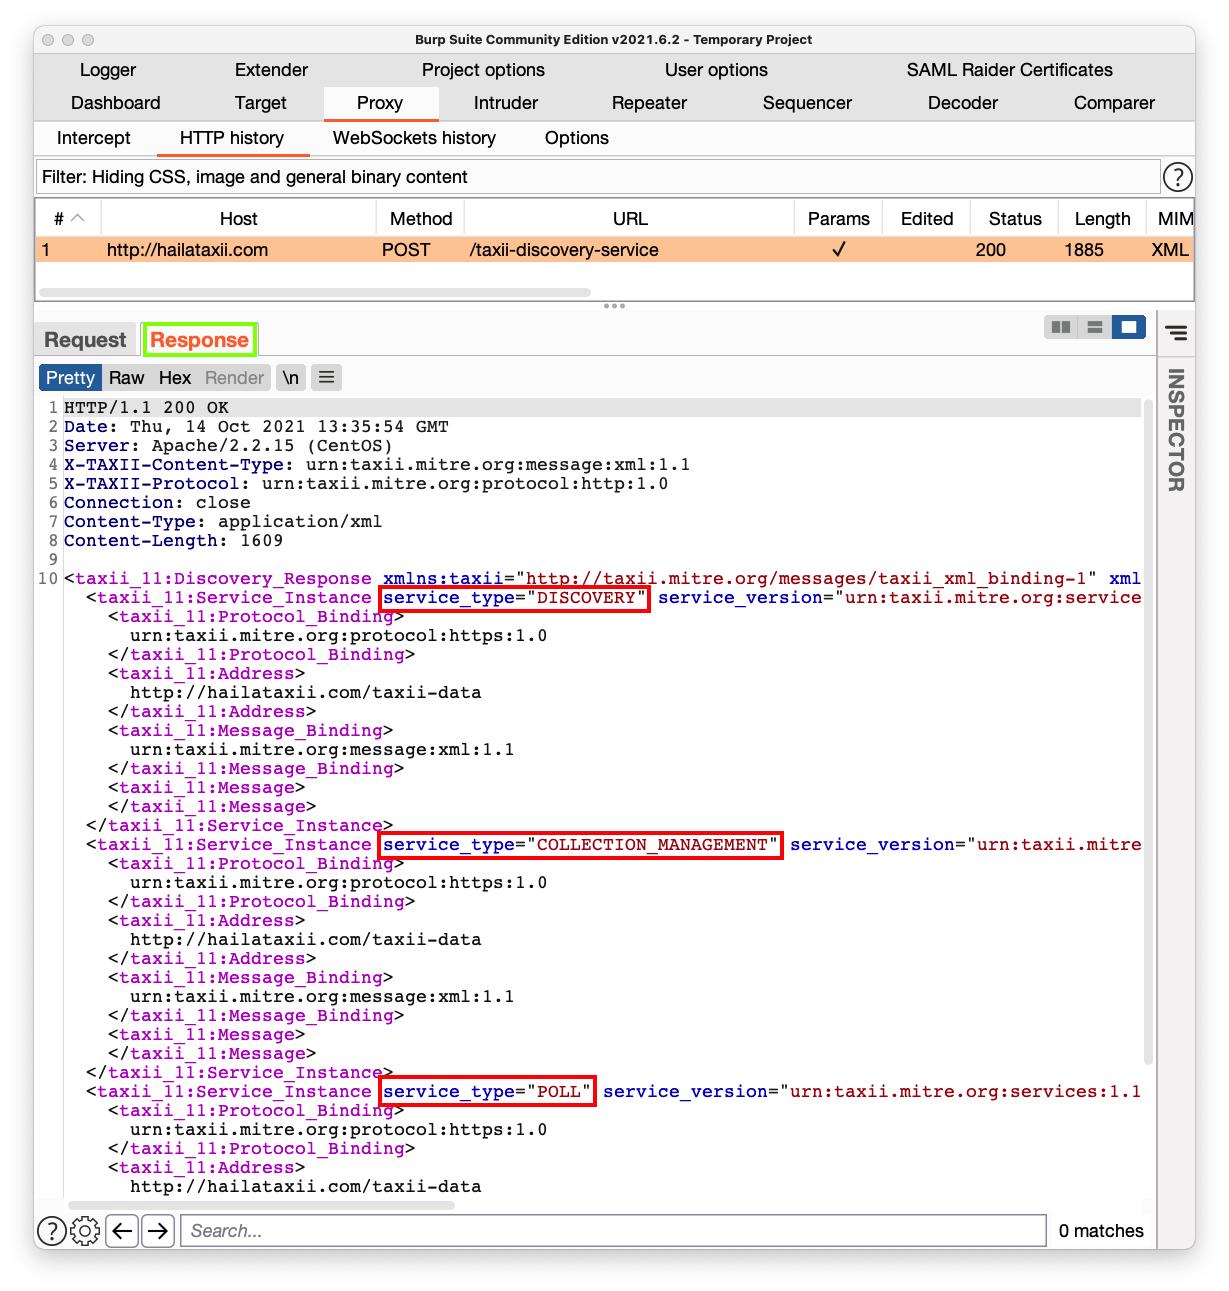
This is the response from the TAXII server. This server offers three services, outlined in red in the image below:
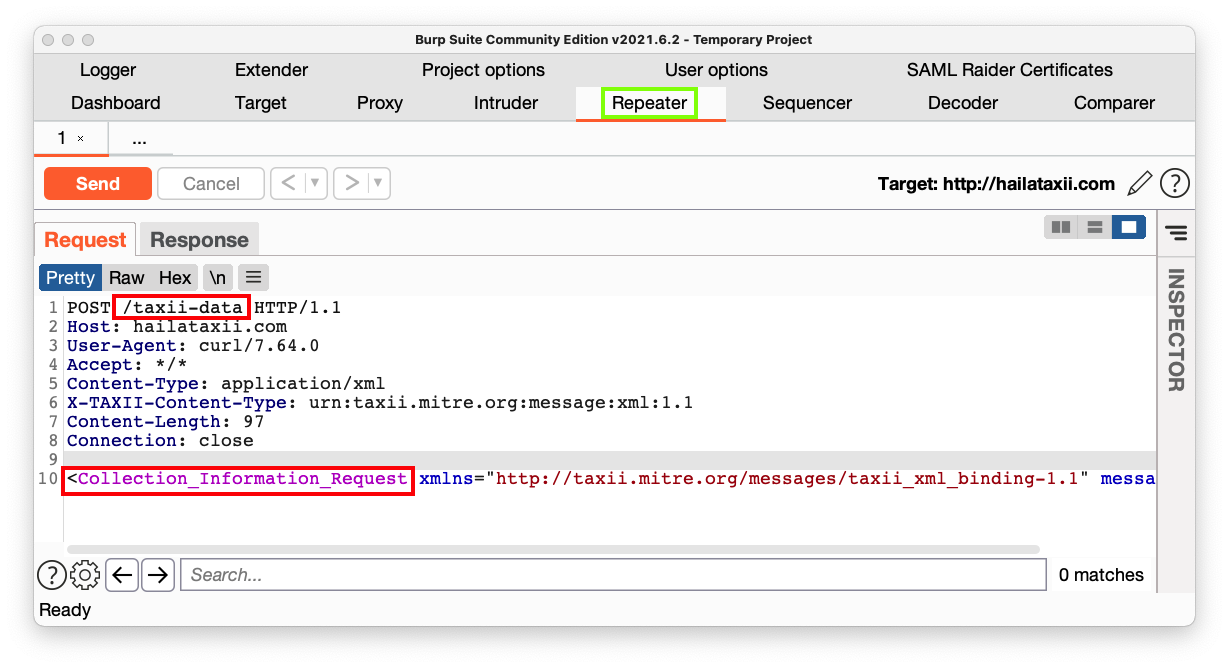
In the lower pane, right-click and click "Send to Repeater", outlined in green in the image below.

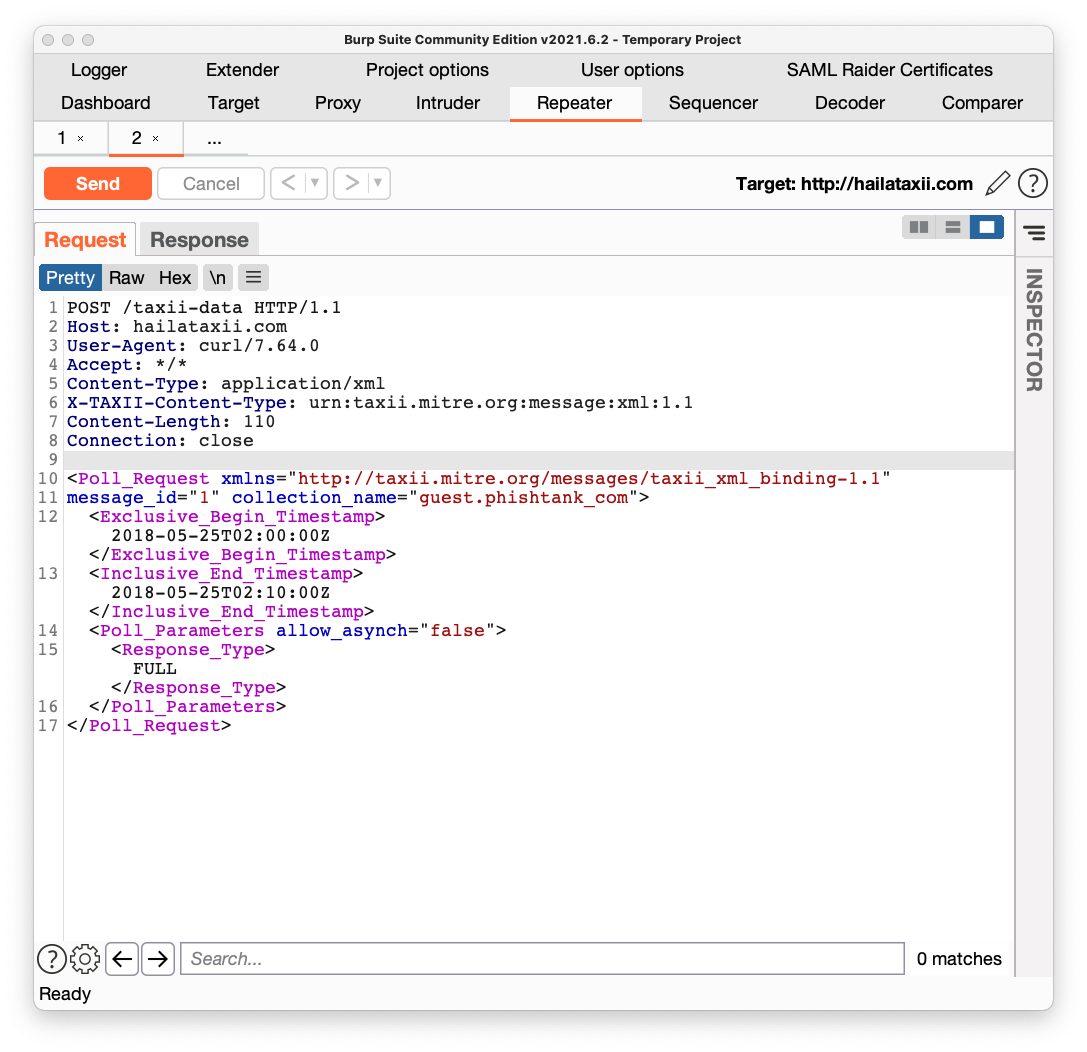
In the lower pane, make these changes to the request, outlined in red in the image below:
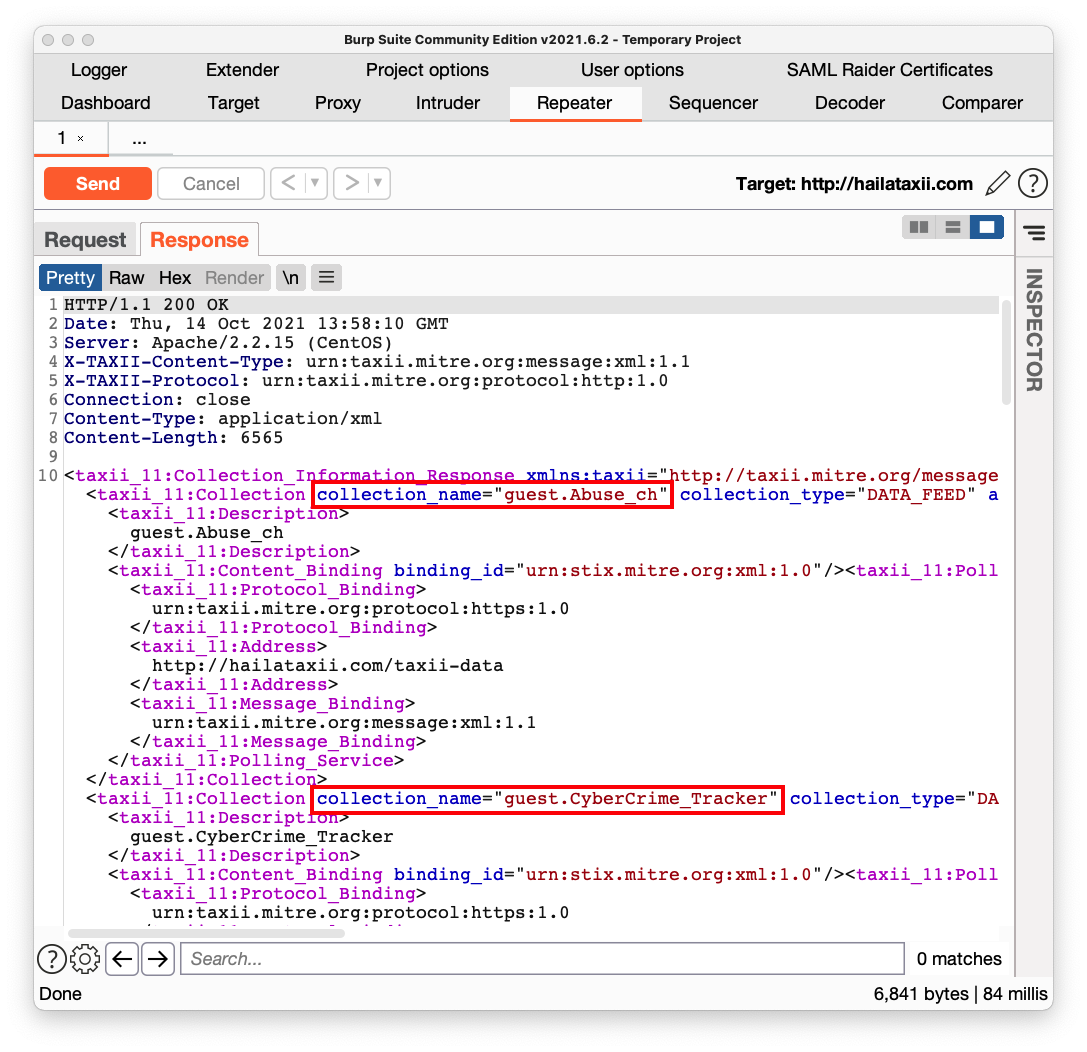
You see the available thread feed collections. The first two are outlined in red in the image below.
In the lower pane, scroll to the bottom and find guest.phishtank_com, as shown below. This is the feed we'll poll.

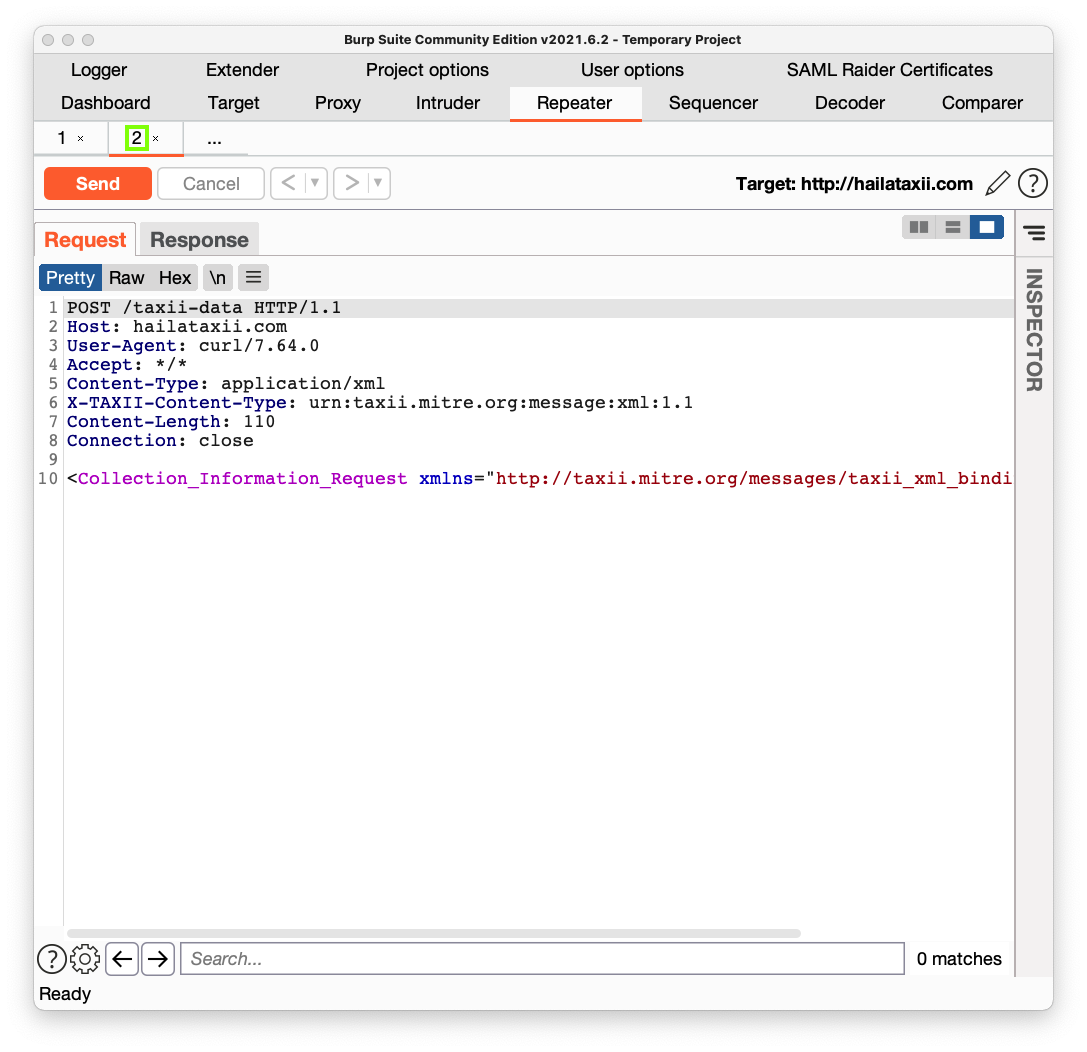
In the lower pane, right-click and click "Send to Repeater",
You see a copy of the request on a tab named 2, outlined in green in the image below.
<Poll_Request xmlns="http://taxii.mitre.org/messages/taxii_xml_binding-1.1"
message_id="1" collection_name="guest.phishtank_com">
  <Exclusive_Begin_Timestamp>2018-05-25T02:00:00Z</Exclusive_Begin_Timestamp>
  <Inclusive_End_Timestamp>2018-05-25T02:10:00Z</Inclusive_End_Timestamp>
  <Poll_Parameters allow_asynch="false">
    <Response_Type>FULL</Response_Type>
  </Poll_Parameters>
</Poll_Request>
IR 381.1: Folder (15 pts)
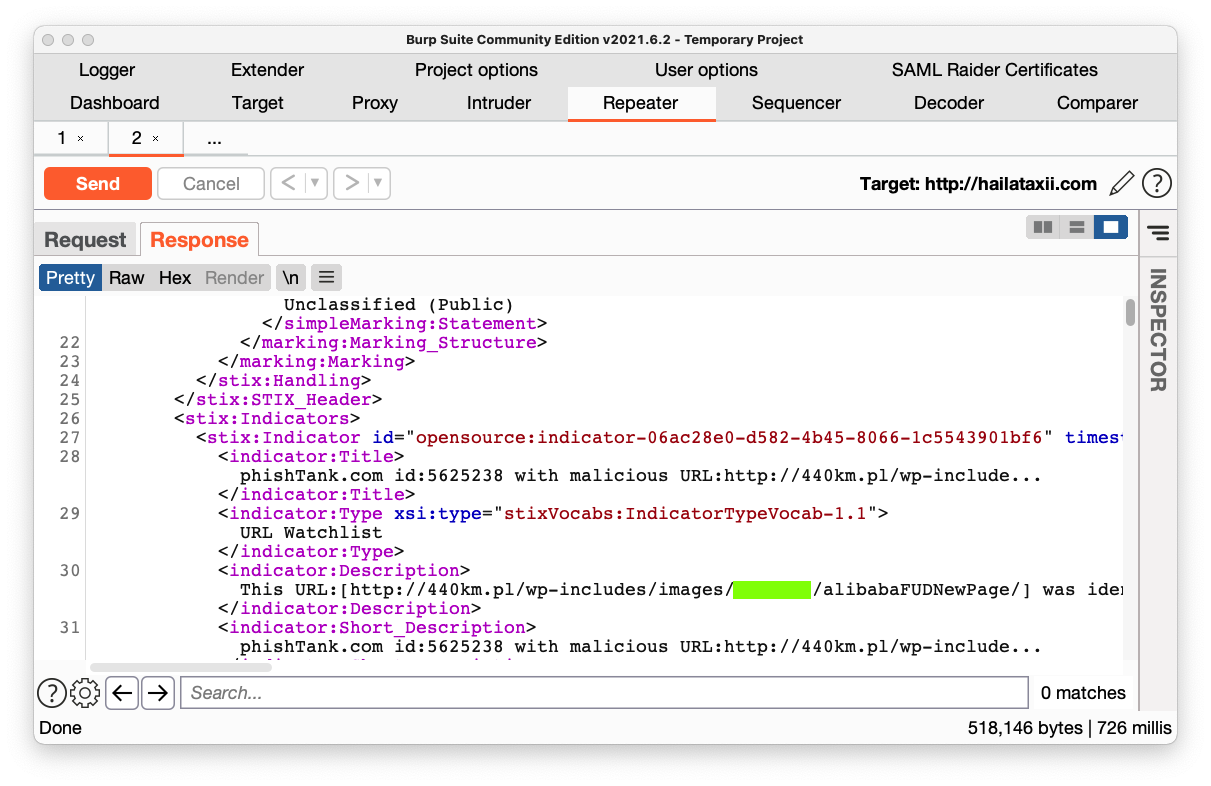
In the Response, scroll down a page or so and find the flag, covered by a green rectangle in the image below.
Posted 10-14-21