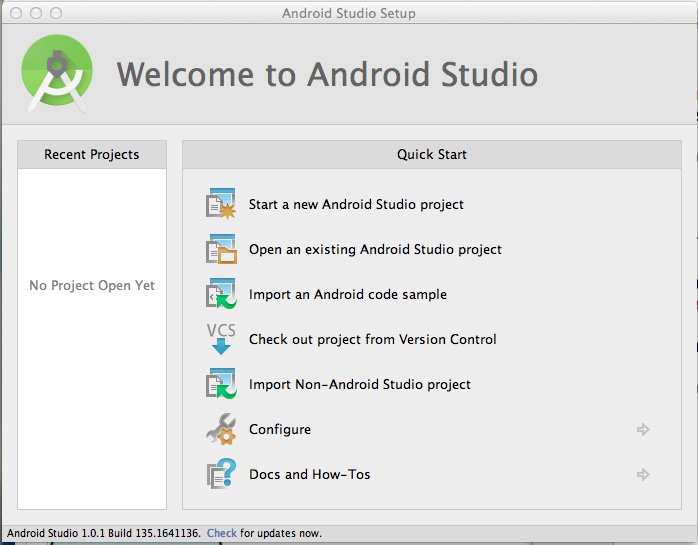
You should see the "Welcome to Android Studio" screen, as shown below.
On the right side, click "Start a new Android Studio project", as shown below.
In the "New Project" screen, enter an Application name of YOURNAME-hello, as shown below.
Don't use the literal text "YOURNAME" -- replace that with your own name.

Click Next.
The next screen asks which versions of Android you are targeting, as shown below.
Accept the default selection and click Next.

In the "Add an activity to Mobile" screen, accept the default selection of "Blank Activity" as shown below, and click Next.

In the "Choose options for your new file" screen, accept the default selections as shown below, and click Finish.

If you are using Windows, it will spend several minutes "Indexing".
Other messages go by, initializing things and "Building".
When all that stuff is done, a project page appears, as shown below.

If "Windows Firewall" boxes pop up, approve Java to access the Internet.
If a "Tip of the day" pops up, close it.
If a "Rendering problems" box appears, close it.
However, if a "Gradle project sync failed" message appears, as shown above, that means you have errors that matter, probably Java errors.
Java fails to work most of the time. It is maddening, but there's no way to escape it.
The most common problem is that the Java files are installed in a directory that the application cannot find. It's been this way for many years, and somehow Java never fixes it.
Here's what I did, but your errors will probably be different. Expect this to take time and a lot of Googling.
In my case, there is a yellow bar saying "Gradle project sync failed...", and a pop-up box titled "Language Level Changed", as shown above.
In the pop-up box titled "Language Level Changed", click Yes.
The project reloads. Now the lower pane shows some Java error messages, as shown below.

Open a Terminal window, and execute this command:
/usr/libexec/java_home

On my Mac, Java is installed at
/Library/Java/JavaVirtualMachines/jdk1.7.0_71.jdk/Contents/Home
In the lower pane of Android Studio, click "Open SDK Settings".
As you can see below, the "JDK location" is wrong.

Copy and paste in the correct location, as shown below.
Then click OK.

Android Studio displays a yellow bar at the top, saying "Gradle sync in progress".
After that, the "Language Level Changed" box pops up again. Click Yes.

The left pane shows the files in your app.
A much easier way to control your app is to use the right pane. Click the activity_main.xml tab.
The center now shows the screen of a phone, showing "Hello world!" in tiny letters, as shown above. This is a graphical view of how your app will look on a phone.
Android Studio should have a project open, such as your "Hello World" app.
In Android Studio, click Build, "Create Signed APK...".
In the "Module" box, accept the default selection of app and click Next.
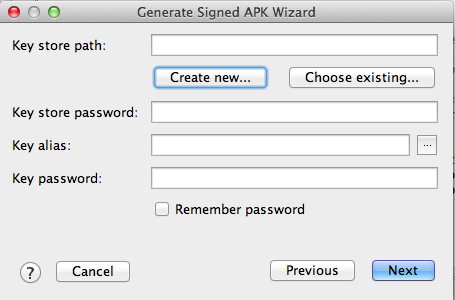
The next box asks for a "Key store path" box, as shown below.
Click the "Create new..." button.
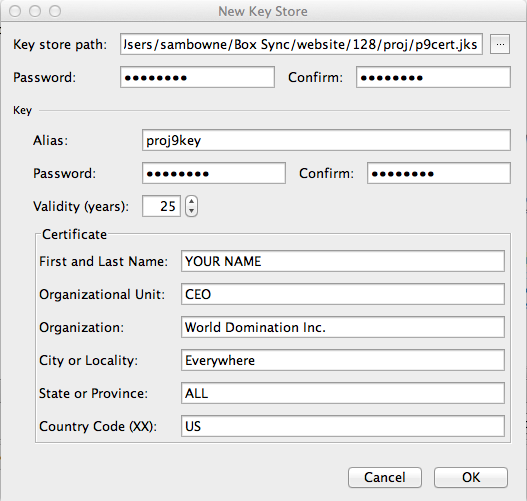
Fill in this box with the values shown below.
Warning: don't put a comma in any of the fields or it will stop with a Java error message.
On Windows, you must type in the complete path, including the filename and extension, such as
c:\Users\Student\Desktop\p9\p9cert.jksThe "browse" button is useless on Windows.
Since we are only signing malware, it doesn't seem too important to choose a very secure password.
Click OK.
Make a note of these items--you
will need them later:
|
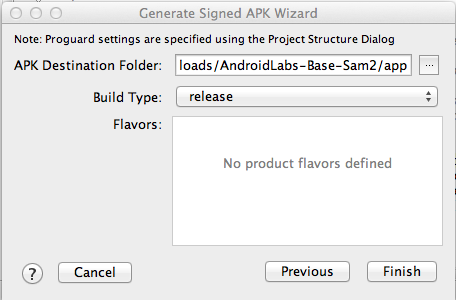
The next box will automatically fill out itself, as shown below.
Click Next.

In the next box, click Finish, as shown below
A box pops up, saying "Signed APK's generated successfully", as shown below.

Drag the signed APK onto the emulated phone and drop it there.
The app should install and run :)
stackoverflow: Error:compileSdkVersion android-21 requires compiling with JDK 7
Intel® Hardware Accelerated Execution Manager
Installation Instructions for Intel® Hardware Accelerated Execution Manager - Mac OS X*
Fusion 5 - Could not open devvmmon: No such file or directory.