For best results, use two PCs: one for Nox and one for Kali.
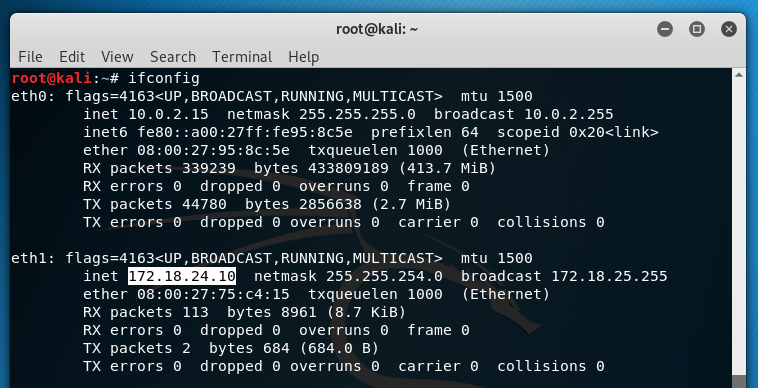
On Kali, in a Terminal, execute this command:
ifconfig
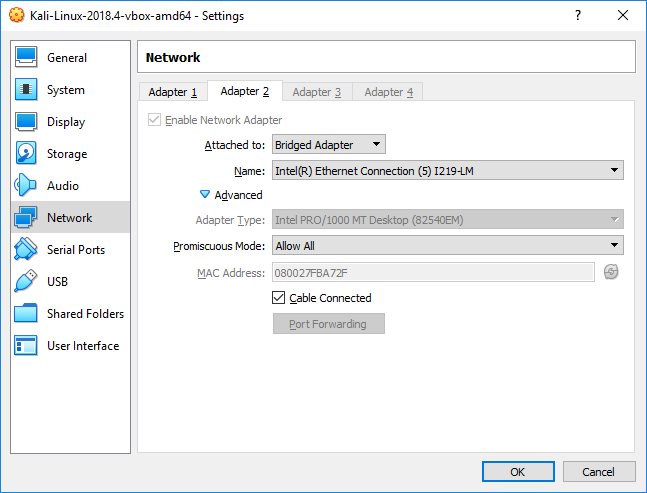
Using VirtualBox
If your Kali is in Virtualbox, you need to shut down your virtual machine and configure Adapter 2 as shown below.
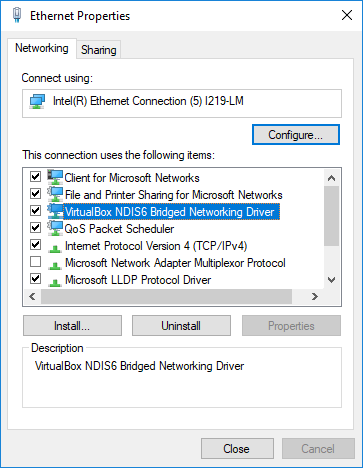
If you cannot connect to any adapters, and all the "Name" options are grayed out, you need to install the "VirtualBox NDIS6 Bridged Networking Driver. To do that, open Network Connections, and the Properties of your Ethernet adapter. Click Install, Service, "Add...", "Have Disk...", "Browse...", and browse to "C:\Program Files\Oracle\VirtualBox\drivers\network\netlwf\VBoxNetLwf.inf" Install the driver, as shown below.
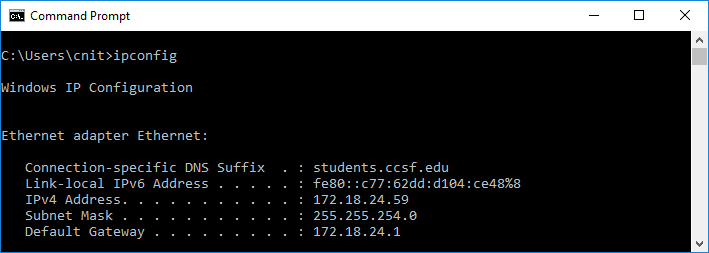
On your Windows host system, execute this command:
ipconfig
On my system, it was Ethernet, as shown below.
In the "Network settings" section, click the blue install link, as shown below.

A box pops up saying "Bridge connection driver installed successfully". Click Ok.
In "System settings", click "Enable network Bridge mode", as shown below.
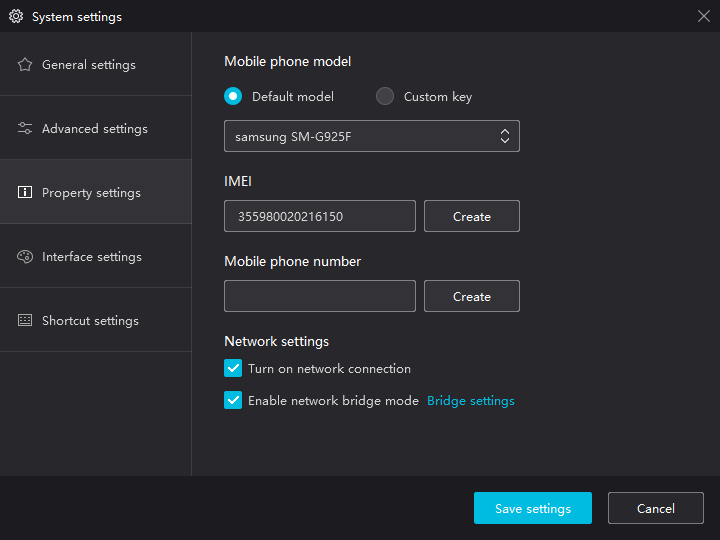
Click :Save settings". Click "Restart now".
Click Tools, Settings, Wi-Fi.
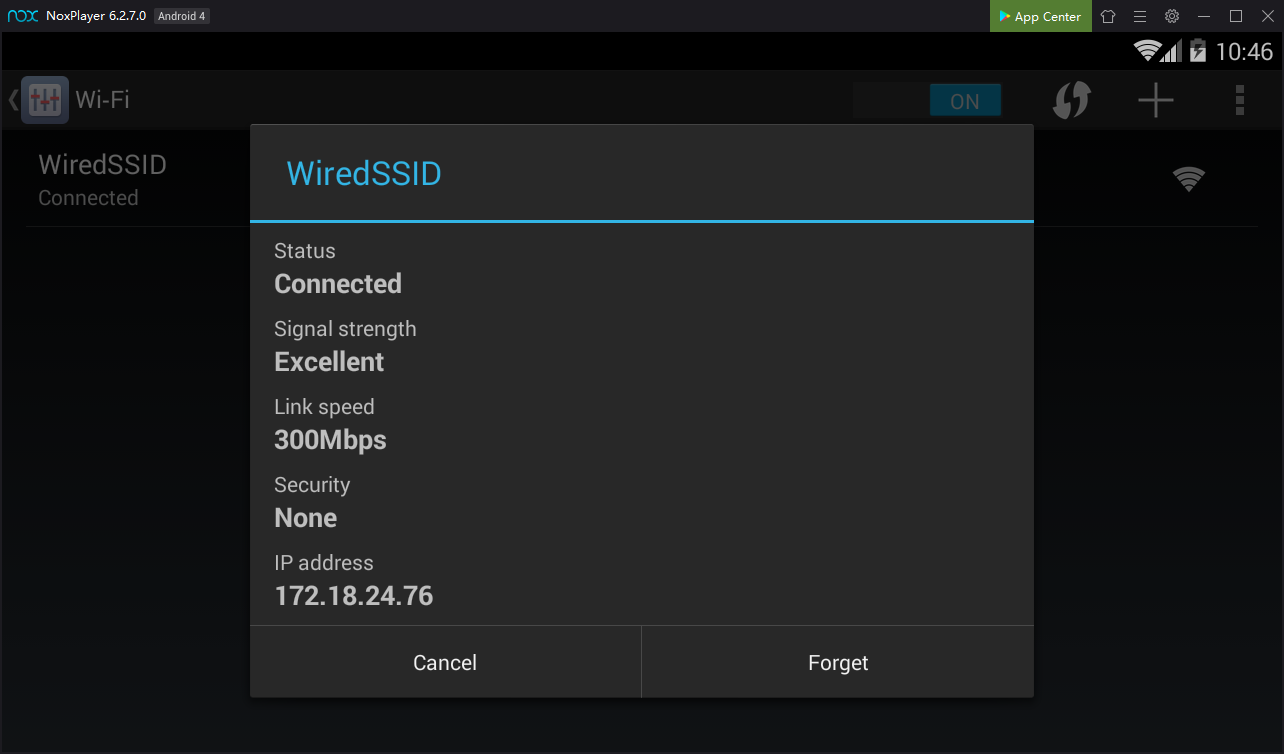
Point to WiredSSD. Hold down the left mouse button until a box pops up. Click "Connect to network".
Click WiredSSD. You see your Nox machine's IP address, as shown below. Make a note of it and click Cancel.
Scroll to the bottom and click "About tablet".
Scroll to the bottom and click the "Build number" seven times, as shown below.
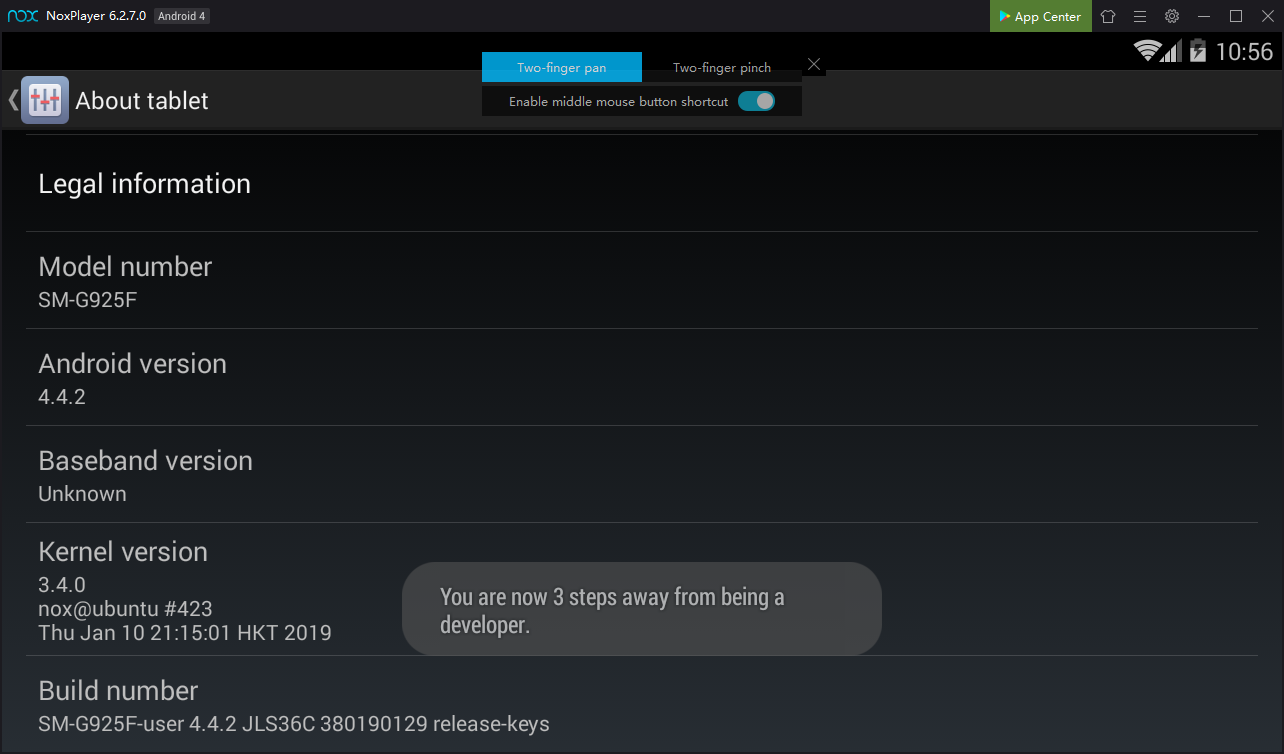
When you click it enopugh times, a box pops up saying "You are now a developer!".
At the top left, click the back-arrow.
Click "Developer Options"
Scroll down and find the "USB Debugging" option, as shown below.
Click the "USB Debugging" and click OK. USB debugging is now enabledf, \as shown below.

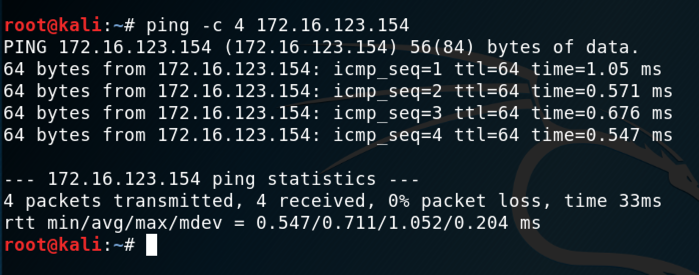
ping -c 4 172.18.24.76
If you don't, you need to troubleshoot your networking before proceeding.
apt update
apt install android-tools-adb -y
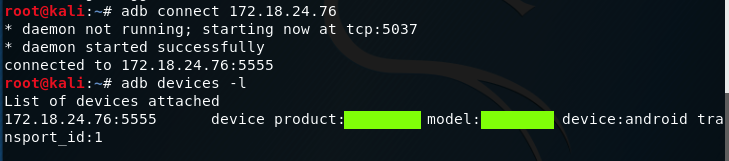
adb connect 172.18.24.76
adb devices -l
You should see your Genymotion device in the "List of devices attached", as shown below.
Troubleshooting
If you see an error message saying "E: Could not get lock /var/lib/dpkg/lock-frontend - open (11: Resource temporarily unavailable)", restart your Kali machine.
Find the product number, covered by a green box in the image below.
Find the text covered by a green box in the image above. Enter it into the form below to record your success.