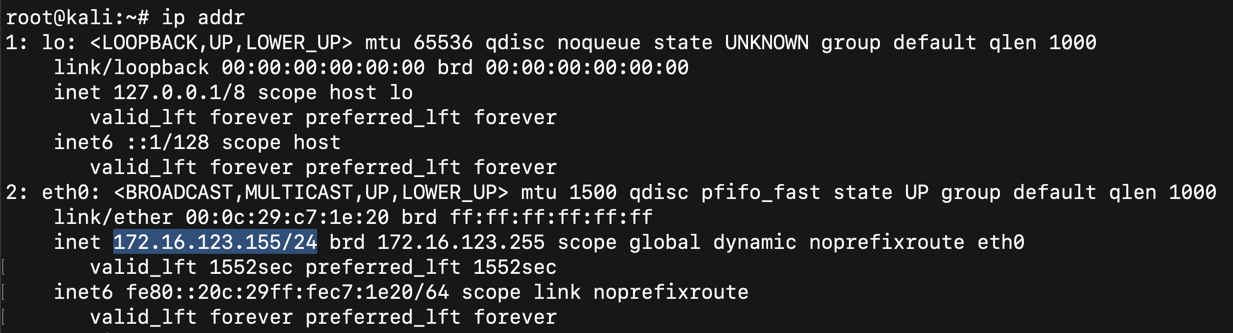
ip addr
To find your Android device, execute this command, replacing the IP address with the IP address you found above, including the CIDR suffix "/24".
netdiscover -r 172.16.123.155/24
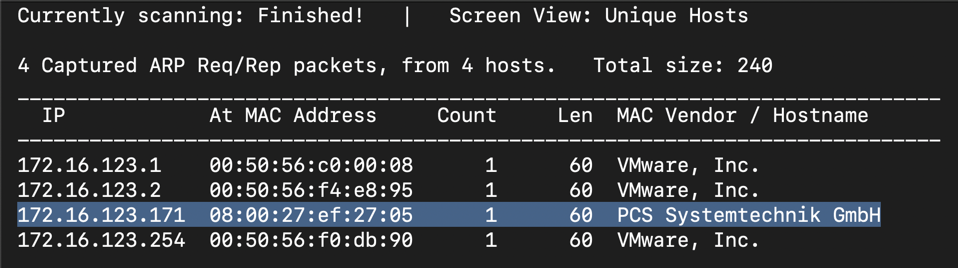
Execute this command to connect to your Android device, replacing the IP address with the IP address of the device you determined in the previous step.
adb connect 172.16.123.171

If you don't have a Drozer agent on your emulator, execute these commands to install one:
wget https://github.com/mwrlabs/drozer/releases/download/2.3.4/drozer-agent-2.3.4.apk
adb install drozer-agent-2.3.4.apk
adb forward tcp:31415 tcp:31415


drozer console connect
run app.package.info -a com.twitter.android
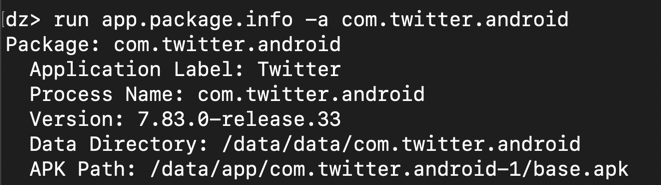
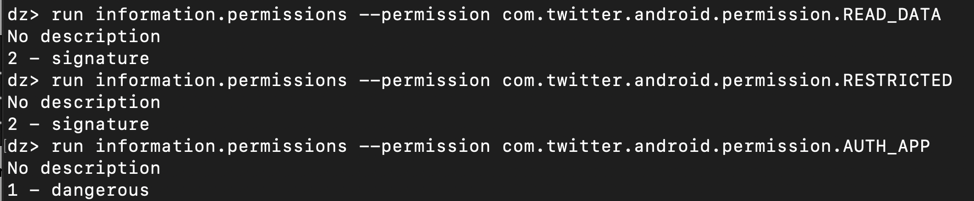
At the end, there are three permissions the Twitter app defines, as shown below:

I was unable to find out what "READ_DATA" does in detail, but we can learn more about the other two permissions.
To see the appm components, execute this command:
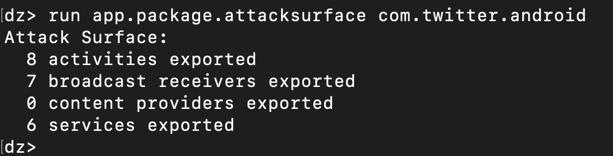
run app.package.attacksurface com.twitter.android
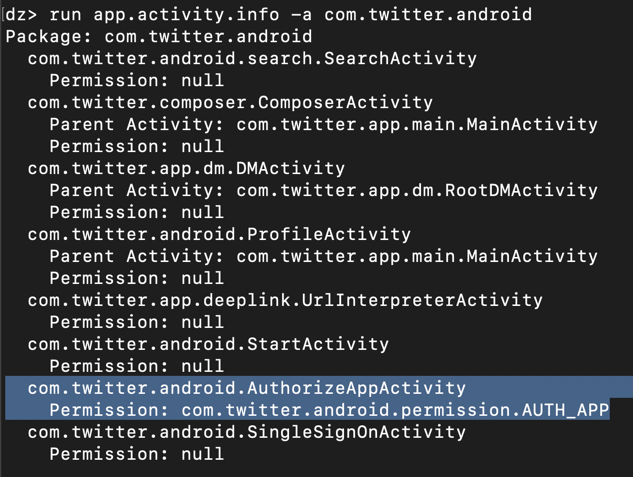
run app.activity.info -a com.twitter.android
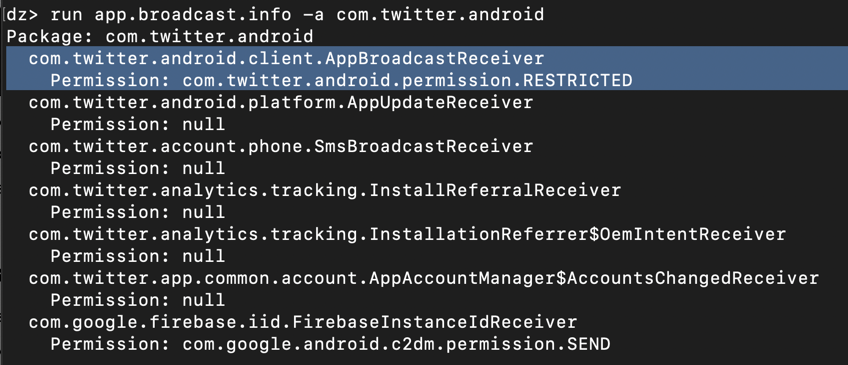
run app.broadcast.info -a com.twitter.android
run information.permissions --permission com.twitter.android.permission.READ_DATA
run information.permissions --permission com.twitter.android.permission.RESTRICTED
run information.permissions --permission com.twitter.android.permission.AUTH_APP
exit
The signature-level permissions are only available to apps signed with the same certificate, and the dangerous permission will pop a box up, requesting permission from the user.
Execute these commands to do that.
apt update
apt install openjdk-8-jdk -y
Execute this command to reboot Kali.
reboot
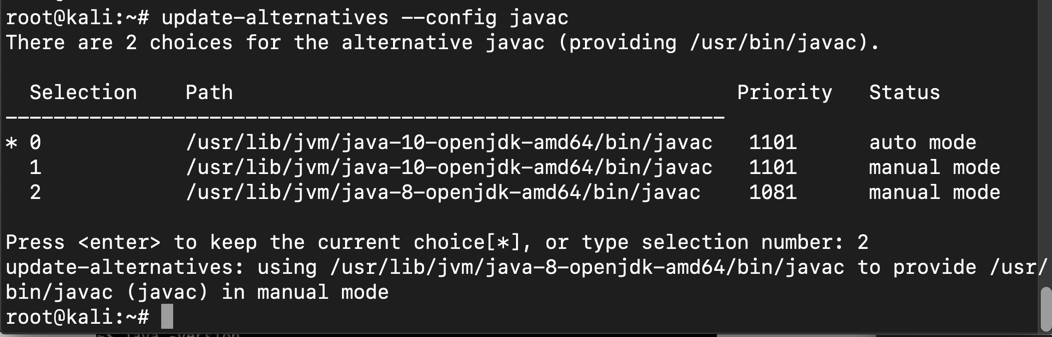
update-alternatives --config javac
Execute this command to select the default version of java:
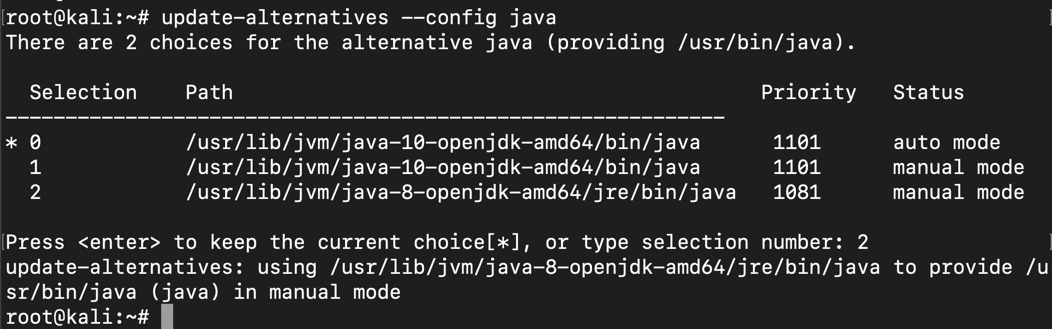
update-alternatives --config java
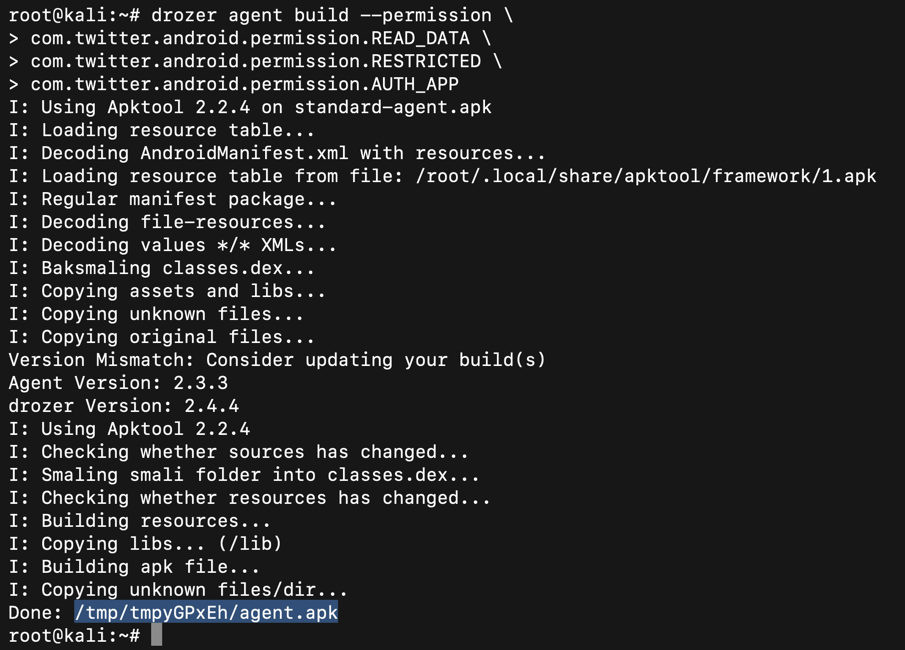
drozer agent build --permission \
com.twitter.android.permission.READ_DATA \
com.twitter.android.permission.RESTRICTED \
com.twitter.android.permission.AUTH_APP
adb connect 172.16.123.171
adb logcat -c
adb logcat | grep perm

In the second command, adjusting the path to lead to the APK file you built previously with Drozer.
adb uninstall com.mwr.dz
adb install /tmp/tmpzXbifs/agent.apk
The log shows that the app was not granted these two permissions:
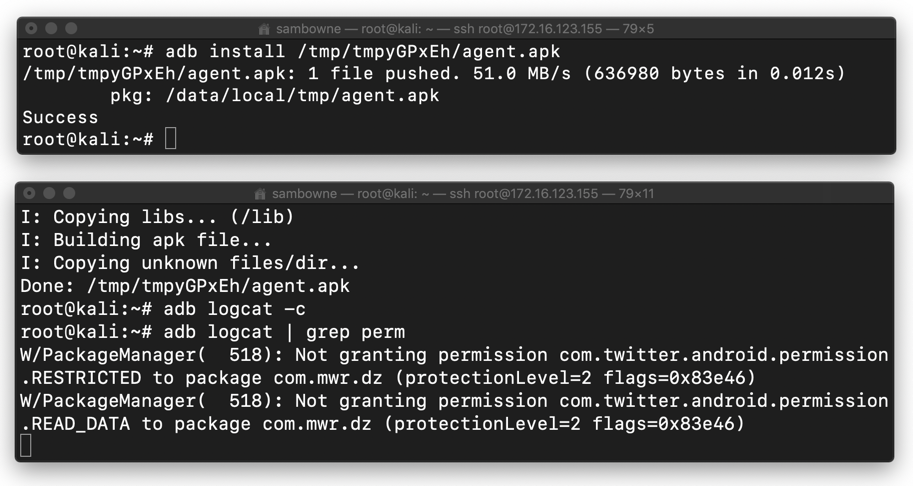
This makes sense, because those are signature-level permissions, and the Drozer agent is not signed with the Twitter certificate.
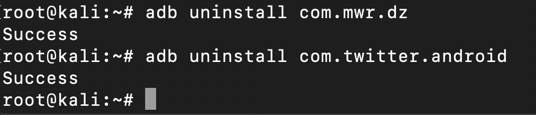
adb uninstall com.mwr.dz
adb uninstall com.twitter.android
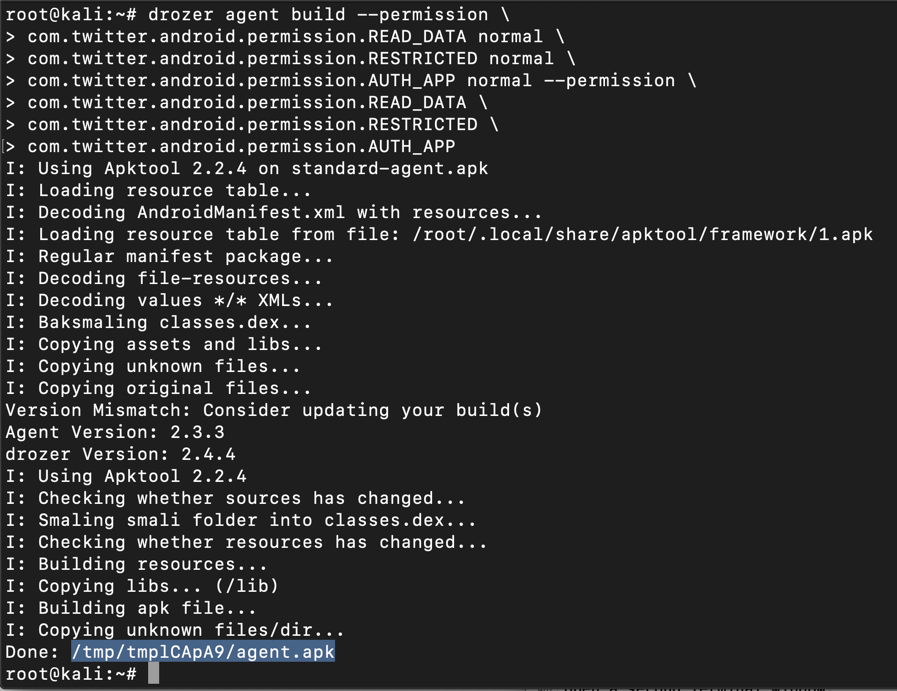
drozer agent build --define-permission \
com.twitter.android.permission.READ_DATA normal \
com.twitter.android.permission.RESTRICTED normal \
com.twitter.android.permission.AUTH_APP normal --permission \
com.twitter.android.permission.READ_DATA \
com.twitter.android.permission.RESTRICTED \
com.twitter.android.permission.AUTH_APP
In the second command, adjusting the path to lead to the APK file you built previously with Drozer.
adb install /tmp/tmp_URMcR/agent.apk

If you are using Android 5.0 or above, the installation should fail with the error message shown below.
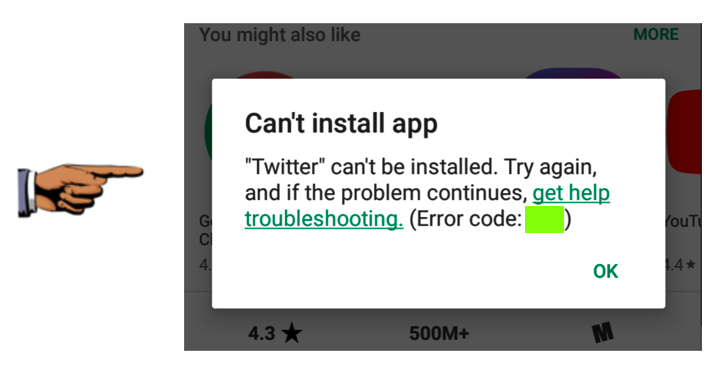
Find the text covered by a green box in the image above. Enter it into the form below to record your success.
I used the one shown below.

You can't use the Gapps button to install Google Play. Instead, you need to install these two components one by one, rebooting after each installation.
https://samsclass.info/128/proj/Genymotion-ARM-Translation_v1.1.zip
https://samsclass.info/128/proj/gapps-jb-20130813-signed.zip
Then repeat the project. This time Twitter will install.
Launch the Drozer agent, configure port forwarding, and execute these commands to see Twitter's protection levels:
drozer console connect
run information.permissions --permission com.twitter.android.permission.READ_DATA
run information.permissions --permission com.twitter.android.permission.RESTRICTED
run information.permissions --permission com.twitter.android.permission.AUTH_APP
exit
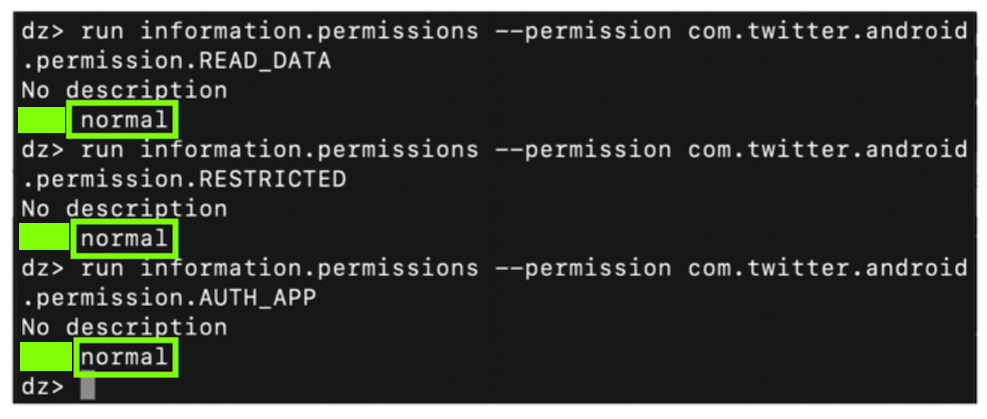
Find the text covered by a green box in the image above. Enter it into the form below to record your success.