CNIT 123 Project X11: Detecting Promiscuous NICs with scapy (10 pts.)

What you need

Purpose

We will send a PING to the target with a fake MAC address. Any machines that reply must be using promiscuous mode, which is something a network security officer should investigate. There is no good reason for end-users to connect in promiscuous mode--nodes that do are probably up to no good.

Start the Windows Machine

Start the Windows machine.

Finding the IP Address of the Windows Machine

On the Windows machine, open a Command Prompt window and execute the IPCONFIG command.

Make a note of your IP address for later reference.

Turn off the Windows Firewall

On the Windows machine, in Control Panel, turn the firewall off. If you don't do this, it won't answer pings.

Don't Run Wireshark

On the Windows machine, if Wireshark is running, close it.
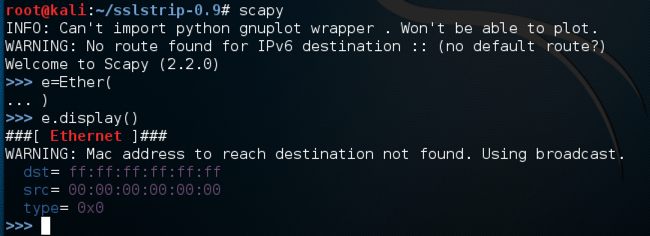
Sending a ping from scapy

On the Linux machine, in scapy, enter these commands, to build an Ethernet frame and display it.
scapy

e = Ether()

e.display()

The ethernet frame is addressed to the layer 2 broadcast address of ff:ff:ff:ff:ff:ff, as shown below on this page.

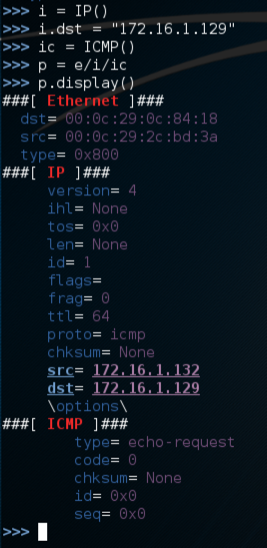
Now we will add the upper layers to the packet.

On the Linux machine, in scapy, enter these commands. Use the IP address of your Windows target machine in the second command:

i = IP()

i.dst = "192.168.198.139"

ic = ICMP()

p = e/i/ic

p.display()

All three layers are shown. Notice that the MAC address has been changed to the correct value, as shown below on this page.

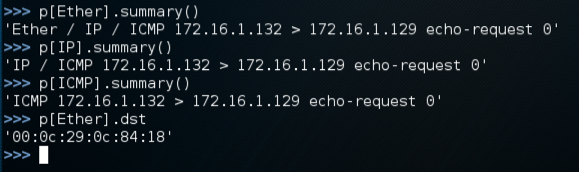
You can reference each layer of the packet named "p" by putting the protocol in square brackets:

On the Linux machine, in scapy, enter these commands:

p[Ether].summary()

p[IP].summary()

p[ICMP].summary()

p[Ether].dst

You see each layer seperately, and then the destination MAC address, as shown below on this page.

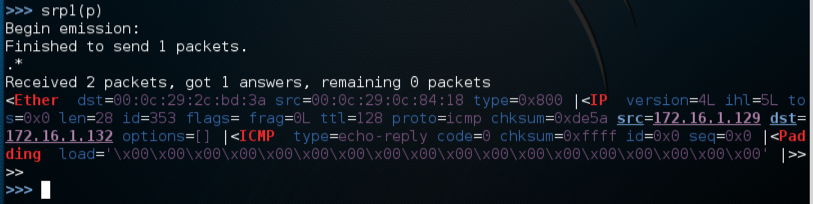
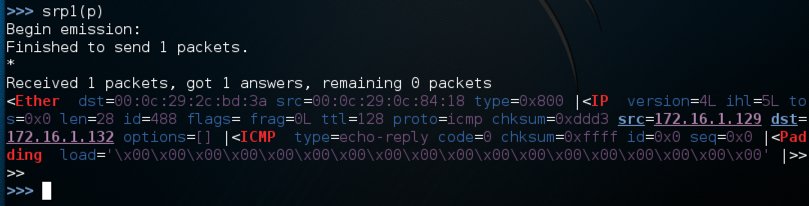
Now we will send the packet, using srp1, which sends at layer 2 and gets one packet in return.

On the Linux machine, in scapy, enter this command:

srp1(p)
You should get a reply, as shown below on this page.

Changing the MAC Address

Now we will change the MAC address and try sending the packet again.

On the Linux machine, in scapy, enter these commands. In the second command, use the real MAC address of your Windows machine plus 1:

p[Ether].dst = "00:50:56:24:3b:c1"

srp1(p)

You should get no reply, as shown below on this page.

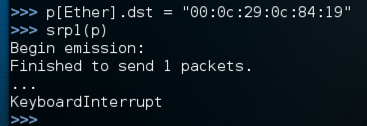
Cancel the waiting process with Ctrl+C.

Run Wireshark on the Windows Target Machine

On the Windows machine, start Wireshark, click Capture, Interfaces and begin capturing packets from the interface that goes to your LAN. This places your NIC in promiscuous mode.

Sending the Packet Again

On the Linux machine, in scapy, enter this command.

srp1(p)
You should get a reply this time, as shown below on this page. This shows that the NIC is running in promiscuous mode.

Scanning a Whole Network

On the Linux machine, in scapy, enter these commands. In the first command, replace the IP address with the network address of your own network.

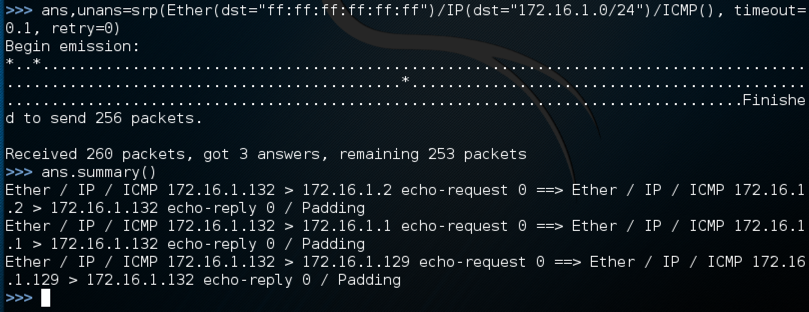
ans,unans=srp(Ether(dst="ff:ff:ff:ff:ff:ff")/IP(dst="192.168.198.0/24")/ICMP(), timeout=0.1, retry=0)

ans.summary()

The first command scans an entire /24 network (254 addresses) and places the reply packets in a list named "ans".

The second command shows a summary of the packets in "ans". I had three machines on my LAN: the Kali Linux attacker, the Windows target, and the Mac OS X host. So I got three "echo-reply" packets, as shown below on this page.

Scanning with a Fake MAC Address

On the Linux machine, in scapy, enter these commands. In the first command, replace the IP address with the network address of your own network. Leave the MAC address as it is, with an obviously fake value.

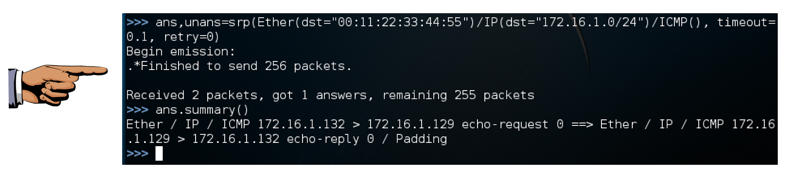
ans,unans=srp(Ether(dst="00:11:22:33:44:55")/IP(dst="192.168.198.0/24")/ICMP(), timeout=0.1, retry=0)

ans.summary()

Now only one machine answers as shown below on this page.

Saving the Screen Image

Make sure the answer summary shows only one, or possibly two, arp-reply packets.

Save a screen image with the filename Proj X11 from Your Name.

Turning in Your Project

Email the image to cnit.123@gmail.com with a Subject line of Proj X11 from Your Name.


Sources

http://trac.secdev.org/scapy/wiki/BuildAndDissect

http://carnal0wnage.blogspot.com/2009/02/quick-scapy-tutorial-for-extending.html

http://www.dirk-loss.de/scapy-doc/Scapy.pdf


Last modified: 11-10-16